
Hi you beautiful artist, Anouk here today with a new blogpost full of Stencilgirl® inspiration! I'm sorry for the misleading title. My intention for this blogpost was to make a page that was completely outside my box. But.. Halfway through this project I started to wonder if that was even possible. Ha!
For someone who has an allergy for the word 'style' I discovered that I can no longer deny that I have a personal art journaling style. Shocking right? Ha! I have nothing against having a style. On the contrary, I think it's so awesome if you find a way of creating that defines you. But in my own art journal journey I find it very difficult to stick with just one thing. My art is always changing and evolving that I find it hard to label it. But if you are following me on Instagram or even if you read some of my blogpost on here you'll know that certain elements always come back in my art. And that, even though I don't like to admit it, I have a significant style.
Anyways, I did try my best to make something different, to experiment a little and think outside my floral, floral and a bit grungy box. But if you are wondering how everything went back to me figuring out that it looks exactly like the hundred pages that I made before, please keep on reading!
Anyways, I did try my best to make something different, to experiment a little and think outside my floral, floral and a bit grungy box. But if you are wondering how everything went back to me figuring out that it looks exactly like the hundred pages that I made before, please keep on reading!
I'll also add a little recipe down below on how I made this page, so that you can play along if you like to!
Journal recipe
1. Apply Gesso with a pallet knife
2. Use a Stencil with some acrylic paint
3. Collage with old book papers and teabags
4. Add some texture with lace
5. Apply gesso on parts of the page that you'd like to soften up
6. Add some pop of colour with watercolour and coffee
7. Apply a stencil with gesso or matt medium
8. Use the same stencil and apply is with a damp brush and watercolour
9. Add some more colour with watercolours
10. Time to add small details with ink splatters, pencil, marks ect.
11. Write, stamp or glue down some journaling
My Process

It all started when I saw the Wild Dreams stencil by
Tiffany Goff Smith. I fell completely in love! It reminded me of those fancy cabinets with all different kinds of shapes in them that you see all over Instagram. As I said earlier I'm more of a floral, script and marks stencils kind of girl so even though this stencil didn't really fit in that description I felt inspired to create.
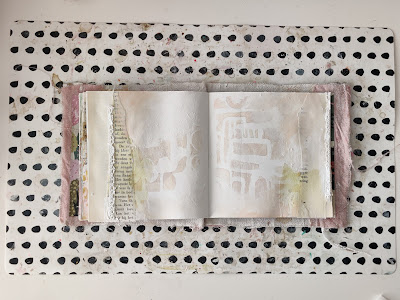
To prep my page I applied Gesso with a pallet knife to create some interesting texture.
Then I grabbed Wild Dreams and created the base for my spread.
My intention was to create vibrant and happy spread using this stencil.
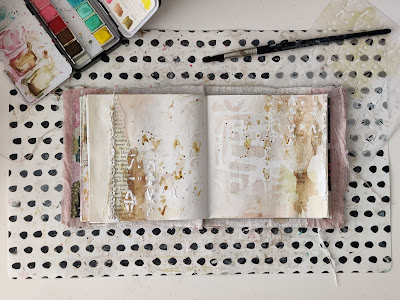
I didn't picked a vibrant colour to start with, because in the end I always make the base layer softer with gesso. So I decided to start with the colour Apricot by Dina Wakley and skip the gesso part. See, trying to think outside the box here! Or... is this the part were I went back in?
I used coffee to grunge up the part were I glued down the teabags and sprinkled down some splatters in the process. Then I grabbed the Glyph Grid stencil by Seth Apter, applying it with gesso to create some more dimension. After the gesso was dry I wanted to experiment a little with using watercolours on my stencils. I don't do this often enough! I really love how watercolours looks through a stencil! I'm obviously not an expert, but what works for me is to use a slightly damped brush.
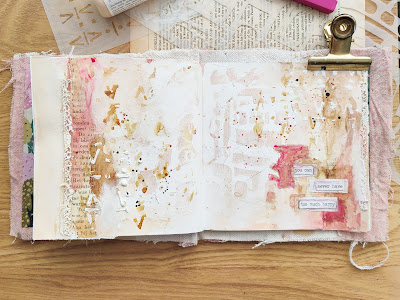
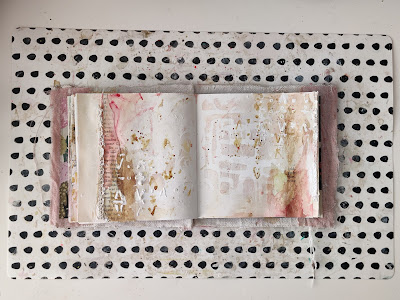 The pink watercolour made this grungy page pop! It looks so nice with the apricot colour on the background. It crossed my mind to colour over the centre part of this page, but I didn't want to cover up the stencilled part too much.
I just really like to keep the centre of my pages light and airy.
The pink watercolour made this grungy page pop! It looks so nice with the apricot colour on the background. It crossed my mind to colour over the centre part of this page, but I didn't want to cover up the stencilled part too much.
I just really like to keep the centre of my pages light and airy.

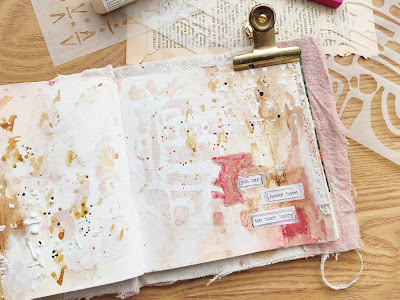
After I glued down the Tim Holtz phrase I looked at my page and I wondered if I could add something different. I grabbed my Wild Dreams stencil again and I outlined it with a grey watercolour pencil. It wasn't really what I was hoping for. So I used my watercolour set again and with the pink shade that I used before I coloured the shape making sure I didn't colour over the phrase sticker.
In the end this page wasn't as vibrant and outside the box as I wanted it to be. But I had fun playing with the stencils and trying to use watercolours with them. Apparently a vibrant colour scheme isn't what I'm drawn to at the moment. And that's okay. My intentions were the starting point that got me making this page. I really like it and I hope you do too!
This goes to show that having a personal style is something you can't force out of you. It's just something that happens when you create and give yourself the permission to play.
Just let things happen. Have fun in your art journal!
.jpg)
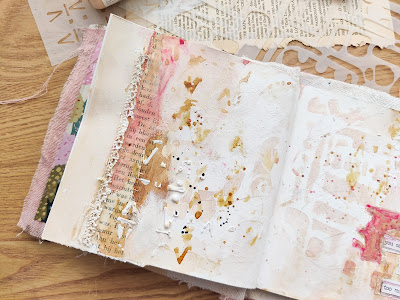

Next I glued down all the good stuff like book papers, tea bags and lace. I grabbed some gesso and the apricot paint to blend all the elements with the stenciled background layer.

I used coffee to grunge up the part were I glued down the teabags and sprinkled down some splatters in the process. Then I grabbed the Glyph Grid stencil by Seth Apter, applying it with gesso to create some more dimension. After the gesso was dry I wanted to experiment a little with using watercolours on my stencils. I don't do this often enough! I really love how watercolours looks through a stencil! I'm obviously not an expert, but what works for me is to use a slightly damped brush.
 The pink watercolour made this grungy page pop! It looks so nice with the apricot colour on the background. It crossed my mind to colour over the centre part of this page, but I didn't want to cover up the stencilled part too much.
I just really like to keep the centre of my pages light and airy.
The pink watercolour made this grungy page pop! It looks so nice with the apricot colour on the background. It crossed my mind to colour over the centre part of this page, but I didn't want to cover up the stencilled part too much.
I just really like to keep the centre of my pages light and airy.
After I glued down the Tim Holtz phrase I looked at my page and I wondered if I could add something different. I grabbed my Wild Dreams stencil again and I outlined it with a grey watercolour pencil. It wasn't really what I was hoping for. So I used my watercolour set again and with the pink shade that I used before I coloured the shape making sure I didn't colour over the phrase sticker.
In the end this page wasn't as vibrant and outside the box as I wanted it to be. But I had fun playing with the stencils and trying to use watercolours with them. Apparently a vibrant colour scheme isn't what I'm drawn to at the moment. And that's okay. My intentions were the starting point that got me making this page. I really like it and I hope you do too!
This goes to show that having a personal style is something you can't force out of you. It's just something that happens when you create and give yourself the permission to play.
Just let things happen. Have fun in your art journal!


.jpg)

Stencil used: Wild Dreams Glyph Grid
Productlist:
Handmade journal
Vintage Music and Book Paper
Amsterdam White Gesso
Mod Podge
Tea Bags
Lace
Instant Coffee
Dina Wakely - Apricot
Tim Holtz Stickers
Prima Marketing Watercolour set Tropical
Amsterdam White Gesso
Mod Podge
Tea Bags
Lace
Instant Coffee
Dina Wakely - Apricot
Tim Holtz Stickers
Prima Marketing Watercolour set Tropical

Thank you so much for reading my blog post. I hope that I have inspired you to create today! My name is Anouk or Creanouk on social media, and I'm an all-round creative from the Netherlands. I love art journaling because I can put my heart and soul into it. You can find my work on Instagram and Youtube.
Oh wow!! I just love this!! And I absolutely love your style!! It is beautiful and so peaceful to me!! Thank you so much for sharing!! :)
ReplyDelete