Hello Creative Friends,
I am the first to tell you that a good challenge always stirs my creative soul!
So getting my head around this technique, the stencil choices and then the decision on colours!
Need I say more!
Today I will be guiding you through a technique that was inspired by a fellow creative Jennifer McGuire.
Love the fact that with one technique we end up with four individual art pieces that can be used for cards, tags, journal inserts, banners or simply framed and gifted.
I did alter the process abit and that means more options!
Check it out below
*Paint was used vs ink pad
* Gel Plate vs tape
Cut four equal pieces of paper (use any paper that will work well with the medium you will be applying)
Here I am using mixed media paper that I tore out of a journal 7"x10" (98lbs) cut into four
Place the papers on the gel plate so that the seams are all touching.
I found that becasue the papers stick to it, it makes for easier adjustment.
Center the stencil over all four pieces of paper
Apply your favourite colours (paint or ink)
With a light touch apply a different colour sparingly on top of the base colour.
I used three colours.
Rotate all four pieces so that there is a void in the center.
Repeat the same technique as in step 1 and continue on all four corners.
Note: Due to my paper size selection I opted to stencil only three corners.
The cards most certainly can be left as they are with a sentiment added but I am going to keep going with two more layers.
I will be making this batch the same.
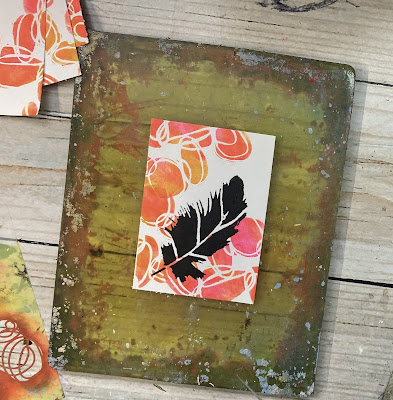
A variety of focals can be added to the cards. I reached for the Feathers 6 Stencil.
I love this nature inspired stencil. It's perfect for focals and backgrounds.
Position the stencil and apply black acrylic paint with an applicator.
Loving the crispness of the black against the pastel background.
Once again feel free to stop here or continue on to the next layer with me.
For the final layer I am using another favourite and well used stencil CrossStitch-Two Step Stencil.
With the remaining paint on my applicator I stencil random marks so that there faint enough to see but strong enough to ground that gorgeous feather.
I love the end result and that I have four individual cards!
Check out the process on YouTube.
Supplies
Stencils:
Puddles S331 designed Rae Missigman was inspired by the art in our everyday environment.
Feather 6 Stencil S178 designed by Cecilia Swatton is a soft stencil offering many arty options
Crossstitch two step stencil designed byTammy Tutterow is a definate go to for backgrounds, marks and even stitching.
Paint:
Liquitex Basics~fluorescent pink
~ cadmium orange hue
~ light olive green
~ black
Paint aplicator
Mixed media paper
Gel press plate
blank cards
Hope you enjoyed the process and that you found inspiration to create your versions.
Stay Creative ✨
Tina


No comments:
Post a Comment
If you are entering a GIVEAWAY, please add your email address in the event we need to contact you.
To avoid SPAM, please write it like this:
marybeth (at) stencilgirltalk (dot com)
Thank You!