UpCycled Lamp Base with Jane Bellante
Hello friends! Jane Bellante back with you this month with an up-cycled creation I really love!
I just got the L652 Garden Montage stencil from designer Cecelia Swatton and I instantly knew that I wanted to use it on this project.


This is the lamp that I use to record all of my video content. It's been banged around and it is well used. But it just doesn't lend itself to the beauty that is my studio, my sanctuary, my flow.
So, I cleaned up the drips of paint and resin on this base and got started.


I ended up painting 5 coats of the Daydream Apothecary White Base to start with. I wanted to use this particular paint because it is a chalk paint/clay paint combination and it really sticks to most surfaces easily. Think of it as the gesso of home decor products. I'm starting with a blank slate.

Then I grabbed a pile of RoyCycled Decoupage papers because one- it's 20 lb tissue which is so easy to work with, and two- because she has so many gorgeous designs to work with.

I absolutely love my gloss sprays, so I selected some of my favorite colors. I ended up only using the Blackberry and the Fuscia.

I placed the stencil on the base to see which part of the design I could position to be my favorite. Now- that being said, I had to actually use this lamp to film the video, so I had to get creative.
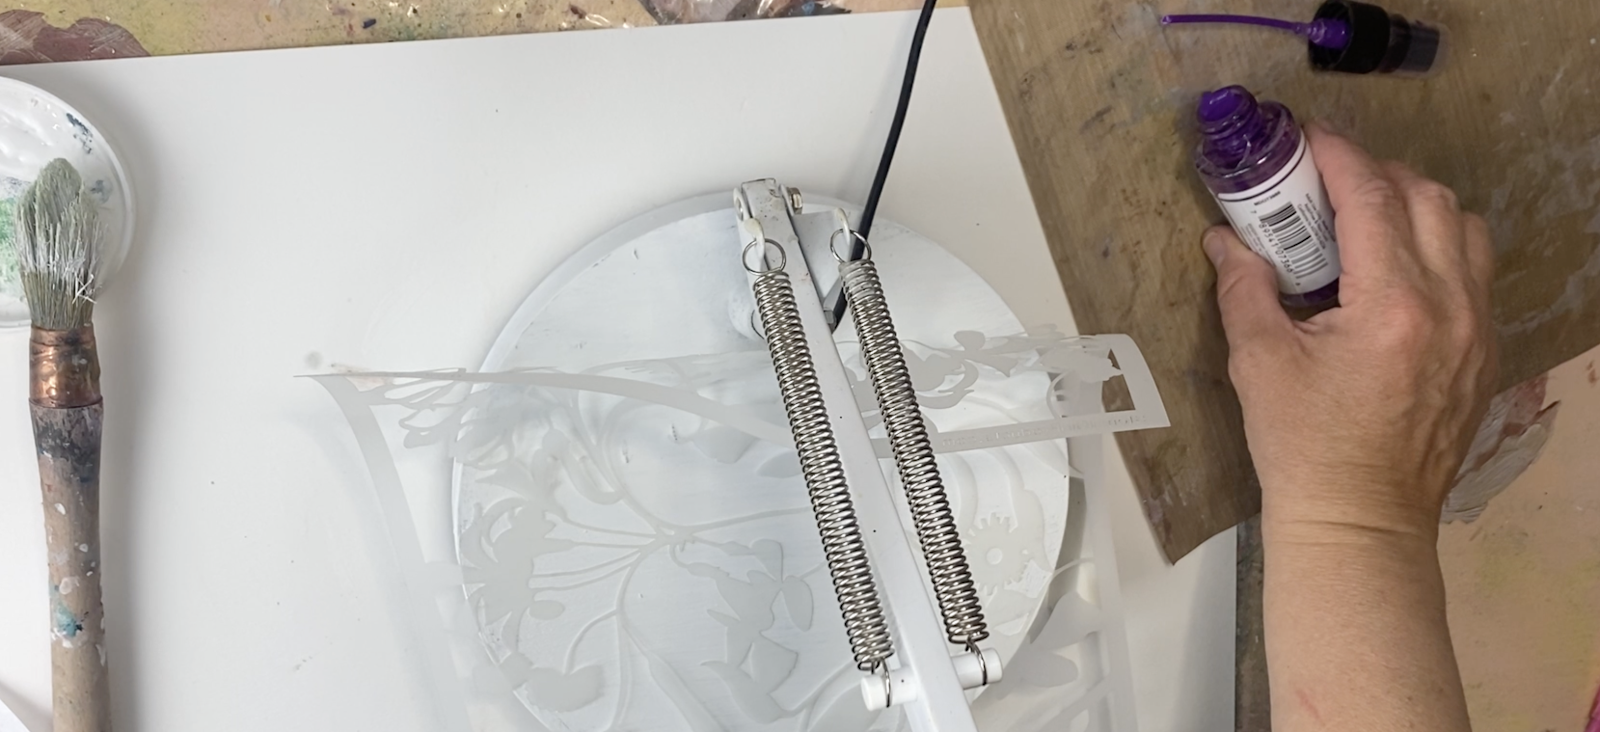
I knew I was just going to have to hold down the stencil in each of the areas so I could get the look I was going for.


I used a make up sponge to apply the gloss spray, and just switched back and forth between the Blackberry and the Fuchsia sprays. Because the stencil was not flat in all of the places, spraying the sprays through the stencil would have been a disaster. This worked so great.

Then, I grabbed the portion of the RyCycled tissue paper that I wanted to use, tore it out to fit, and used a soft matte gel to adhere the tissue.

I wanted the white of the background to be a little more cohesive, so I took my Distress Ink pad in Antique Linen and applied it all over the white areas in the stenciled area.

Loving how it's was looking, but I needed something else to balance out this composition. So I grabbed the L827 Emotions and Feelings 1 from Carolyn Dube and instantly the word "worthy" popped out at me. As artists and creators we tend to struggle with these feelings of imposter syndrome, and abundance in general (and social media does not help with that at all- hello comparison....). So I knew this would be an amazing daily reminder to me that i am worthy to create whatever I want to create, whenever I want to create it.
I used a black permanent ink to stencil with so I would show through, but also bring together the black lines in the paper with the brightness of the stenciled area.

Then I finished the sides with the Garden Montage Stencil, repeating the process with the gloss sprays and the Antique Linen Distress Ink.

I absolutely love this result, and now I feel like I need to paint the whole lamp (hee hee), but this will do for now. A quick project that makes my studio a little more colorful and a lot more inspiring.


If you like to watch videos, here is the step by step video tutorial:
RoyCycled Decoupage Paper
Daydream Apothecary White Base Paint
Distress Ink pad in Antique Linen
Soft Matte Gel
Black Permanent Ink Pad
I truly hope you enjoyed this tutorial and that it inspires you to up-cycle something in your creative space so that it looks and feels more like you.
You can find me at https://www.janebellanteart.com and @janebellanteart on all social media platforms.
Have a great day!!
xoxo,
Jane
Unique idea!! And stunning results!
ReplyDeleteWhat a delightful transformation for a mundane object! Thanks, Jane!
ReplyDelete