Hi Everyone! I'm so excited and to be back on the blog today. Today's post is inspired by the work of Alabama Chanin Design Studio, where the use of reverse applique is used extensively to create couture garments. Below are the items I made using this technique with paper, and below it is a glimpse of a reverse applique garment I'm currently working on that inspired me to try the technique with paper for today's post.


Here's the garment project that inspired me - which is not yet finished! I used my Japanese Influence stencil (L669) randomly placed and stenciled using acrylic paint (with a fabric additive) onto a brown tee shirt. I placed the same size and style of tee shirt in green beneath it and hand stitched them together around the edges of the stenciled images. Once stitched, most of the painted stenciled area is cut out, revealing the green fabric beneath. I just adore this textured and 3-D look! Why not use this idea with stenciled paper?!

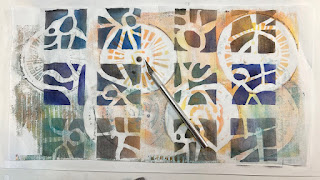
So I did! Using this idea, I created a couple of reverse applique bookcovers and tags but you could create art journal pages, embellishments and more, using this technique with paper layers instead of fabric. I made a short video to give you an overview of the process. More detailed written instructions follow the video below. I had a lot of fun working with this idea - I hope you do too! (And by the way, before I forget...all of my stencils are on sale until March 25, 2025. Just use coupon code CS20 to get 20% off! Now back to the project!)
Materials:
Stencil
(I'm using my L669 Japanese Influence), preferably not highly
detailed, simple openings are easier to cut out
2 sheets of
solid
color paper
in contrasting colors, or
other painted papers
Acrylic
paint or any other medium you desire in any color to contrast with
the papers
Exacto knife
Cutting mat
Glue
Bone
folder or other scoring tool (optional)
A book to cover
(optional) I
used an old diary that belonged to my daughter – only a few pages
in it were used!
Ruler
(optional)
Technique:
If using a book, measure the height and width of the book adding an extra 2”-4” on front and back for flaps to turn to the inside, plus the width of the book spine.


Choose two papers to fit the size of the book as measured above. I chose a painted paper for the top and a solid white for the backing.

Using the book dimensions measured in step 1, mark the fold lines for the flaps and the spine on the top paper. I used orange post-it stickies so that I could lay out my stencil and avoid stenciling on the folds and spine. (This prevents the reverse applique from wrapping around the edges, which are hard to keep flat and can rip once the two sheets are glued together.) Also, I cut my Japanese Influence stencil in half so I could arrange it accordingly.

Using a color that will contrast with the backing (or monochrome but slightly different hue depending on the desired effect) stencil the design on the paper and let dry.

Using the exacto blade on the cutting mat, cut out inside the stenciled areas leaving a small width of the stenciled color intact. If cuts are made that completely remove the stenciled area, the effect will be lost. Leave at least 1/8" of the stenciled design. Don't worry if the cuts don't exactly match the stenciled area, and feel free to leave really small areas that are hard to cut out.
Before cutting...

All cuts made!
Turn the stenciled paper over and apply glue; place the cut-out stenciled paper on top of the backing paper to glue it down. Trim excess backing paper if it doesn't match with the top paper, as necessary.

Place the glued papers under a heavy book while glue dries.
After the two layers have dried, set the book on it’s spine in the center of the paper and from there score both sides of the spine and flaps using a bone folder or other blunt tool. Using the score lines, wrap the paper around the book. Conversely, set the book in the center and simply wrap the cover around the front and back tucking the flaps to the inside.


You can embellish the finished cover with a title, doodles, inked edges, etc, if desired. Or cut the stenciled areas apart and create a couple of tags...these can be used in many ways!


I hope you enjoyed this project! Be sure to check out my inventory of stencil designs at Stencilgirl Products and get 20% off between now and March 25 using code CS20. Until next time, happy stenciling!
This is wonderful!
ReplyDeleteThank you so much!😊
ReplyDeleteThank you for presenting this fun idea! I love this stencil too. I doubt I will applique a shirt but definitley like the paper idea. I am on the hunt to finally get started on some t-shirts that I bought in 2023 on clearence. I have the dye, paint, fabric medium and lots of stencil girl stencils but I have FOMIU fear of messing it up.
ReplyDelete