Showing posts with label Abstract landscape. Show all posts

Thursday, May 26, 2022

New Abstract Florals and Landscapes from Jennifer Evans


Paperwhites are delicate flowers that can be grown indoors from bulbs. Similar to daffodils in structure, they are tiny blooms that appear in clusters. This stencil is reminiscent of looking closely into a gathering of blooms (upper right square shape) with a close-up of a leaf on the left and a border of stems underneath.  Experiment with using the negative space (areas around the main images) to see what kind of new designs will inspire your art.


When sketching a flower, I always examine it from all angles. This stencil looks at a sunflower 3 ways: from the side, straight on into the bloom, and underneath the bloom where the greens look like a crown before it attaches to the stem. You can experiment with different color blooms. I imagine the final product being cut apart to be utilized in other projects, or to make bookmarks.


A common carnation gets the star treatment in this stencil, which features a single bloom over a background of stems and leaves. Try your hand at lending texture to the petals with any type of collage elements, or just sketch them in with a colored pencil.


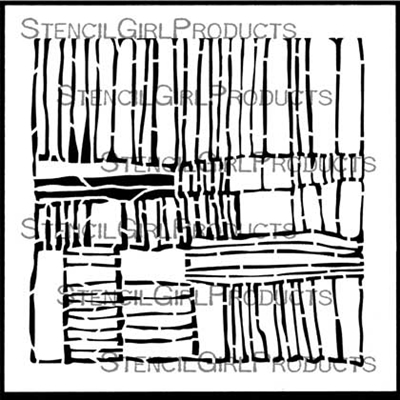
Nature lovers and landscape artists will recognize how to put this stencil to good use. The horizontal and vertical lines in this design allow for close-up studies of different terrain: rocks, hills, grasses, puddles, trails, evergreens, mountains and plains.... Or, you can combine them all into one design (see example). 


This landscape with a building structure is open to many interpretations: as a waterscape (see example). Or, turn the water into rocky terrain or grassy hills. The greenery behind the building can be interpreted as hills/mountains if you prefer.


Tuesday, August 7, 2018

Dog Days of Summer - Mini Artworks with Louise Nelson


Hello Hello :)

Today I would like to share with you my take on this months Inspiration Theme; 'Dog Days of Summer'.


I am a big fan of Mixed Media Mini's, so with that in mind, I decided to create a set of 3 'lil framed artworks that depict the colors and look of an Australian Outback Summer landscape. My approach is somewhat abstract, and a lil 70's style in look, but you get the idea.


The main colours of the Australian outback are blues and ochers, so I have used a vibrant sky blue and a pale earth color acrylic paints. I have used these paints to created the landscape on a 'lil 6 x 4 gel printing plate, with a very basic color blocking approach.


Have you noticed that when the sun is high and hot in the Desert/Outback there is a heat haze-like filter on your view of the landscape?

Well, with my little arty landscapes I tried to emulate the look of a heat haze by using a fabulous StencilGirl stencil designed by the one and only Mary Beth Shaw; Layers S429!


I thought I would include some photo collage images to show and describe to you how I created these 'lil arty landscapes. The technique is very simple, so simple in fact that it would be great to use this as an art project for a holiday activity with your children. Frame them up and they would be a great gift got the grandparents! :) 


  • In the above image, you can see the supplies that I have assembled and used for these lil arty landscapes.
  • I have used office supply index cards, to print on.
  • because I needed to stencil in similar colours I actually lightened the background landscape colors with white acrylic paint.
  • I have used 2 sizes of brayers to apply the paint to the small gel plate, this made it easier to proportion the colours correctly to place the horizon line in the right place on the gel plate.


  •  I brayer'd the paint on fairly evenly and burnished the paper firmly so that most of the paint came off on the cardstock with the first print.
  • I repeated this process to create quite a few backgrounds; it is always to good to create extras in case of oopsies!


  •  When I completed the backgrounds I then repeated the process using the stencil to create the look of the heat haze. 
  • This time tho I used neat colours [a lil darker] so that the stencil'ed pattern was evident but subtle.
  • I over layed the stencil on the paint loaded gel plate, took a light dummy print, then flipped the paint loaded stencil over onto the pre printed backgrounds.
  • To ensure the paint on the stencil was transferred on to the printed background I used a brayer.

  • As you can see from the first image in the photo above the transferred paint is light and patchy, which helps to create the illusion of the heat haze look.
  • To complete my lil landscapes I used a stamp which is an abstract image of people off in the distance against the horizon with a sun in the sky.
  • After the image was stamped onto the background I then highlighted the sun with some dark orange water color paint. I also added some very small splats of coordinated water color paint to help soften the overall look.
Here are a few close up images of the finished arty landscapes.


I do hope you enjoyed my creative take on this months fabulous Creative Inspiration theme?!

Cheers for now and Happy StencilGirl Creating!!!

Tuesday, June 13, 2017

The Weeping Forest by Louise Nelson


Hello Fellow StencilGirl Fans :)

Welcome! Today is my very first creative share for StencilGirl and I am very OTT Excited. I would love to share with you a canvas that I created using, what I know will be a fave, the StencilGirl Klimt Forest Stencil, designed by Cathy Taylor.

I chose to use this stencil to help me create my canvas as I was very much inspired by a quote that I found on-line by Thomas Paine  an English-American political activist, philosopher, political theorist, and revolutionary. One of my favourite things to do, is to get online and 'Google' stuff; that is how I found the quote that inspired this canvas.

"Everything that is right or reasonable pleads for separation. The blood of the slain, the weeping voice of nature cries, its time to part."

I must confess that I do not know how this quote is meant to be interpreted, but what immediately came to my mind after reading it, was an image of a Weeping Forest. So I set about creating that mental image of a weeping forest on canvas.


All of the painterly 'dripping' techniques that I used to create this canvas, I hoped would reflect the image of a forest crying, weeping tracks of tears.


I thought it would be fun to include a few step images on how I created this canvas so I have included 2 collages of 8 step out images; with brief step-by-step descriptions underneath.


I began by applying a coat of black acrylic paint to the canvas. Whilst the paint was still wet I applied the stencil to the top portion of the canvas. I then over-sprayed the stencil using spray gesso. While the gesso was still wet, I started to remove some of the spray gesso from the trunk portion of the trees with a water mister. This assisted the gesso to run down the length of the canvas to create lines of white on the black background. To help create the illusion of foliage I dabbed my finger into the wet gesso of the treetops.

While the gesso was still wet I re outlined the tree stencil pattern using a slim palette knife.  To create the illusion of foliage on the remaining trees I applied a spray mist. I applied this liberally so that it would drip and run down the canvas. To redefine the tree trunks I applied the stencil again; applied another light coat of spray gesso and another coat of spray mist.

I do hope that you have enjoyed this; my first creative share for the fabulous StencilGirl!

Cheers for now and Happy Creating :)

Louise :) xxx