Showing posts with label Stenciling. Show all posts

Tuesday, December 27, 2022

Creanouk - Gell Press Poppy Seeds


Hi, you beautiful artist! Anouk here again to share another art journaling spread.  I hope you had a wonderful Christmas and are all ready a new art journaling process video!
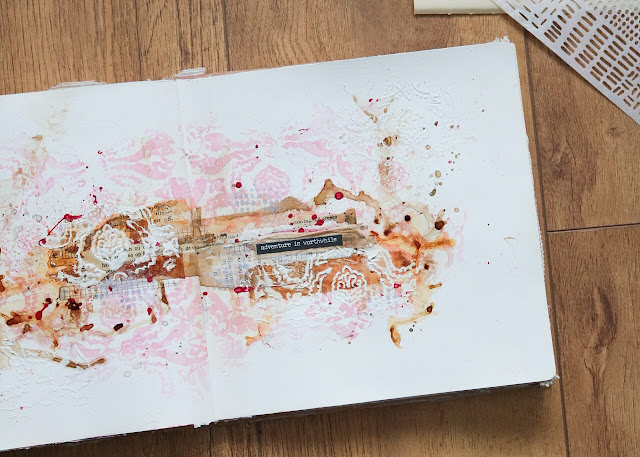
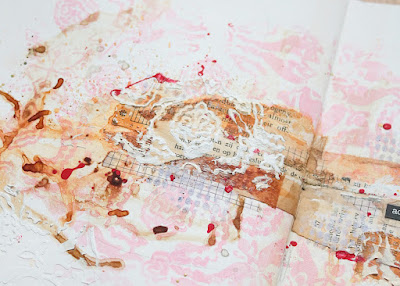
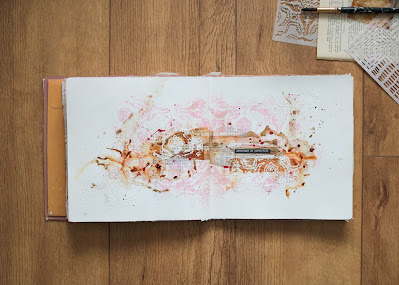
This time I worked with the gorgeous stencil Poppy Seed Heads by Cynthia Silveri that I pressed on tissue paper with my Gel Press printing plate. I alway enjoy a gel printing session, they are just so relaxing! And in the end you'll have a stack of beautiful papers to use in your art journal! You can use these papers when you don't have a lot of time to be creative or to just get yourself inspired.

I build this page up by creating layers with the same stencil. I started with a light colour as a background layer and then I add the darker tissue paper print of the stencilling to create the foreground. I like to work this way to create an art journal spread with a little bit of depth. Sometimes I even add a third layer with modeling paste or gesso to create even more dimension. 
It can be scary to use one stencil multiple times, it can become quite busy if you overdue it. That's why I like to use my tissue paper prints when I'm building up a page with stencilling. The tissue paper is easier to control and to try out if you aren't sure of the outcome.

While I was filming this page I run out of Mod Podge. I almost cried. Ha! Life is tough with a newborn. I remembered that Matt Medium is also an adhesive so at the time it felt like a life saver. Little did I know that tissue paper and Matt Medium are not the best of friends. It dries very waxing in my opinion. So if you are watching this video and see me using Matt Medium for sticking down the tissue paper, I'll not recommend doing the same. I can't wait for my Mod Podge to arrive, because it's been a hard few days without.  


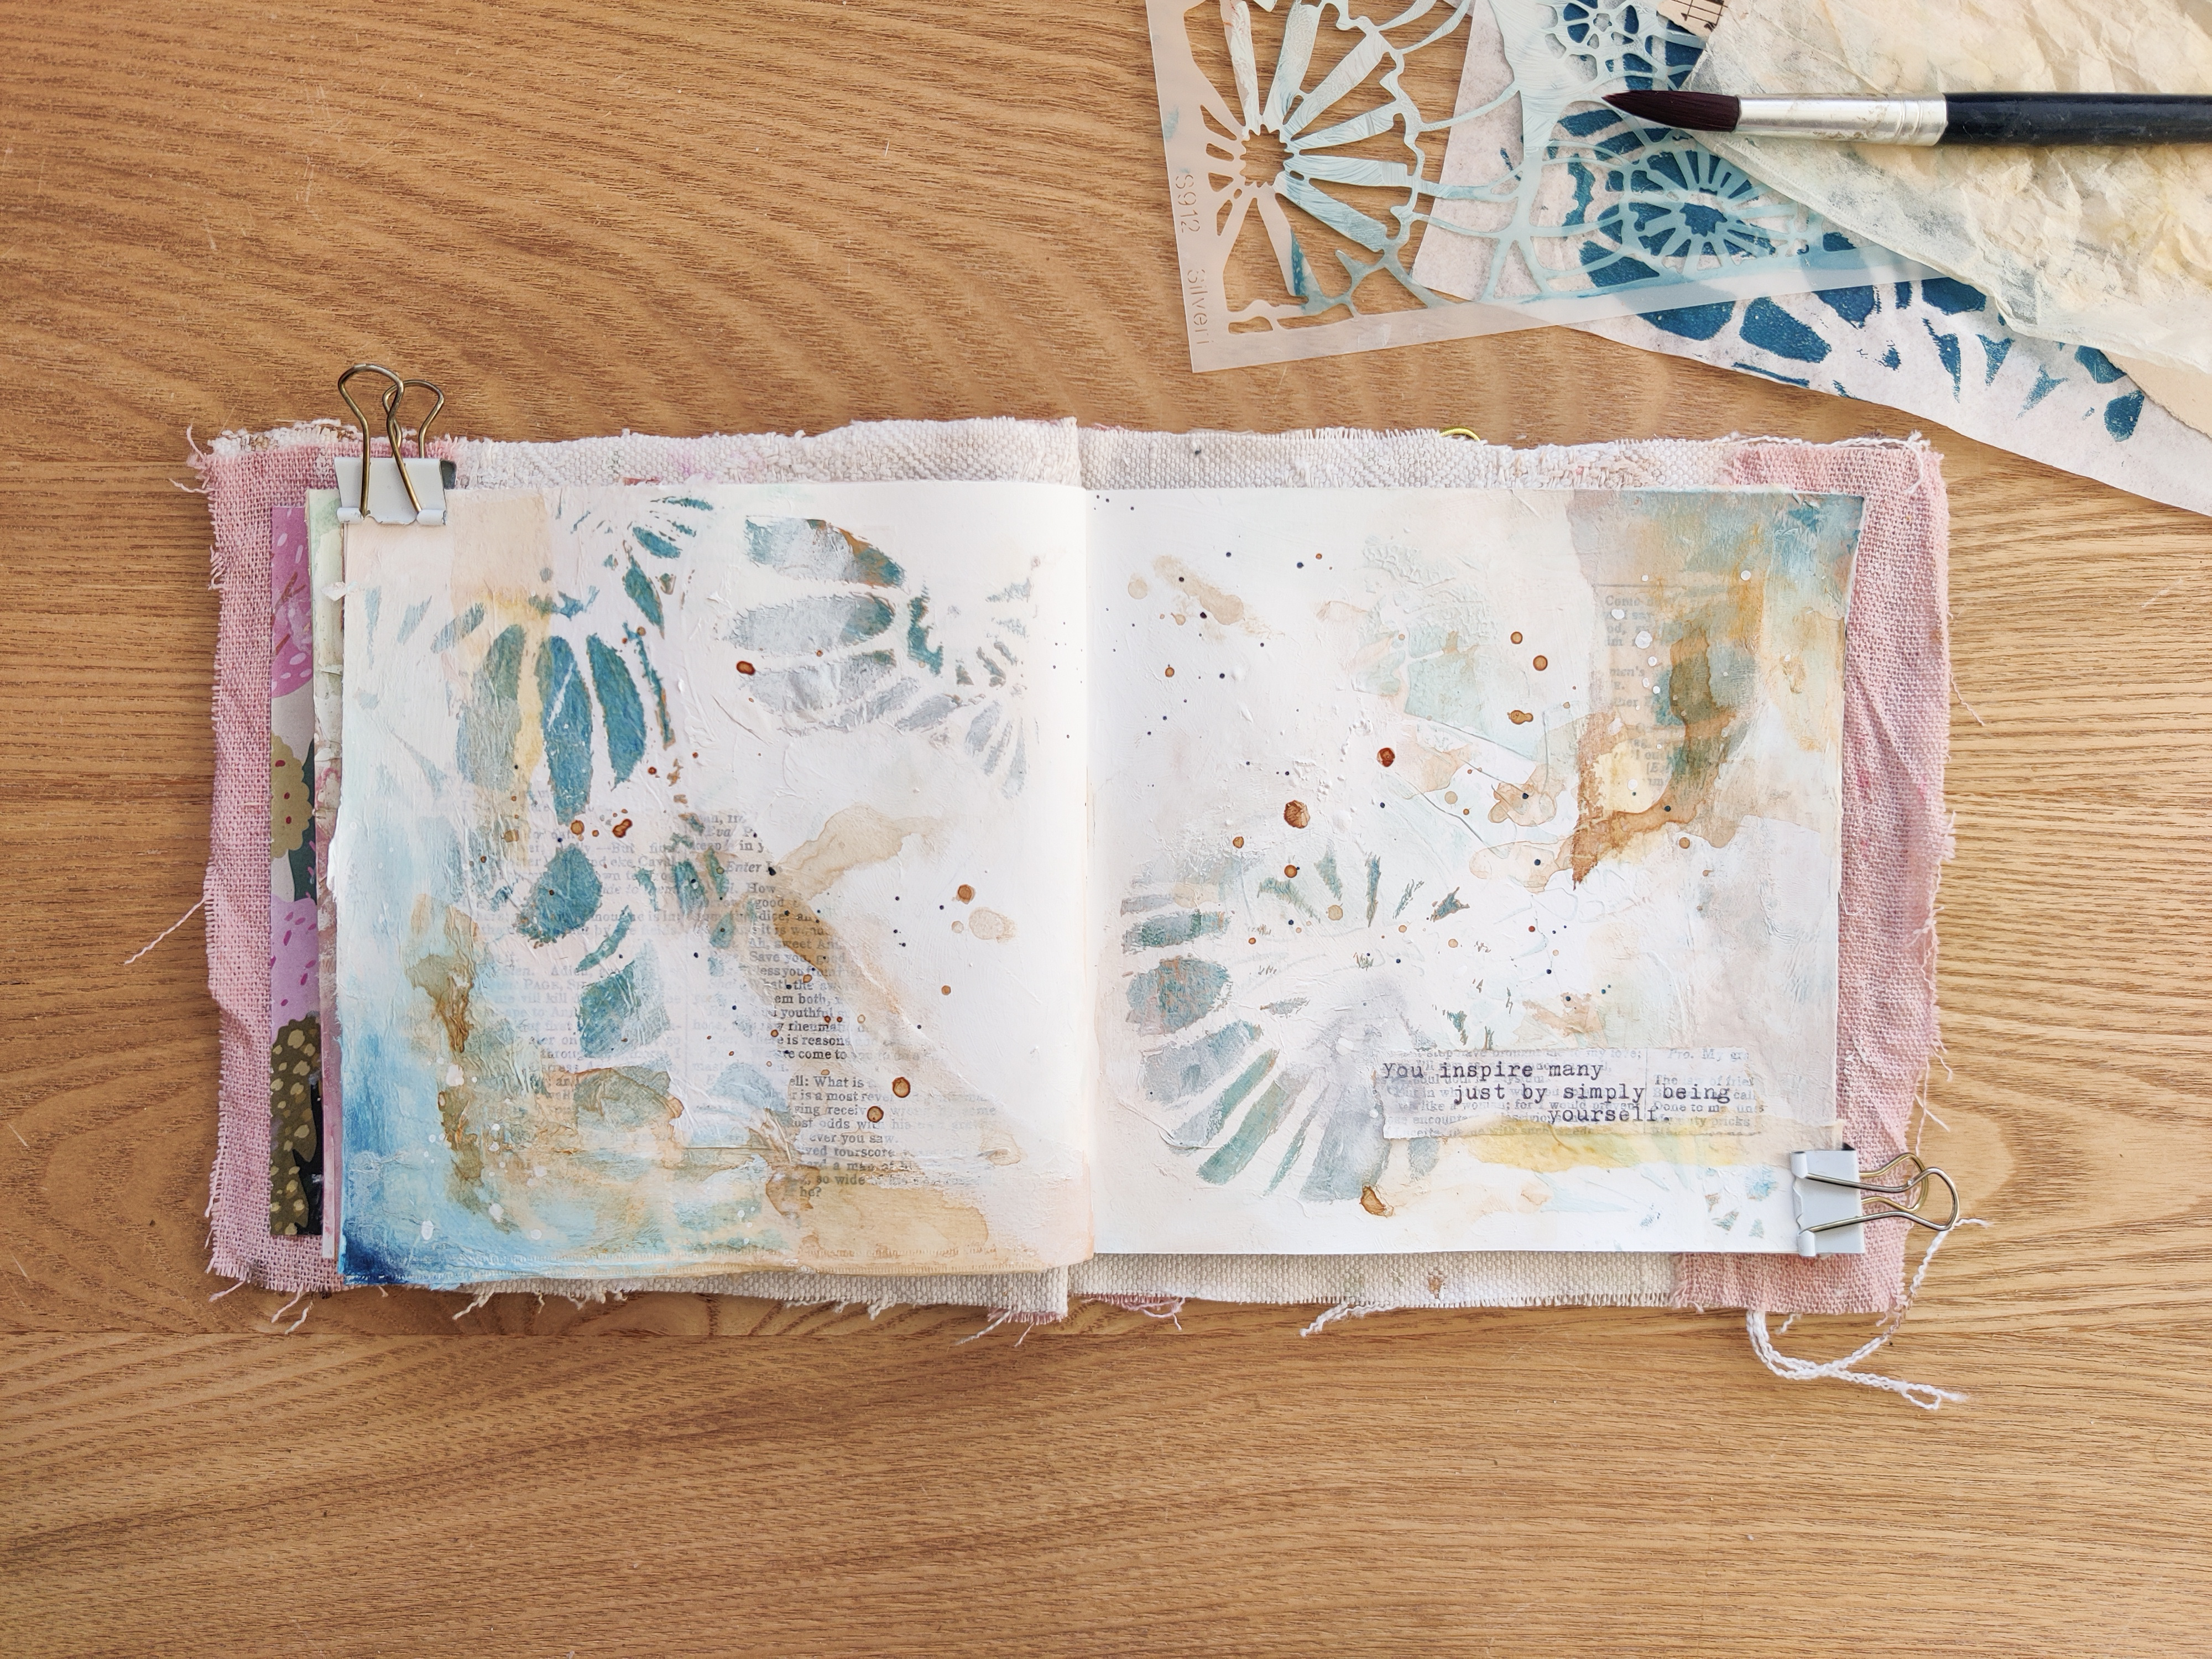
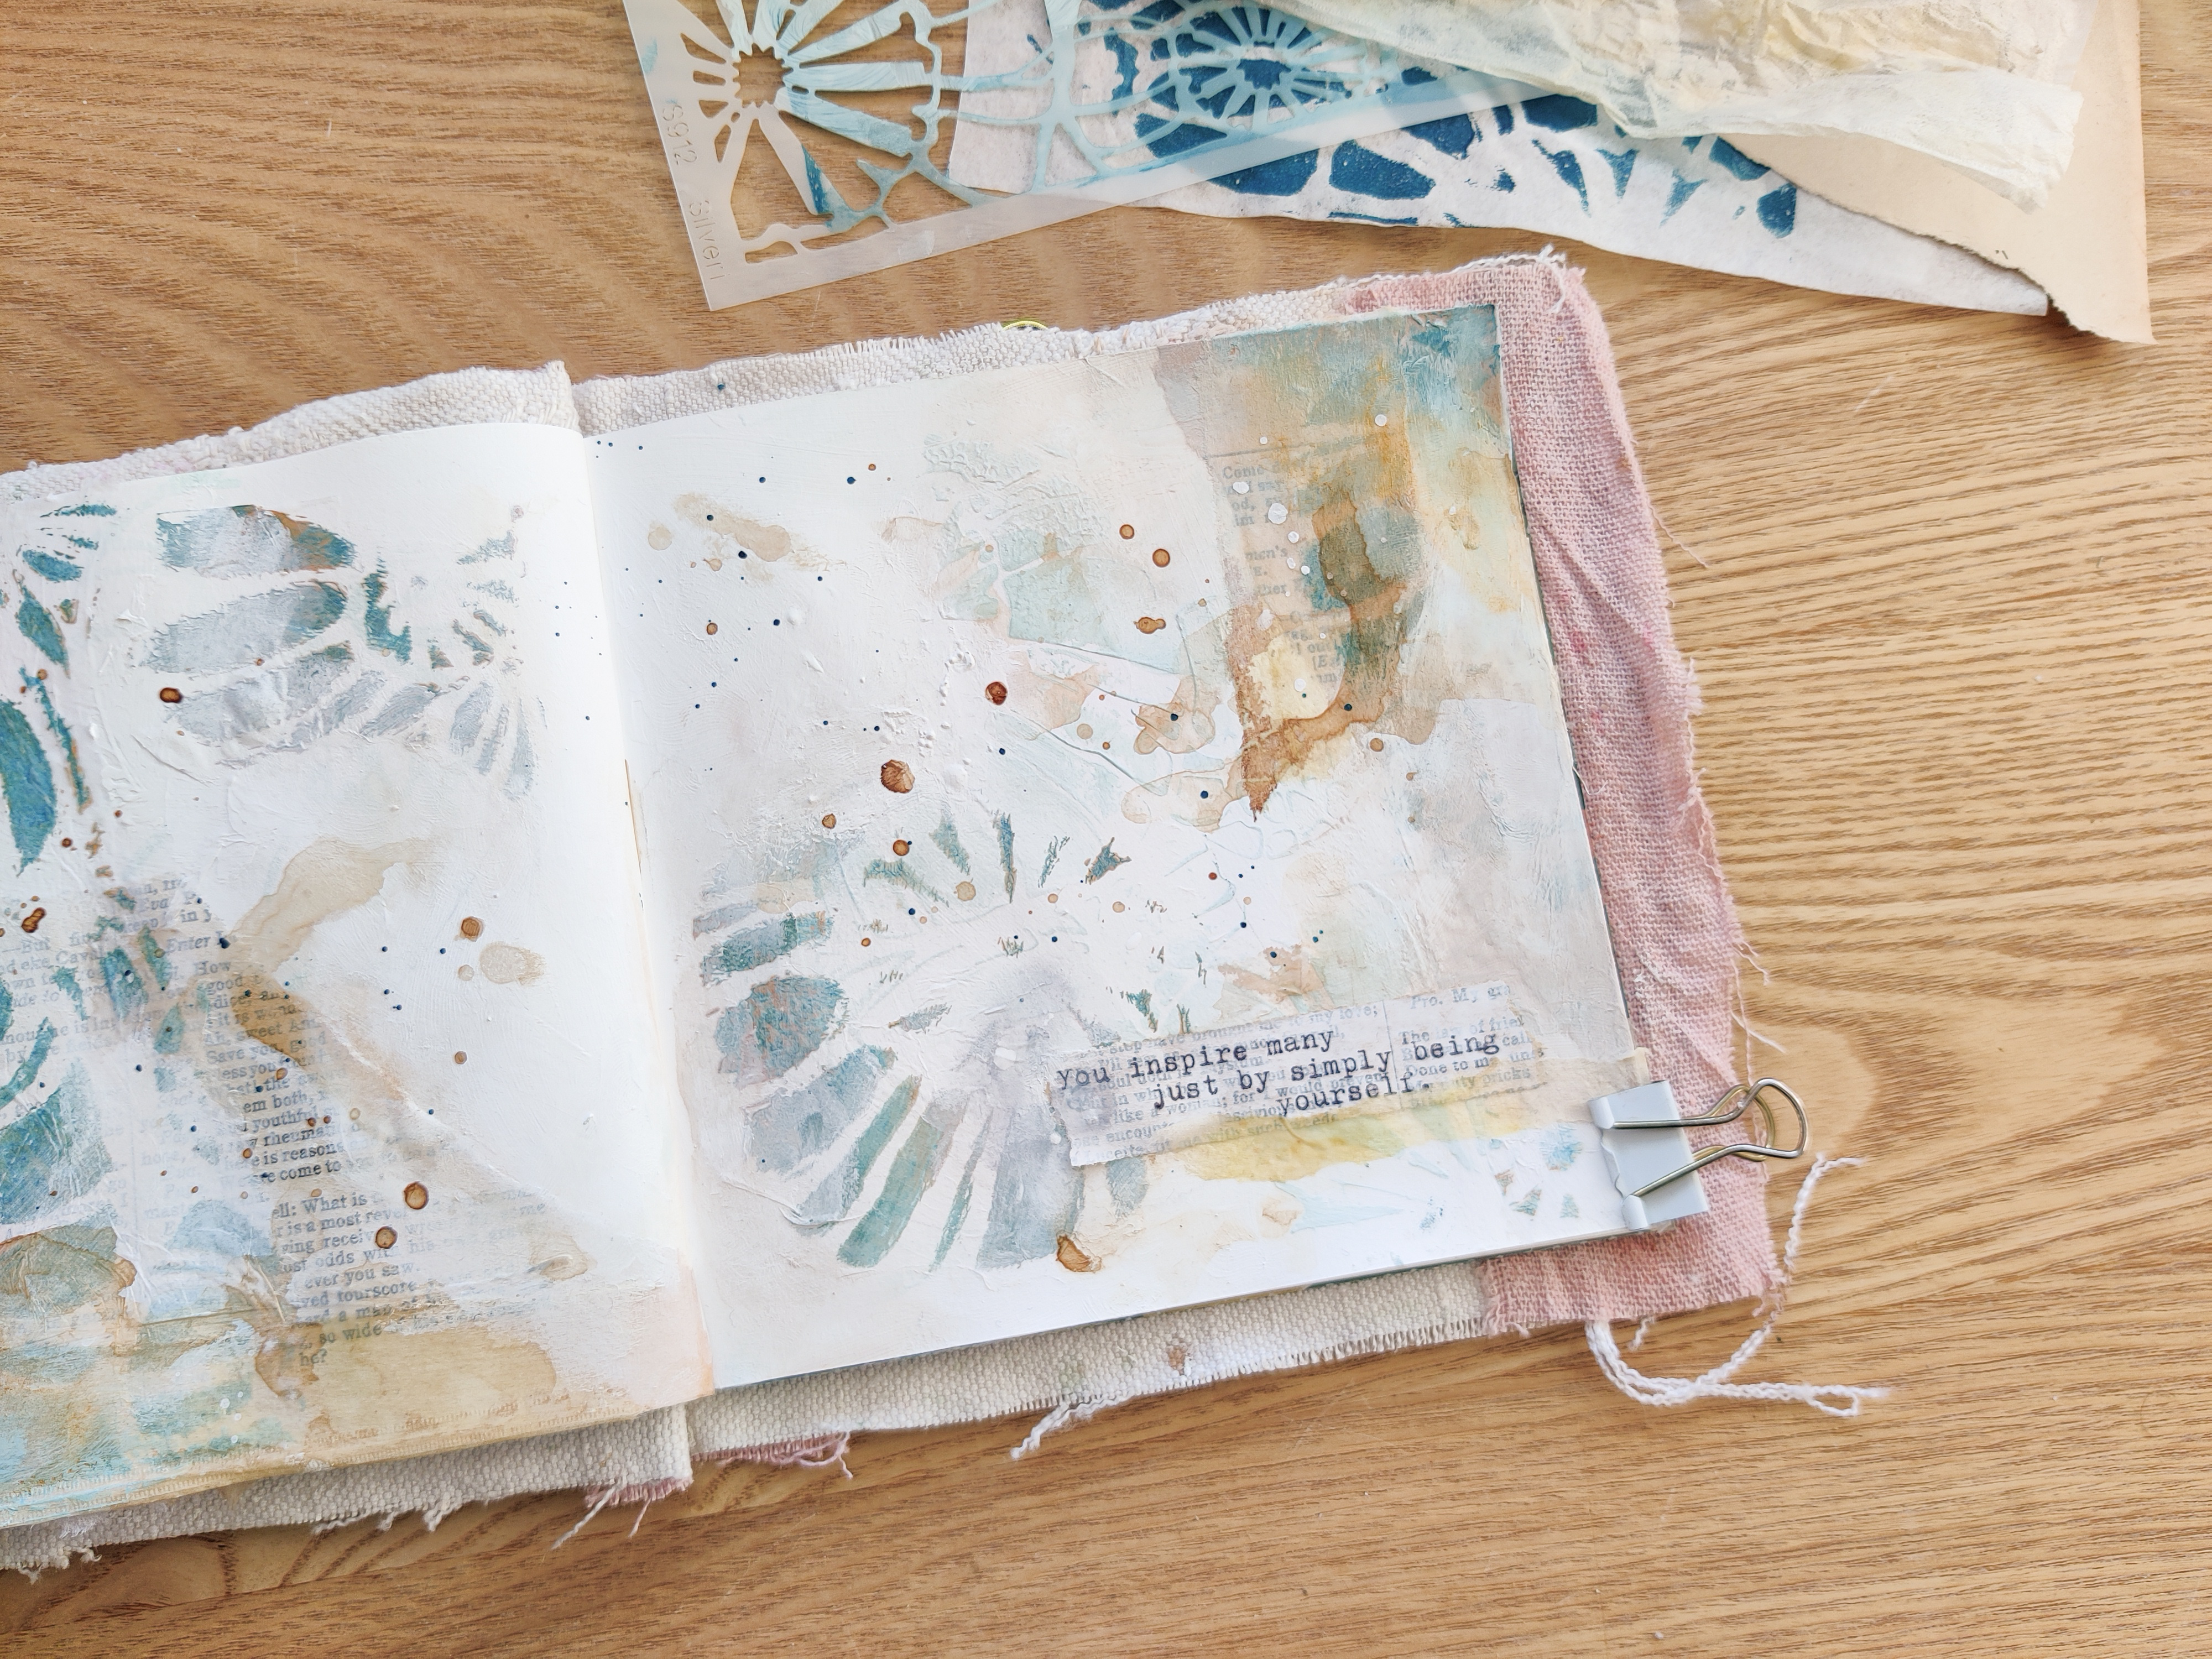
As you can see, the Poppy Seed Heads is such a nice little stencil to create layers with. I hope you enjoy the video from my process that I made for you! 

I wish you all a Happy New Year with lots of creativity!

Until next time.

Anouk


Productlist:
Handmade journal
Amsterdam Matt Medium 
Vintage Music and Book Paper
Amsterdam White Gesso
Amsterdam Titan Buff Deep Acrylic
Amsterdam Prussian Blue Acrylic
Sostrene Grene - Pale Green
Sostrene Grene - Gold
Tissue Paper
Tea Bags
Instant Coffee
Ranger - White Linnen Acrylic ink
Gel Press - A5 printing plate
Gel Press - Brayer
Typewriter


Thank you so much for reading my blog post. I hope that I have inspired you to create today! My name is Anouk or Creanouk on social media, and I'm an all-round creative from the Netherlands. I love art journaling because I can put my heart and soul into it. You can find my work on Instagram and Youtube.


Tuesday, November 9, 2021

Anouk (Creanouk) - In the Centre


Hello you beautiful artist,


When I first started art journaling I wasn’t very familiar with the using white space in my art. I used to fill my pages until everything was covered. It felt just so weird to leave a little spot of white open. Maybe even a little intimidating? And even though I’m still a big fan of using lots of layers and filling everything up, I really started to appreciate white space more in my art this last year. For me, using spaces of white allows my work (and myself) to breathe and to grow.


For this project I really wanted to challenge myself and work with a lot of white space. Instead of building my page up with collage all over the place I started in the centre with the gorgeous Morocco Rug (L997) by Kate Thompson stencil. I used the stencil to create a little boundary for myself, to prevent me from colouring outside the lines too much and create that nice little white space around the artwork. I love to layer with the same stencil a few times to give the page some dimension. So after I got all the mixed media layers done I used the same Morocco Rug stencil with white modeling paste on the back and foreground to bring all the elements together.


Because this page is happening in the centre I used a lot of liquid mediums to keep it light and airy. There were definitely a few times where I wanted to overdue and put my mediums all over the page, but luckily I could hold myself in and guide the puddles away with my heat gun. 


My heat gun has been such a life saver for me for this page as you can see in the little process video that I made for you. I deliberately left the heat gun parts in the video so you can see how much you can influence the drying process when you are using liquid mediums like watercolours, coffee or ecoline.


For mark making I used the Boro stencil (S705) by Kristin Williams. the background a little bit. This stencil is so versatile! It has ten different unique marks that you can use on their own or all at once.  When I add marks I like to stencil them on top of my collage elements to blend them in with.


Making this page has made me learn so much more about using white space in my journal. It made me realize that I don’t have to fear it all, that it doesn’t make my page look dull and that it can definitely be a big part of the page. I think this page has turned out very interesting and I can’t wait to make more of these centred pages!


If you are just as excited as me to make your own centred page, I made a video where you can see the process from start to finish. Play it while you create, and hopefully you’ll get inspired.


The stencils that I used for this project are:

Morocco Rug (L997) by Kate Thompson

Boro stencil (S705) by Kristin Williams


Product List:

Dylusions Squared journal

Amsterdam - Modeling Paste Matt

Vintage Music and Book Paper

Mod Podge - Matt

Amsterdam - White Gesso

Amsterdam - Persian Rose

Amsterdam - Violet mixed with Titanium White

Red Acrylic Ink Tim Holtz - Sticker Book

Faber Castell - Art Grip Aquarelle

Kaiser Craft Mist - Antique Gold

Instant Coffee


Thank you so much for reading my blog post. I hope that I have inspired you to create today! My name is Anouk or Creanouk on social media, and I'm an all-round creative from the Netherlands. I love art journaling because I can put my heart and soul into it. You can find my work on Instagram and Youtube.


Tuesday, July 22, 2014

How to Stencil on a Mixed Media Canvas - "Enjoy All Things" Canvas

A few weeks ago I was asked by a few local scrapbooking & crafting ladies in my area to teach a mixed media painting class to them - they really wanted to know more about how to stencil on a mixed media canvas project. If you've been creating mixed media art, art journaling, or painting for a while, using stencils might seem old hat. But for scrapbookers and crafters who like straight lines and "unmessy" projects, paint and stenciling has a permanency to it that is quite intimidating. It's scary!

What if I MESS UP my piece?

What if I don't like it after I put the paint down and stencil it?

What if it looks UGLY?!

ACCCKKKKK!

Okay, crafty friends, let's calm down.

The beauty of stenciling is that it can be undone ;) Just paint over it! And, it is much easier than you might think! 


I created the base of this canvas in this class as I taught it, decoupaging book pages onto canvas and then painting and stamping over top of the canvas. Now's where the fun starts - the stencils, of course!


Here are some tips for how to stencil on a mixed media canvas for the first time:
  • Less is better - load your brush with the least amount of paint possible. This helps prevent the paint from bleeding under the stencil, which can happen when you add too much at once. I load up the foam brush and then I dab some off on a paper towel or my palette - this makes it "dry" and better for stenciling. 
  • Dab the brush onto the stencil - painting or brushing over it can make the paint seep under the stencil.
  • "Practice" on a scrap of paper or the back of your project before stenciling directly on the canvas. Then, "practice" again by stenciling the sides of the gallery wrapped canvas. Finally, stencil onto your project directly.
  • Keep wet paper towels or baby wipes handy to wipe away any mistakes as soon as they occur.
  • If a mistake can't be wiped away, paint over it, allow it to dry, and then stencil again.
  • Consider using Workable Fixatif between layers of stenciled images or paint to protect the work you've already done from potential new mistakes.
  • Sometimes the best images are created from "mistakes"!
  • Have fun!
In a couple of spots on this canvas, I loaded my brush with too much paint and it seeped under the stencil. I took my fingers and a paper towel and smeared the paint to create a streaked image with the excess paint. If you don't tell anyone, they'll think you got that effect on purpose! I smeared the doodling on the canvas to continue the smearing theme and look to make the piece look cohesive:


Here are the supplies I used on this piece:
At the end of the class, everyone had a different and unique piece, with various colors and choices of stencils, yielding completely original results for each person! A little time experimenting is all everyone needed to be comfortable stenciling with paint and ink. Now, what are you going to stencil next?

Thanks for visiting us here at StencilGirlTalk today! 

Happy Stenciling,

Jennifer Priest


Visit my blog at HydrangeaHippo.com