Showing posts with label acrylic ink. Show all posts

Friday, March 20, 2026

Make Your Own Transparent Layers with Stencils!

Hello friends, Julie Peterson, @nuthouse73, mixed media artist and creative maker, here to share my love of stencils.  Stencils are such a versatile tool and can be used to enhance almost any surface.  I’ve been experimenting with transparent and translucent substates and I'm sharing with you today stenciling on transparency film. 


Supplies


Transparency film for inkjet

Acrylic Ink

Dishes or a palette

Make-up sponges

Stencils: 

    S405 Bullseye by Mary Beth Shaw

    L477 Versailles by Nathalie Kalbach

    L827 Emotions and feelings by Carolyn Dube


Grab a sheet of the transparency film and make sure it's on the right side, the side that you would print on if you were sending it through the printer.  Decide what colors of ink you want and put some in your dish or pallet, get your makeup sponge dab small amount of ink on the sponge, tap some off, you don't want too much ink on the sponge. Start of with light pounces, making light layers.  Sometimes you might have to go over it a couple of times depending on how dark you want the image.  


Now that you got the gist of the process you can explore layering two stencils together and using multiple colors on one stencil.  


Using the transparency film


You can do a mass make and have them on hand for when inspiration strikes.  They can sometimes be a little tricky to get stuck down.  My favorite ways are a stapler, sewing machine, and double sided tape.   They can make great stand alone pages for your journal or cut them up to enhance whatever art you're making, even the smallest pieces can be used.   


Saturday, January 5, 2019

Love & Friendship: Junk Journal by Louise


Hello, Hello, Fellow StencilGirl Creative :) :) :)

Today I would like to share with you my creative interpretation of our current theme 'Love & Friendship'.

As you may have know from my last blog post for StencilGirl®, I am a huuuuge fan of creating Junk Journals. I have a few 'on the go'! I have a collection of tags, paper bags and paper scraps that I have pre-prepared with layers of paint, mostly 'dirty plate pulls', from when I get on a roll with printing using my gel printing plates.

For today's creative project I have used 2 of the pages from my Junk Journal stash to journal personal sentiments I feel for a couple of creative friends, who are having a bit of a tuff time at the moment. 


To create these 2 journal pages I have used 2 awesome StencilGirl® stencils designed by the fabulous MaryBeth Shaw.


I would like to share with you some photo collage images that depict my step-by-step process for creating these journal pages.

  • To create these journal pages I assembled some basic requirements; Gel Printing plate, StencilGirl® stencils, brayer, acrylic paint, wet wipes, journal pens, sponge applicators, paintbrush, journal stickers, and gesso.
  • I actually mixed 2 colors of acrylic paint on my gel printing plate to apply to the backgrounds.
  • the application was abstract and a little haphazard to blend with the background pages.


  • Whilst the paint was still wet I layered the stencil down and then proceeded to remove paint to highlight stencil pattern, with a wet wipe, on 1 background, and then on the second background, I applied another color of paint onto the gel plate, layered down the same stencil and then printed the pattern.


  • When the paint was dry I applied white gesso with a palette knife, roughly in the shape of a human upper torso.


  • To complete the pages I added visual highlights with the ATC stencil, sponging on acrylic paint.
  • Extra splats of coordinating acrylic paint were added using a soft bristle paint brush.
  • The shoulder and upper body definition were created using liquid ink.
  • I hand drew the remainder of the face and neck with black journal pens.
  • Journaling was added using journal stickers and journal pens.
Here are some close-up images of the fabulous stencils that I have used :) :) :)


 I do hope you enjoy these Junk Journal pages that I have created. They for me are very personal, am hoping that their love reaches those intended [IYKWIM]! :) 

Cheers and Happy StencilGirl Creating for the Festive Season. Please stay safe!
Much Mwah!


PS: please remember this.....

"You owe yourself the love that you freely give to other people."

 p.s. Click the pic if you want to be part of our Instagram Contest!

Monday, September 19, 2016

Gwen's Gems - Stenciled Abstract Mixed Media Panel

Hi all, it's Gwen back again today with the September edition of Gwen's Gems! This month's project had a totally unexpected result; I typically work best when I have an idea of where I want to go with something, and this project was no different at the start. However as I progressed, I realized that my original vision was NOT going to work, and I ended up having to work pretty intuitively in order to finish which was very weird for me, but I really like how it turned out! 

Here's what I made this month: it's a stenciled mixed media collage on a 9x12x1.5" birch panel.


Despite the big deviation in my plans I continued to take pictures as I went, so if you're interested, here's an overview of the process I used to make this piece.

First, I pulled out some sheets and scraps of under paper (paper that I use under something else to catch stray marks or that I use to clean off brushes and stencils or test or clean stamps.) A lot of people have junk or mop-up journals where they clean off brushes, etc... but I've found that I really like to do it on loose sheets of paper and deli paper - that way, I keep building up layers until I get something cool looking, then I set it aside to save for moments like this. 

On each paper I inked through a different stencil with gold pigment ink, then heat embossed with Ranger gold detail embossing powder.


From left to right, here are the stencils I used on these sheets:
Next, I used matte medium to start collaging pieces of these papers onto my substrate - some of them wrapped around the sides as well. When that was done I started scrubbing in some paint - I used titanium white, titan buff, and nickel azo gold, eventually I also added in some quinacridone nickel azo gold.


This is where things stopped going according to plan... lol. I kept feeling like I needed more paint and less pattern showing through.


Don't get me wrong, I really liked how it looked at this stage. It's hard to see in the above photo, but because of the embossing on the collage papers, there's quite a bit of good texture here (I also let some of the deli papers wrinkle a bit as I collaged them - more texture!) I had also cleaned a bit of molding paste off of a stencil on one of these - even more texture!

At this point I realized that my original plan was NOT going to work, so I started winging it. I cut out a few images from the leftover paper where I'd stenciled my Ornamental Petals Mask and laid them on top.


I decided to commit to that and adhered them in place. Next I felt that I needed some dimension in the center of my petal images. I thought about doing something with clay, but ended up using some metal findings to create little flowers.


I assembled, added a jewel in the middle of each, then glued them in place with E6000.


How about some drippage with acrylic inks?


Eh... I added some turquoise ink and then used a paper towel to blend the colors into the background, but I left some of the lines from the original drips - I really liked how that looked... subtle.


I was pretty happy at this point, but I wanted to add more, so I pulled out a few stencils by Seth Apter (Unfinished and Timeless) and masked off the sections I wanted, then added a few words and some texture elements with black Archival Ink. (I picked the word "change" from one of the stencils since it was particularly a propos for this piece.)


So that looked cool, but why not play some more? I mixed some pouring medium with just a small amount of a brownish glaze and poured some puddles on top of the areas where I'd stenciled the words.


I spread the poured medium around until it was in the general shape I wanted it, then let it dry overnight. Once dry, I used a Stabilo All pencil to go around the edges, then I feathered it out with a water brush and dabbed a bit until I liked how it looked.


Was I done? Did it need more? (Yes... added some rust effects to my metal flowers.) I spent some time looking at it from different angles (one of my favorites is to set something on the floor and look down at it,) and finally decided that yes, I was done! Not at all what I'd originally planned, but it just goes to show that every now and then us planners need to let loose and do something intuitive!


Above you can see how the poured medium gives a totally different texture and finish to areas of the piece - I like the subtle contrast and the added depth and visual interest you get.  You can also see how I continued the collage around the edges.

A few more close-ups:


In this last photo above, you can really see some of the texture from the area where I'd cleaned some molding paste onto my under paper... I love how that worked here!

So there you go - I hope you enjoyed this month's project! My takeaway this month... sometimes I need to let go of control and just see what happens... you never know - it might be better than the original idea! If you try this process in your own art, I'd love to see how it turns out.

Until next time, happy stenciling!


Monday, September 9, 2013

Flying Tulips!

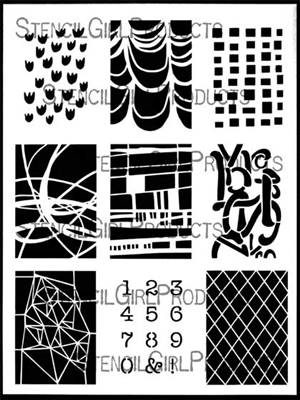
Hi!  Leslie here to show you how much I love this gorgeous stencil from SteniclGirl!  I love the cool graphic quality of this pattern as it is something I will use over an entire page, and as a linear feature or in small areas.  It makes a great "wallpaper" effect on the page as well as on fabric.
First I am adding some red paint to a previous project for an additional layer.
I'm working on both edges of the page.

Can you see Mary Beth Shaw's Circle Tiles stencil from StencilGirl in the mix?
By adding the Flying Tulips on the edges, I think it gives a sort of "brambly" look.

To further differentiate the background from the foreground I edged the red paint with a black pen.

I was thinking of a house set in a "secret garden".
The letters were filled in with white opaque marker to bring the house shape forward.


I wanted to cover the page in my sketchbook with the stencil, but really
disliked how the white marker looked on this paper!

So, I write over the surface of the page...

And then I used my fun dauber with some Modern Masters Iron paint.
I think this paint was past its prime as it was a bit separated.
I like the staining of the page, however.  I'll take it!

The dried paint is a very faint tint.  Perfect for the next layer.

I covered the page again with black paint.

Happy!

Now I use a palette knife to cover the back of my Secret Garden page.

I positioned the page in the sketchbook.

After placing a sheet of parchment over the page to prevent sticking I used whatever was at hand to weight the page.

It dried nice and flat!

I decided to use the stencil on a piece of solid gray fabric:

...and acrylic ink


I love this faded mark!


I added some Setacolor transparent black paint....


and added two rows of opaque white paint

and marked the edges with a gel roller texile pen

I like the depth of the faint ink stencil marks.
This piece of cloth will be fun to use in a future project!