Servus, hi and thanks so much for stopping by today!
I am sharing a small (you could almost call it tiny) project with you today that I have created using large stencils only. And I did so on purpose. Why? I recently found I have been narrowing down myself in my creative thinking as I have for a long time considered large stencils only going with large format projects. Which makes sense when you are using stencils that have a rather specific design like a scenery or portrait for a example. But when it comes to abstract stencil designs only using part of the stencil is not only an option but also a great way to add some creative randomness to your project designs. And they are great fun to use for mark making.
So I decided to take that idea to the top and pick the smallest format I know - ATC size!
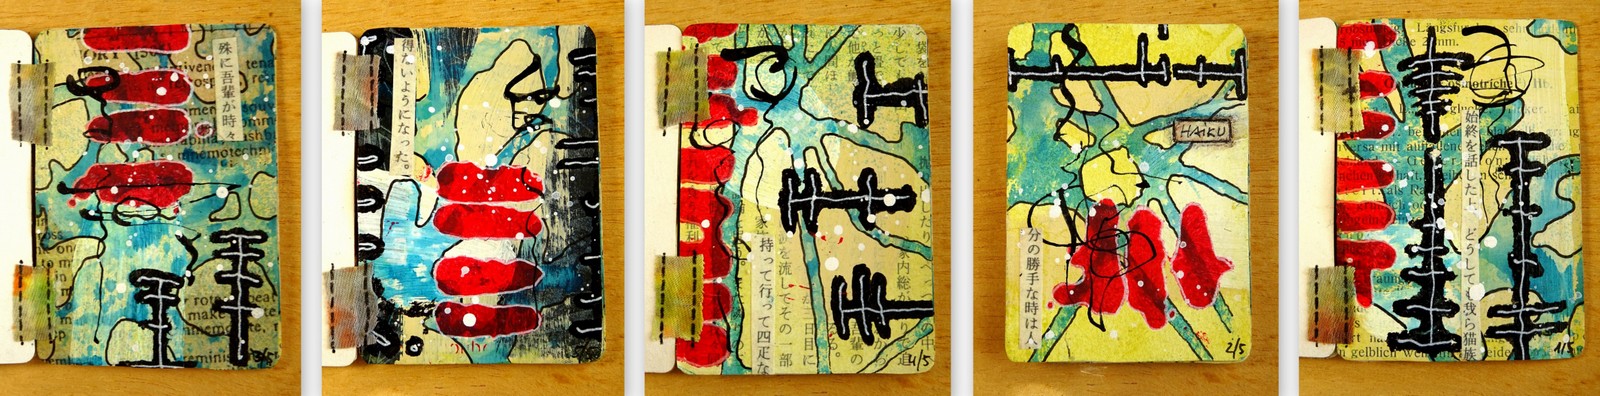
The beautiful large format StencilGirl® stencils I picked to create a set of five abstract ATCs were these:
by
Dave Daniels
by
Seth Apter
by
Seth Apter
and
by
Jane Monteith
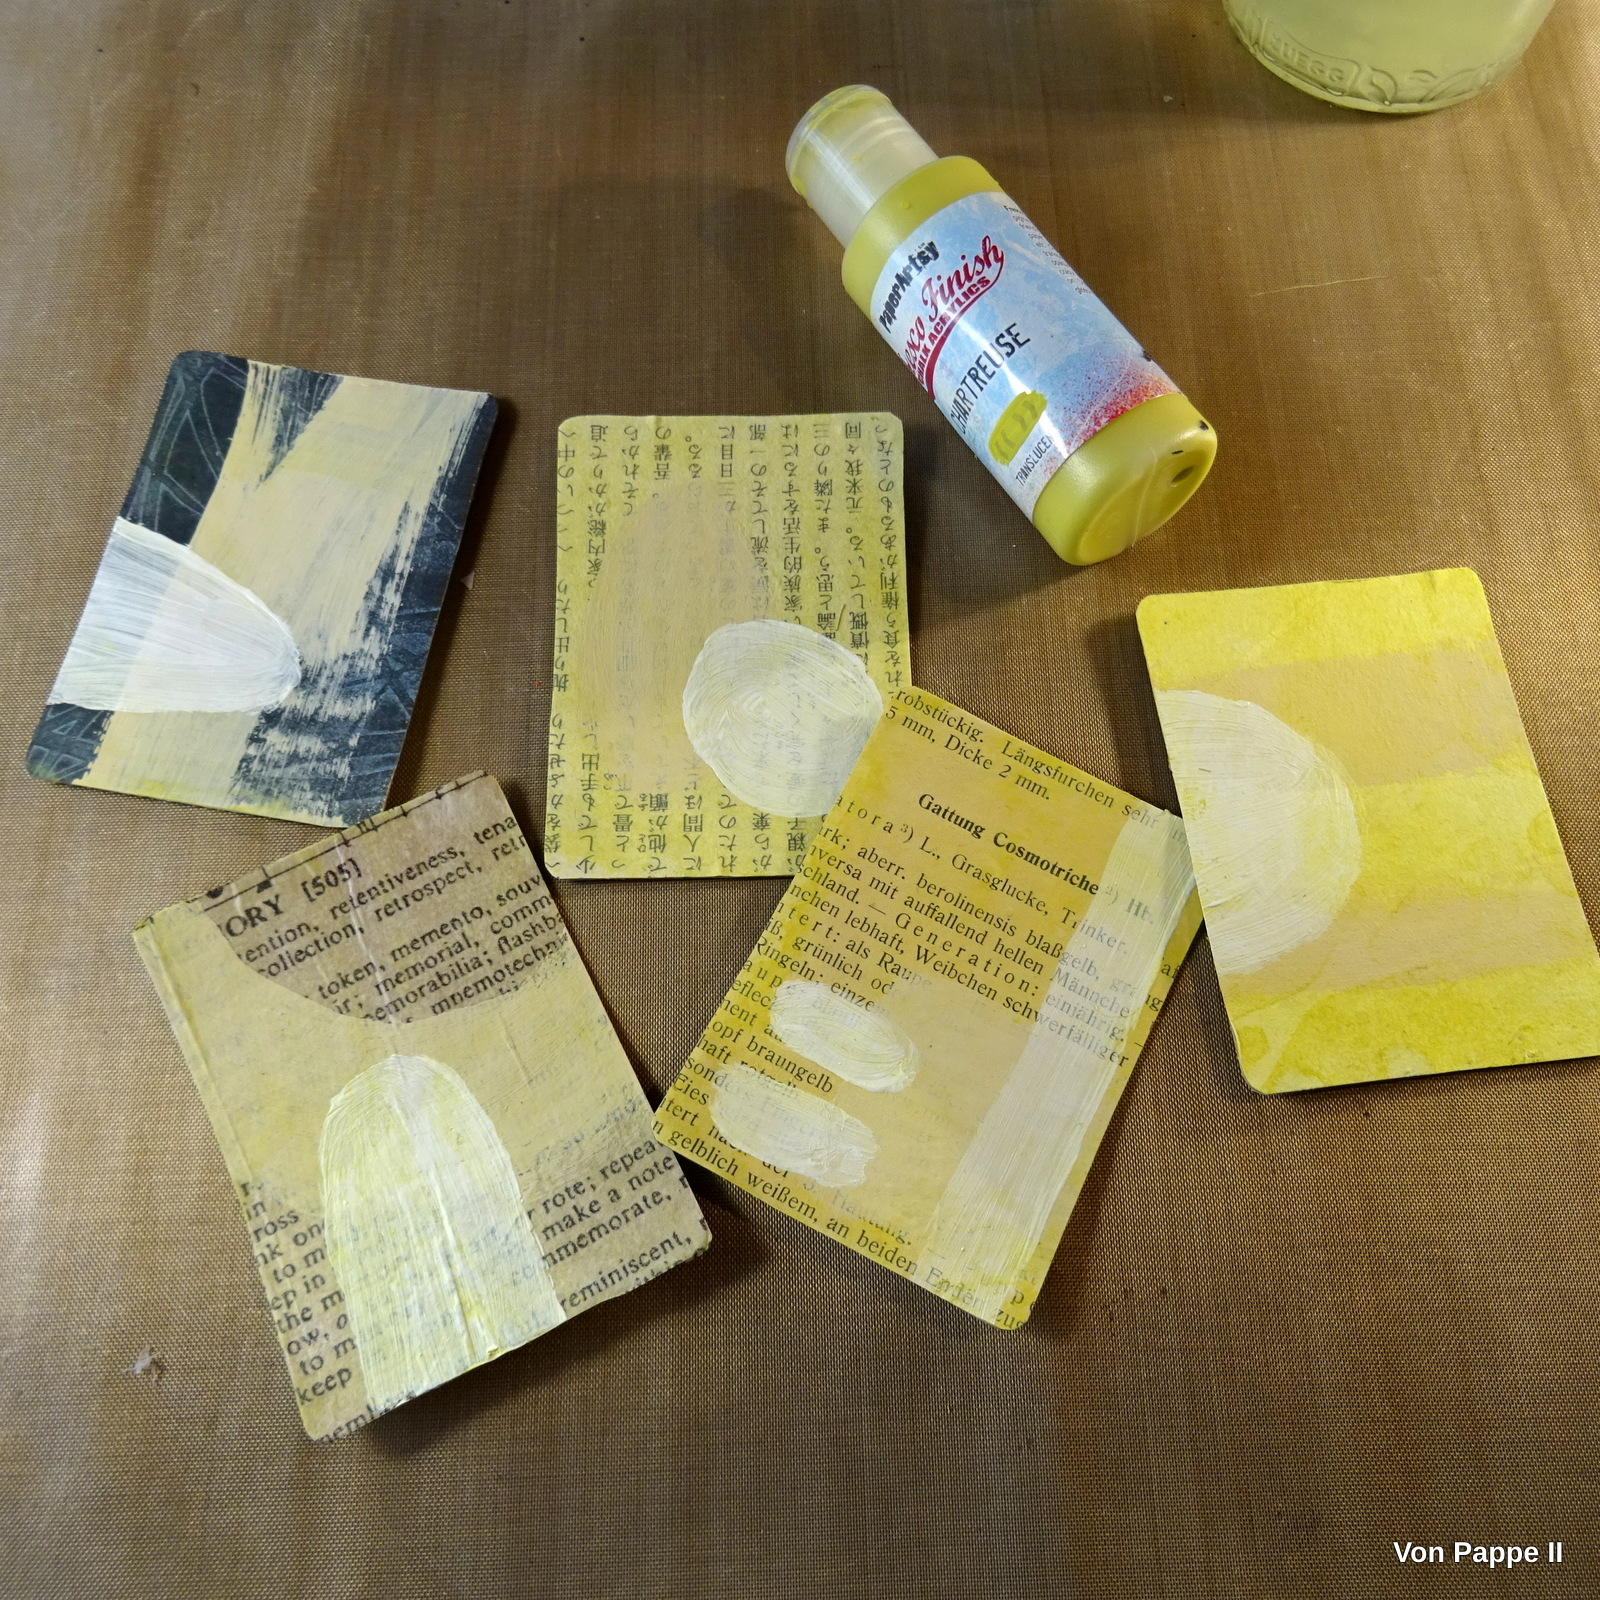
I didn't plan any of the designs for my ATC set. Actually I tried to kind of surprise myself, so I decided to let the results from each step lead the way to the next choice of design, colour or medium. To prepare the ATC backgrounds I picked some old book pages and papers from my stash (the black ATC in the middle shows an old gel plate print done with another StencilGirl® stencil (for this project
here). I glued these to the die cut ATCs using DecoArt matte Decou-Page and a soft wide brush.
Then I "primed" the ATCs by adding random brushstrokes using DecoArt "beige" Chalky Gesso and DecoArt premium White Gesso. I didn't overthink this step - I just made sure I had both colours on each ATC and that these overlapped in some spots.
Once that had dried I added a layer of translucent PaperArtsy Fresco Finish Chalk Acrylic "Chartreuse" on top. Before the paint dried I wiped most of it back using a baby wipe. This way the ATCs got kind of "tinted" and all the detail underneath still showed through.
I wanted my first stencil-layer to contrast the cold yellow-ish tint, so I picked the "Teal High Heel" Chalkboard Glimmer Mist from Tattered Angels for the next step.
On my craft mat I misted the stencil with the spray paint and then pressed the ATCs face down into spots I thought would create a great pattern. This way I got some really cool random designs!
I repeated that step with a different stencil. The picture below also shows that I always try to use up all the paint that I have used. In this case I also pulled a print using a sheet of printer paper (the one to the right). The paper to the left is the one I had in my splatter box when misting the stencil.
It's always nice to have some self made papers for future projects, isn't it?
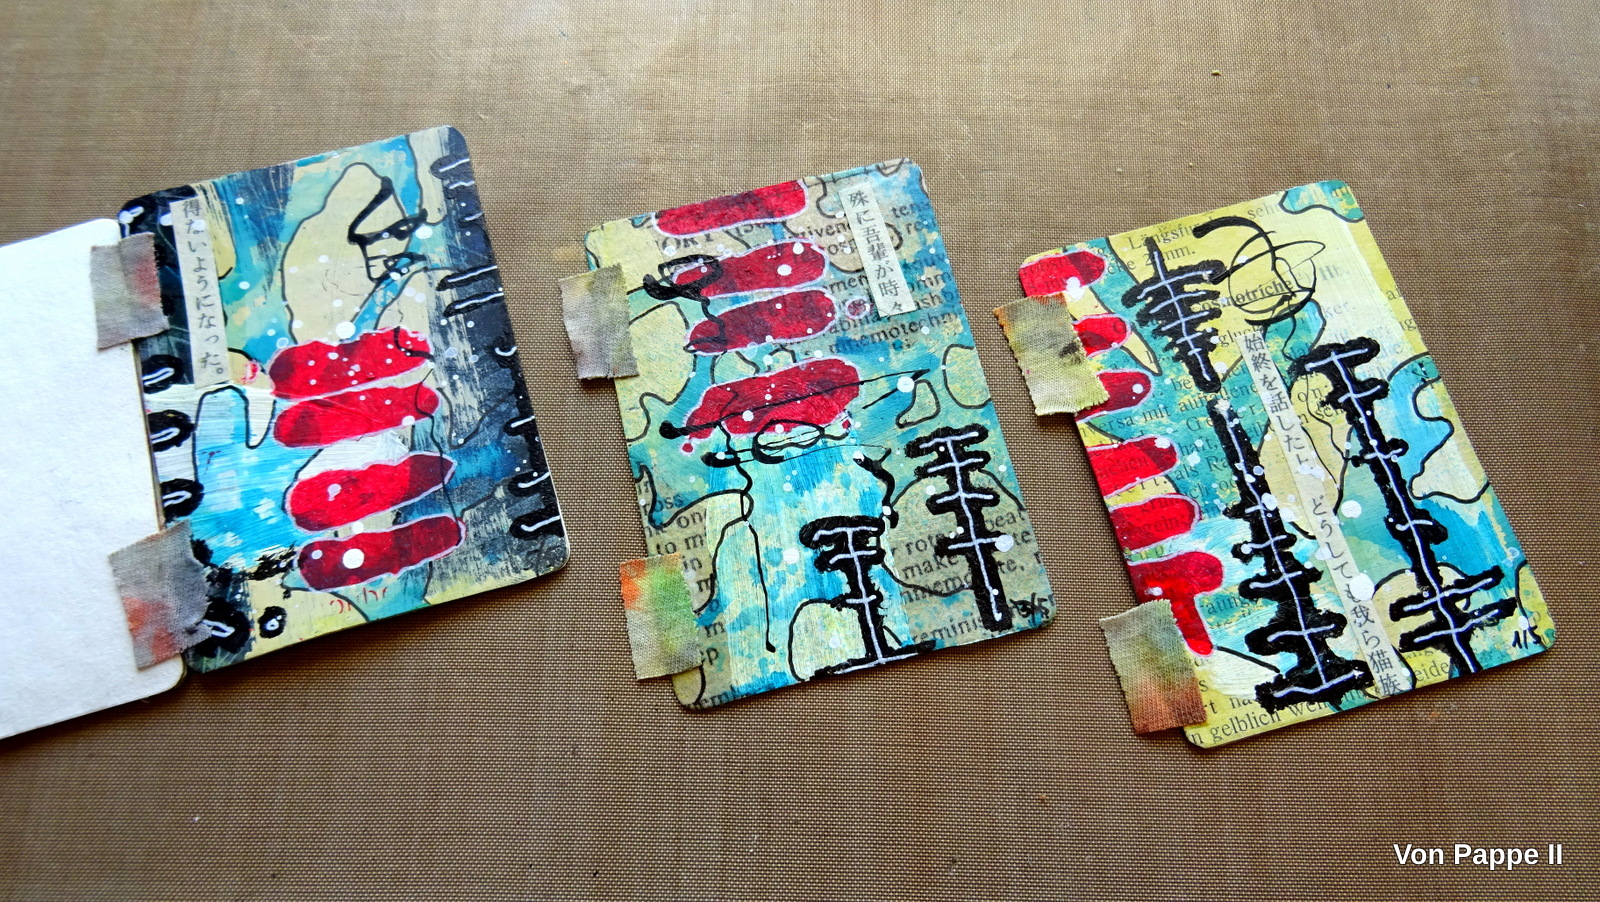
Time to add some focal elements! I used DecoArt media Carbon Black acrylic paint and a small stipple brush to only use single elements from Seth Apter's stencil. I thought they looked a bit like calligraphic elements - which was a perfect design to use for my little Haiku ATC Booklet.

In some spots I only used half of an element to create an interesting border...
Finally I needed a colour that would really pop and contrast the cool blue and yellow - so I went for a bright Cadmium Red (I grabbed a cheap acrylic paint from a set bought at the dollar store as I knew it was translucent too).
For more interest I added some doodling using black and white pens.

I found my ATCs still needed some texture - so I used the left over Asian book page and cut out some strips to glue in spots that I thought were missing visual interest.
To finally visually fuse all the elements I added some scribbling in black (using the nozzle from the DecoArt "Carbon Black" Mister) and sprinkled on some "White Linen" ink (again using the nozzle) from the Ranger dylusions ink spray paint.
During drying times I had die cut five more ATC blanks from lightweight sketching paper and written five of my own favourite haiku on them.
I glued these to the ATCs' backsides using matte DecoArt decou-page again.
I wanted to create a binding for my ATC booklet that would allow me to add more pages whenever (and how many) I wanted to without having to take the book apart or something like that. So the easiest way was to create fabric hinges and always hinge the following page to the previous one. My search for a thin ribbon wasn't successful, so in the end I cut some pieces of fabric from one of my painting rags.
The first and second page were easy to assemble....I used more matte Decou-Page as it dries really fast and holds really well.
While pages one and two were drying, I already glued the hinges to all the following pages and let these dry thoroughly (I also used my heat tool to make sure they were completely dry).
Adding the following pages made me search for something I could stack so the two pages that were going to be fused would lie evenly. I found some MDF blanks to stack and these worked pretty well.
It was a bit of a fiddly job, first adding the glue to the exact spots on the pages, then to the fabric "tab", then putting it all together in the right spot and adding more glue on top, but I knew I wanted all the pages to really hold together as fast as possible, so I could add a lot of haiku pages in the future.
I made sure I let the fabric hinges dry in a way so they would not get glued together accidentally (which would make flipping and opening a page impossible without tearing some part of a page off) - so I let my booklet dry like this - with all pages opened:
Once all had dried, I "faked" some stitching on the fabric hinges by doodling it on with a Faber Castell PITT pen.
This is how the binding looks once all is done and dry:
And this is the finished booklet (well, actually it was really finished once I had glued a little strip saying "haiku" to the front page).
To keep my Haiku ATC Booklet closed I fixed a vintage button to one end of a piece of rough string and wrapped that around the pages.
You can "read" the book in two ways...holding it in portrait format to look at the ATCs, or in landscape format to read the haiku.
I love how the first five pages form a visual unit - bound by colour scheme and design - and that the next set of ATC pages will add a different "block" of visually fused pages...and so on. My haiku collection will grow slowly but steadily and I hope for the booklet to become really thick one day...a chunky collection of visual art and poetry...
You could also use this kind of booklet to collect affirmative quotes for example...or to note your favourite peoples' birthday dates in...well, I am sure you will find a lot more creative and useful ways for a booklet like this. But in the first place it is a beautiful way to display and collect your own ATC art - created using large stencils. ;)