Showing posts with label Stencil Storage. Show all posts

Monday, February 13, 2023

To See or Not to See...Your Art Supplies


To See or Not to See...Your Art Supplies

Hello! I am Kristin Williams and, like you, I have too many #$@^ art supplies. 


Amiright????? 


Recently I culled through, gifted, sold, tossed, and essentially liquidated the contents of my 2.500 s.f. shop & studio, Ephemera Paducah. For about 3 months I felt like I did nothing but make 87,532 micro-decisions each day. 

  • Do I toss it? 
  • Do I keep it? 
  • Does it work?
  • Does someone else want this?
  • Where will I put it? 
  • What will it go with? 
  • Am I ever going to touch it again? 
  • Do I want to touch it? 
  • Will I remember where I put it? 
  • Don’t I have another one of these?
  • Is this the good one??
  • Repeat. 

At the end of the days in December and November when my husband and I would have the dreaded “what do YOU want for dinner conversation,” I would be in the fetal position in the corner mumbling, “you pick you pick you pick you pick.” Actually, I was probably yelling, "A MANHATTAN!” but the incoherent mumbling makes for a better story. 


I survived and am on the other side. 
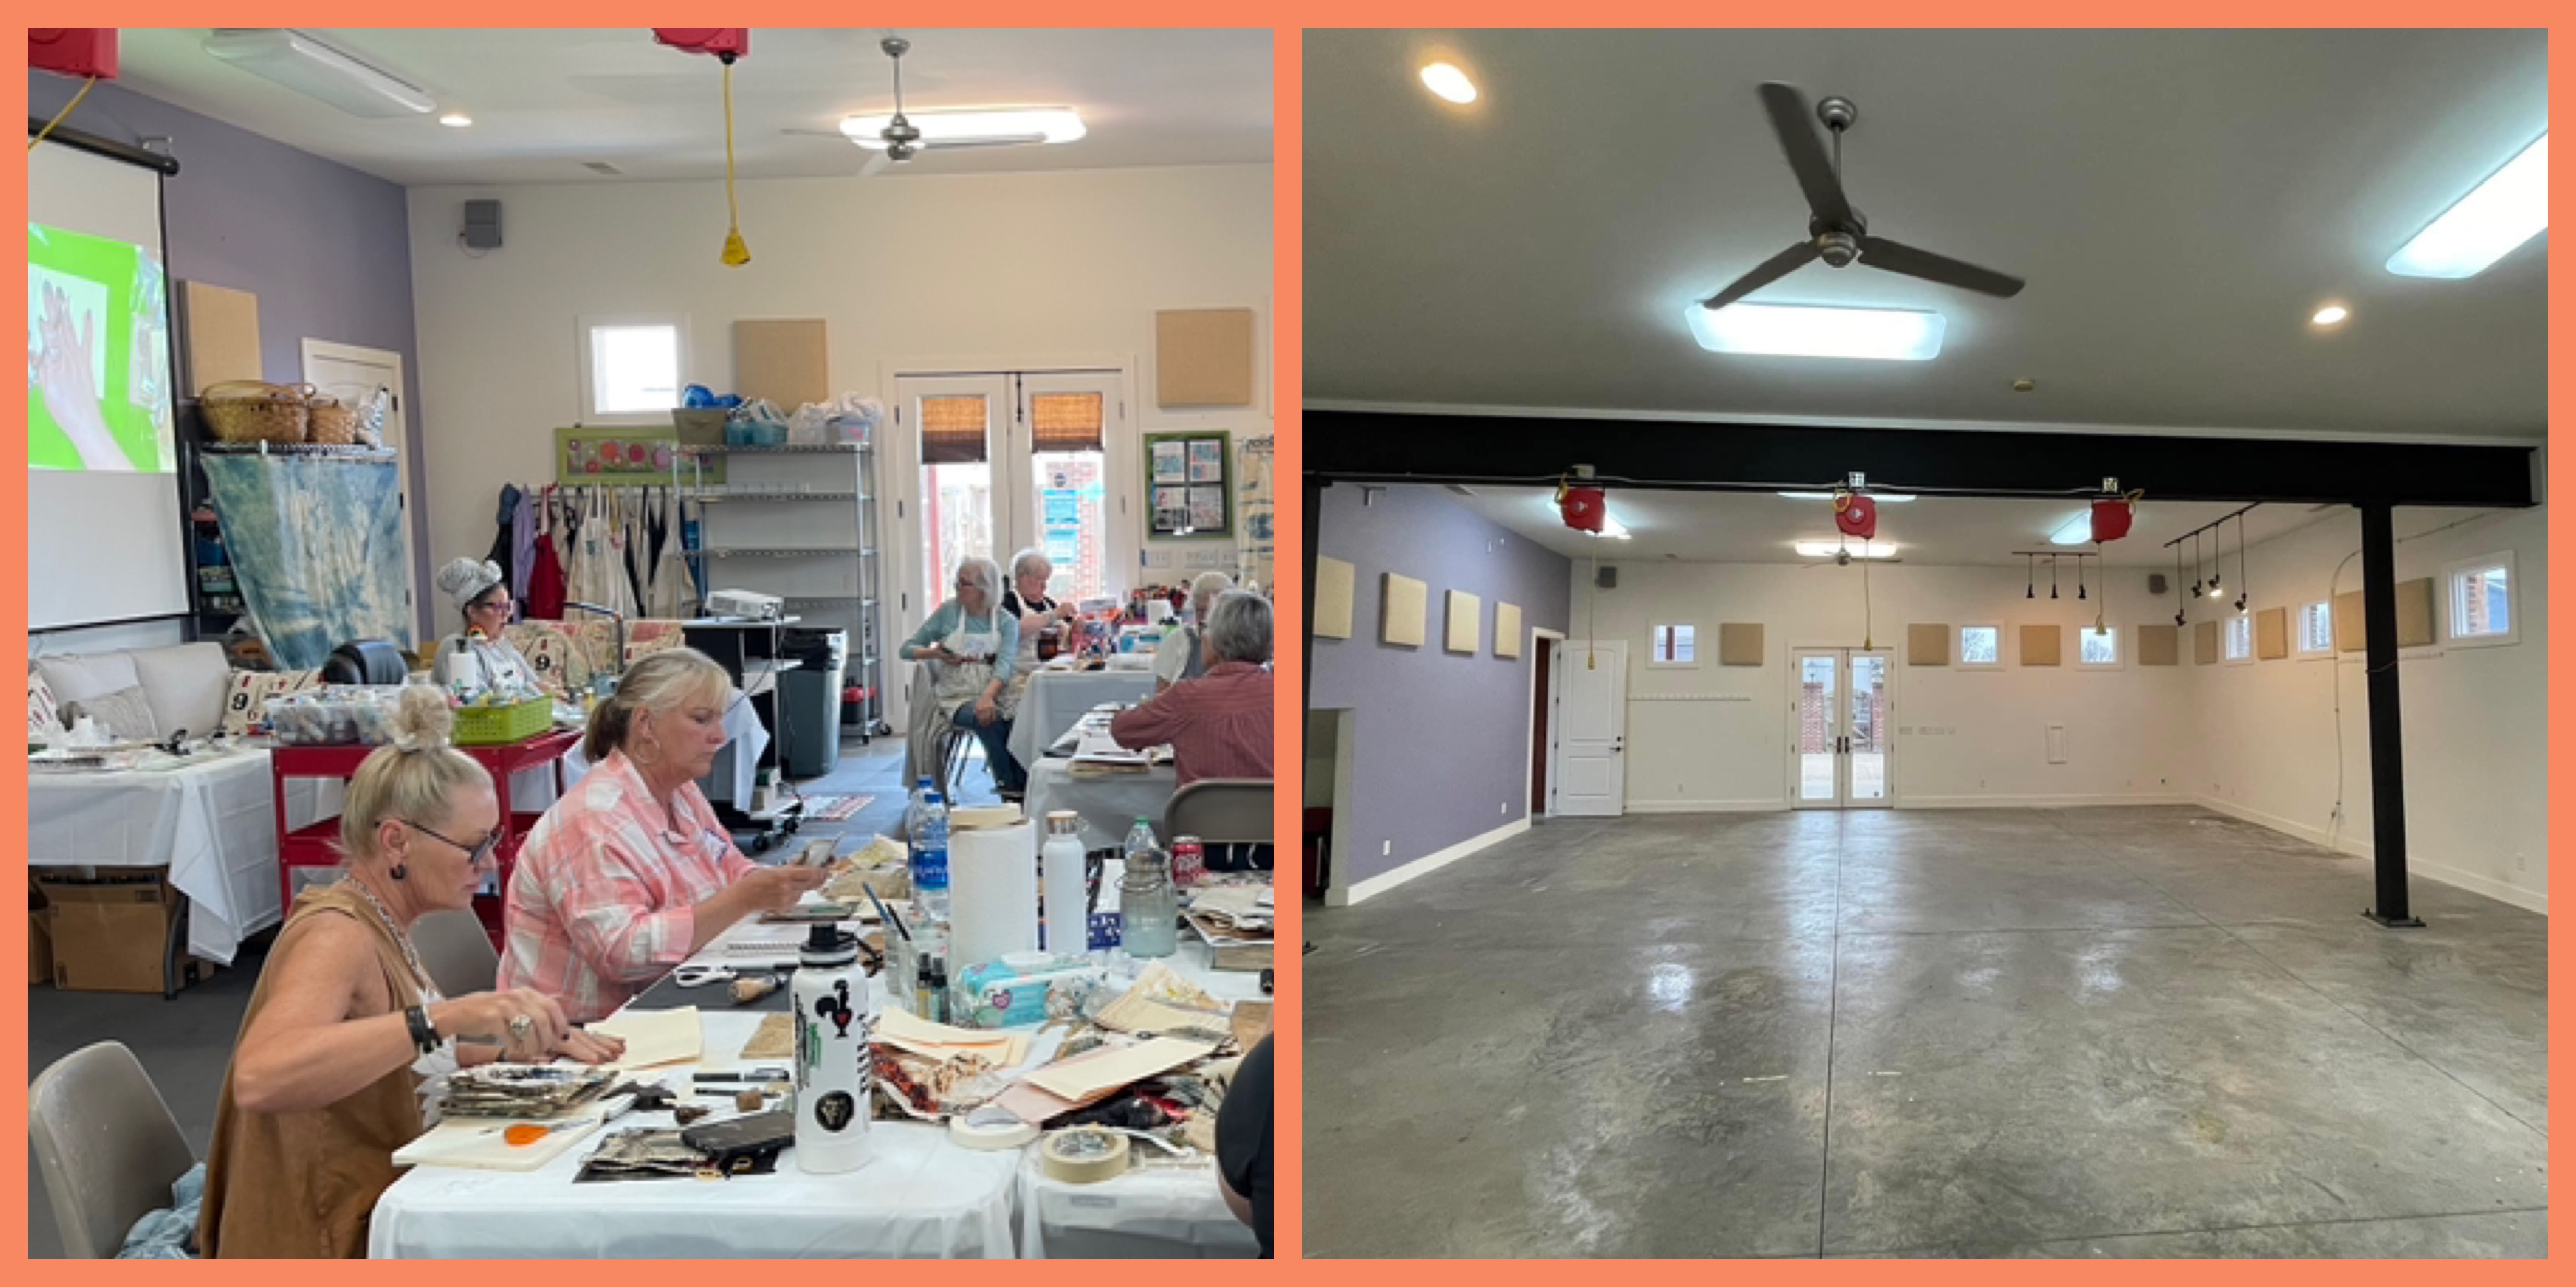


Thankfully I had great helpers, and wonderful customers who enjoyed a heck of a sale, and, just in time, two enterprising folks appeared out of the woodwork and purchased what was left lock, stock, and barrel. By early December the place was cleared out except for what I kept for personal use. 


Yeah, more micro-decisions. Where to put all the supplies I wanted to keep?


I ignored the piles as long as I could, but when my big dog TeeJay decided to snack on a tray of Acrylic Inks and took the title “Blue Dog” to a realistic level. I had to get busy. 


Sidebar — I don’t know about you, but I have to have something mindless going on in the background while working in my studio. A TV is an art supply for me. I am not ashamed. And, thankfully, as I was doing the business of integrating a gazillion supplies into my home studio in December, I was incredibly thankful for Hallmark Christmas movies. They got me through sorting pens and pencils by color and lifelessness because you can tune out and pick up in the next movie but not miss a thing.  


At first, I thought I needed either everything either out of sight, shoving bins into existing furniture and closets, or arranged in cute carts I could rotate as I needed. Since TeeJay is head level with the top of the carts, and art supplies are so delicious, I had to scrap that concept. 


Also, I know myself. If I can’t see it when I am working, I am not going to use it. Having all the acrylic paints boxed up in a piece of furniture across the room from my desk was not going to work for me. 


Mary Beth Shaw to the rescue! She had gone through the exact same mental exercise of “to see or not see” her Art supplies (prior to the horrible incident of frozen pipes bursting in her studio in December). I hopped in the truck and ran up to St. Louis to see her organizational methods for myself, and fell in love. 


Off to The Container Store we went for clear stackable drawers, (which she reported to me post studio flooding, stayed dry inside). Once home I rearranged the existing furniture in my home studio and created a nest around my desk where I can twist in my chair and grab 90% of what I will use for mixed media — art crayons, paints, pens, brushes, etc. all at hand in a cozy, well-lit space.
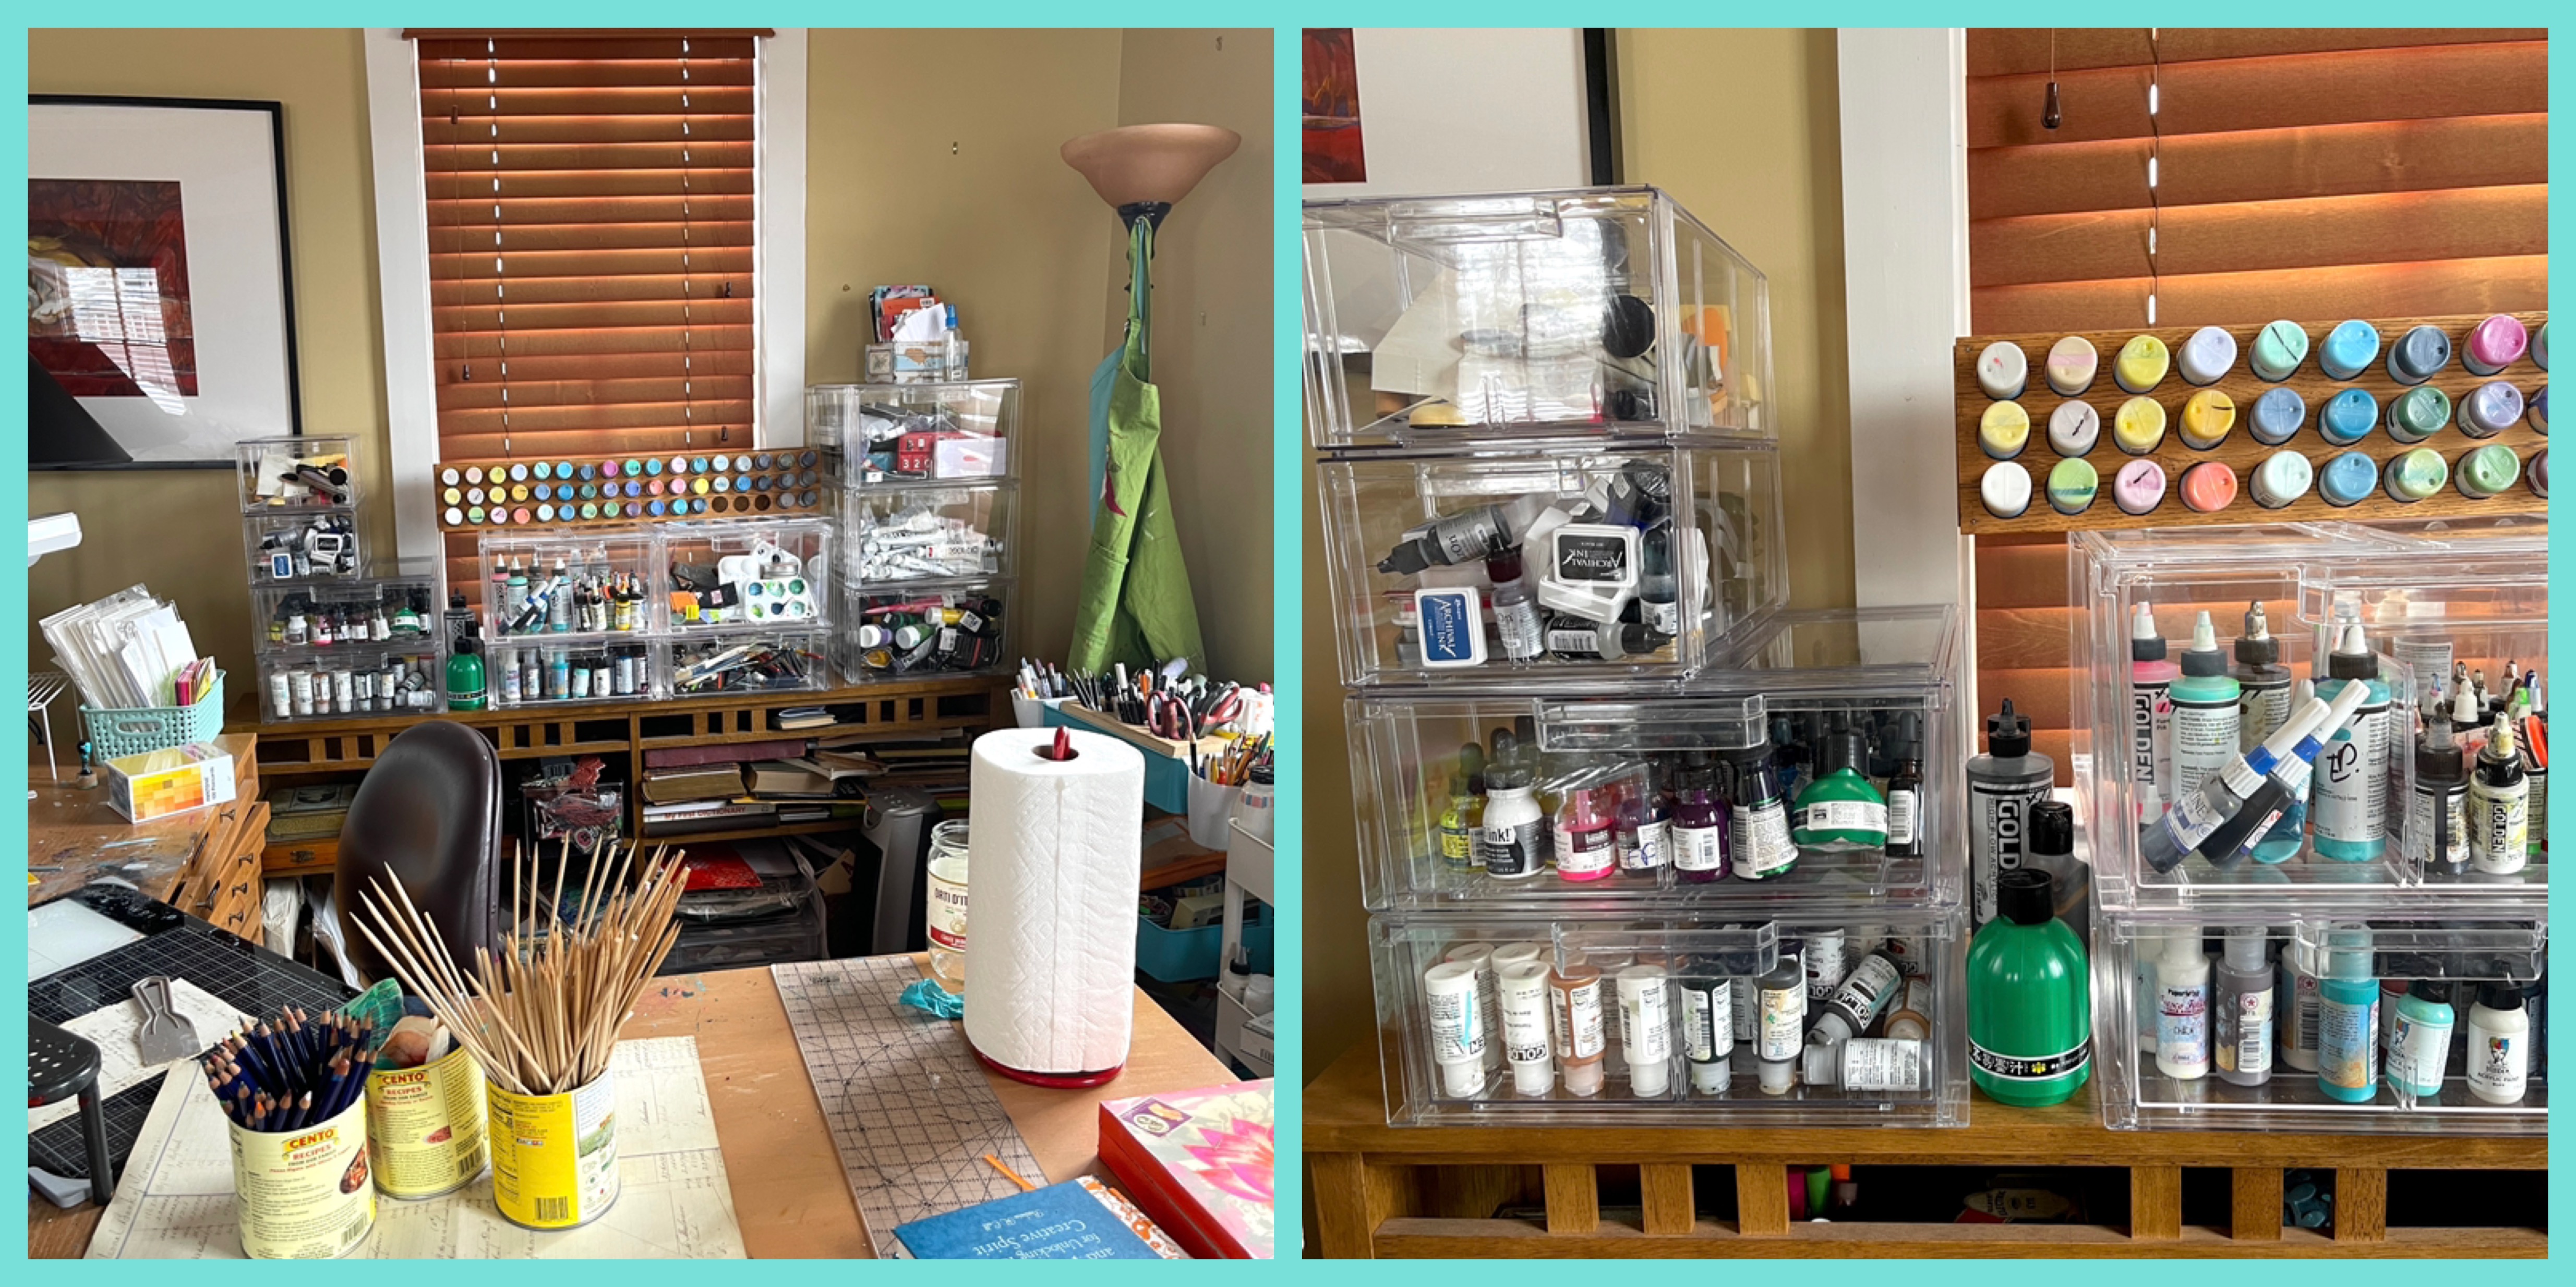


I set up my sewing machine in a separate area and moved another piece of storage furniture to house everything fiber. — fabric, thread, notions, and tools. Sorting fabric is my next big thing but I am happy to report that I am still in love with my thread sorting system incorporating the Target felt baskets. 


Using the 12” x 12” clamshells always on sale at Micheals or clear zippered pouches, I have my “specialty” packs together stored in furniture rather than out. For instance, I keep all the items needed to carve stamps together. And, I incorporated my favorite re-use of big cans of tomatoes for quick-grab or stuff items on my desk. One of these cans is a fabulous choice for those paper bits you can’t bear to throw away. 


I am more compact in my Tennessee Studio. I love looking at this piece and have diligently labeled the drawers with a Signo Uni-ball and blue tape. It obviously is the opposite of “to see” but I can read what’s in each drawer. I also try to limit the number of supplies there as the space is so much smaller. I end up packing what I am working on back and forth to the two locations.


As for stencil storage, I do what works for me which is a giant drawer in Kentucky and a clamshell box in Tennessee. I swear the process of culling through them with my hands is part of my creative process. I love it when I sort through them and trip across the perfect stencil -- something that happens every time. I keep a ratty baggie of my favorite ATCs, Minis, and 6x6s together for travel and couch art journaling. 


Other than some of the obvious things like keeping ‘Likes with Likes,” gifting or tossing something as soon as you realize you are not going to use it, having a place for all categories of supplies to live, and labeling as you need to, I don’t have any other words of wisdom other than "to thine own self be true!" I wish I could be creative in a beautifully curated studio, but that intimidates me more than inspires me. 


Thanks for reading! If you’ve got a favorite Art Supply Storage tip please add it in the comments!!


Friday, September 28, 2018

Stored in My Studio with Katie Lamb


Hello all, Katie here.

Today I am going to show you how I store my stencil collection.


I store my 9 x 12 stencils in large zipper bags but I go for the size up to make sure the stencils do not catch on the bag when they are removed. Keeping them in bags also stops the intricate parts from bending. I then keep these in a box and just get them out when I use them.


I store the 12 x 12 stencils in the 12 x 12 pockets that go inside scrapbook albums and then I store them in a plastic box.


For my 6 x 6 and A4 size stencils, I keep them in ring binders so I can flick through them and choose the one I need.

Thank you for visiting!


Thursday, September 27, 2018

Stored in My Studio & What's Old is New with Kristin Peterson


You would think "stored in the studio" would be no big deal.... and it really wasn't. Except that at the time, my studio was a disaster. And not your normal disaster. This was full on, stacked high, no counter space to be seen, I should be embarrassed, type of disaster. I did some pre-cleaning so I could do some filming and now, I can show you some storage options (good, bad or otherwise) and my fun old-is-new that fit in perfectly!

I started with the old is new and scoped out our local thrift shop; not really knowing what exactly I was looking for. I just knew that when I saw it, I would know.


As it turns out, Redeemed Remnants had exactly what I needed. I don't want to spoil my video so you will have to watch to see what I bought at the thrift store. When I was done there, I wandered further down the street and went to one of our antique stores.


Check out the super cool vintage school maps!! If I only had a good spot for one of those..... Anyway, super fun to poke around that store and look at everything.... but, back to the studio.

Welcome to my studio and how I store some creative items including my stencils.


xo. Kristin


Friday, September 21, 2018

Stored in My Studio & Stencil Storage Idea by Cheetarah


Hi everyone, it's Cheetarah here and this month the StencilGirl® Creative Team shows how we store things in our studio. I'm fortunate enough to have an apartment where we both have our separate offices / creative space and I just love spending time in my little home studio.


This is my art desk where all the art stuff happens :) I have a LOT of stuff stored here that I need in reach, like brushes, markers, glue, my art journals, ink, watercolors etc. but I am good at keeping my work surface clean after a project, thankfully. That is the traveler's notebook I currently am working in. Let me give you a little tour of the room. 


This is what it looks like when you come in, on the left side my art desk with boxes of papers and trays of markers & cups of brushes and yes I store stuff on my windowsill as well, things I want near but have no room for on my desk. 


On the other side is my writing desk. You can see the stack of planners I use for my writings and my Lamy fountain pen collection display box on the window sill. Here I do stuff that is writing related but as you can see, there is a lack of computer here which I like because I don't want to get distracted by the internet in this room! I also try to leave my phone out but it's difficult as it's also my camera, haha!


When you turn to face the wall on the right side you'll see my rubber stamp storage - wood mounted stamps that is. The cling & clear stamps are in ring binders. Sprays are stored in open boxes next to the "spray work surface" on the smaller cabinets that created an impromptu work surface. 


In the cabinet drawers (which were donated to me by very good friends who moved away) I have paints, mediums, masking tapes, pigment powders, pastels, etc... all drawers are labeled and the cabinet closest to my desk has all the ink pads and markers (yes more...) and watercolor paints.


And one last thing I wanted to show you in my studio is the shelf where I store my little collection of figurines/vinyl toys of Cheetara's of the Thundercats :) The one from the far right is an original one from the 1980's. I also collect prints of her and have quite a few.
And this concludes the tour of my home art studio :)

"Stored in my studio" is of course also about how you store your stencils. So this got me thinking on how to effectively store my stencils because I want a fast visual reference. The storage solution I had was not sufficient for this and I kept forgetting which stencils I have. I stored them in see-through file folder & have an excel file with the stencils I own.


This is fine in itself but the visual reference, locally in my studio, was lacking. As I told you earlier, I rather do not want to look up stuff on the internet while I am working. So I set out to make a visual storage with the help of a vintage postcard storage idea.


I have bought these vintage postcard binders at a thrift store on vacation in Sweden and just LOVE how these albums look. 


They have paper sheets inside them and I figured I could store the stencils in them instead of the postcards that were currently still there. 


I stenciled on the paper sheets (and also made reverse prints of them in some cases) with black acrylic paint to create my visual reference album and stored the coordinating stencil on the sheet.


Of some, I kept the packaging of so it would not tangle with the stencil on the opposite page. All the small and mini stencils I currently own are now stored in the binder. The large stencils I did stencil out & printed in the visual reference book, but kept them in the large file folder still. 

I've filmed the process of how I made this stencil storage and there is a flip through of all the stencils I currently own. So if you're curious about that, definitely have a look :) A full list of them is under the video:


List of stencils used in the video: 

9"x12" Large Stencils:

L578: Spirit Wind Mask by Valerie Sjodin

L606: Soulful Scribbles by Traci Bautista 

L543: ATC Mix Up 1 by Mary Beth Shaw

L258: Uplifting Words by Carolyn Dube

L200: Map by Mary Nasser

L215: Celestial Cove by Kae Pea

L598: Sacred Feminine by Carol Wiebe

L346: Pen and Ink by Lesley Riley

6"x6" Small Stencils:

S576: Art Deco Peacock Feather by Gwen LaFleur

S498: Moon Phases by Cat Kerr

S323: Sunburst by Daniela Woolf

S288: Pretty as a Peacock (face) by Andrea Matus DeMeng

S242: Diamond Dance by Terri Stegmiller

S203: Thanks a Lotus by Andres Matus de Meng 

S264: Doodle it Tornado Flowers by Maria McGuire 

S224: Succulents by Daniel Woolf 

S027: Peacock Feather by Kae Pea

S080: Marbled 6 by Cecelia Swatton

S260: Encouraging Scribbles by Carolyn Dube

S233: Cornish Petals by Lizzie Mayne

S278: Starlight by Lesley Riley 

S295: Deconstructed Chrysanthemum by Traci Bautista

Hope you enjoyed having a stroll in my studio and that the video inspired you to create your own stencil reference & storage book.  Thanks so much for stopping by! Have an awesome day & see you next time :) 


Tuesday, September 18, 2018

Stored in my Studio - Mini Stencil Storage Case by Claudia Neubacher


Hi, servus, and thanks so much for stopping by today! Claudia here to share with you a storage solution for the smallest size of StencilGirl® stencils. 

I found this little wooden gardening case in a Dollar store last year and had put it to the side to alter it at a later date. Yes, my name is Claudia and I am a hoarder of alterables of all kinds! On already crammed shelves I hoard a collection of old boxes, picture frames, little drawers, chests and other treasures to alter and I always tell myself to not take any new treasures home with me as there is no more room to store these, but I simply cannot pass any of these by when I find them in the sales sections or dollar stores. 
But on the other hand, having boxes in many different sizes is a good thing - this way I discovered that this particular case is the perfect size to hold the smallest 4" x 4" StencilGirl® stencils. Yay! 


I also use it to store very small stencils from other manufacturers, but especially the StencilGirl® minis are an exact match in size and look even more tempting in it. 


I have been using this case already in my studio but didn't like the original look of it. 


See? It has been doing its job, but it wasn't an inspiring sight to look at. I love to surround myself with objects that spark my imagination or that I simply enjoy looking at and this was definitely not one of those.  


This is the view from where I sit when creating mixed media art and other craftsy stuff. To my left sits the Roman style bust alongside with jars holding fine detail brushes, small scissors, brayers, pokey tools and other items I need to have at hand for the everyday crafting. The papier machĆ© bowl in the middle holds tiny bits and bobs - leftovers from projects that I could not throw away...often these find their way onto assemblage pieces.


If I turn even further left on my swivel chair there's a red metal rolling container with drawers holding my rubber stamps. I like to sort these by themes - one drawer holds stamps for creating patterns, another the holiday-themed ones, a third my steampunk themed ones. If I turn to the right on my swivel chair there's my rolling storage holding brushes, acrylic paints, and media.


And behind me on the shelves are all the bits I often use and need to have close at hand like blending foam, stamping ink pads, gel pens, markers, assorted glues and sticky foam pads, boxes with little found objects and my dies (also sorted by themes).


To my right on my desk, there's the stencil storage. I am using stackable plastic bureau storage trays for my stencils.


I have sorted my stencils by designers and/or manufacturers. This way I can simply take the tray I need to the top and browse through without needing any additional space on my desk (which is important as free space on my desk usually shrinks down to the size of a large paper pad within minutes). 

But back to my altered gardening mini tool case. 


Looks so much better now, doesn't it? 

I used the same stencil with the birds in the branches on both sides but varied the background so I created a different mood on each side. I wanted to showcase how the use of the same stencil can lead to totally different beautiful results. 
I love both sides and depending on my personal mood I turn one or the other side towards me when sitting at my work desk. 

I did the same with the lovely Zinnia mask and stencil on the smaller sides. Same stencil - two different designs ( - endless possibilities for more variations on future projects ;)


StencilGirl® stencils used:


Before I started to work on the new design for my stencil case, I primed the front and back sides and the sides of the handle with two thorough coats of DecoArt Chalky Finish paint "serene" to cover up any smudges and the former decor. 
I also added masking tape to protect the sides from any paint stains. 

Then I used a makeup sponge and mixed some Americana paints - two different blues, some turquoise and a bit of white - with it on my palette and started building up the background layer by layer. The final layer was pure dark blue that I dabbed onto the still wet paint coming from the outer edges and working my way towards the center. This way I achieved a kind of ombre look with a darker visual "frame". 


Once the paint had dried, I mixed tiny amounts of Jade Green, Yellow Light and Bahama Blue with more White Wash Americana paint on my palette and added the gorgeous Matisse inspired stars to the background.


To make the stars pop and to also cover up any inaccurate edges from the stencilling, I painted some shading around the stars' silhouettes using Navy Blue and a fine detail brush. 


The next layer was stenciled on using a stencil brush and Lamp Black Americana paint with the "Black Birds in Trees" stencil.


Using Yellow Light acrylic paint and a smaller stencil brush I added an inspiring quote using a section from the Wall of Words stencil.


The other side was done pretty much the same. I only used different colors to create a kind of early morning mood. To do so I mixed some English Red Oxide media fluid acrylic (only a few drops) with white acrylic paint and dabbed that onto the still wet light blue background I had prepared. 

I also added a thin wash of the English Red Oxide across the whole surface. 


I used my heat tool to speed up drying time and then added the lovely birds again....


...and also another quote with a lighter mix of white and English Red Oxide.


I stenciled more encouraging words onto the handle's sides. 


Then I added the Zinnia in Zinc to both narrow sides of the case and finished these up with black and dark blue acrylic paint and a detail brush and some doodling with a black Faber Castel PITT brush tip artist pen. 


To visually fuse the black from all sides I colored the upper edge with a black permanent marker. 


Done!


How do you store your stencils? By size? By theme? I really would love to know! 

Hugs and happy crafting!
Claudia
xxx