**If you are looking for the StencilGirl/Walnut Hollow Blog Hop, keep scrolling down after this post**

Hey Everyone, it's Judy Shea, to show you how I used StencilGirl Stencils to make some polymer clay bookmarks.
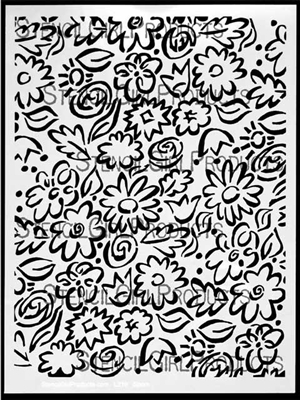
The featured stencil I am using was designed by Jessica Sporn
called Sporn Flowers Positive Stencil.
However, I must admit, I had so much fun making these bookmarks (as you can see from the picture above), I included a few others from StencilGirl.
Here are the other ones I used:
Of course, I started with some really colorful polymer clay. First, condition the clay in your hands to soften it and I run the strips through my pasta machine several time to make it even softer turning it at each run.


Once the clay strip is pliable, it's time to run the stencil through. The plastic sheet you see under the clay here is from a turkey bacon package. You know the plastic the bacon is on? Yup, that's it. They also make a great paint palette. I know, right? So, you need to spray the plastic and the clay with water. Then lay the stencil on top of the clay. Now, I had to cut Jessica's stencil to fit in the pasta machine. I know, that's sad. But, it's okay because I had an extra one.


Let's run it through. I have it set at the 3rd largest setting. When the clay runs through the rollers, I need to make sure the stencil pushes into the clay... and can I just say.... StencilGirl stencils are pretty durable. I've had their stencils get smashed in the rollers and they just bounce back. OK, commercial done.


Now, you will need to trim the clay to the size of the bookmark you want. I use a clay blade.


Take a piece of plastic wrap and lay it on top of the clay and gently smooth the edges of the bookmark.

Let's me show you a couple more.


Ready to be baked. These are thin. Follow the package instructions. I put them in my pre-heated, clay dedicated oven for 10 minutes. Shut the oven off and let them cool down in the oven.

Done baking. This thin sheet is easy to bend; pretty strong, too.

I put a hole at the top of the bookmark with my Crop-a-dile.

Ready for some decorating, but first I sanded around the edges to make them smoother and to round off the sharp corners.


Using acrylic paints and glitter glue, I began to put more color pops on.


Once the paint dried, I began to stain the bookmark using brown acrylic paint and wiping it off so the paint resides in the crevices of the embossed stencil design.


Once the stain dried, I put a coat of glossy Collage Pauge over it. This was the first time using this on clay. It worked well, however, I still like the Future Floor Polish the best, as it gives it a nice sheen.
Once the polish was dry, I added Stickles glitter glue for some blingity bling.

Ran the Krylon Gold Leafing Pen around the edges for a finishing touch.

Added tassels and ribbons through the holes and you're done. You could use lace, twine, yarn.. whatever you want. You could also add beads to the ends. (Note: The green bookmark using the Gigi stencil was stained with blue paint. Just trying something different. I like it.)

Wouldn't this be a great gift for a book lover? There's nothing like handmade.
Well, I had loads of fun with you. Thanks for coming by and visiting StencilGirl Talk. There's always lots of fun happening at StencilGirl. Stop by Facebook and say hello to Mary Beth, Maria, the designers and the creative team members and see what they are up to. Don't forget to follow StencilGirl Talk, so you don't miss any new posts.

These are Judy Shea oh so fantastic. Just sayin....xox
ReplyDeletewow! That is very clever!
ReplyDeleteGreat idea
ReplyDeleteThese are beautiful Judy. Thank you for using my stencils in such a fabulously creative way.
ReplyDeleteThese are great! I'm wondering what type of polymer clay you used that enabled the book marks to be so flexible....
ReplyDeleteI used PREMO clay.. It's at a thin setting, so it becomes flexible. I would not use Sculpey III.
DeleteGreat use for the old pasta machine! These are great Judy! Do you have virtual ones for digital books and magazines?
ReplyDeleteThanks everyone.
ReplyDeleteJulie: I used PREMO clay.. It's at a thin setting, so it becomes flexible. I would not use Sculpey III.
Great use of an old pasta machine....maybe I can find one at a second-hand shop. The bookmarks are so colourful and gorgeous.
ReplyDeleteLove your clay work.. This so another great project!
ReplyDeleteWhat a fun project! These would be great teacher or office gifts! Thanks, Judy!
ReplyDeleteBeautiful! Thanks for reminding me how fun poly clay is!
ReplyDeleteGreat job, Judy! These bookmarks are awesome!
ReplyDeleteSo cool!
ReplyDeleteThese are so fabulous, Judy!
ReplyDeleteLove the combination of colors and textures and patterns!! :)
These are so fun. I have a bookmark collection dating back to my elementary school days in the last century and I don't have any polymer clay ones. Hmmmm...........
ReplyDeleteawesome use of stencils! Thank you!
ReplyDeleteWhat a wonderful project and so many fabulous step-out shots!
ReplyDelete