Hi, I'm Magdalena Muldoon. I am the owner of MercArt. MercArt was founded in 1970 in Mexico City by Magdalena Barrena (my mom).Since then, MercArt has been offering only the best quality products. In 2002 I moved to Texas with my husband and three daughters and I created MercArt USA, becoming the first company in the US to offer the best quality and most complete variety of tools and metals for Metal Embossing. We are commited to excellence, not only in our products, but also in our Craft.
I'm here today to show you how to
emboss metal with stencils!
First decide what to emboss: Place the aluminum
(color up) over the stencil and over the acrylic IF you want the white part of
the design to be embossed. IF you want the blank or empty parts of the design
to be embossed, then place the stencil on the color side, and flip the metal to
the back over the acrylic.
Small Segments is the Deal of the Day at StencilGirl Products!
1. Rub the metal against the stencil with a paper stump
until you can clearly see the design.
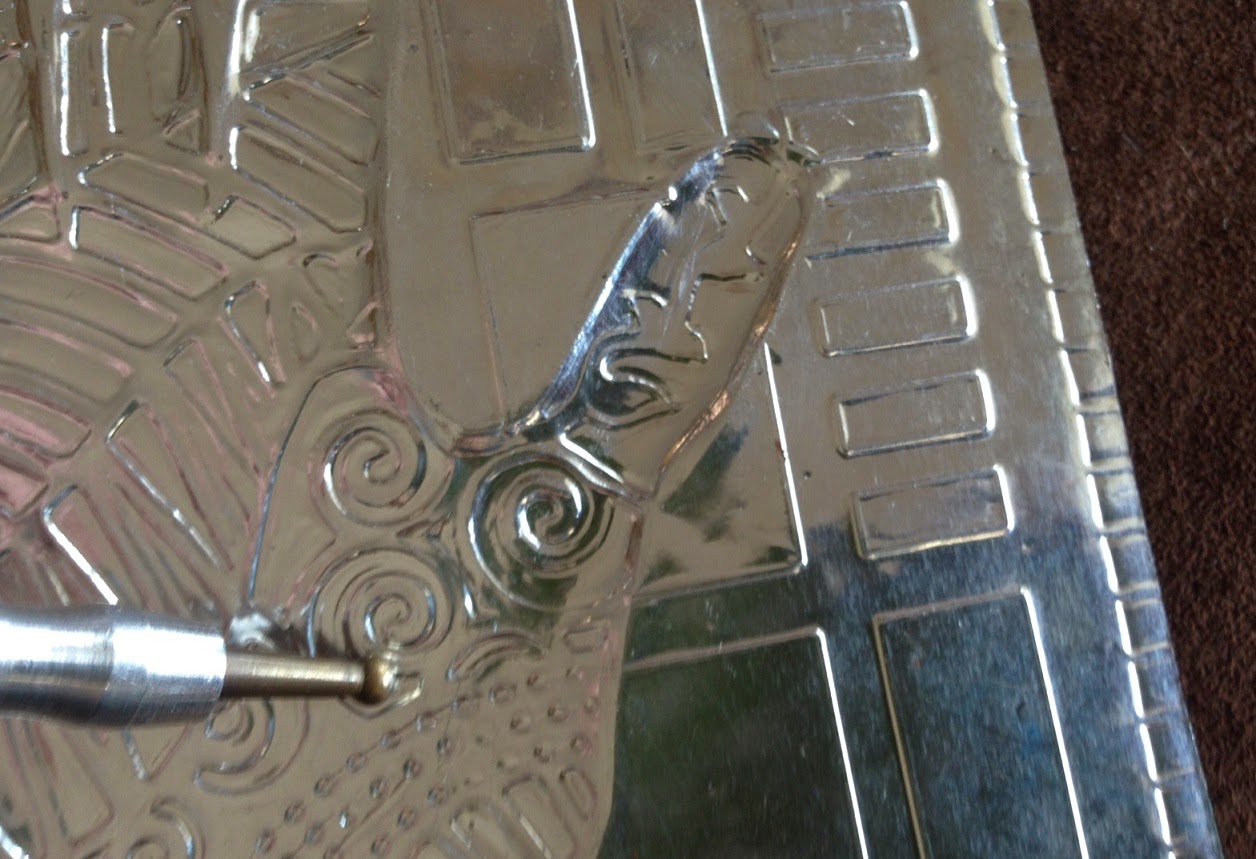
2. Outline every part of the design with the pointy part of
the Teflon D-01 tool.
3. Flatten any bump on the metal with a paper stump.
4. For the background, place the metal over the stencil and
rub with the paper stump to see the design.
5. Outline each line with the Teflon D-01 tool.
6. Remove the color off the embossed areas with a sanding
block.
7. Use the thin Fiber Glass tool to remove the color from
small or specific areas.It
removes the color better than the sanding block. (Remember to clean any fiber glass residue with a damp paper towel).
8. Add a border with any Decorative Wheel. This
is done at the back of the metal and on the suede.
9. Rub the metal with your choice of any Gilders Paste color to add several
patinas and tones to the metal.
10. At the back of the metal and over the suede,
emboss assorted areas of the design with the Cup and Ball and the paper stump to create a bigger dimension and
make the metal “puff”
11. Fill the embossed areas at the back with MercArt’s “Filling Paste” and let it dry. This
will prevent any embossed areas from being pushed down.
Here is another version with a slightly different color:
Where You Can Find Me
Products
used:
StencilGirl Products Large Tribal Hand and Small Segments
Glass or acrylic (surface to work on)
Gilders Paste in assorted colors: Foundry Bronze, German
Silver, African Bronze, and Copper.*
Available Gilders
Paste colors @ MercArt: Rich Gold, African Bronze, Copper, Iris Blue,
Verdigris, Slate, Foundry Bronze, Sandalwood, Rust, Patina and German Silver
.JPG)


Very nice project!
ReplyDeleteAmazing! Amazing! Amazing! Wow!
ReplyDeleteJust so beautiful. Thank you!
ReplyDeleteThis is so pretty. I went to your website and looked through the gallery. I'll take one of everything please. Seriously, i love the light switch cover. What a great way to make art and display for everyone to see.
ReplyDeleteOh, Yeah! I've always loved your work and this is truly fantastic! Did not think to use it on metal, but it's perfect!!!
ReplyDelete~Linda
wow! i love this and want to do this, interesting that there was no jewelry in the gallery on your site, i am definitely going to make some jewelry pieces with this, i have been searching for something new in jewelry that does not require me to sling a hammer! i may have just found it! tx for sharing and inspiring, aloha, angi in hana
ReplyDeleteA great project....and thanks for the tutorial.
ReplyDeleteWow! Totally awesome and cool!! Thanks for sharing!
ReplyDeleteOne word = stunning.
ReplyDeleteWow! I'm going to add this to the list of things I must do
ReplyDeleteGorgeous! And the aged metal look you achieved is great! Thanks for the reminder to get out my metal working tools and for the tip about the MercArt filling paste. Looks way easier than filling with spackle. Thanks for sharing!
ReplyDeleteThis is so cool! I was just playing with some copper tape, and now I want to work bigger. :)
ReplyDelete