Hi! Frieda Oxenham here! So happy to be
back with you here in a New Year and I want to wish you all a very happy and
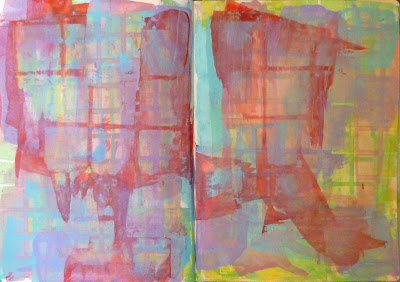
creative 2016, filled with stencils and fun. For this spread I have used the
set of different sized squares stencils designed by Mary Beth herself! I love
grids of all kinds (I’m not a quilter for nothing!) so they were a Must Buy for
me as soon as they appeared on the website. I knew they would become a project
to feature for one of my spreads as Guest Designer.
Many thanks as ever to StencilGirl Products for having me.
Many thanks as ever to StencilGirl Products for having me.
1. Gesso
two facing pages in your journal (I used the large Dylusions journal).
2. Using
PaperArtsy paints Zesty Zing and Mermaid (or paints of your choice) spread
paint over the pages using an old credit card. Use the smallest squares stencil
(from Mary Beth’s Grid Stencils Set) and a baby wipe rub away the paint
partially.
Let dry!
Let dry!
You need to let
every layer dry thoroughly before proceeding to the next step to avoid making
muddiness on your pages.
From here you can follow my steps exactly or use paints of your own choosing and the stencils from the kit in random order if you prefer. But this is what I did:
From here you can follow my steps exactly or use paints of your own choosing and the stencils from the kit in random order if you prefer. But this is what I did:
3. Do
the same again as in step 2 using Rose color paint.
4. Repeat
again with Mermaid, and make sure you put the stencil with the smallest squares
on a different place on your pages, every new round of paint color.
5. Repeat
again, this time with Lilac and using the medium sized squares stencil.
6. Repeat
step 5 with London Bus red paint.
7. Use
the smallest sized stencil and this time stencil through it using a cosmetic
sponge and Lime Light paint.
8. Repeat
step 7 with Mermaid.
9. Repeat
step 7 using the medium squares stencil and pearlescent white paint.
10. Repeat
step 7 using the small squares stencil and Zesty Zing paint.
11. I
found some fabulous hand-made wrapping paper with colored squares
and glued some of them to the pages using
matte medium.
12. Using
a pencil and the largest square stencil mark out large squares on the page and
fill in the rest with Silks glaze
(I started by using Sky Blue but that wasn’t dark enough so I covered it with Olive Vine).
(I started by using Sky Blue but that wasn’t dark enough so I covered it with Olive Vine).
13. Using
Radiant Gel (by ColourArte) in Gold, add small squares by stenciling using the
smallest squares stencil and a cosmetic sponge.
14. Outline
squares with black and white markers.
15. Glue
on the words ALL SQUARE as shown.


Wonderful!!! Thank you for sharing
ReplyDelete