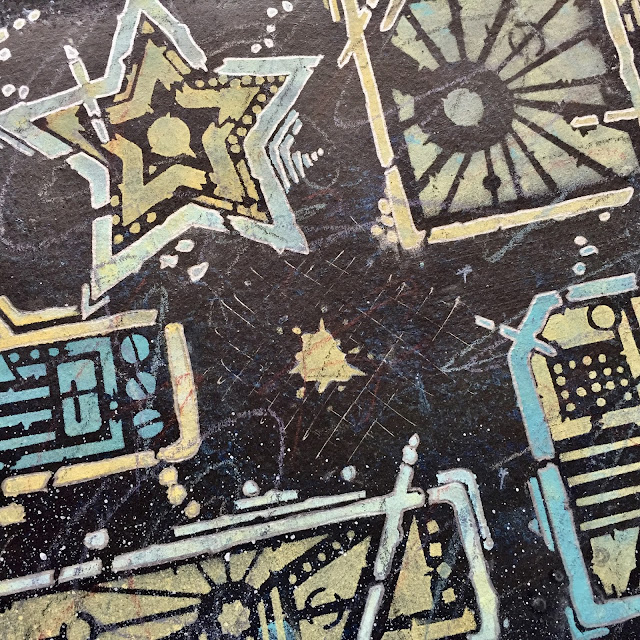
Hi
stencil lovers. Seth Apter back with another guest post on StencilGirl Talk.
Today I wanted to talk technique – specifically, how a few small tricks and
tweaks can have a big impact.
One
of my mottoes with mixed media is more is
more. I can (and do) easily spend hours creating a background. After doing
that, the last thing I want is a simple stenciled design sitting on top of a
layered, dimensional background. For me, every component along the way needs to
be equally complex in development and design.
The four, simple techniques in this post can help you do just that.
SHADOWS
Many
times, artists choose one color of ink or paint to use with their stencil.
Stopping there, however, often leads to a flat and uninteresting effect. With
shadowing, as illustrated below, multiple colors are used instead.
You
can completely stencil your first layer with one color. After that, replace the
stencil on your design and loosely go back over with 1, 2 or 3 other colors.
More than 4 total often leads to a muddy palette. The key word is “loosely” as
you always want some of the lower layers to show through.
Tip
1: Dye inks work very well with this technique.
Tip
2: Start light and work your way through progressively darker color layers.
OUTLINE
Often
when a design is stenciled, it looks as if it is sitting on top of the layer
rather than being integrated into the background. Outlining the design is the
perfect solution.
Not
only does this connect your stenciled design to the rest of your work, it also
serves to make the stencil pop off the background. Much like a frame around a
work of art, an outline guides the eye to see what is within and adds a level
of finish to your work.
Tip
1: While you can follow directly along the edges of your stenciled design to
create the outline, sometimes it is most effective to be loose and messy.
Tip
2: Change up the color or design of your outline within the same stencil to
highlight certain areas and to get more complex effects.
OVERSTAMPING
When
we think of stenciling, we generally think of color being the added element.
But why not think outside the box and add detail design work via a rubber
stamp?
After
you have added color through your stencil with ink or paint, place the stencil
back over the design. Choose a rubber stamp with an abstract design and press
the inked stamp through the stencil, adding the detail from the stamp to the
stencil design itself.
Tip
1: Use an uncounted stamp so that you have the flexibility to press the design
into even a small opening in the stencil
Tip
2: Stamps with smaller, detailed designs tend to have a bigger impact.
THE BUMP
One
of my favorite techniques, bumping
your stamp will add depth, dimension, and interest to your stencil designs.
Add
your choice of color through the stencil. Move the stencil slightly off from
the original placement to the left or right and/or to the top and bottom. Add a
different color through the stencil. This adds shading to your design as if
coming from a light source.
Tip
1: Practice different color combinations. Some combos have a strong impact and
some fall flat.
Tip
2: Stencil designs that have very small, close openings do not work as well as
stencils that have gaps in between the stencil cuts.
Hope
you will give these techniques a go. They are both simple and fun to do but can
really raise the bar on your stenciling.
*******
For more mixed media and art journaling inspiration from Seth Apter, visit his website and blog!


What a great post of stencil techniques! I'll be bookmarking this to try out some of these techniques!
ReplyDeleteThanks Sara.
DeleteI especially like your suggestion to use a stamp with the stencil after painting.
ReplyDeleteOne of my favorites Terry. Thank you.
DeleteThanks for sharing some great techniques Seth.
ReplyDeleteMuch appreciation Anne.
Deletethis has me realizing it is time to step up my stenciling techniques! I have always loved the "bumping"; I look forward to incorporating more of these into my work. Thank you for sharing.
ReplyDeleteThey are are so easy to do too Ann.
DeleteThanks Seth you always have great Ideas!
ReplyDeleteAwww...thanks anon.
DeleteSeth, thanks for sharing some great techniques.
ReplyDeleteMuch appreciation Jan.
DeleteSeth, I really enjoyed the techniques you showed. I too really like the bumping technique and have used it before with great success.Ill have to try it again.
ReplyDeleteGreat Cathy. Thank you!
Delete