Hello Hello :)
Today I would like to share with you my take on this months Inspiration Theme; 'Dog Days of Summer'.

I am a big fan of Mixed Media Mini's, so with that in mind, I decided to create a set of 3 'lil framed artworks that depict the colors and look of an Australian Outback Summer landscape. My approach is somewhat abstract, and a lil 70's style in look, but you get the idea.

The main colours of the Australian outback are blues and ochers, so I have used a vibrant sky blue and a pale earth color acrylic paints. I have used these paints to created the landscape on a 'lil 6 x 4 gel printing plate, with a very basic color blocking approach.


Have you noticed that when the sun is high and hot in the Desert/Outback there is a heat haze-like filter on your view of the landscape?
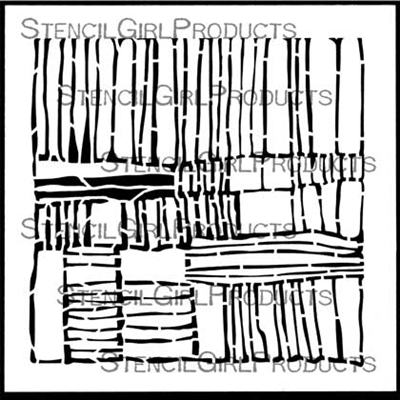
Well, with my little arty landscapes I tried to emulate the look of a heat haze by using a fabulous StencilGirl stencil designed by the one and only Mary Beth Shaw; Layers S429!
Well, with my little arty landscapes I tried to emulate the look of a heat haze by using a fabulous StencilGirl stencil designed by the one and only Mary Beth Shaw; Layers S429!
I thought I would include some photo collage images to show and describe to you how I created these 'lil arty landscapes. The technique is very simple, so simple in fact that it would be great to use this as an art project for a holiday activity with your children. Frame them up and they would be a great gift got the grandparents! :)

- In the above image, you can see the supplies that I have assembled and used for these lil arty landscapes.
- I have used office supply index cards, to print on.
- because I needed to stencil in similar colours I actually lightened the background landscape colors with white acrylic paint.
- I have used 2 sizes of brayers to apply the paint to the small gel plate, this made it easier to proportion the colours correctly to place the horizon line in the right place on the gel plate.

- I brayer'd the paint on fairly evenly and burnished the paper firmly so that most of the paint came off on the cardstock with the first print.
- I repeated this process to create quite a few backgrounds; it is always to good to create extras in case of oopsies!

- When I completed the backgrounds I then repeated the process using the stencil to create the look of the heat haze.
- This time tho I used neat colours [a lil darker] so that the stencil'ed pattern was evident but subtle.
- I over layed the stencil on the paint loaded gel plate, took a light dummy print, then flipped the paint loaded stencil over onto the pre printed backgrounds.
- To ensure the paint on the stencil was transferred on to the printed background I used a brayer.

- As you can see from the first image in the photo above the transferred paint is light and patchy, which helps to create the illusion of the heat haze look.
- To complete my lil landscapes I used a stamp which is an abstract image of people off in the distance against the horizon with a sun in the sky.
- After the image was stamped onto the background I then highlighted the sun with some dark orange water color paint. I also added some very small splats of coordinated water color paint to help soften the overall look.
Here are a few close up images of the finished arty landscapes.


I do hope you enjoyed my creative take on this months fabulous Creative Inspiration theme?!
Cheers for now and Happy StencilGirl Creating!!!
These are awesome!
ReplyDeleteI love your 3 little paintings! The colors and lines really work together to give the impression of desert summer.
ReplyDeleteThese are fantastic <3
ReplyDelete