
My full time job is
working for Allard’s,
an art supply store in Fresno. We carry a line of paints which I had never seen
before starting to work there that are for airbrushing. The brand is Createx,
and although I know nothing about airbrushing, I knew I had to figure out how I
could use these paints in my artwork because they are bright and shiny and
beautiful. I bought a bunch and experimented with doing paint pours with them months
ago, and they came out really well. I
decided I would use them again to do backgrounds for the projects for this
post.
I love the way paint
pours look, but I have found that not everyone ends up being a stand-alone
masterpiece. If you’re like me and have a stack of paint pours that are
lackluster, you can use them as really cool backgrounds for something else. My
first step for these projects were to create three different backgrounds, one
for each stencil design.
I prepared wooden panels
by applying two coats of Liquitex Basics white gesso. I then painted the sides
of the panels black with Liquitex black acrylic paint and let everything dry.

Next I prepared the
paints for pouring. I poured Liquitex pouring medium in little condiment cups and
added one color of paint to each one. The ratio I used was about two parts
pouring medium to one part paint.


 I mixed each one well with a palette knife.


I then took all the mixed
paint in the little cups and poured them together into a bigger one. I poured
them gently into each other to avoid mixing them too much. This is called a "dirty pour."

Then I flipped the cup
over onto the canvas and lifted it. I helped the paint along to cover the
entire canvas by tilting it back and forth. All the beautiful colors cascaded
over the canvas and danced with each other to create beautiful patterns that
would make excellent backgrounds for my stencil projects. I went to sleep that
night being very satisfied with my work!

When I woke up the next morning, however, my pours had
changed considerably. As it dried overnight, it crackled. Like, a lot. It was
definitely not what I was expecting to see. I kind of liked the effect, but I
knew it happened because something wasn’t right. Like I said, I had paint
poured with these airbrush paints before on canvas and they came out great, and
I regularly use alcohol and it has never caused a problem. I was stumped, so I
turned to a few paint pouring experts to help me figure out what happened. We came
to a consensus that it was probably the gesso that I used underneath being too
dry. I may never know the exact answer for sure, but now I was faced with the
decision of whether I wanted to scrap this project and start over or try to
save the work I had already done, and I opted for the latter.

I actually liked the crackle effect so I decided to
try and go with it. I took a white Posca paint marker and traced my stencil
design onto the piece.


I then used other Posca
paint markers to color in the lines.

As you can see, the
crackles can still be seen through the paint and I wasn’t really happy with
that. Plus the crackles in the background were really white which I thought
competed with the dog. So I decided to
make a few more changes.
First, I poured some Createx paint onto a sponge and
rubbed it into the crackles to tone them down. The paint is very thin so it
soaked into the crackles nicely and wiped off of the raised areas easily.


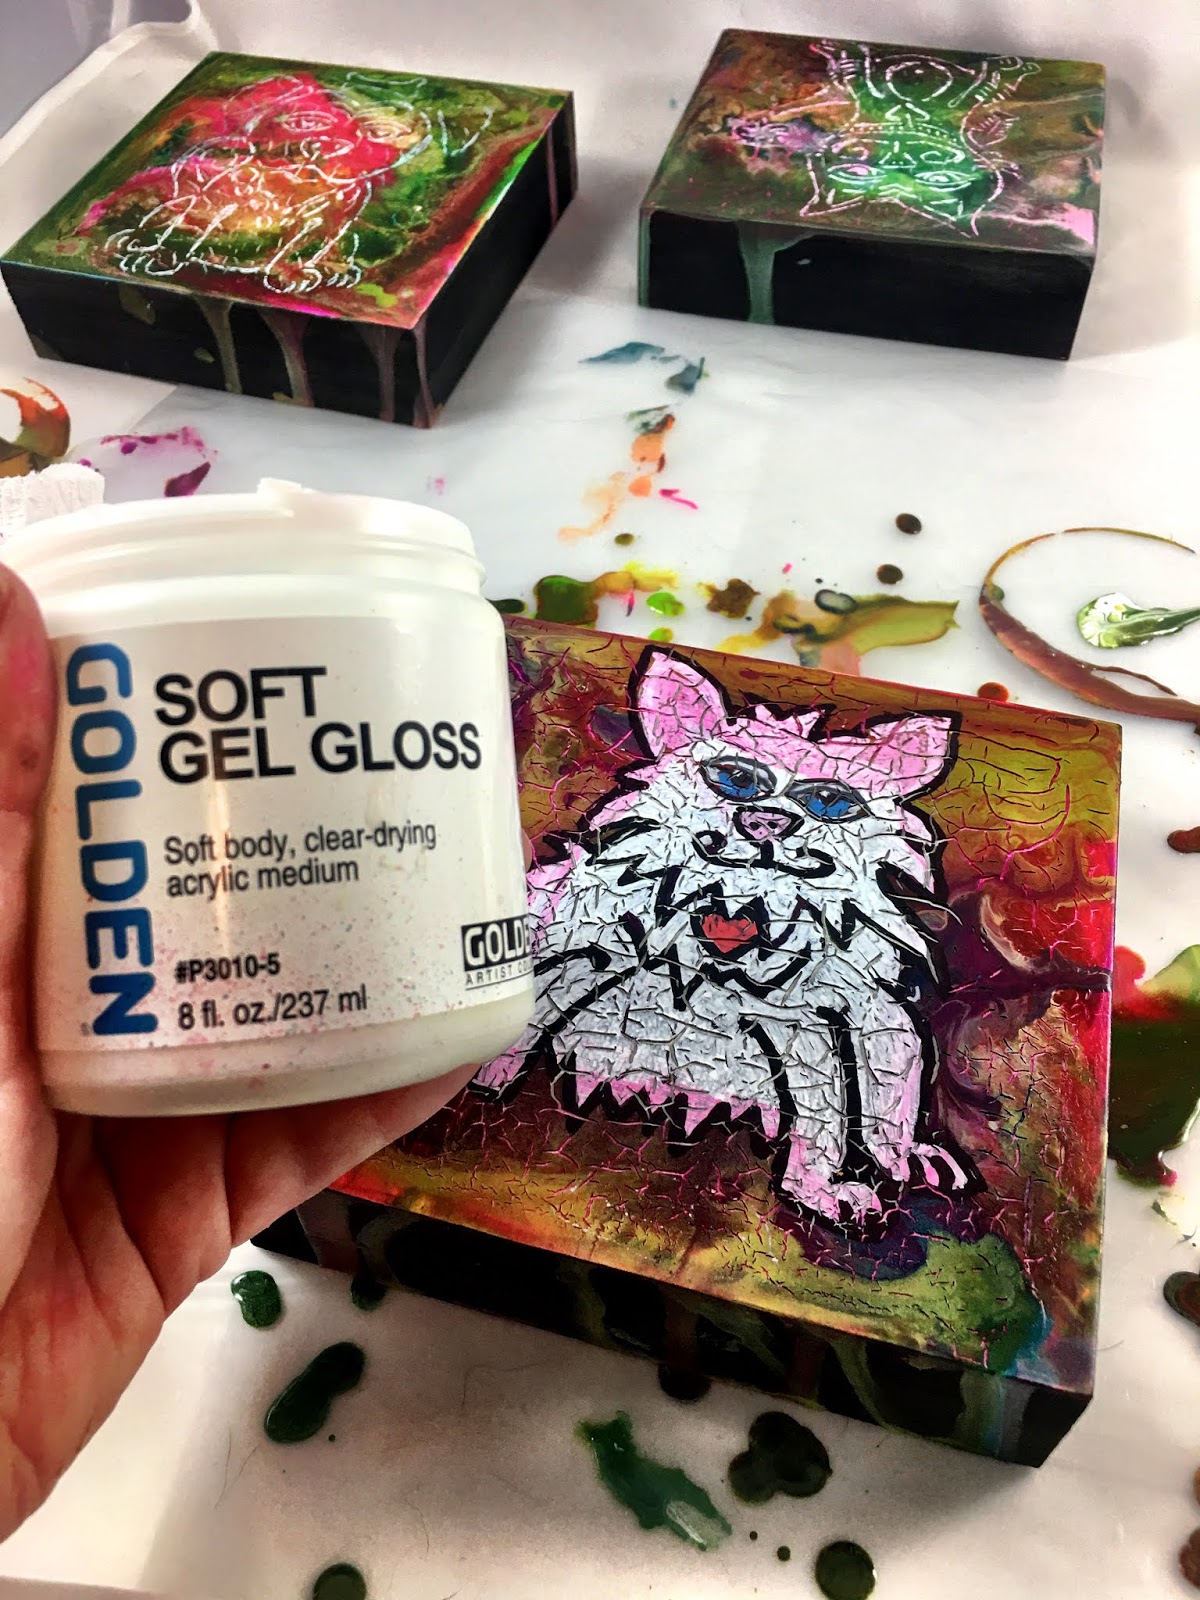

Once I got an even coating on this guy, I went back
over him with the paint markers again and he looked so much better! I finished the other two and now I have a set
of three pieces that I actually like quite a bit. I’m glad I pushed through and
didn’t get frustrated and give up. Sometimes you learn the most by making
mistakes, so you should never be afraid to make them. As Bob Ross says, there
are no mistakes in art, there are only happy accidents. And the crackle effect
that I ended up with here was definitely a happy accident!


I hope you enjoyed my post!
If you’d like to learn more about me or my artwork, follow me at The Peculiar Palette on Facebook or @thepeculiarpalette on Instagram. I also have an Etsy store (The Peculiar Palette) and teach ceramics and mixed media classes in the Fresno area. Hope to see you again soon!
 Laura Fraedrich
If you’d like to learn more about me or my artwork, follow me at The Peculiar Palette on Facebook or @thepeculiarpalette on Instagram. I also have an Etsy store (The Peculiar Palette) and teach ceramics and mixed media classes in the Fresno area. Hope to see you again soon!

Great project!!! Thank you so much for sharing this great tutorial. I have never tried pouring but I think I will try it soon. Kisses!!!
ReplyDeleteDelightful project. I love the way you describe your process and turning a mistake into a piece of art.
ReplyDeleteBravo! I enjoyed learning more about paint pouring and its challenges. The finished pieces look amazimg!
ReplyDelete