Showing posts with label dog. Show all posts

Wednesday, February 1, 2023

Presenting Your February 2023 StencilClub Exclusives from Tina Walker!


Joining StencilClub means you have access to the coolest stencils around. Stencils that aren't sold anywhere else except to club members. Artist designs, made especially for club members.


Each month, you get the following:

  • Two 9" x 12" EXCLUSIVE Stencils. 

Always Artist Designed

Sometimes there will be 2 designs, other times there will be multiple designs on two stencils.

    • An EXCLUSIVE video for MEMBERS ONLY provided by the designing artist. It's a class in itself!
    • A downloadable PDF with basic instructions to go along with the video for that month.
    • Entrance into a SECRET Facebook group for MEMBERS ONLY! A place to share, inspire and talk all about stencils!
    • Plus, as a MEMBER, you are eligible to purchase ANY past month for the membership price. Email Us with a list of which previous StencilClub sets of stencils you would like to purchase and he will provide you with a bill through PayPal.
    • StencilClub members receive a loyalty coupon code each month good for 20% off stencils in the public collection. It can be used more than once.


    StencilClub is only:

    $25 USD - United States, monthly, shipping is included!
    $35 USD - International, monthly, shipping is included!


    Thursday, July 18, 2019

    Painting on Fabric with StencilGirl® Stencils

    Hello StencilGirl® fans! I’m Laura Fraedrich and I’m thrilled to be here on the blog to show you a recent piece I did with my George stencil. 

    I have always loved fabric and have an extensive collection of it that keeps growing and growing. The funny thing is that I can’t sew to save my life. Many people have tried to teach me and are amazed at my lack of talent behind a sewing machine. I had an easier time learning organic chemistry in collage than I do trying to thread one of those things. I have major respect for anyone that knows how to operate a machine and create beautiful artwork with it because I am definitely not one of those people. Therefore I am left with piles of fabric that I don’t have much use for, unless I get out some paints and other supplies that I’m much more comfortable using and turn the fabric into a piece of artwork that can be framed and hung on the wall! 
    For this piece, I used a black Jacquard Tee Juice marker to color in the spaces of my stencil, then used it to draw the firefly, clouds and mushrooms. I used Marabu Aqua Inks and a brush to paint the sky and grass, then used Posca markers to color the dog, firefly, mushrooms and clouds. I felt it needed some bling so I grabbed my Pentel Sparkle Pop gel pens (my new favorite pens) and added some glitter. Lastly, I drew some dots and highlights using my Uniball Signo white gel pen. I found a really cool double circle mat at Allard’s Art which completed my piece. 

    Here is a close up pic where you can see some of the glitter from the Sparkle Pops. These pens are so cool!
    This piece was inspired by a dragonfly that has been hanging around my yard for the last few months. Sadly my dog George who inspired my stencil design passed away this February. The dragonfly showed up shortly after and I like to think it is a gift from George to let me know he’s still with me. I miss him terribly, but am so happy that his spirit will continue to live on through my stencil design!

    Happy Arting!
    Laura


    Friday, January 18, 2019

    Laura Fraedrich: Paint Pouring & Stenciling with StencilGirl® Stencils

    Hello! It’s Laura Fraedrich of The Peculiar Palette here and today I’d like to show you how to do a project using my pet themed stencils that I designed for StencilGirl®. I wanted to do something a little different than what I usually do, so I decided to play around with paint pouring as a background. I’m no paint pouring expert by any means, but I have dabbled around with it and felt confident that my projects would come out without a hitch. However, I ran into a couple technical difficulties that required me to come up with ways to troubleshoot them, which I will also share with you in case you ever find yourself in a similar situation.

    My full time job is working for Allard’s, an art supply store in Fresno. We carry a line of paints which I had never seen before starting to work there that are for airbrushing. The brand is Createx, and although I know nothing about airbrushing, I knew I had to figure out how I could use these paints in my artwork because they are bright and shiny and beautiful. I bought a bunch and experimented with doing paint pours with them months ago, and they came out really well.  I decided I would use them again to do backgrounds for the projects for this post.

    I love the way paint pours look, but I have found that not everyone ends up being a stand-alone masterpiece. If you’re like me and have a stack of paint pours that are lackluster, you can use them as really cool backgrounds for something else. My first step for these projects were to create three different backgrounds, one for each stencil design.

    I prepared wooden panels by applying two coats of Liquitex Basics white gesso. I then painted the sides of the panels black with Liquitex black acrylic paint and let everything dry.
    Next I prepared the paints for pouring. I poured Liquitex pouring medium in little condiment cups and added one color of paint to each one. The ratio I used was about two parts pouring medium to one part paint.

    I mixed each one well with a palette knife.
    I added a few drops of 91% Isopropyl Alcohol ONLY to the white. Using alcohol is one way that you can create ‘cells’ in your paint pours. Cells are little bursts of color that can magically appear in a paint pour if you include an additive such as alcohol or silicone. I only added it to the white because I just wanted get a little action. You can experiment with mixing more or less and in more than one color if you do this yourself.
    I then took all the mixed paint in the little cups and poured them together into a bigger one. I poured them gently into each other to avoid mixing them too much. This is called a "dirty pour."
    Then I flipped the cup over onto the canvas and lifted it. I helped the paint along to cover the entire canvas by tilting it back and forth. All the beautiful colors cascaded over the canvas and danced with each other to create beautiful patterns that would make excellent backgrounds for my stencil projects. I went to sleep that night being very satisfied with my work!


    When I woke up the next morning, however, my pours had changed considerably. As it dried overnight, it crackled. Like, a lot. It was definitely not what I was expecting to see. I kind of liked the effect, but I knew it happened because something wasn’t right. Like I said, I had paint poured with these airbrush paints before on canvas and they came out great, and I regularly use alcohol and it has never caused a problem. I was stumped, so I turned to a few paint pouring experts to help me figure out what happened. We came to a consensus that it was probably the gesso that I used underneath being too dry. I may never know the exact answer for sure, but now I was faced with the decision of whether I wanted to scrap this project and start over or try to save the work I had already done, and I opted for the latter.
    I actually liked the crackle effect so I decided to try and go with it. I took a white Posca paint marker and traced my stencil design onto the piece.
    I then used other Posca paint markers to color in the lines.
    As you can see, the crackles can still be seen through the paint and I wasn’t really happy with that. Plus the crackles in the background were really white which I thought competed with the dog.  So I decided to make a few more changes.

    First, I poured some Createx paint onto a sponge and rubbed it into the crackles to tone them down. The paint is very thin so it soaked into the crackles nicely and wiped off of the raised areas easily.
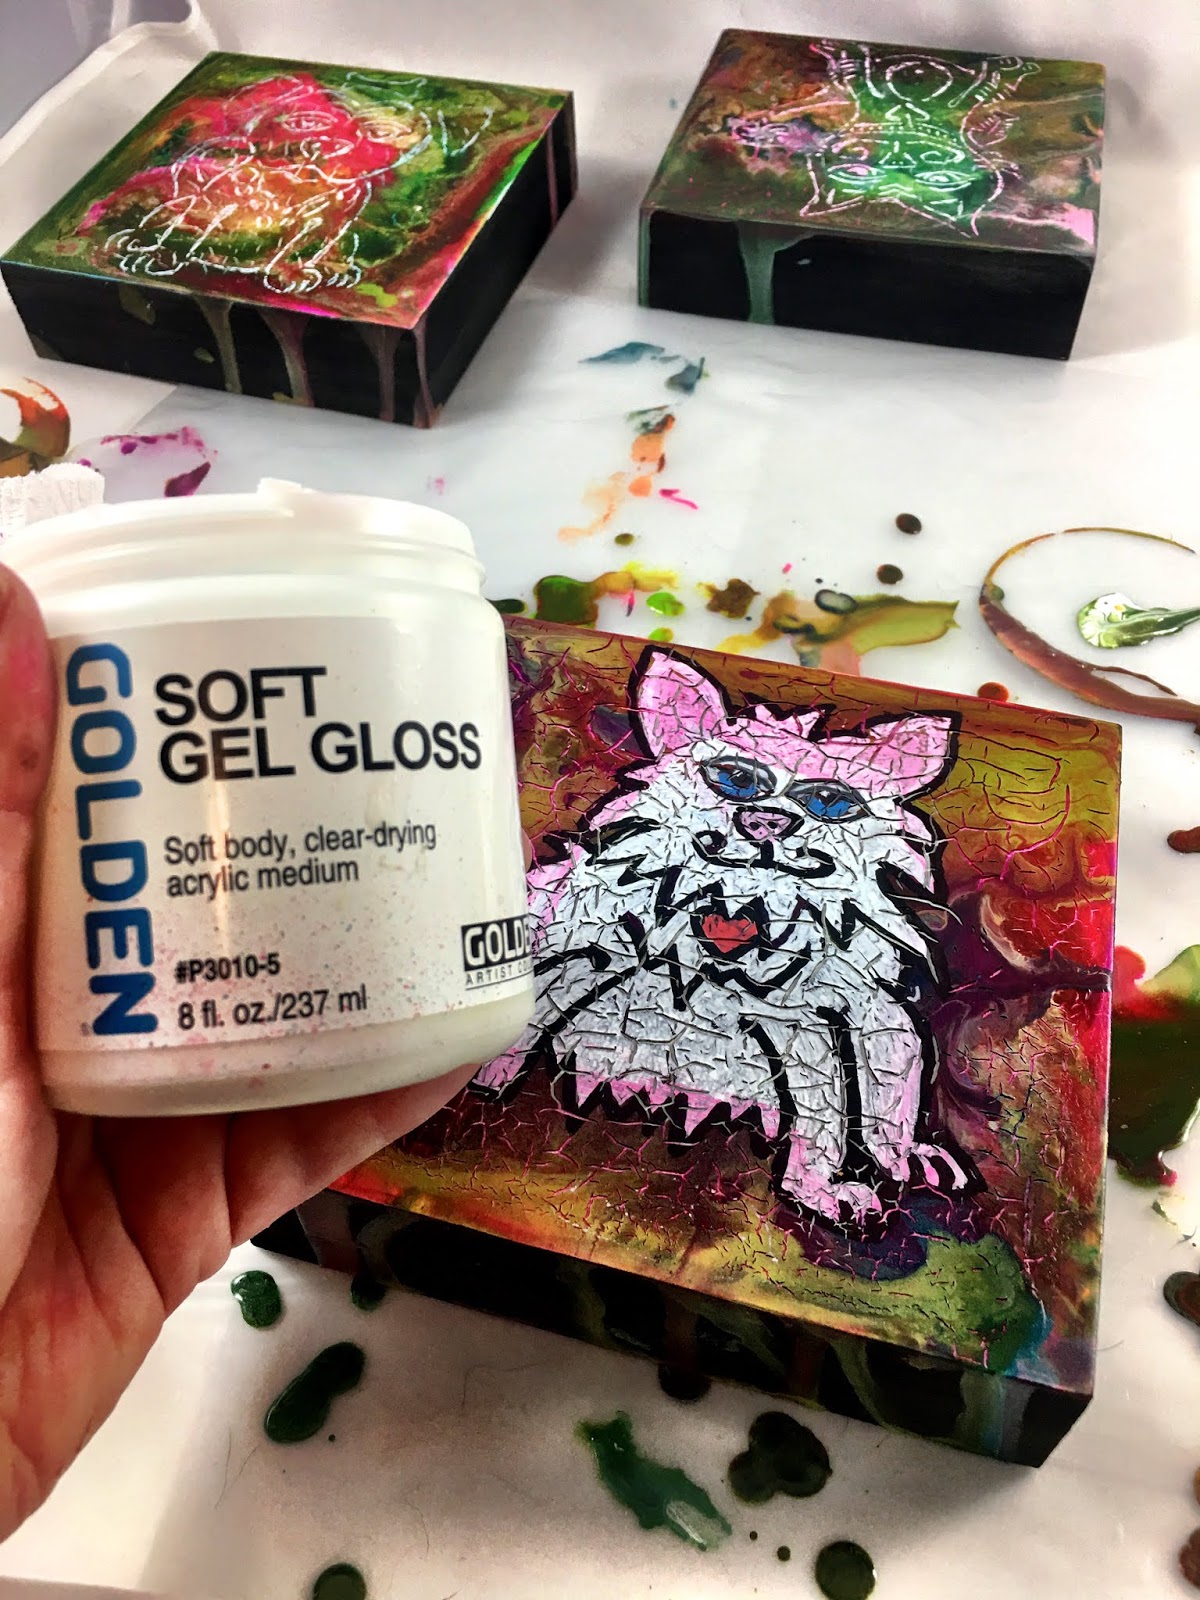
    Next I took some Golden Gloss Gel and used my finger to rub it into the crackles to even out the surface.
    Once I got an even coating on this guy, I went back over him with the paint markers again and he looked so much better!  I finished the other two and now I have a set of three pieces that I actually like quite a bit. I’m glad I pushed through and didn’t get frustrated and give up. Sometimes you learn the most by making mistakes, so you should never be afraid to make them. As Bob Ross says, there are no mistakes in art, there are only happy accidents. And the crackle effect that I ended up with here was definitely a happy accident!
    I hope you enjoyed my post!
    If you’d like to learn more about me or my artwork, follow me at The Peculiar Palette on Facebook or @thepeculiarpalette on Instagram. I also have an Etsy store (The Peculiar Palette) and teach ceramics and mixed media classes in the Fresno area. Hope to see you again soon!
    Laura Fraedrich