Hi, everyone! Carol Wiebe here!
“One
of my mantras is, 'Embrace what makes you unique, even if it makes others
uncomfortable.' I keep that with me in my back pocket. Shoot, I keep it in my
front pocket! I keep it in my hair.” ~Janelle Monae
The past few months have
been challenging on many levels. I thought the isolation of a Pandemic might
offer an opportunity to clean and organize my studio, but the many papers in my
bins seduced me into transforming them into art journals. It is always so much
more exciting to create than to clean. Obviously, the studio situation had not
yet reached a critical enough stage. I am presently working on art journal
number 9. Each journal consists of at least 40 pages (if numbered the same way
you read a book), 8 ½” x 11,” give or take the edges I have ripped off on all
four sides. This means that a double page spread is about 11” x 17.”
Two art materials that
are integral to my art journal construction are gel plates and stencils. And,
as I have stated before, I play with stencils in a “suggestive” manner—using
only part of any given stencil, and doing that in a “messy” or intuitive way,
including the layering of stencils over each other. For this reason, my stencil
of choice is usually an abstract pattern.
I like to create pockets
within my journals, and most often use the same material that I make covers
with, craft chipboard. However, on these journals I tried something new (for
me) and constructed pockets out of papers printed on my gel plate, using
stencils.
1–I cut a shape for the
base of my pocket and glued it to construction paper. Then I folded various
papers to create pockets to place on this base. I kept them fairly simple so as
not to detract from whatever I might decide to place in those pockets.


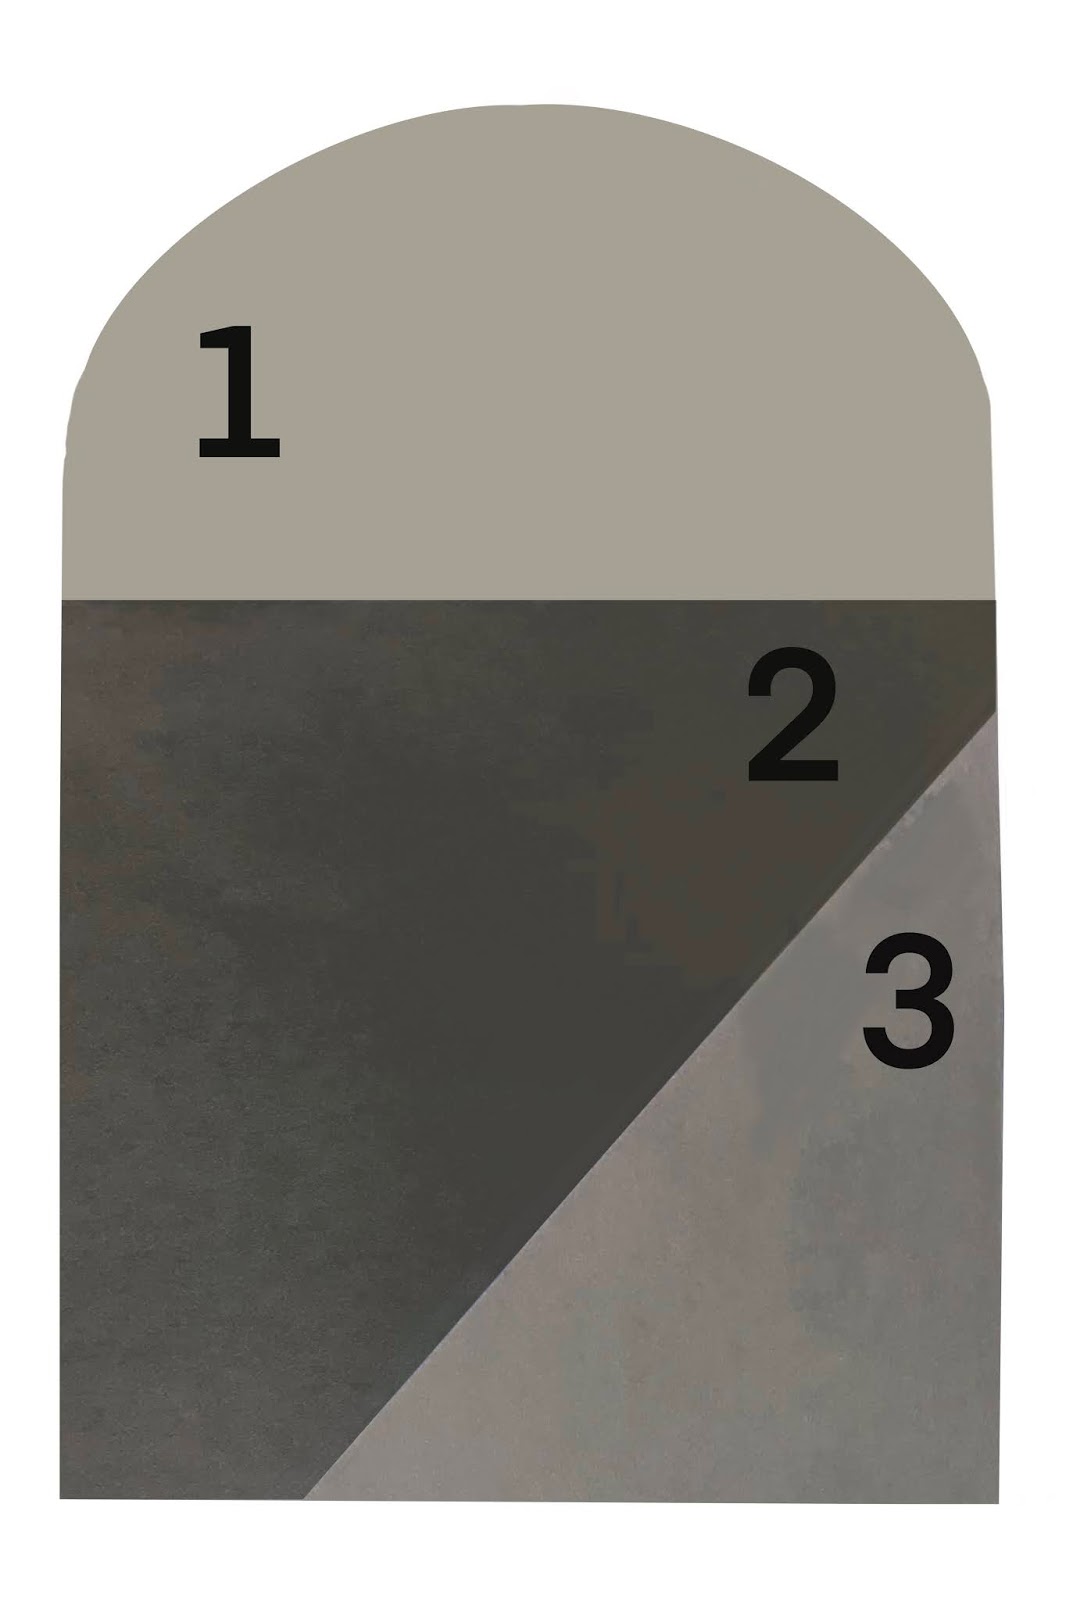

2–The three pockets are
doubled and folded, so that the top edge is a folded edge.
3–These inner pockets can
be glued in place along the edges. I chose to stitch around the outer edge of the
base with a blanket stitch, then crochet the edge with crochet cotton. This is
entirely optional. You may have other skills you can employ, like adding washi
tape or stitching with a sewing machine.

There are so many options
for fascinating items that could be placed in those pockets! I like the idea of
tags, especially specimen tags (leaves, flowers, seeds, bugs, butterflies). One
could include recipe cards, quotes, interesting faces and symbols. What about a font collection? I might even
put some of my crochet motifs on cards, or buttons I’ve collected. Employ a
favorite poem, or note, written out in your own hand. And, of course, we can
combine all of these ideas with stencils. Once you start thinking about it,
ideas will proliferate!

Another way I use
stencils is by taking a photo of my stencil, after it has been painted, and
then combining it with a different image in an app that blends photos together.
This is a really versatile use of a given stencil, because you can resize the pattern
and place it over your other photo (in a lower opacity) in a way that offers
you the best composition. Once you have the photo of your stencil, you can go
even further and use your favorite drawing app to change the design, or
amalgamate several stencils, as I did for this stencil design.


I combined the face and
stencil images, and then kept refining the image in my favorite drawing
app—Procreate—until I was satisfied with the result.

I use my digital artwork
in my journals quite a bit. It is wonderful to provide your own source of
collage. I can paint the resulting image further, and add more stencil work if
I deem it required.
Here are a few more pics
from the journals I am working on. First, I put a pocket on the back of my
journals as well, but there my favored approach is to use crochet and stitch.

Here is another set of
pockets, on the left. Notice the Yayoi Kusama dots? This pocket set looks
rather like an abstract painting.

The spread begged for
more, so I added another of my printed digital artworks as collage.
(I decided the spots were
no longer suitable. Forgive me, Yayoi!)
 My best suggestion as an
artist who both uses and designs stencils, is to employ them in creative ways
you haven’t tried before. Use parts of stencils, cut them up and recombine
them, photograph the stencils themselves to use as collage, merge them with
digital art, use materials you haven’t tried before to apply them, use them for
rubbings.
My best suggestion as an
artist who both uses and designs stencils, is to employ them in creative ways
you haven’t tried before. Use parts of stencils, cut them up and recombine
them, photograph the stencils themselves to use as collage, merge them with
digital art, use materials you haven’t tried before to apply them, use them for
rubbings.
In other words, act like
a Stencil Ninja, and always carry stencils “in your back pocket.”
Be fearless!
Stencils used in this
article:
Organic Roots 1 Small,
Organic Roots 3 Small, Organic Roots Large
Loved seeing this Carol!! Thank you for sharing.
ReplyDeleteBig love to you Terry! I am always happy to hear from you (and see your work).
ReplyDeleteCarol,
ReplyDeleteThis is beautiful and inspiring...thank you for including details, just lovely.