
Hello from Geri Beam.
Just to be totally upfront, I have never created a mask like this before. I was in new territory with a lot to learn.
The number one lesson I learned on this project was patience. While I didn’t spend decades searching for a tomb that people thought did not exist, I had my own set of obstacles to overcome. Wanting to “get it done” was the biggest.
I know that when trying something for the first time it is important to test out your materials to see how they react together. I knew I would be using plaster, stencils, abaca paper, embossing powders, and gesso.
My first question was what color to make them?
I gathered some paper and went to work making samples. I painted three sets to test how they worked together.
1) Black gesso background
2) Gold gesso background
3) Black gesso then covered with gold background
I placed the stencil Egyptian Hieroglyphics by Caroline Dube on the backgrounds and made swatches.
1) Black gesso sponged through stencil2) Gold gesso sponged through stencil
3) Black embossing powder
4) Weathered Gold embossing powder
5) Sea of Tranquility embossing powder

I referred back to these swatches throughout the process to help make design decisions. But the most important was the first one about the overall color of the mask. I found that the background of black covered with gold gave me the depth I was looking for. I liked the look of the black embossing powder for the hieroglyphs.
Now to take the first step – making the mask base.

I covered plastic masks with Press ’n Seal wrap to help remove the set plaster from the mask. I followed the instructions on the bag of my plaster strips (Craft Wrap Plaster Bandage Cloth) to place a layer of plaster over the mask. I have experience using clay and I knew I needed to get a smooth surface or the seams would show. I wet the plaster strips and made three layers over the entire face of both male and female masks.


Now my first lesson in patience – I had to let the plaster completely dry before proceeding. This took longer than I expected but I trusted my instincts to have them completely dry before going on. I let them sit for a week.
Caution - working with plaster creates quite a mess. Luckily, I don’t mind getting my hands and surfaces covered with stuff.
Next, I painted the masks with a single layer of black gesso. I let that dry overnight and then applied a layer of gold gesso. I let some of the black show through the gold to add more depth.


I knew I wanted to put hieroglyphs on the masks. I wanted to cover the bottom of the female mask with more hieroglyphs than the male. Women communicate verbally more than men and I felt that was appropriate. The male would have the beard piece to compensate.
I read a fascinating story of how the Tutankhamun mask lost his beard and had it reattached with beeswax – Google that story for fun reading...
I have used abaca paper in a lot of my mixed media work and I knew this was the best way to get transparency onto the curved surface. Teabags are made from Abaca paper. It is lightweight and very strong even when wet.
I used a brayer to put gold gesso onto the abaca paper. I then used a makeup sponge on an embossing ink pad and pounced through the stencil. I used the stencil Egyptian Hieroglyphics by Caroline Dube. I used black embossing powder and a heat gun to get the wonderful hieroglyphs.


I attached the strips of hieroglyphs onto the masks using gel matt medium and a brush.
I put some black gesso on top of the gold abaca paper and cut lip shapes. I used Weathered Gold embossing powder to outline the lips. I attached them with gel matt medium and a brush.


I created two headbands with card stock painted in gold gesso. I wanted them to stand out from the mask so I created a strip of painter’s tape to give an uneven edge to the headband. I covered the edge using the Wow! Mixed Media Embossing Brush (a brush with embossing ink in a bottle) and Weathered Gold embossing powder. Then I put the hieroglyphs on the headbands the same as I did the abaca paper.


I created the ornaments for the headbands. I painted two wooden circles measuring two inches with gold gesso.


For the male ornament, I used the stencil Egyptian Ankh by Carolyn Dube to make the Eye of Horus.
For the female ornament, I used the stencil Under the Sun Stencil by Roxanne Evans Stout to make the Ibis symbol. The bird was actually bigger than two inches so I did the embossing on sturdy cardstock and then glued it to the wood.
I used embossing powder to make the images stand out on the ornaments.
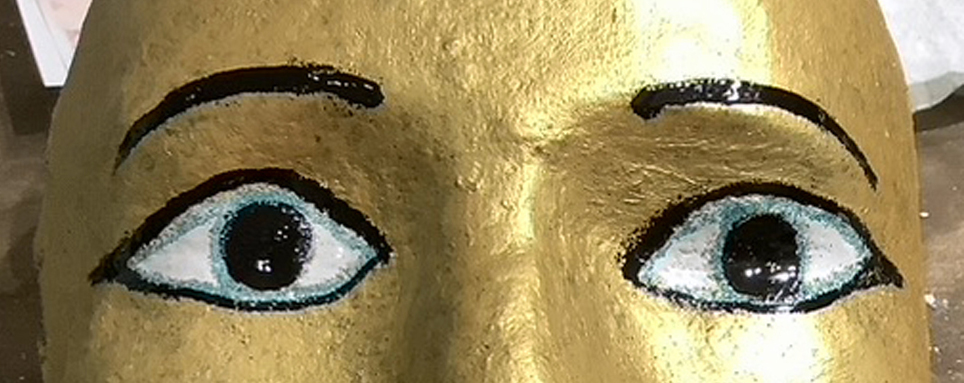
For the eyes. I used embossing powder and the Wow! Mixed Media Embossing Brush. Watch the videos to see what order I applied the powder to get the final result.

At this point, I was very happy with my progress. However, I did not know how I was going to do the hair for the female or the headdress and beard for the male. As often happens when in the middle of a project, I woke at 4 in the morning with an idea. What if I used toilet paper rolls to make the side pieces? The male mask top piece was too long so I would use a paper towel roll for the top.
I painted the rolls with gold gesso and used painters’ tape to add blue stripes. I covered the entire roll with a layer of liquid matt medium.
For the male, I cut a circle out of cardboard to cover the bottom ends of the side pieces.
I used a smaller piece of toilet paper roll to make the beard. I cut cardboard for the top and bottom and painted the beard with acrylic paint.


For the female, I used black rat tail cording for the hair. On top of the head, I braided three strands to make a row across the top. I made ten braids and glued them in place. On the bottom of the side pieces, I cut 10 single cords for each side. I covered the bottom of the cord with painters’ tape and hand- painted the gold to make them look like beads.


Attaching the side and top pieces took a lot of trial and error, double-sided tape, glue, and patience to get them to all stay in place. I did not even keep track of how many days it took to complete this part of the mask.
During the last part of the project, I almost gave up. I had no idea how I was going to display them. I wanted to hang them on the wall but was not sure how to mount them.
I did what I always do when faced with a difficult design issue, I asked my husband to sit and brainstorm with me. We started out thinking about using wooden dowels. I wanted the back to be covered and not show the plaster. When discussing how to weigh them down so they wouldn’t tilt I thought about sewing them onto a canvas. That way the back was covered and it would support the mask.
From there the rest was easy. I chose a 12x12 inches canvas to give the mask the right proportion. I painted the canvas with black gesso and used the gold gesso with the stencils Egyptian Hieroglyphics and Egyptian Ankh by Caroline Dube.
Around the edge, I used painters’ tape to give me sharp lines and a dry brush to give a finished edge.


I sewed the masks onto the canvas by punching holes in the side pieces. I used a 15-weight black cotton thread that was covered with beeswax.

For a finished back, I used double-sided tape to secure heavy black card stock to the frame. My hubby did the hardware to hang and the pieces were done!

I know that these are not as stunning as the real thing, but boy did I have fun learning how to make them. I am very happy with the end result. My stylized version reflects the challenges I faced and overcame. What a wonderful gift to have art in my life.
Supplies used in this project:
Stencils
Under the Sun Stencil by Roxanne Evans Stout

Egyptian Hieroglyphics by Caroline Dube

Egyptian Ankh by Caroline Dube

Paint
Black Gesso by Bob Ross
Daniel Smith Acrylic Gold Gesso
Paper Artsy Fresco Finish paint
Embossing
Wow! Embossing powder – colors Primary Ebony, Opaque Bright White,
Wow! Seth Apter embossing powder – colors Weathered Gold, Sea of Tranquility
Stampendous embossing powder – colors red and yellow
Wow! Mixed Media Embossing Brush by Seth Apter
Versa Mark embossing ink pad & brush
Heat gun
Makeup sponge
Other Tools
Painters’ tape
1-inch Chip brush
Black cotton thread 15-weight
Beeswax
Craft Wrap Plaster Bandage Cloth Fast Set White 4 inches wide Scor-Pal Scor-Tape 1⁄4-inch double-sided tape
PVA glue
Liquitex Gloss Fluid Medium and Varnish
Liquitex Matte Gel Medium
Black rat tail cord 2mm
Glad Press’nSeal
What wonderful, creative thinking you put into these two pieces, Geri! It was a pleasure to read about your trials and triumphs!
ReplyDeleteI have seen the King Tut mask in person, and am very impressed by how reminiscent yours are. That gold gesso is surprisingly effective. I love the hieroglyphs and the eyes. Wonderful!
ReplyDeleteThis is absolutely amazing Geri! Love all that gold! King Tut's tomb is such an inspiration- when I stood at the entrance to it years and years ago I was in awe of the history and mystery.
ReplyDelete