Stenciling and Stitching on Cabinet Cards
e·phem·er·a
/əˈfem(ə)rə/ noun - things that exist or are used or enjoyed for only a short time."There were papers, letters, old boxes—all sorts of ephemera"
I chose it as the name of my shop/studio as almost every supply list for art workshops in mixed media I attended had it listed. When visitors come in the shop and ask what it is, I tell them it is items of memorabilia, typically written or printed, originally expected to have a short life, but salvaged and savored by artists in collage.
When I see stacks of cabinet cards or other old photos in flea markets or garage sales, I feel compelled to rescue them. Although their highest and best use is to be with their family, I rationalize that, when separated from their loved ones or relatives, being in art is better than being in a landfill. I hope they feel the same way.
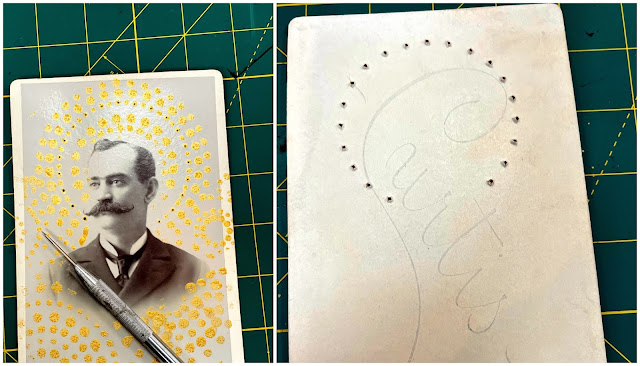
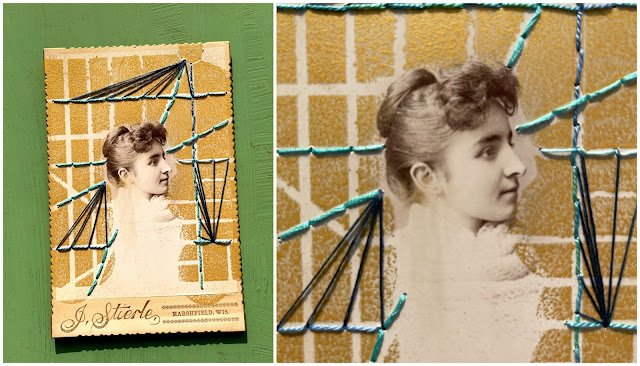
We have been stitching quite a bit in the studio lately and someone sent a remarkable “Pin” related to stitching on Cabinet Cards. I dove down that rabbit hole and quickly made a Pinterest Board of my favorites before giving it a spin, myself. And, I added the twist of using stencils with my beloved Daniel Smith Gold Gesso to add a pattern to stitch upon. When stitching through something painted, I always go for non-sticky paint or gesso.
Here are some things I learned:
- I used painters/light masking tape to try and mask the faces on one card. Unfortunately, when I removed it, it took up the delicate photo. After that, I relied upon visuals to avoid stenciling where I wanted no paint and just tacked the top of the stencil to the top of the card. I could have also carefully placed a piece of paper atop parts to keep paint free, sandwiched between the stencil and surface.
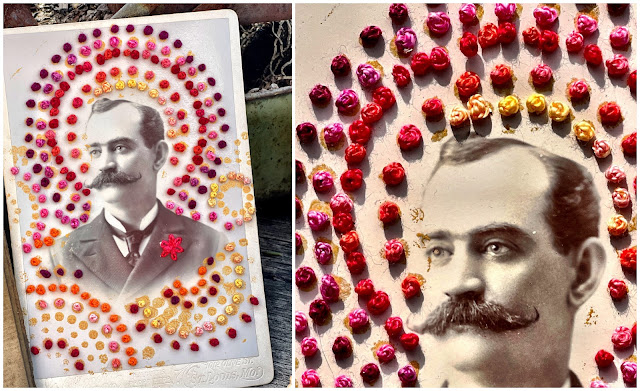
- Not having the flexibility of the fabric to stitch on, straight up/down stitches worked the best like Running Stitch, Backstitch, and Straight Stitch. Also, stitches that sit on top of the card like French knots and Lazy Daisys worked well.,
- I used an awl and metal ruler to mark my stitch holes on straight lines so that my stitch lengths were consistent. I was extremely careful near the edges of the cards so as not to create a hole on the side.
- The stencils proved to be a great guide as you will see. Although I stayed to more geometric shapes, to begin with, I can now imagine using all kinds of shapes and adapting my stitching to them.
- I used a variety of threads to stitch with including 6-strand embroidery floss and Perle cotton. As the hole you create with the awl is larger than one would usually make in fabric with a needle, use a thick enough thread so your knot won't slip back through it.


Delightful idea - thanks, Kristin!
ReplyDeleteThank you, Terry!
ReplyDeleteThese are fab! Just moved, but saved a bag of embroidery floss thinking I might need it for "something", lol. So glad I kept it!
ReplyDelete