Hi all! Happiest of holidays to those who celebrate and for those who don't, I hope today's column will be perfect for gift-giving ideas all year round. With the holiday season not too far away, I thought I would showcase a few things that can be made quickly and easily for gifting using scraps you have on hand but feel free to create some fun and festive papers to use specifically for these projects as well.
I made three different projects, a bracelet, candle and gift box, using some gel prints I created on copy paper a while back that incorporated a variety of StencilGirl® stencils. The list of stencils and designers are listed at the end of this post. Super fun to create art on a different substrate.
For the bracelet, I used a pre-made bracelet blank, cut and adhered circles from the stenciled paper into the blanks, attached a clear dome, added beads and was done. It took no more than half an hour. You can find these bracelets online or at some of your local hobby stores. I imagine you can add words, sentiments and mark-making too! How fun would it be to have friends come over with their papers and everyone takes a small piece of each design to create a "friendship" bracelet of sorts? You could also extend this into a necklace by attaching links.
Although I think I could have covered this glass candle with gel printed-paper and made a fun collage, (next on my list), I chose to show a different way to use up scraps.
For the embellished trim around the middle, I attached various strips of stenciled papers (2 layers) and ran a sewing machine stitch down the middle. I actually think this would have looked even better if I had torn the strips but, oh well! Another project for another day. :) Anyway, I snipped them with my 5 bladed scissors almost to the stitch line on either side and then ruffled the fringe with my fingers. I attached it to the candle and added some buttons and baubles to give it a little bit of "fancy" and was done. I actually made enough trim that I have some for future gift-wrapping. :)
Of course, a gift box is a necessity when giving a gift. I used a variety of papers again and wrapped up my box. If you run short on any paper, feel free to attach different patterns and pieces and make it a collage-look.
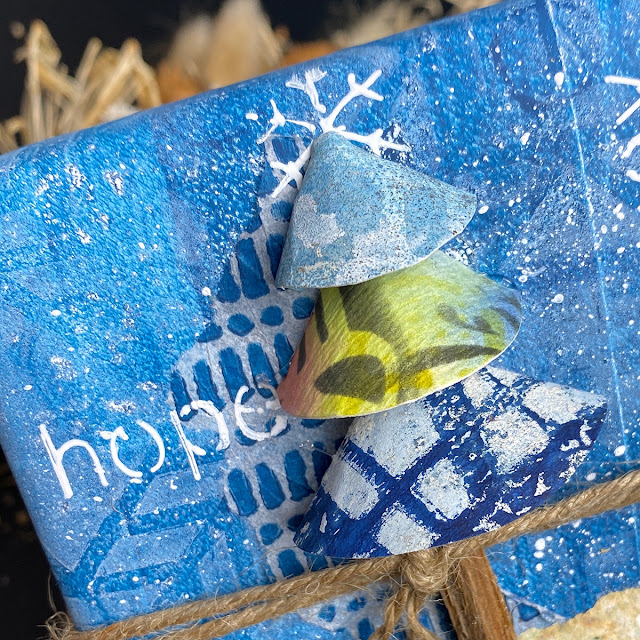
The top of the box was misted with white paint and a small snowflake placed where I planned the top of the Christmas tree to go.
The "grungy" snow at the bottom was a strip of painted paper.
I created a three-tiered Christmas tree using 2/3 of a snipped circle to form the sections. See photo below.
Each circle was slightly larger than the last one. I rolled them around a bit, making the middle have a point and then hot glued them in place. A stick was used for the trunk and a white uni-ball pen was perfect for stenciling words on the box. It was all tied together with twine.
And there you have it. Quick, easy and no waste. Especially nice if you have some pieces that might not be your favorite or are remnants from trimming a larger art substrate.
Well that's it from me today. Sure hope you get to do a little making this season and it brings you much joy.
XO,
Stencils Used in Projects:
Looking for more projects to make for the holidays? Check out my past posts for gift-giving...
You can find my work here:
Instagram: debi_adams
Facebook: Debi Adams-Friends
DebiAdams04-Arty Business
Side Gig: Instagram: quillandcloverflorals


Great ideas, Debi - thanks!
ReplyDeleteFor the bracelet blanks, what name/description would I search for?
ReplyDelete