
Hello and happy fall!
Nicole here to share a fun, quick and easy card that’s perfect for the fall season. It’s almost starting to feel a little more fall-like here in Central Texas, and I am waiting in anticipation for our leaves to start changing. Until then, I am going to have to be satisfied with making my own fall leaves.
I always like to have a variety of cards on hand for sending happy mail or tucking into giveaways and attaching to art that someone purchases from me. With my stash dwindling a bit, I needed to get creative to make some more.
Often when I sit down to make cards, I find making multiples takes just about as much time as making one. (Plus the supplies are all out!) In just under a couple hours, with four large ledger sheets, one stencil, a bunch of paint, cardstock, and a few other supplies, I was able to create 10 cards and 10 different postcards.

I began by adding a small amount of watered-down gesso to some vintage ledger sheets. If you don’t have a ledger that’s falling apart or that you want to take pages out of, you could also use book text or even use your own handwriting on some pages. This card would be awesome with a fall poem as the background, too!

The way white gesso mingles on the old book text is one of my favorite layers, however you can also use clear gesso. The white doesn’t cover up the pages much at all, it just adds a sort of chalky-like coloring. The gesso protects the pages just a bit from the paint we’ll be adding next.

Once that gesso was dry, I grabbed my closed leaves stencil, all the fall (warm) colors from my Dina Wakley Media paint, sponge applicators and some patty paper for my palettes.
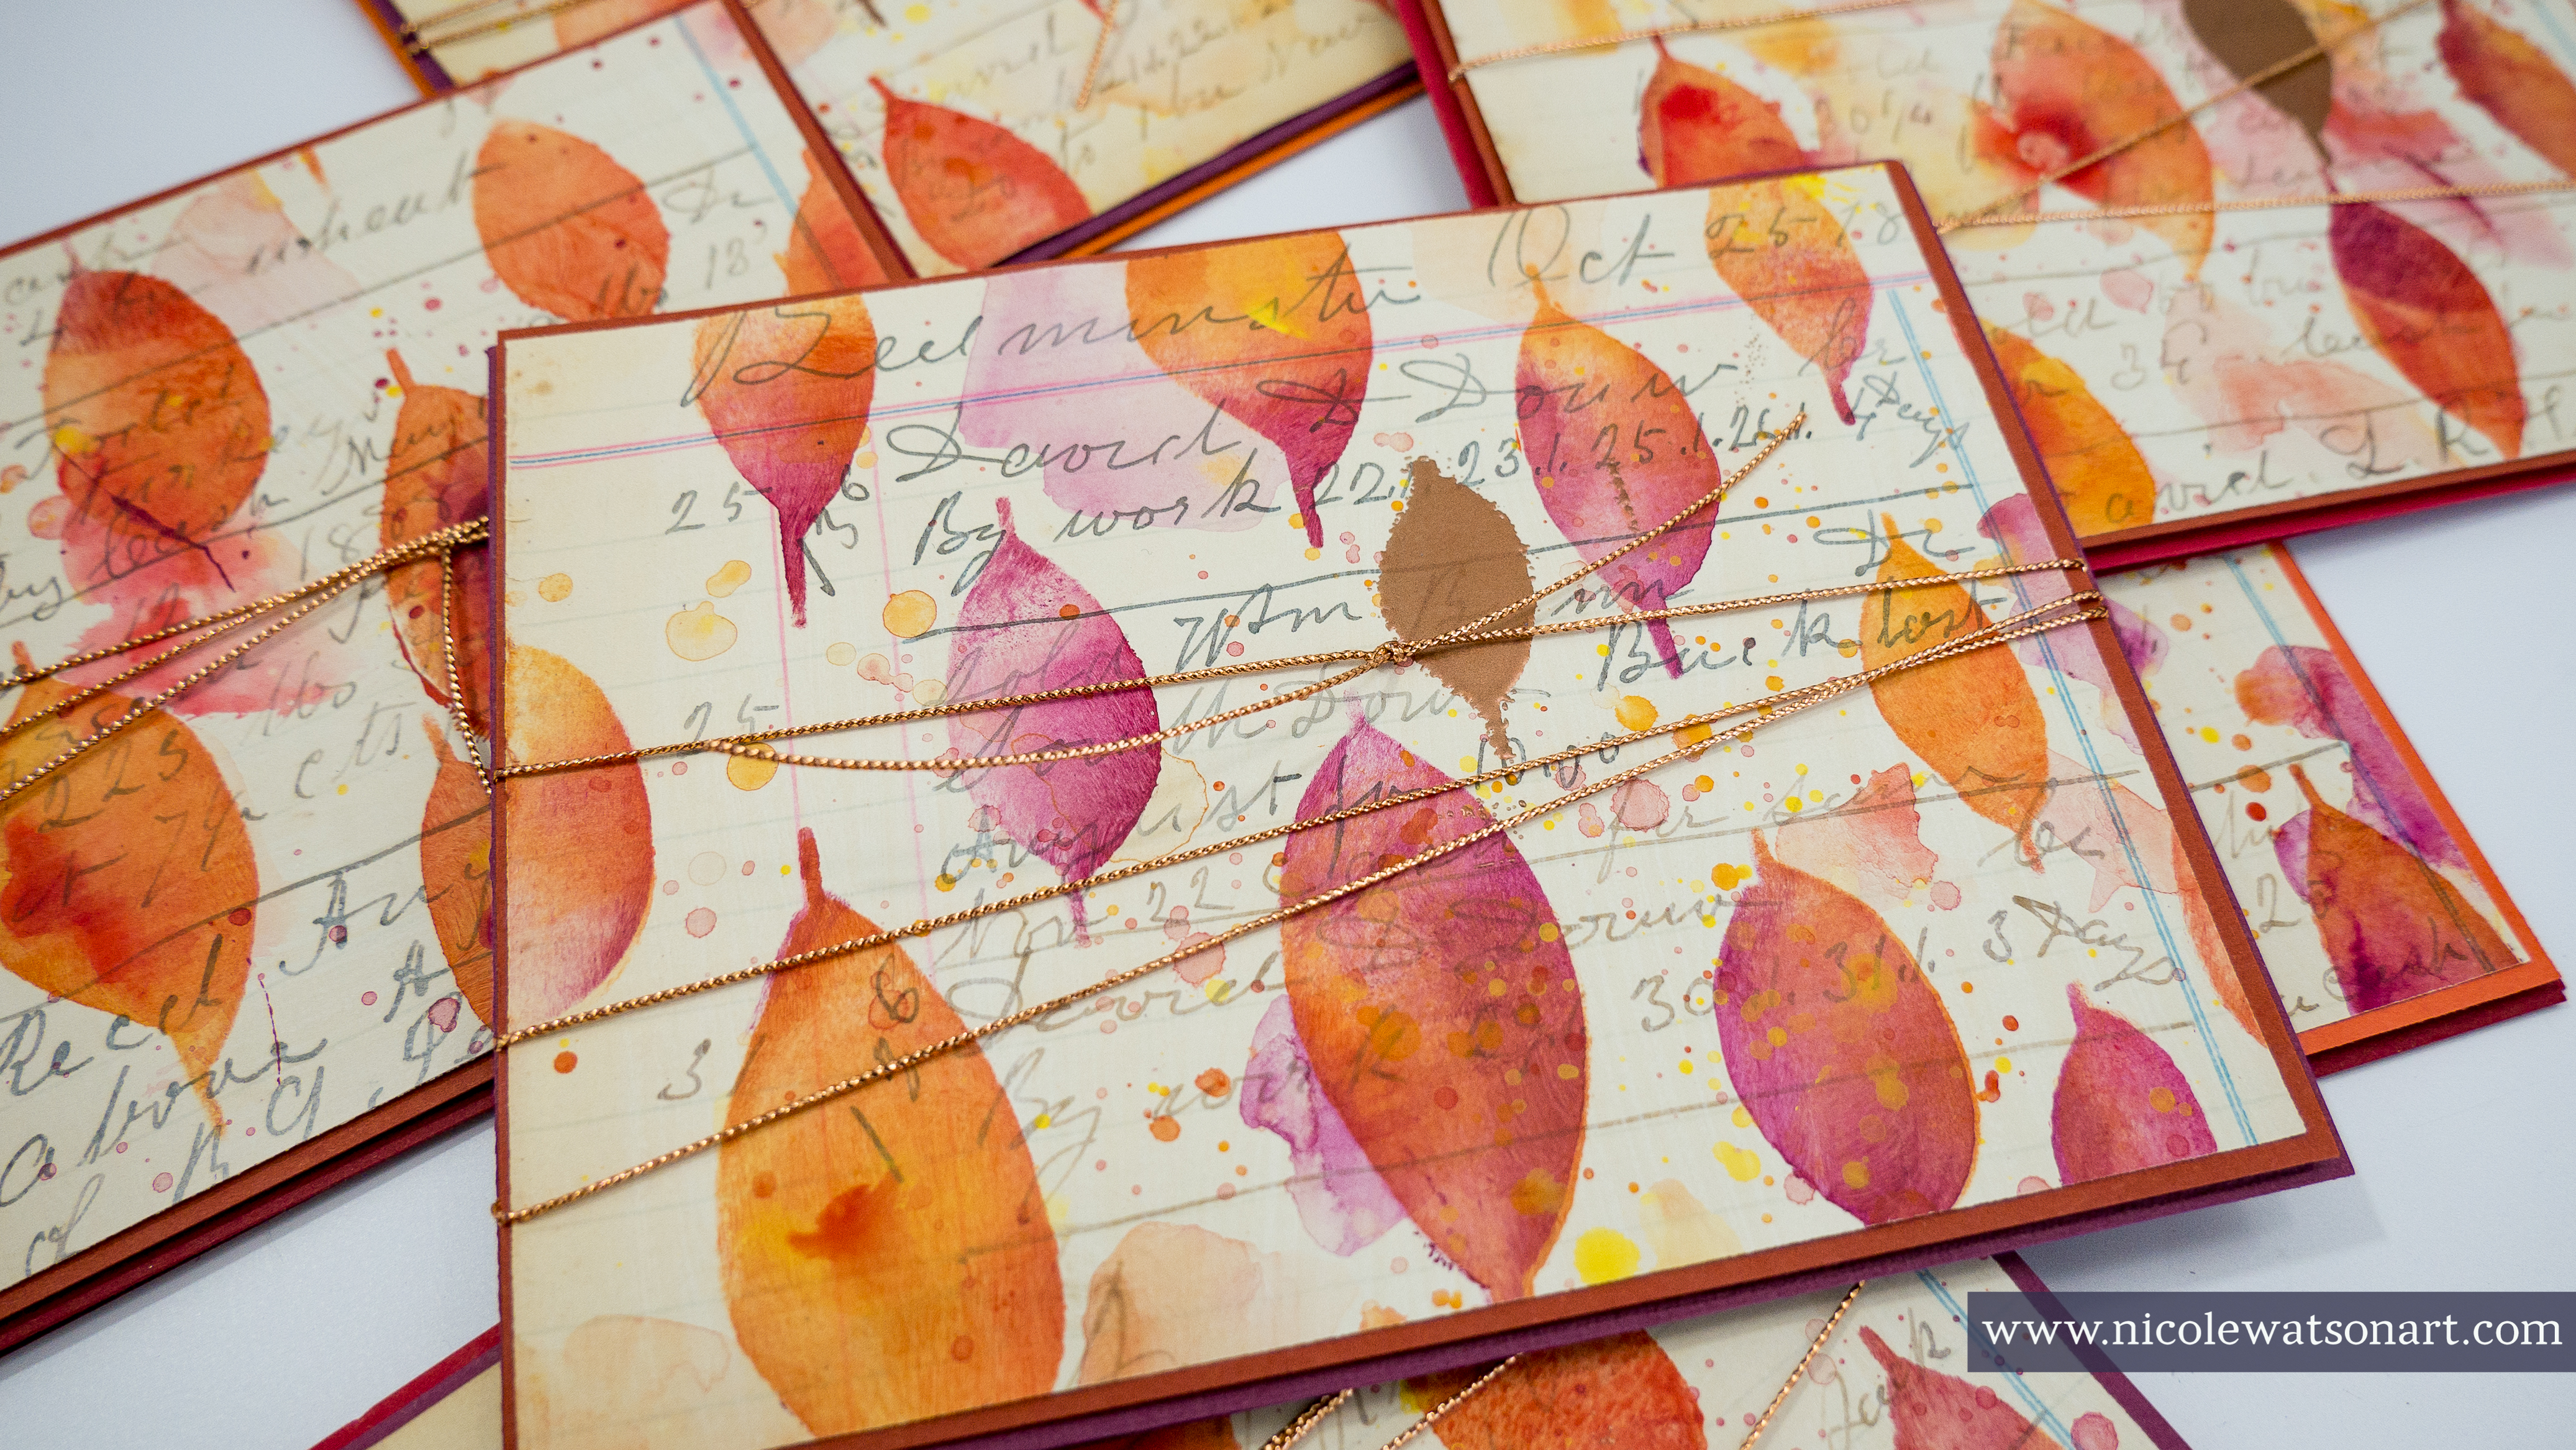
Begin with one of the fall colors. I like to start lighter and then progress to darker colors. (By the fourth ledger sheet, I just had fun and didn’t use that rule!) Use the sponge applicator to stencil loosely inside the leaf shapes. Don’t stencil prefect; keep some of the leaves half stenciled. Lift the stencil and repeat the process to fill maybe about half of the page or so. My favorite part about this particular stenciling process is that it does not have to be perfect.
Then, pick up another color and place the stencil in the same spots to add color to the leaves and complete the shape. Repeat this process with several colors on the page. All these colors mix beautifully together, so you do not have to worry about making mud. A quick note, if this isn’t making sense, I have a video of the process linked below!

Once the page is full of leaves, grab a paintbrush and add splatters, watered-down pools of color, and even paint a bit on top of the leaves. Use this process to add interest, grunge the page up a bit, and disguise any problem areas.

Repeat this process with several different color combinations on all of the ledger sheets.
When the sheets are dry, cut the pages into card fronts (mine are 4 by 5 ¼"), and also cut colored card stock into base cards and a layering card as well (the layer is 4 1/8 by 4 3/8").

At this point, you can assemble the cards as they are, or add some embellishments like I did.
I decided it would be fun to add one embossed leaf to the front, so I squished versamark ink through one of the leaves on the ledger page. I chose a spot that needed a leaf and whatever size leaf fit best. Be careful to not get the versamark anywhere else, by using a mask to prevent this.

Then, I sprinkled copper embossing powder on top and use a heat gun to melt it.

After repeating this process nine more times, I added the ledger sheets to the layering card. I felt they needed something else, so I wrapped them with some copper string.

I stuck the card front to the base with some dimensional foam adhesive.

When the cards were finished, I still had some leftover stenciled papers that were odd sizes, so I made some postcards with those.

This process was so much fun to make cards with. I anticipate myself making similar cards each season with a different stencil. Winter snowflakes, spring flowers, summer sunshine… or even shapes in seasonal colors. I’m getting excited just thinking about it!

Check out the process video below (or click here!):
I hope this inspires you to create some cards and send some happy mail! If you do, be sure to tag me on social media so I can see your beautiful art
Happy Fall!
-Nicole

Connect with me on
Stencil
- Ledger Paper
- Colored Cardstock
- Acrylic Paint (warm/fall colors)
- Gesso (white)
- Palette Paper
- Paper Trimmer
- Versamark Ink Pad
- Embossing Powder (copper)
- String (copper)
- Tape Gun
- Adhesive Foam
- Heat Gun
- Sponge/Foam Applicators

These cards are GORGEOUS! I was on the fence for the leaf stencil but now I have to have it! Thank you for this seasonal inspiration - in south Florida it is pretty much always summer so I can hardly wait to make these!!
ReplyDeletethank you so much! I completely understand the pretty much summer part - thankfully we get a small taste of fall and winter here. :)
DeleteHi! I'm working on these right now. But I'm having trouble understanding how to cut the colored paper as well as the stenciled paper. Is 1/8" difference about right?
ReplyDeleteI just saw your question - sorry! Typically I cut the layer 1/4" smaller for my single layers, and then when I double layer on top the card I use 1/8" -Nicole
Delete