Hello! Nicole here, and I’m really finding myself in a major creative slump after some time away from my studio. I had the perfect plan for this month’s blog post, and nothing worked!
After a few days of troubleshooting the project that didn’t happen, I sat creatively challenged and staring at my messy desk. Not only did I have to figure out a new plan, I had to clean up the old plan. Ugh.
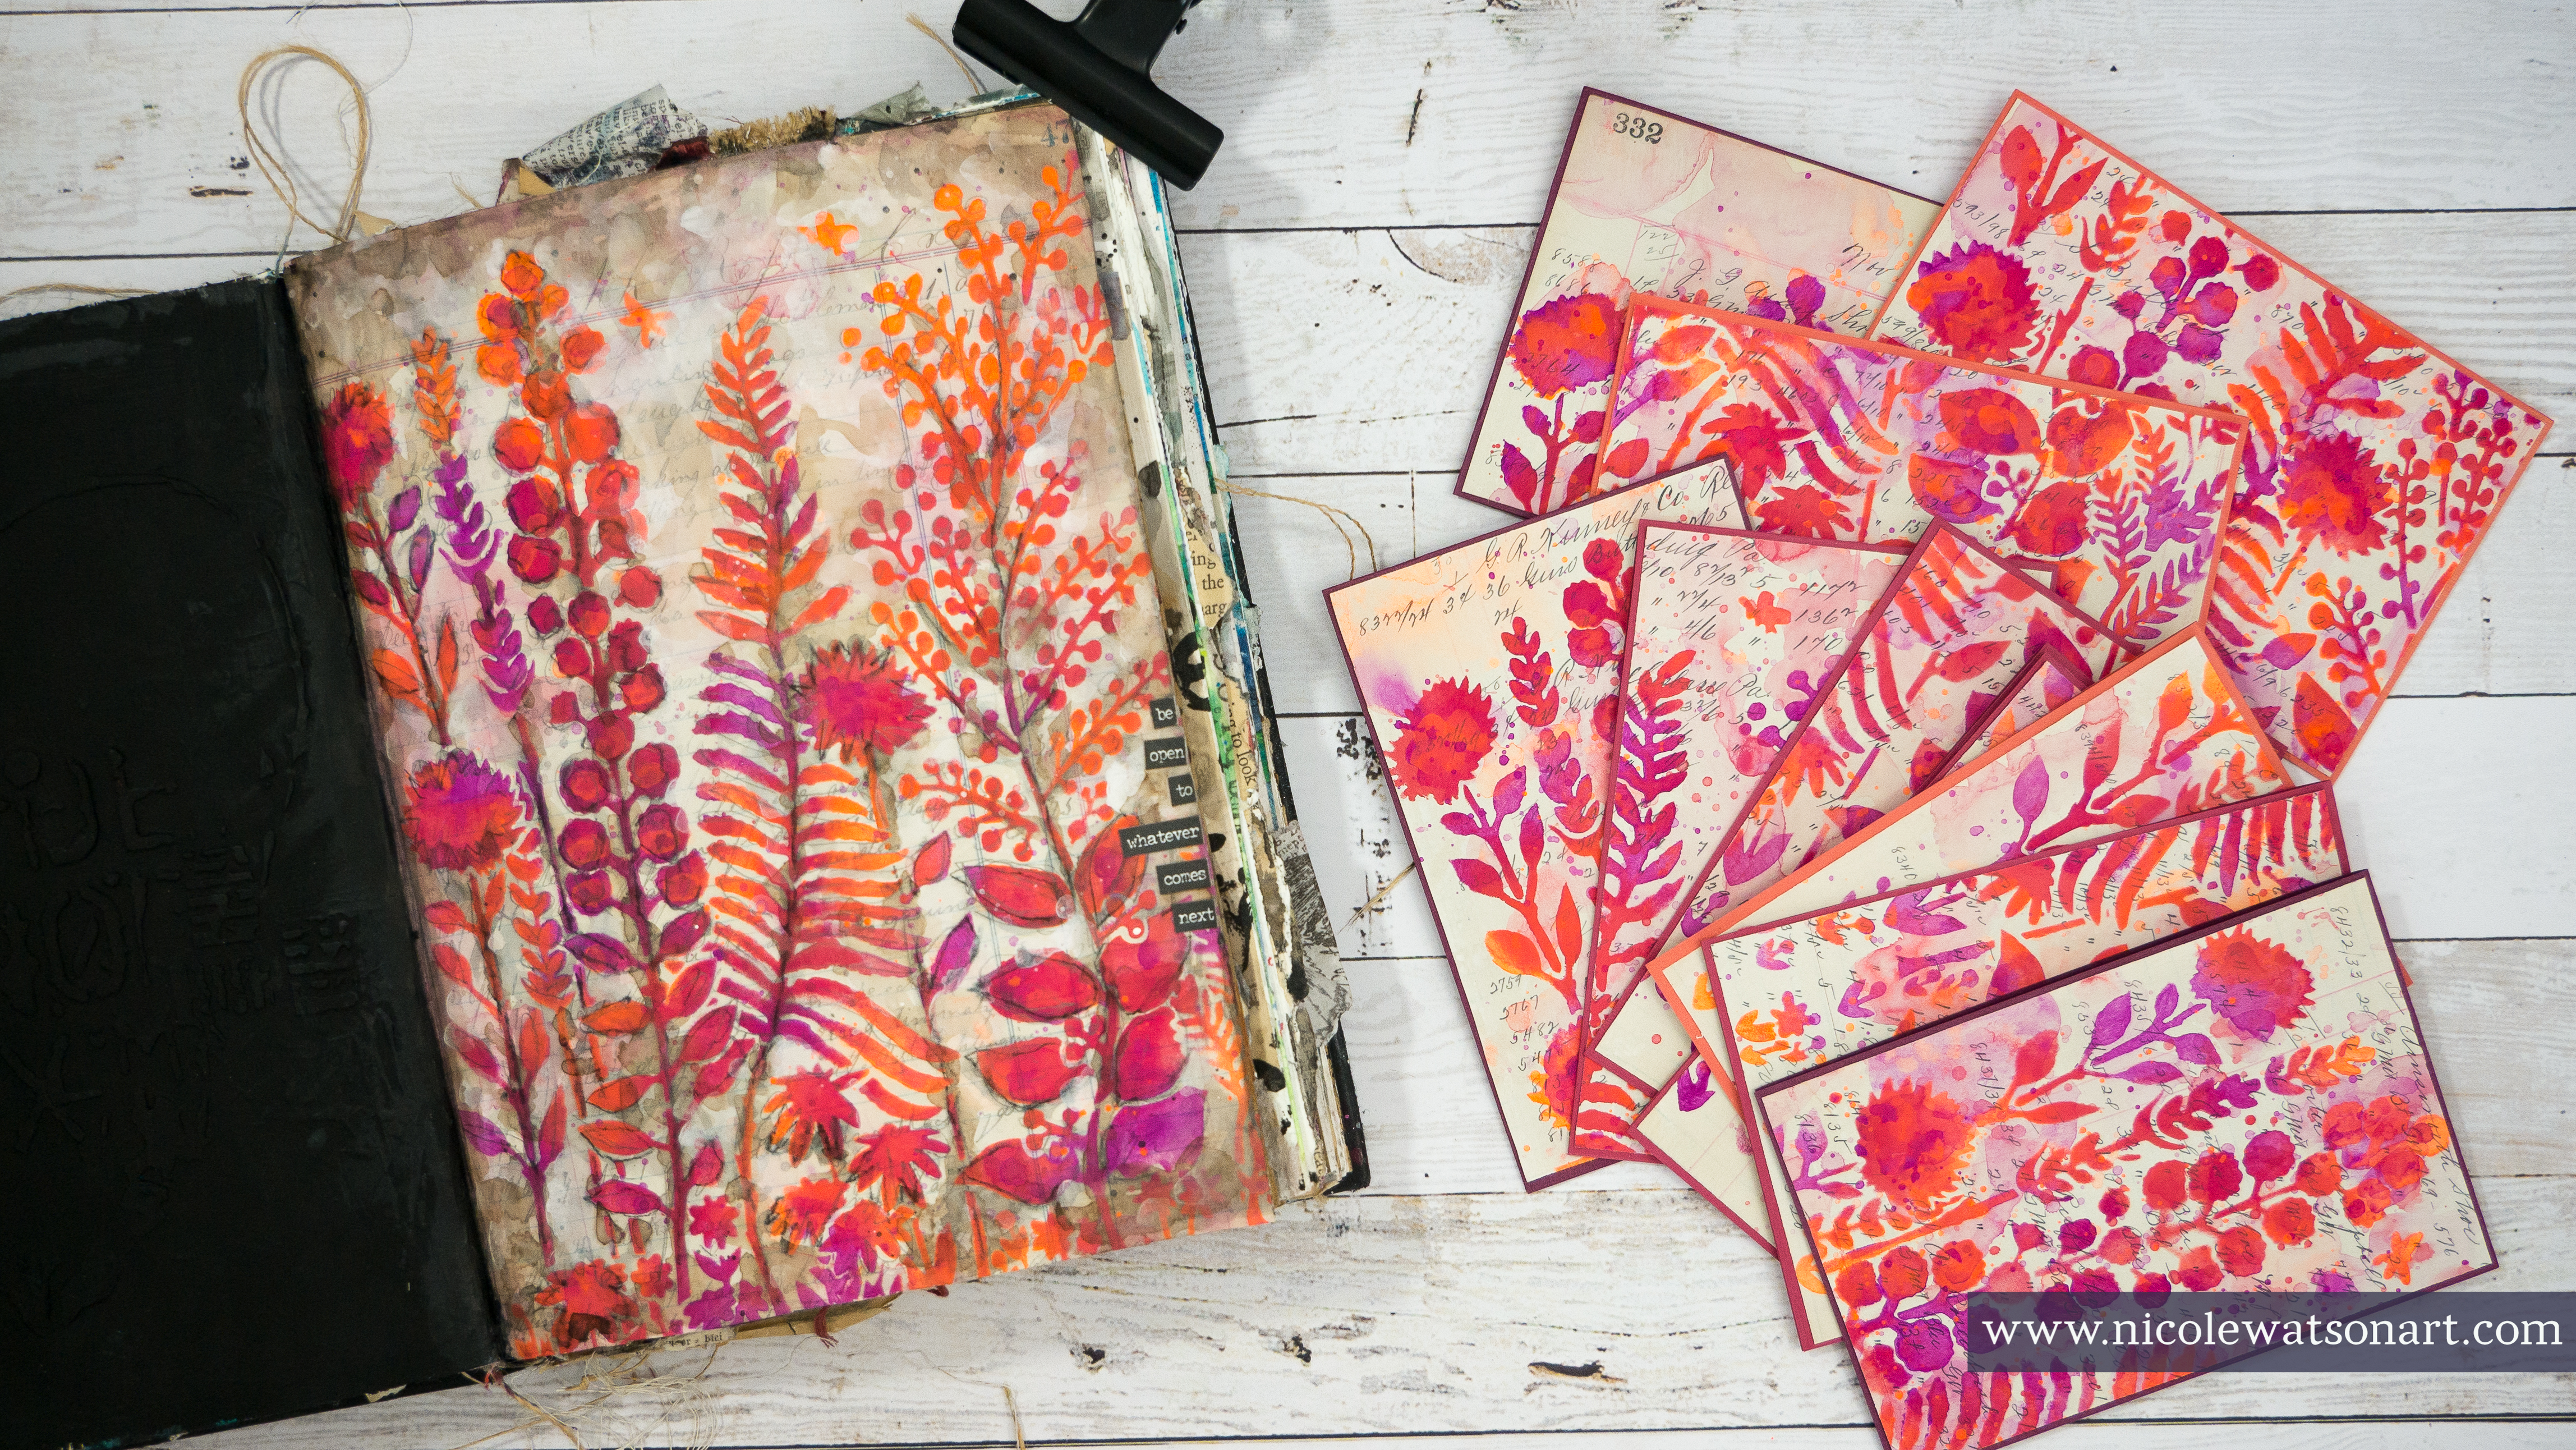
Avoiding the mess, I flipped through my pile of StencilGirl® stencils and the Tall Flowers one caught my eye. I brainstormed some ideas while cleaning and remembered that I needed to make some spring cards with graduations, Mother’s Day, weddings, showers, and other spring events around the corner.

I often replenish my card stash seasonally. In fact, I made some similar cards last fall with a leaf stencil. I began making cards when I was first married and realized that my family size nearly tripled. My style has changed, and now I really enjoy sending a little piece of my art in the mail.
This process isn’t much different than my previous post, however we’re using spring colors, a different stencil, and it’s even easier.
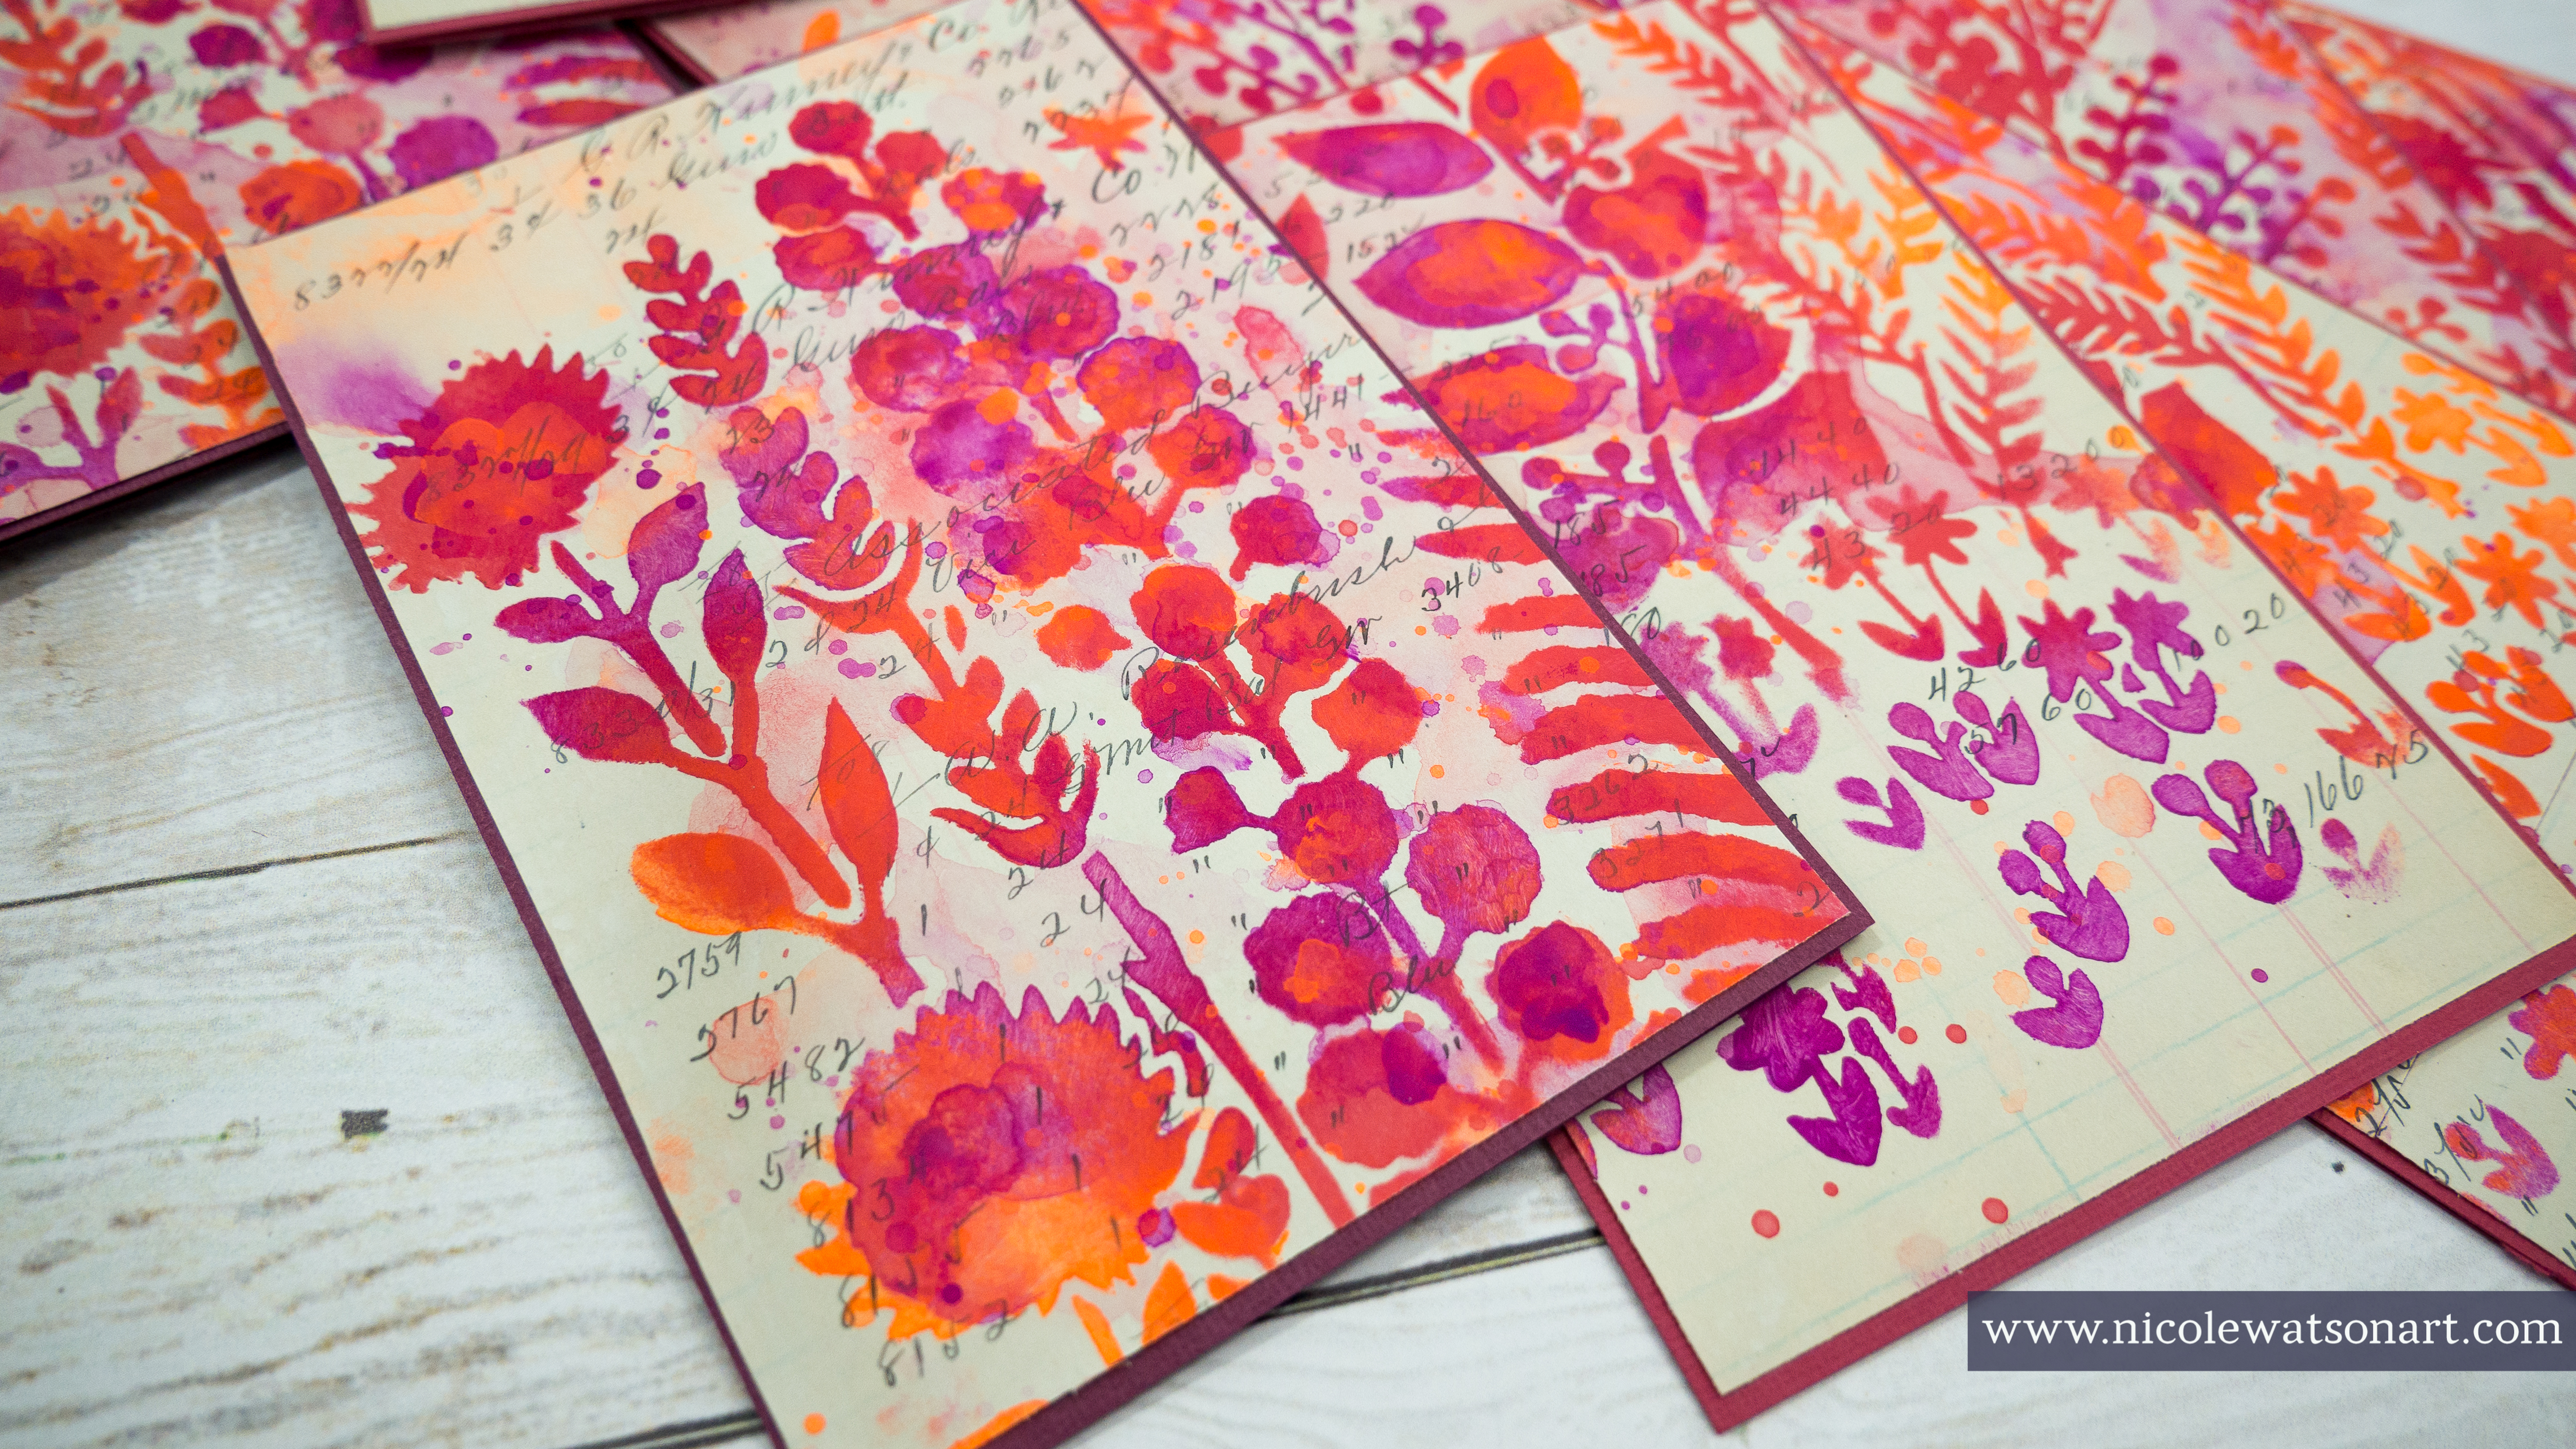
I began by lightly gessoing some ledger pages that I found loose in my paper stash. I have no idea where they came from (Thanks if you’re the one who sent them to me!), but they were the perfect size to get two card fronts across the top. I also gessoed one page to add to my art journal.

If you check my last card post, there’s a photo showing the difference between the gessoed and non-gessoed pages. It’s just a very light coating to protect the page as I add paint and water.
Once the pages were dry, I began to stencil. Since this stencil is a little more detailed, I taped it down to the ledger sheet and my table. I grabbed three colors that I knew would blend well together and used a sponge applicator tool for each one.

First, I stenciled with the Naphthol Pink, lifting the stencil a couple times to check my work.
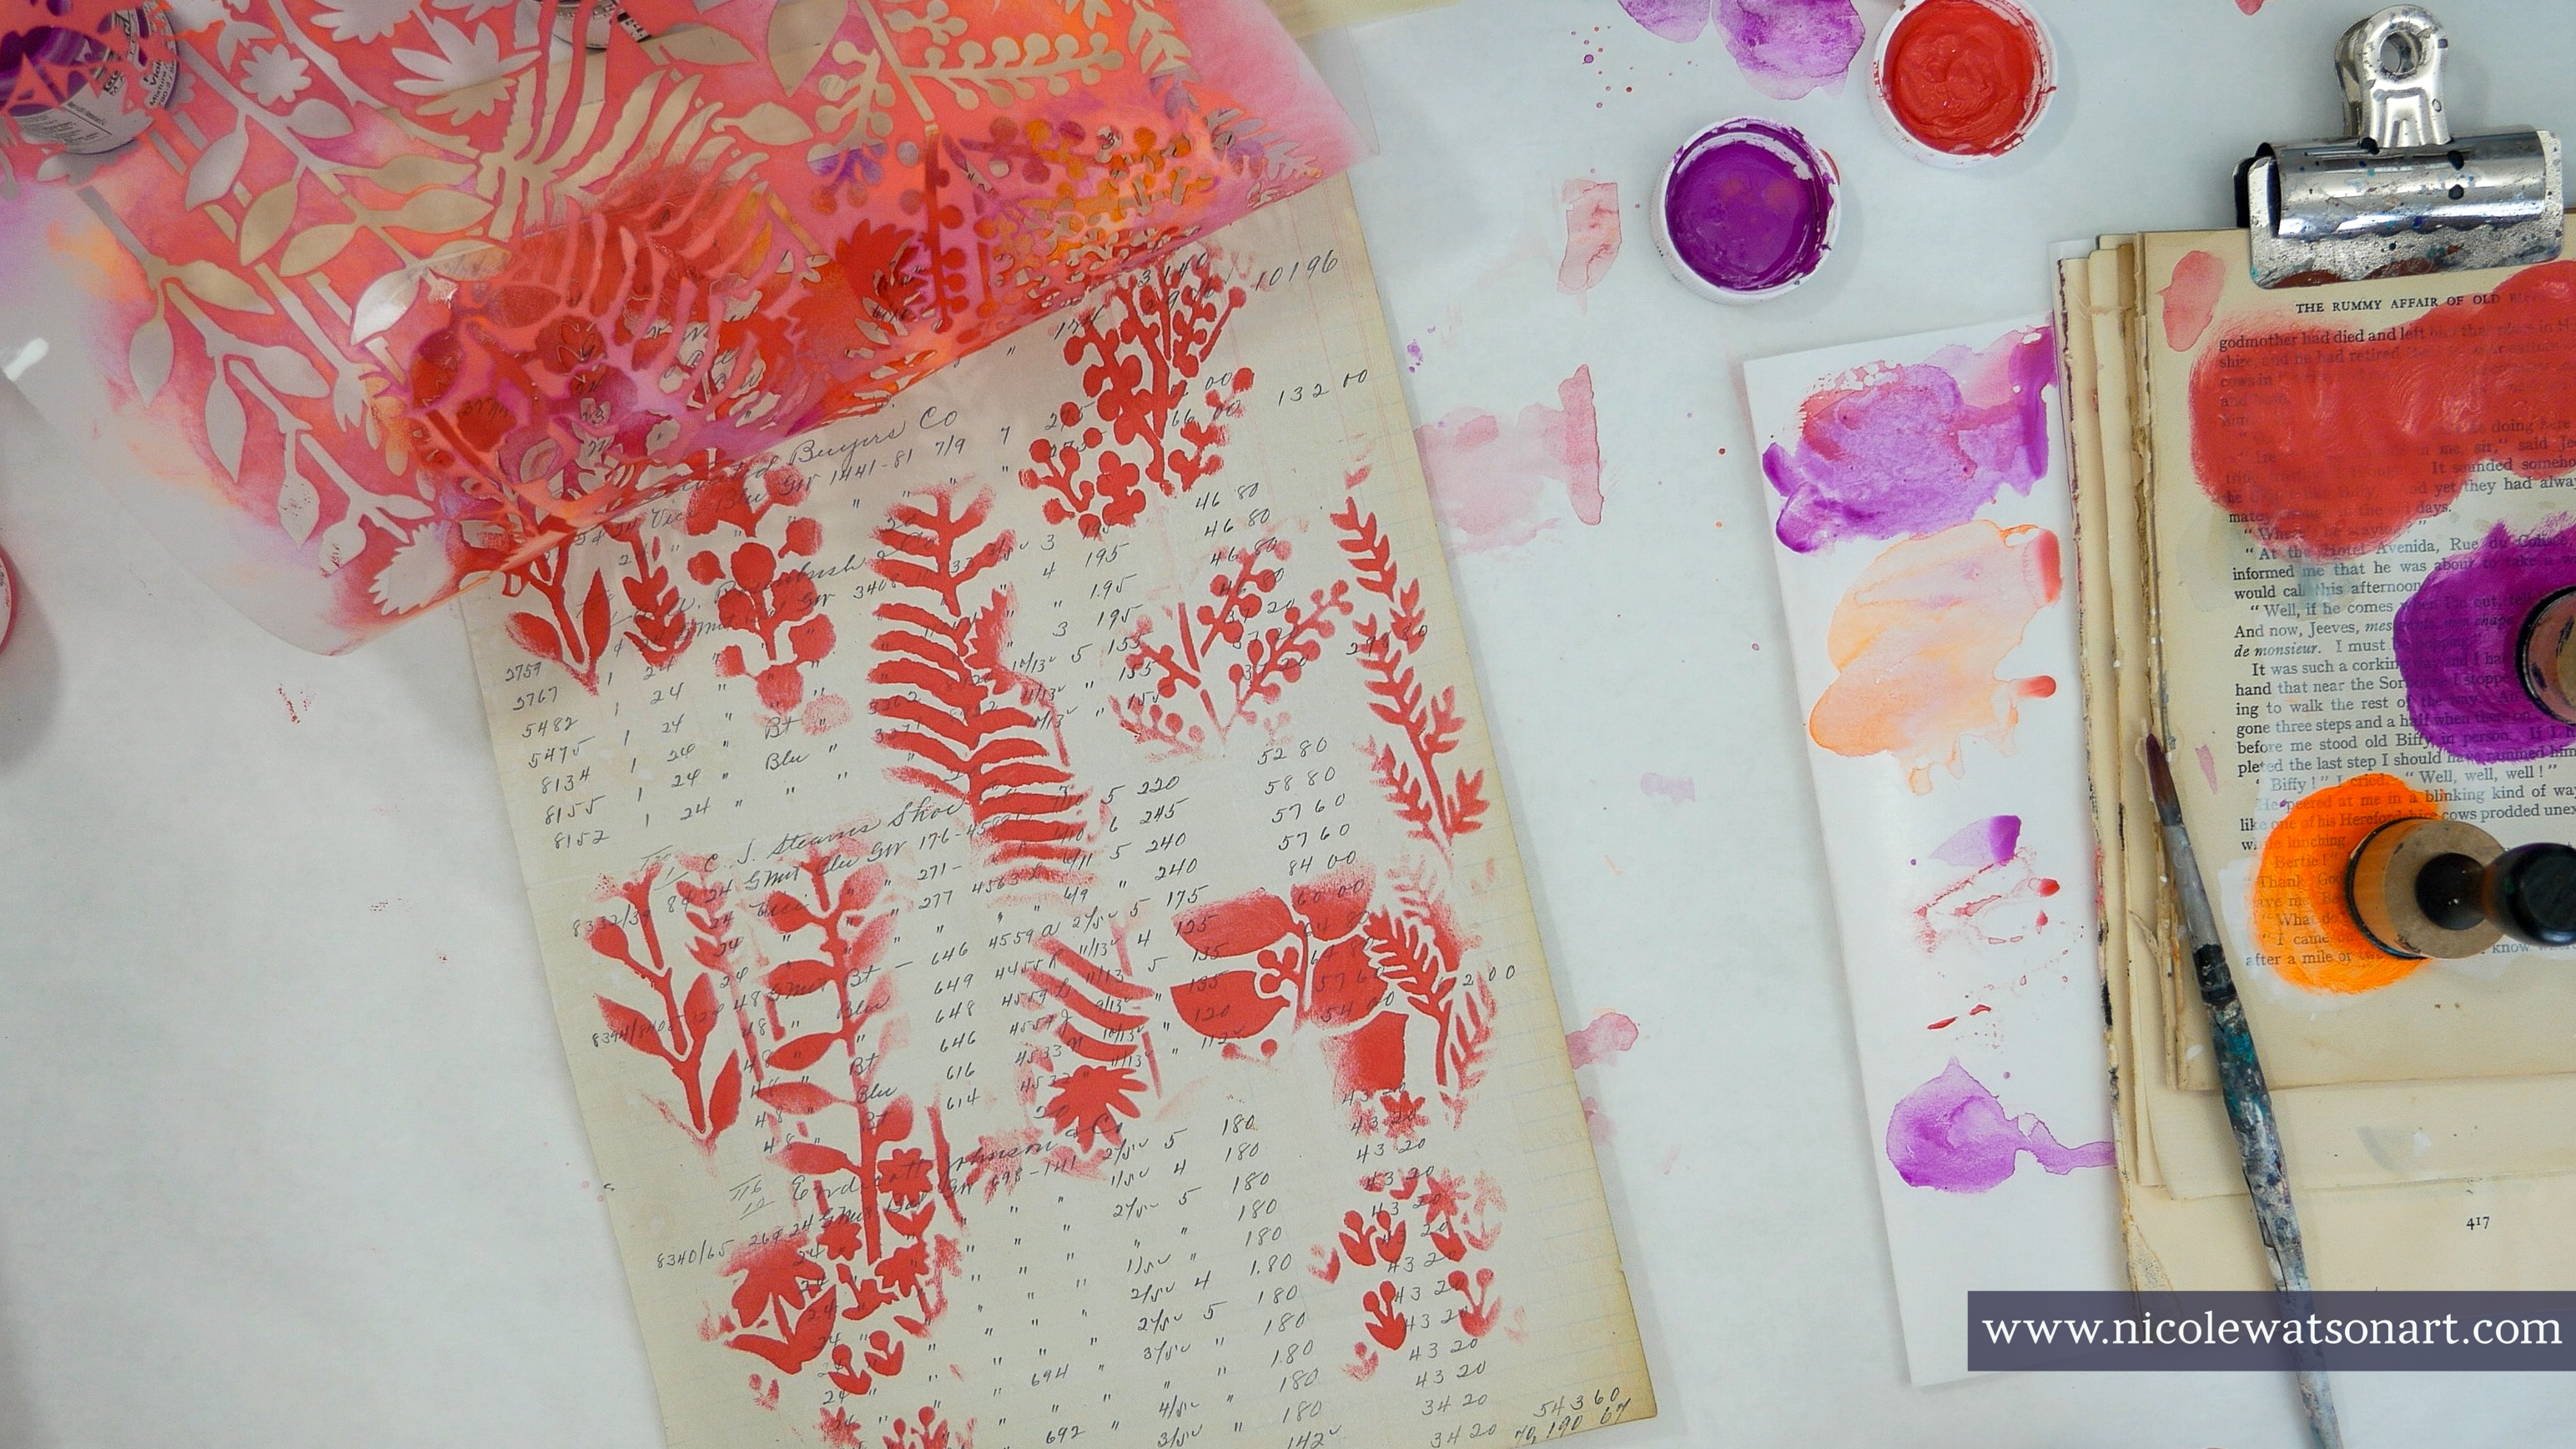
Then, I added the Fluorescent Violet, again checking the progress.

Last, I topped the stencil off with some Fluorescent Orange.
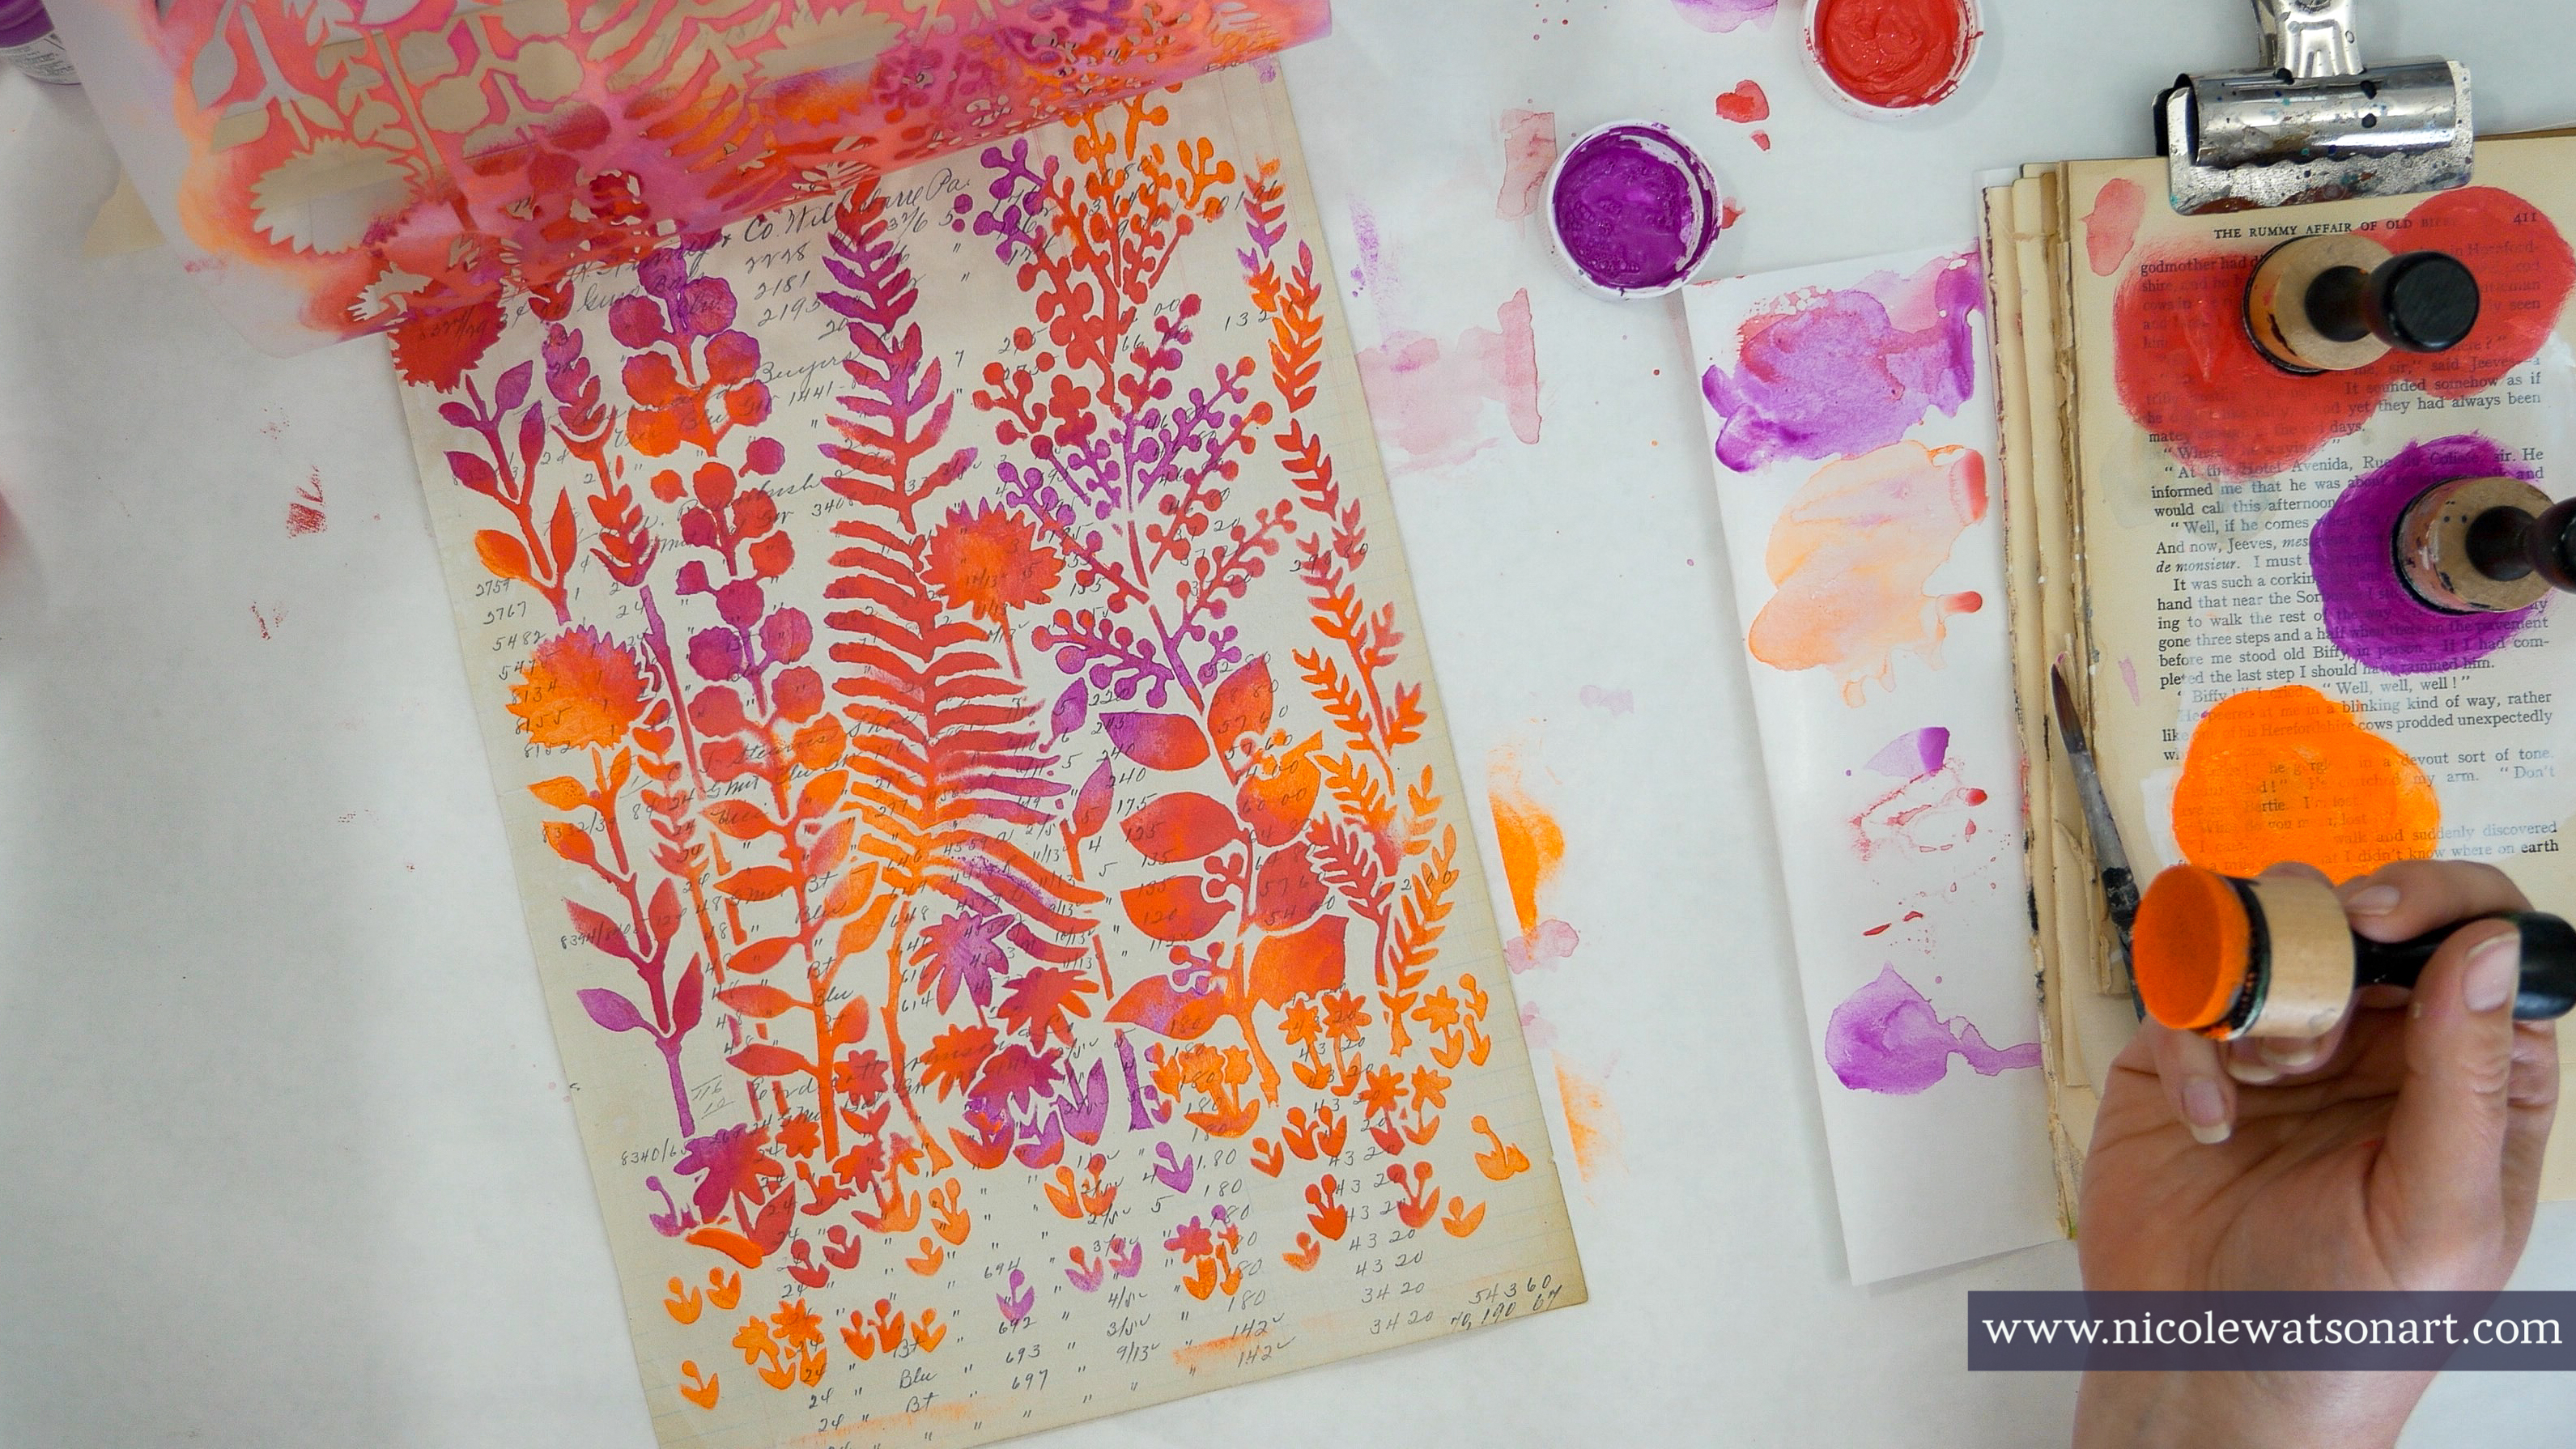
After all the stenciling was finished, I removed the tape and added some watered-down color plus some splattering. I like how this adds some of my style and personality to the stenciled image, and I’ll add even more later.

I repeated this process three more times for a total of three papers for cards and one for my art journal.
Once all that watery paint and spatters were dry, I lined up the papers and added a few more details. For example, on some of the darker violet flowers I added some of the fluorescent orange to give dimension and make them pop a bit.

Since the flower pattern is pretty detailed, I decided to keep the cards themselves pretty simple and didn’t add anything else. I cut 12x12 cardstock into 3 card bases (4x12") and then cut the ledger pages into my card fronts. They are just shy of 4x6", allowing for a small colored boarder of the cardstock around them.


For the final step, I folded the cardstock and adhered my stenciled images to the front.

Check out the process video here!
A few tips, tricks and ideas:
- Since the stencil is so detailed, use your hand to hold it down as you stencil through it. Your hand will get pretty messy, so wear a glove if that bothers you.
- Chose colors that blend well together. If you aren’t sure, test them out first.
- If you don’t have a ledger page, use a stamp with archival (waterproof ink) for some background texture. You could also use book pages or music sheets.
- Further enhance your stenciled images and cards with ribbons, stamps, stickers, or even trace and draw or doodle in the flowers.

Since I liked the stenciled image so much, I wanted to also include a page in my art journal.
After adhering the stenciled page with matte medium, I enhanced the image a bit with stabilo all (black and graphite), gesso, and walnut ink to add some grunge, shadows and shading. Then, I topped it off with a little sticker quote. These are all ideas you could also add to your card fronts.
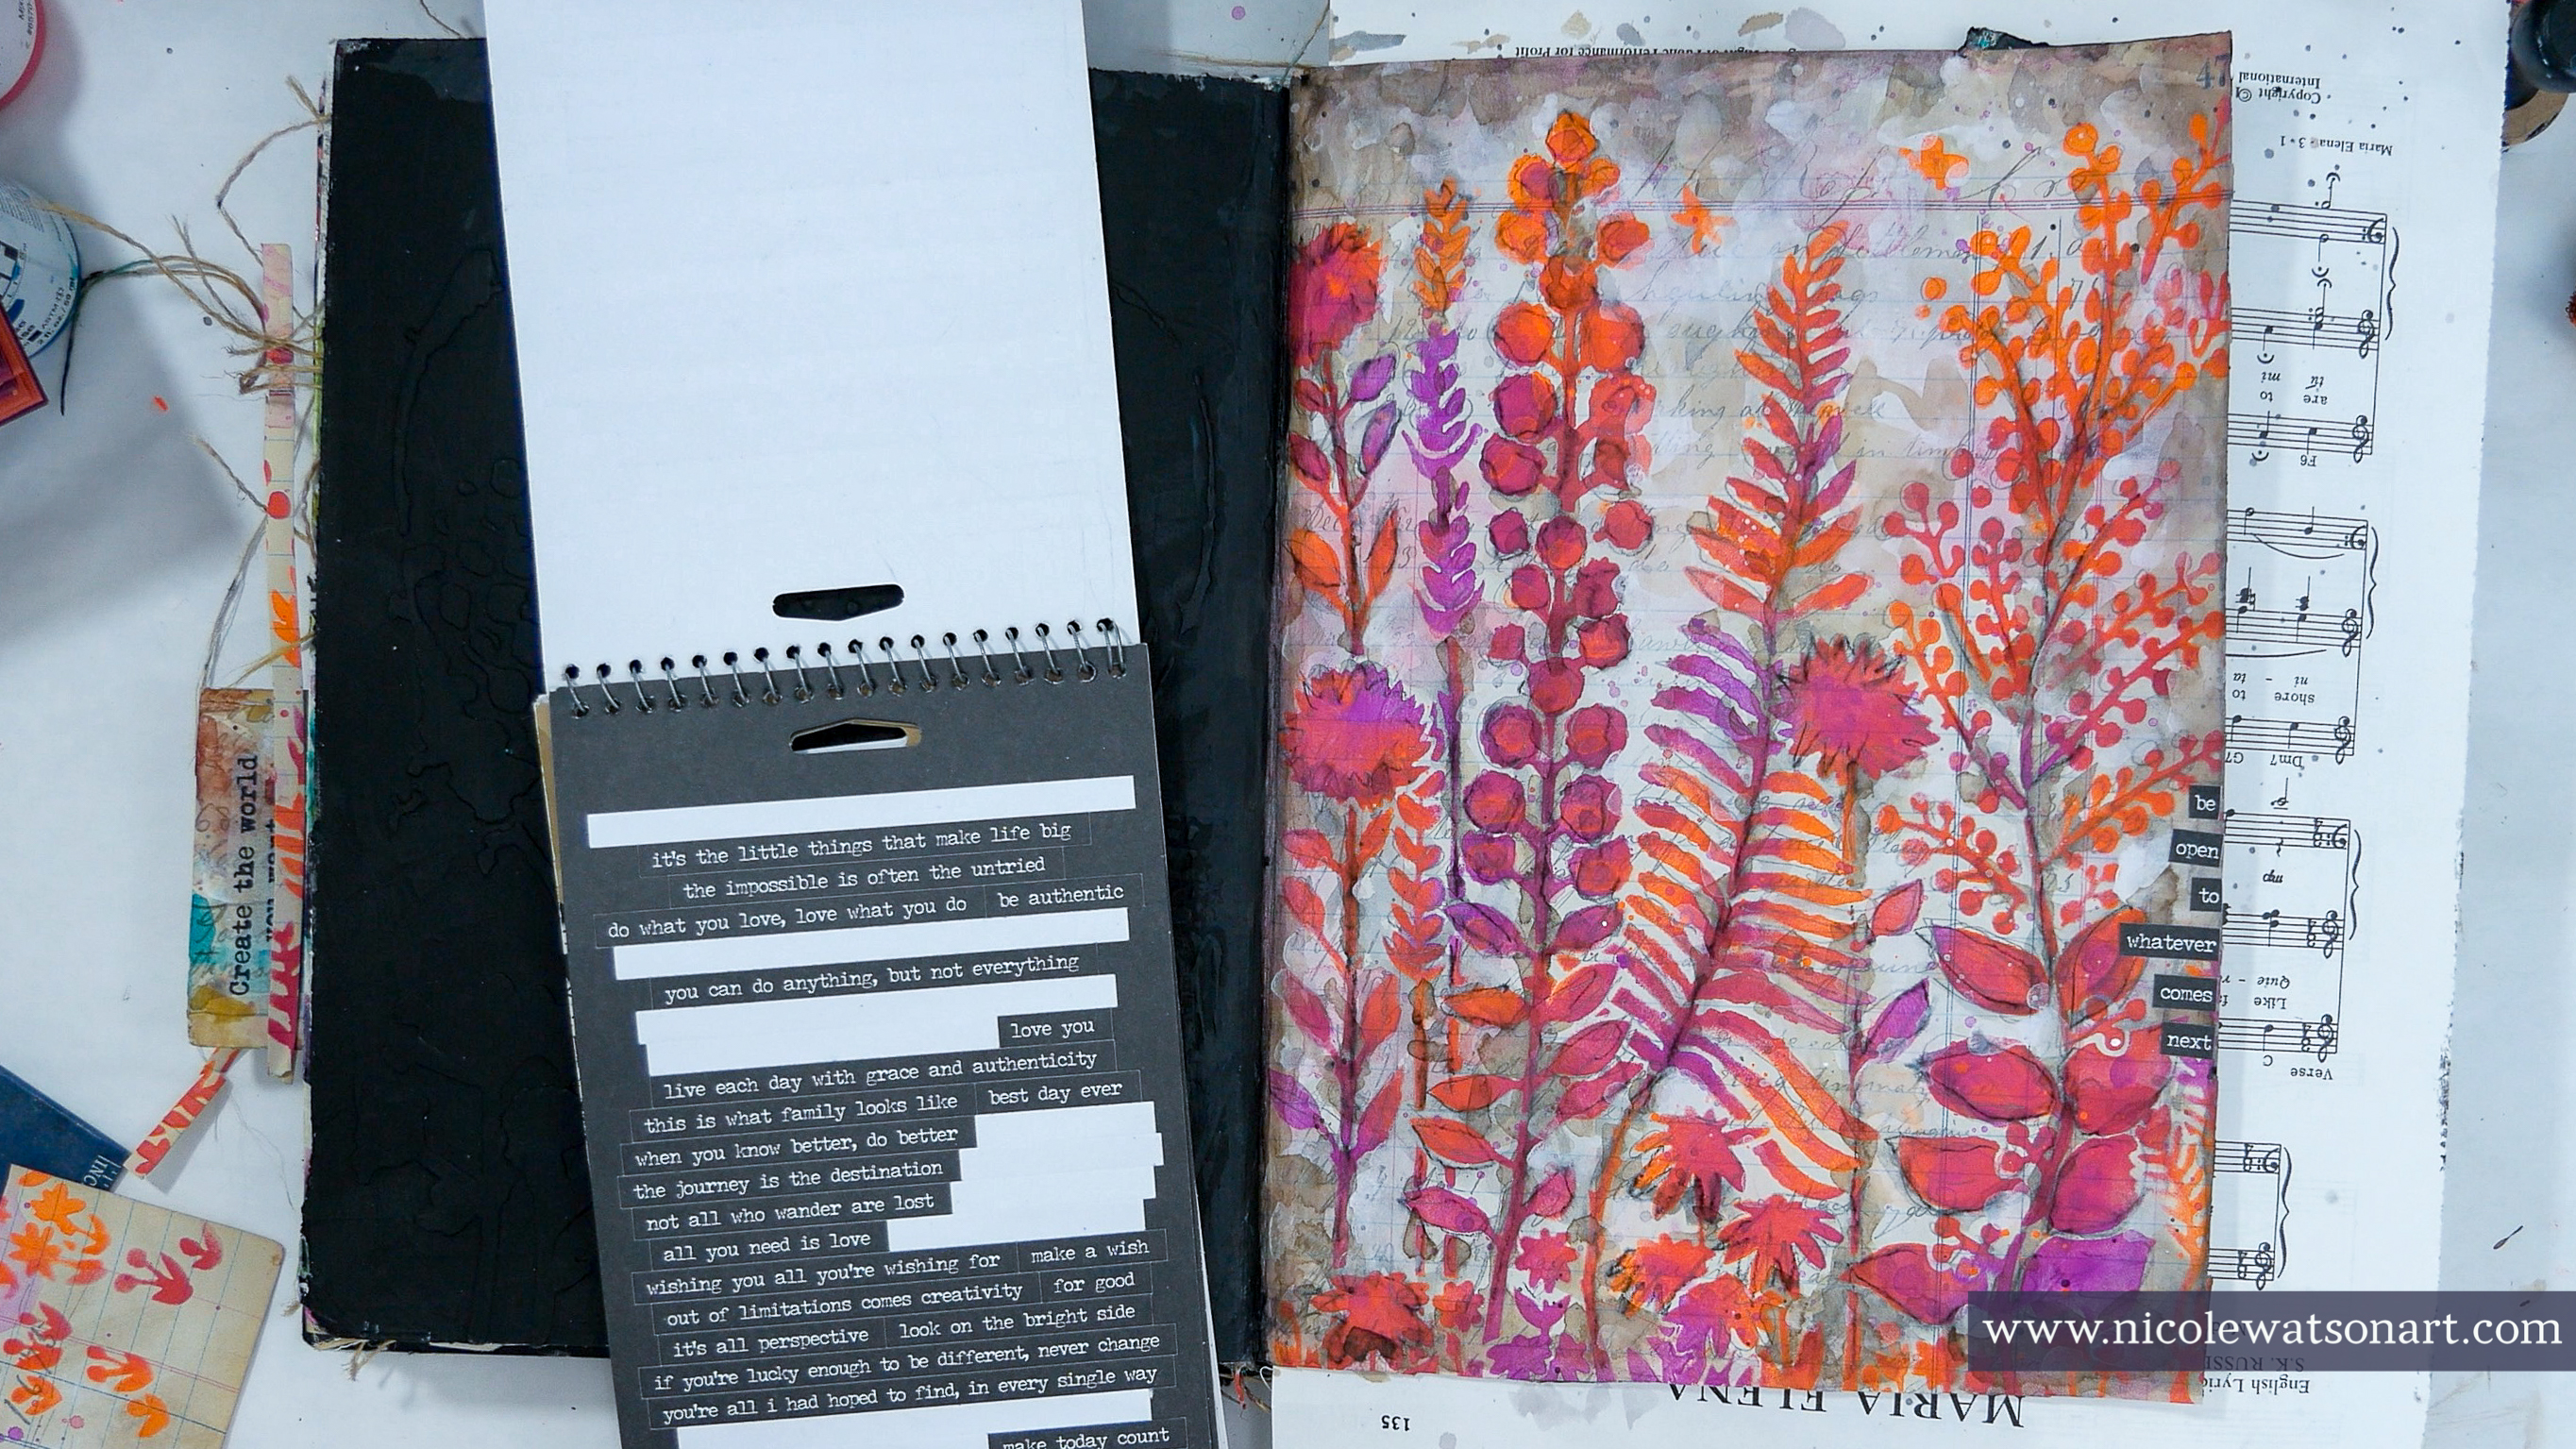
Here’s a little bonus video of how I added it to my journal.
I hope this inspires you to grab a stencil and make some cards today!
-Nicole

Stencil
Card Supplies
- Golden So Flat (fluorescent violet, fluorescent orange, naphthol pink)
- 12x12 Colored Card Stock
- Ledger Pages (or see alternative ideas above)
- Sponge Applicators
- Masking Tape
- Tape Runner Adhesive
Additional Journal Supplies
- Matte Medium
- White Gesso
- Stabilo All (black, graphite)
- Walnut Ink
- Quote Stickers
This is so bright and happy! Great idea.
ReplyDeletethank you so much!! :) -nicole
DeleteLove this! Wonderful😊
ReplyDeletethanks!! -nicole
Delete