StencilGirl®
Products has a wonderful selection of stencils to choose from and today’s
project was inspired by a set of stencils that themselves were inspired by
tiles. They are all sized 6 x 6” and designed by Laurie Mika. They are gorgeous
and I used three of them in today’s art. Here is the tutorial:
1. Take
a sheet of A3 sized (11.69 x 16.54”) watercolour paper and brayer on white
gesso. My sheet was by Crawford and Black
2. Spray
the sheet with a variety of spray paints. I used mainly Lindy’s Starburst
sprays for an extra bit of sparkle
3. Stencil randomly through the text stencil from March 2023 StencilClub using Titanium White acrylic paint.

4. Using a variety of colours stencil randomly over the sheet using a cosmetic wedge and stencil L921 Japanese Tulip Oriental Rug.

5. Repeat step 3.

6. Repeat step 4 but using different colours of acrylic paint and stencils S933 Lisbon Tiles, S932 Douro Valley Tile and S931 Cascais Tile.
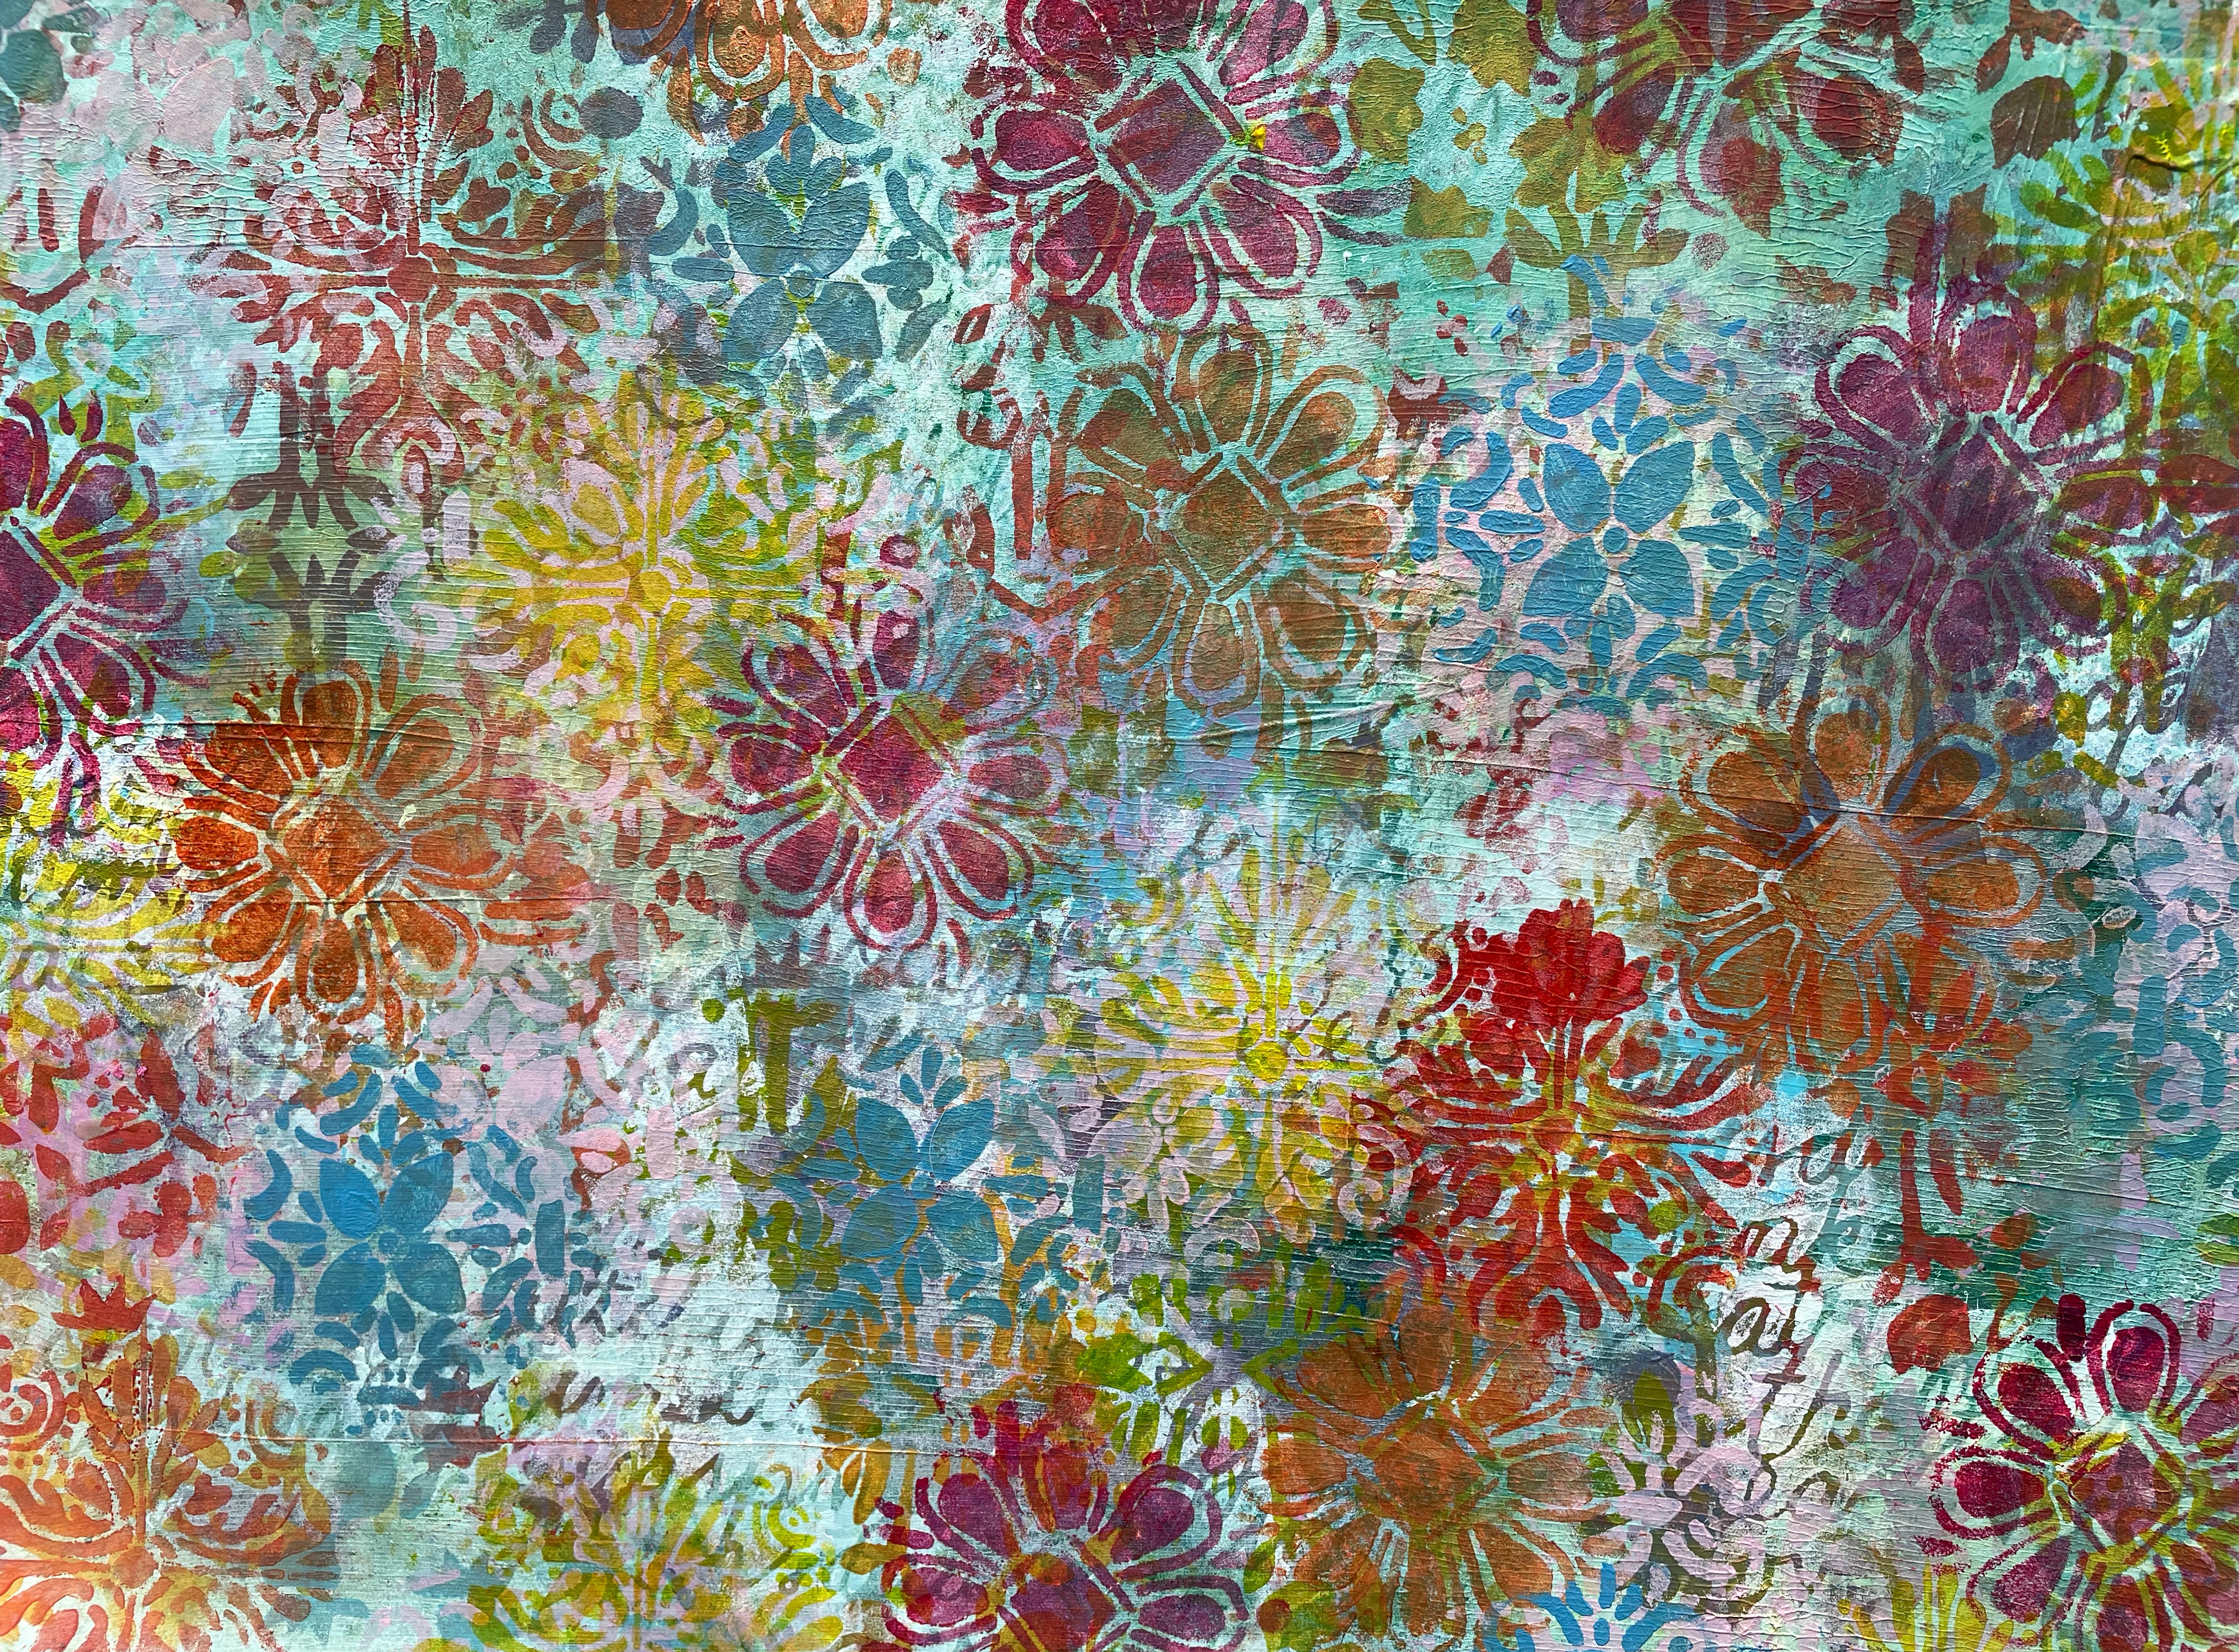
7. Using black acrylic paint and stencil L281 Bold Flowers, stencil on flowers pointing towards the centre of the page. To make this easier I cut the stencil into individual flower parts. I used 3 different sizes of flower.

8. Add white text to the black flowers by putting the stencil pieces you used in step 7 on the black flowers and then adding the text stencil from step 3 on top of that and then stencilling with Titanium White acrylic paint using a cosmetic wedge.

9. Using stencil S931 Cascais Tile and crimson Stencil Butter paint, stencil the tile twice onto black paper.

10. When dry, cut out the two tiles and cut one in half. Glue onto the sheet as shown. I used double sided tape, but gel medium will also work.

11. Using
the small alphabet stencil from the April
2014 Stencilgirl® Club and a red Posca (or other) permanent paint marker
stencil on your chosen quotation onto black paper, cut out and add to the sheet
as shown
12. Using a white Posca marker, outline the tiles and the text.

13. Add a black frame of approx. ¼” around the sheet with a black Posca marker.


©Frieda
Oxenham May 2023
This is brilliant!!!! I never thought to just keep going and going! Or to create an A3!! Thank you!!
ReplyDelete