

Servus, hi and welcome to today's share of weathered textural - easy to make - goodness!
I was in need of some wall decoration for our guest room (which is our son's room in the first place when he stays with us in the house) and as we are living in a solid wood house surrounded by mountains, lakes, fields and forests, I wanted this home decor piece to reflect all of that.


What did I use to create my mobile?


I primed the different pairs with different shades and mixes of beige DecoArt Chalky Gesso, brown Vintage Effect Wash and Dark Chocolate Americana acrylic paint. I also made sure there were a lot of brush strokes visible as that adds to the textural feel of the project.
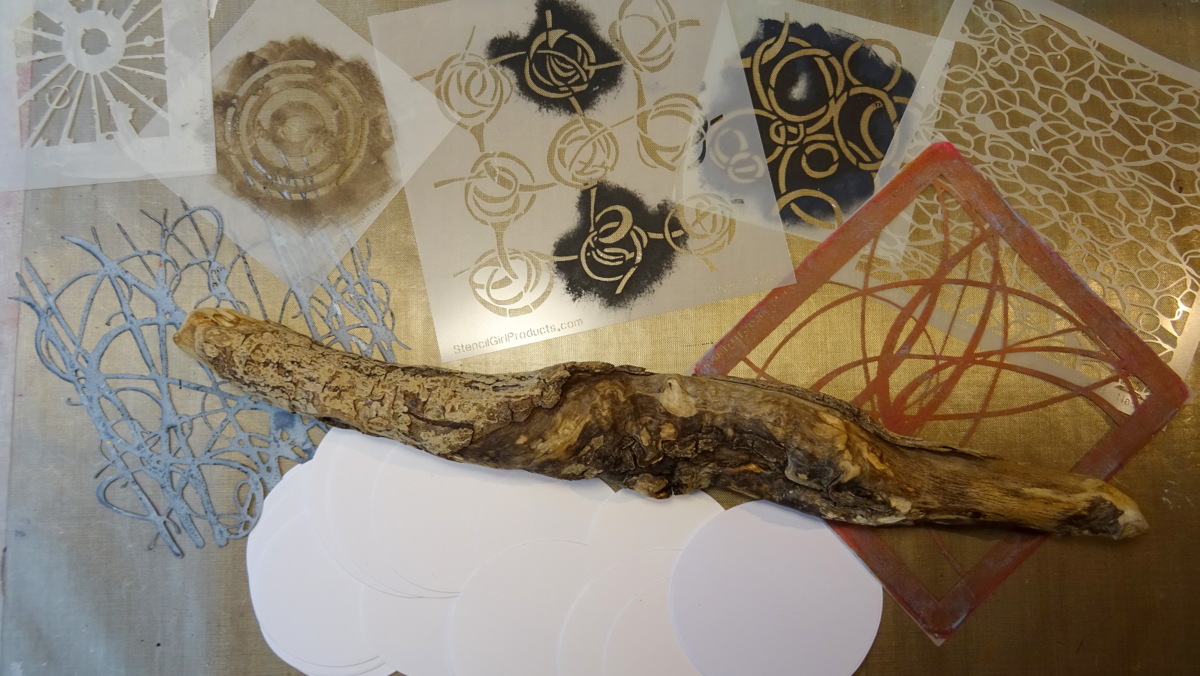
As you can see in the picture, I've used a piece of drift wood from the lake (about 40cm/16"), sixteen die cut card stock discs in two different sizes and a collection of StencilGirl stencils that provide patterns especially apt to create intriguing (abstract) detail when using only a small section of the design.
In this case I've used Seth Apter's Urban Insiders Square Stencil (M058) and Techno Inisiders Circle Stencil (M086), Mary Beth Shaw's Curves (S430), Scribble Roses (S525) and the smallest stencil from the StencilClub October 2016 - Mary Beth's Private Collection - set, Mary Nasser's Abstract Water surface stencil (S898) and Trish McKinney's Dune Grass mask (S659) to play with.
I die cut my sixteen circles using the two moon background cutting dies from the Tim Holtz "Moonlight" dies set. What I especially like about these is them not being perfect circles. Instead they are a bit wonky in shape and the set provides them in two different sizes - perfect for a make that was meant to have a nature feel to it.


The DecoArt media Texture Sand Paste was of course not easy to apply through the Scribbly Roses stencil. As it wasn't possible to apply it evenly with a palette knife, I rather dabbed it on here and there and tried to remove the stencil as carefully as possible. The highly textural result though was such a reward! I love it!

Of course - REMINDER! - I immediately put all the used stencils into a pan filled with hand warm water, so none of the pastes would dry and permanently stick to the stencils (and thus ruin them). Keeping them in the pan underwater makes cleaning afterwards a piece of cake and you can go on working on your project without having to run to the sink to clean each stencil right after use each time.
As most pastes do bubble when you use a heat tool to speed up the drying process, I decided to let my texture discs dry naturally overnight. This way I could be sure none of the pastes would react when being heavily loaded with paint washes (which was the plan for the next day).
I used heavily diluted DecoArt media fluid acrylic Raw Umber and a wide soft brush to apply the wash quite loosely here and there to my circles, making sure the paint would create puddles here and there. I wanted an as uneven as possible result, so I got really messy and repeated the wash step several times (as sometimes you only see how much pigment has really ended up in a spot once it has dried...often the wet spot looks a lot darker and you find you have to go in again after it has dried).


I made sure each texture circle sat at a different height compared to the neighbouring strings to add as much natural "randomness" to my make as possible. The three strings were then simply tied to the drift wood piece and that got a cord loop as a hanging device. Done!


Our son's/guest room really needed some piece of atmospheric decoration and I was absolutely happy with how my nature inspired mobile turned out. And of course the texture-stencilling-experimenting session was great fun, too!


Hugs,
Claudia xxx
.jpg)
Claudia, wonderful! Your sharing of happy accidents was inspiring and fun, it is sort of a mad scientist discovering this or that, Yea for you!
ReplyDeleteThank you very much, Linda! Yes - the happy accidents really deserve to be embraced, don't they? xxx
DeleteAll the texture play and randomness is beautifully inspiring.....hmmm- I feel some serious art time coming up😉. Thank you!
ReplyDeleteThank YOU for the kind words! Have fun! x
Delete