Showing posts with label Valerie Sjodin stencils. Show all posts

Tuesday, February 6, 2024

How to Create Pendants and Earrings Using Polymer Clay and StencilGirl Stencils

Hello everyone!  Jane Bellante here, and I'm back today to show you how to use your StencilGirl stencils and masks to create jewelry with polymer clay.

I love experimenting with polymer clay, and I just knew that I could create some fun pendants and beads with the Garden Flowers Tile Mask by Valerie Sjodin.

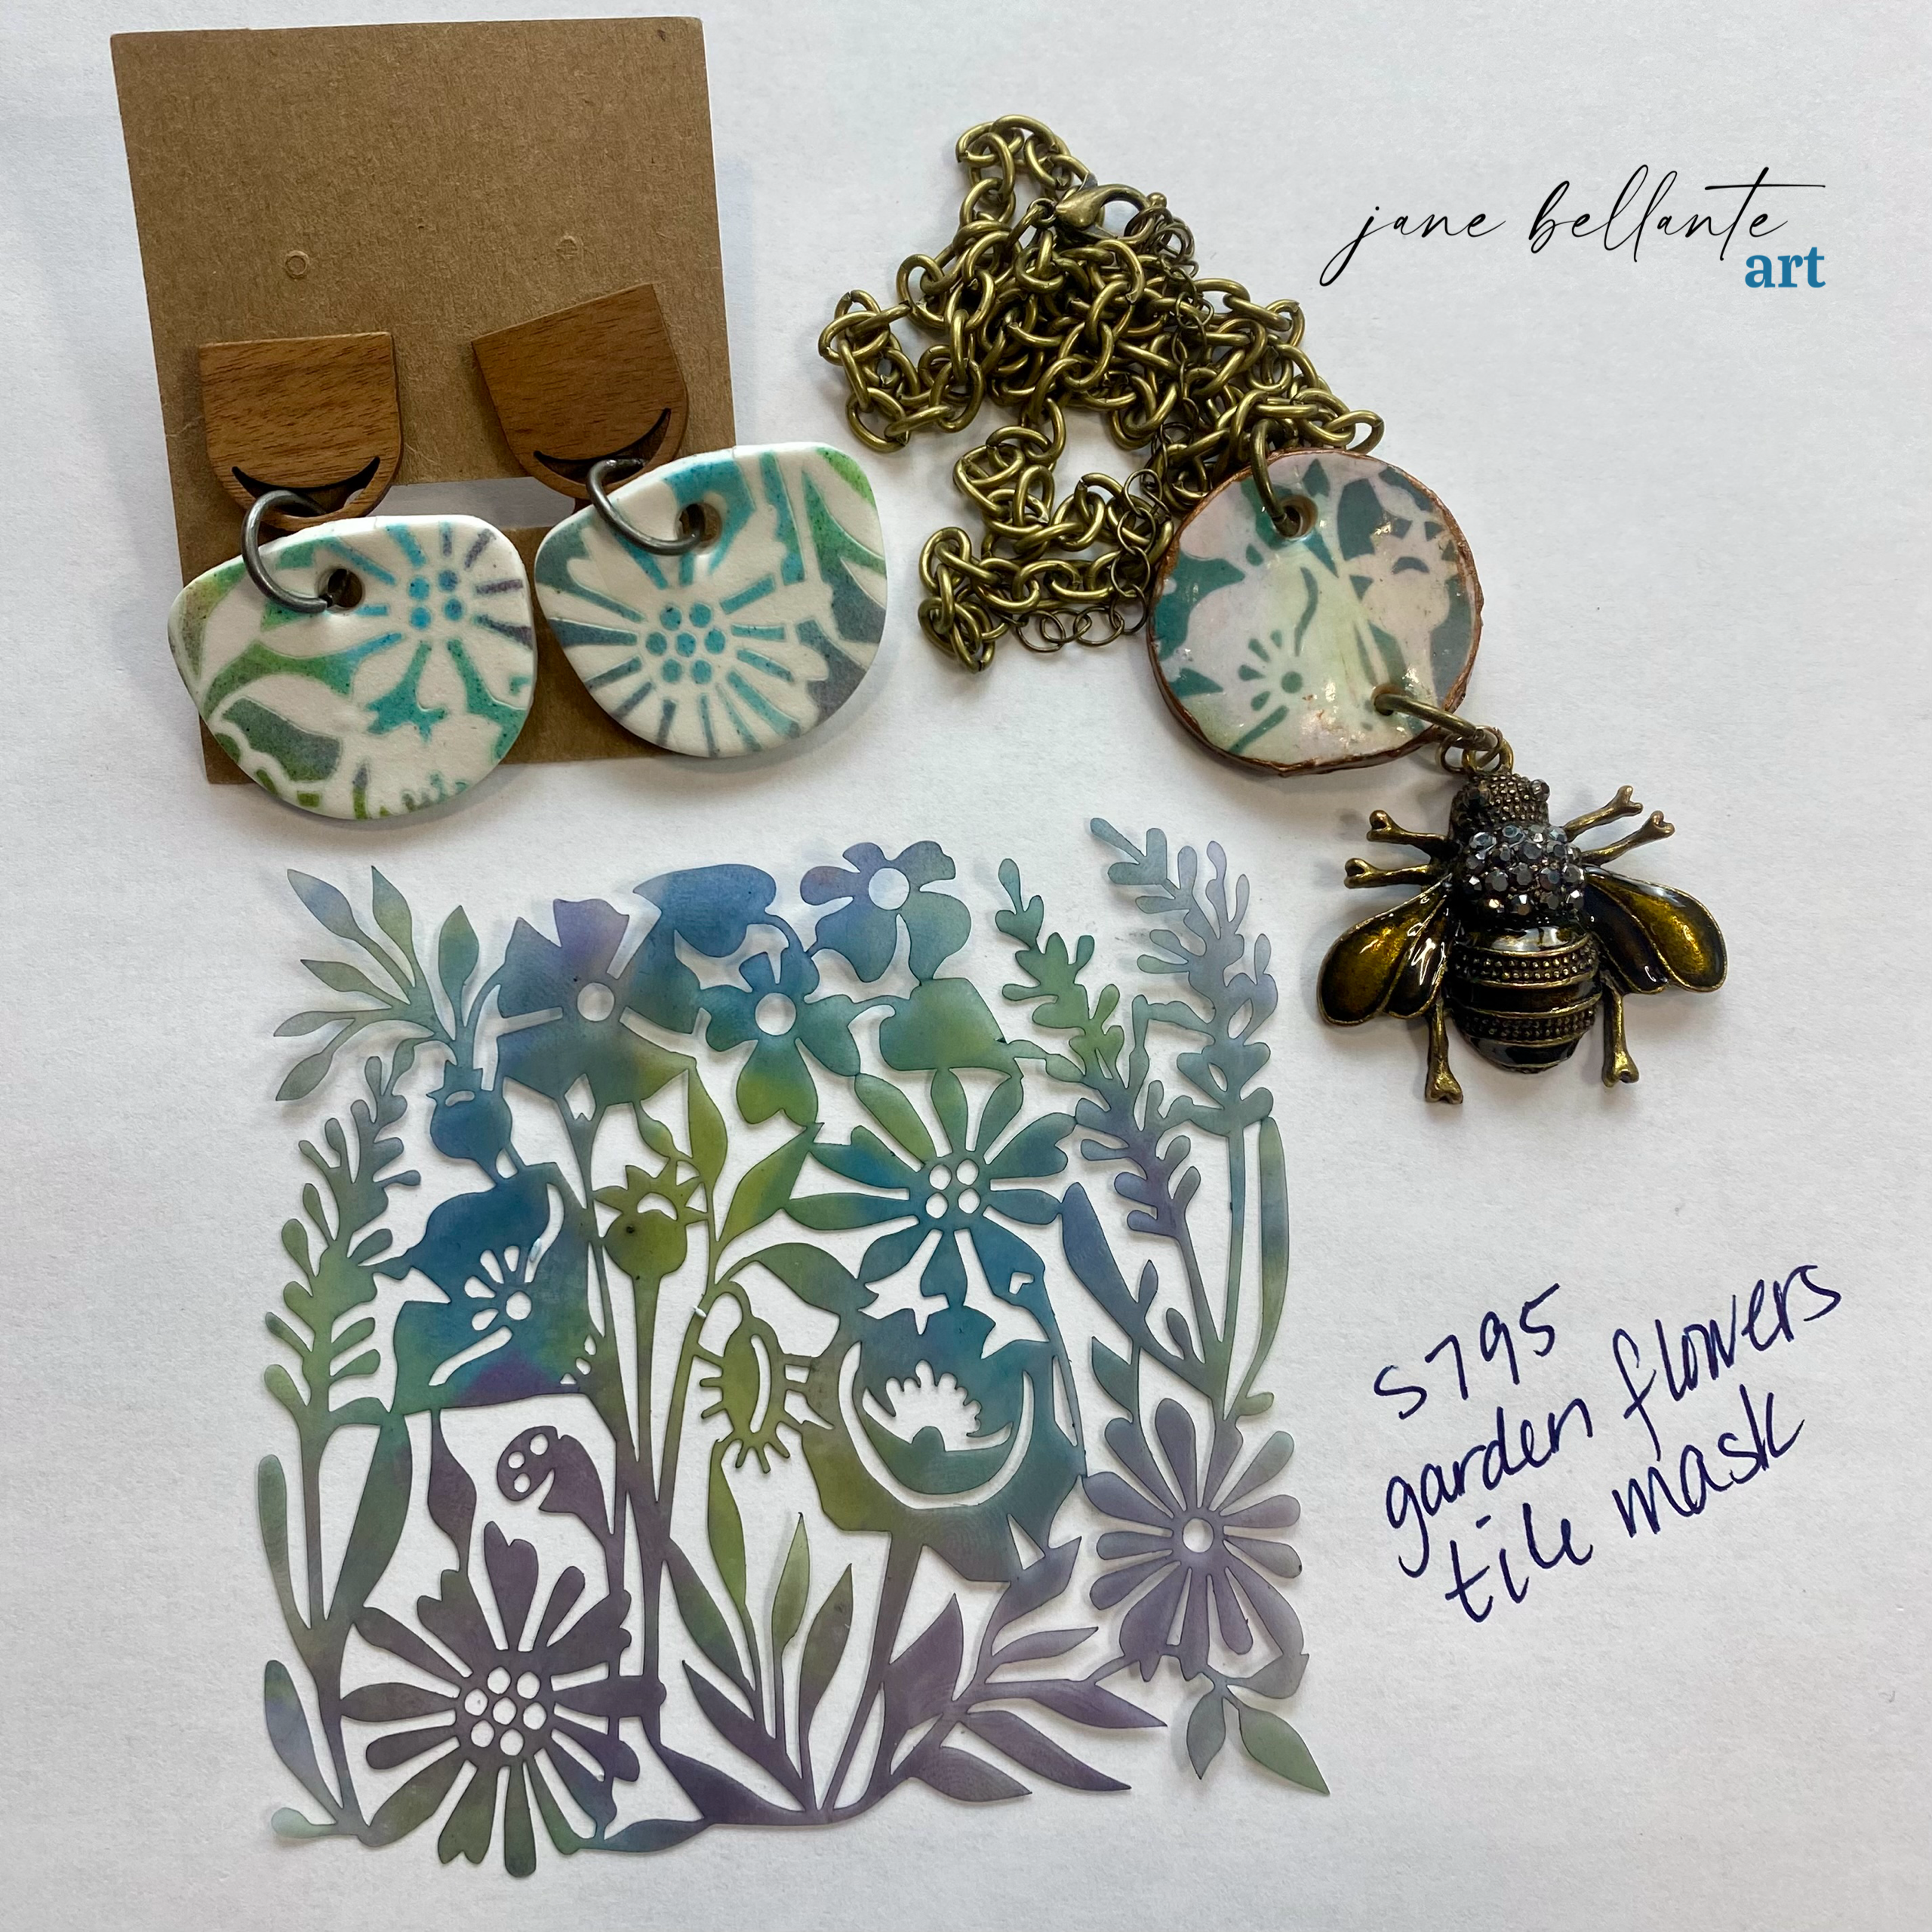


I started by rolling some white Sculpey Clay in my pasta machine on a #7.  This is about 1/8th of an inch thick which is great for pendants and earrings.  


Next, I grabbed my Archival Distress Inks and some make up sponges.  I cut my clay in half so that I had a small area to work with after I placed the Garden Flowers Tile mask on.  I pressed the mask gently into the clay and started applying the inks.  This part is so much fun- you can use any color combinations that you like!


I have a bunch of polymer clay cutters (you can use small cookie cutters if you have those) so I cut out several shapes from the clay with them.  You can use the leftover clay with the ink on it again by rolling it all together and kneading it.  When you roll it out again it will show some of the leftover ink, but you will never see it if you just ink on top of it again.


Then, I poked some holes in near the top of each shape so I can get a jump ring in them after they are baked.


You can bake these in your oven at 275 degrees for 15 minutes per 1/4".  These are about 1/8th of an inch, so they baked for about 8 minutes.

After you let the cut out shapes cool, you can then embellish them more.  Glaze them, paint them, use more ink, etc.  You can really create any look you love with your StencilGirl stencils and masks, Archival Distress Inks and polymer clay. 


You can watch the full tutorial right here:


I hope you enjoyed my tutorial!  You can find me at Jane Bellante Art on all social media platforms.  And- if you create something with your StencilGirl stencils and masks, please drop me a line and show me your results.

Until next time, 

Jane


Thursday, October 19, 2023

Yay! New Designs from Valerie Sjodin


Circle Line Borders - LL1001


Use this stencil to create beautiful borders of various circle shapes and lines or an overall pattern. It is a great companion with the Circle Lines Stencil Mask.


Circle Line Stencil Mask - LL1002


This versatile stencil of lines within and extending from circles can be used to sculpt the edge of a journal, a background pattern, and a retro-looking edge. It is a great companion with the Circle-Line Borders stencil.


Valerie's stencils are available now at www.stencilgirlproducts.com


Thursday, February 2, 2023

Brand New Stencils and Masks from Valerie Sjodin


ATC and Planner Combo Paint Brushes and Tubes - L953


This brushes and tubes stencil is designed to fit ATC cards and A5 planners. It can be cut into sections to keep in the pocket of your journal or kept in the larger size. Check out the video for inspiration.


ATC and Planner Combo Writing and Drawing Tools - L954


This writing and drawing tools stencil is designed to fit ATC cards and A5 planners. It can be cut into sections to keep in the pocket of your journal or kept in the larger size. Check out the video for inspiration.


This stencil can be used as a mask, a stencil, or a combination of the two. Watch the video to see easy stenciling techniques and inspiration.


Valerie's Stencils are available now at stencilgirlproducts.com


Friday, February 22, 2019

St. Patrick's Day Tag by Valerie Sjodin

One of my goals for this year is to be more light-hearted and joyful. Making this tag to give has been light-hearted fun, sweet and easy and just in time to celebrate St. Patrick’s Day. I hope you are inspired to make your own and you have as much fun as I did making it. Blessings!  Valerie


Materials Used:
Stencils:
Nesting Dolls Stencil - L694
Doll Crowns Stencil S667
Celtic Celebration Stencil L279

Other Supplies Used:
Water-soluble Scribble Sticks (I’m using CaranD’ache Neocolor II Water-soluble Wax Pastels)
Micron Pen (I’m using size 02)
Tag or ATC card (or any card or art journal page that can take water)
Filbert or flat watercolor brush about 3/8” or 1/4” wide

Technique:
1. Trace around a body mask of Nesting Doll (L694) on a tag or ATC card with waterproof pen. My line went off track so I drew a second scribbly line around the whole thing, which I like since it goes with the childlike design.
2. Choose a crown from the Doll Crowns Stencil (S667) and trace inside the Stencil with the pen twice.
3. June Pfaff Daley as designed a great stencil: Celtic Celebration Stencil (L279) . I’m using it here with Water-soluble crayons to draw inside the pattern of the stencil border.
4. Use a slightly wet brush to brush the stencil with water. When I dip my brush into water or rinse my brush out, before I paint on a stencil I touch the brush to a paper towel, so there won’t be too much water that will bleed under the stencil.
5. Put the Doll stencil-mask back on the tag and color in face with flesh color using water-soluble wax pastels. Then paint with water using a slightly wet brush.
6. Color in the heart and leaves with the pastels. Using 2 colors of green and 2 colors of red will add interest and variation to the colors.
7. You can add shading around the edges with slightly darker flash color if desired.
8. Color around the edges of the doll, fading in toward the center.
9. Shade the edges with a darker green or other color you desire.
10. Brush with slightly wet paint brush to smooth out and brighten pigment.
11. Put the Doll Crowns Stencil back on the crown drawn.
12.Color in with desired color.
13. Remember to touch the wet brush to the paper towel before painting the water on the stencil, over the crayon.
14. Tape the face part of the doll stencil onto the tag face.
15. Make simple eyes by drawing eyes with a Micron pen where the eyeballs would be in the stencil.
16. Finish both eyes and trace around the lower part of the nose and mouth stencil.
17. Add doodles & embellishments to the crown, hair, and heart clovers if desired.

18. Color with water-soluble wax pastels and paint with water.
There are so many ways to use this nesting dolls and personalize them using various stencils.  Here is the tag, an ATC card and journal page.
Stencils used in this photo:
Nesting Dolls Stencil - L694
Doll Crowns Stencil S667
Celtic Celebration Stencil L279
Scalloped Border Small Mask S644

For more ideas on what to do with the Nesting Doll Stencil and other stencils and mediums check out Valerie’s blog at https://valeriesjodin.com/blog/  and How-To Stencil Video and Inspiration Page at: https://valeriesjodin.com/how-to-stencil/

Cheers!