Hello! I’m Nicole
Austin (aka Kinueko) and I’m excited to be Guest Designer this week on StencilGirl Talk! Today, I’d like to share with you how to use stencils to
screen print onto fabric!
If you are new to screen printing, no worries!
This is a super simple technique and once you’ve tried it, you’ll be addicted
and want to screen print all the things! (aka, just go screen print crazy!) I’ve
included both a video tutorial (below) as well as step-by-step instructions.
Supplies:
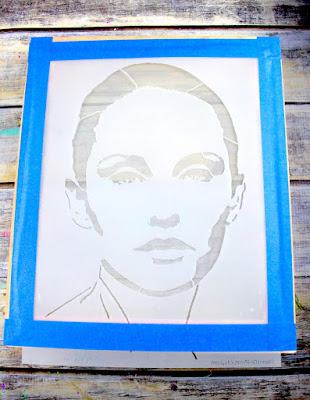
Stencils: Abigail, A Timeless Woman,
Butterfly Journeys, and Cruiser Side
Screen printing frame
(8" x 10” or larger)
Squeegee
Screen printing ink (for
fabric)
Painter’s tape
Tea towels (or other fabric
items to print on such a t-shirt, apron, pillowcase, etc.)
Make sure to wash, dry
and iron items beforehand. Place a thick sheet of paper or cardboard underneath
your fabric item (or between the top and bottom layer if printing something
such as a t-shirt, pencil case, etc.) Tape the stencil to the surface of
your screen including any part of the screen that is not covered by the stencil
or any part of the stencil’s design that you don’t want to show up on the
fabric.
Place the screen face
down on the fabric and add a spoonful of fabric screen printing ink on the side
of the screen. Pull the ink across the screen with a squeegee, making sure to
push the ink through the screen and stencil.
Lift up screen to see
your print! You can now let this dry and add other printed patterns in
different colors, too! Note: remove the stencil from the screen and
immediately wash the screen under warm water, scrubbing with soap to remove all
the ink. If the ink dries on the screen, you won’t be able to print with
it again!
If you’d like a
background pattern or element touching the main printed image, you’ll need to
create a mask to cover the image so that you can print over it without covering
it up.
To print the butterflies
behind the face, cut out a mask from paper in the shape of the face and cover. Then,
tape the butterfly stencil onto the screen. Tape over any of the butterfly
stencil that you don’t want to show up in the print.
Change the colors and
taping of the butterfly images in between printing to get a kind of rainbow
burst of butterflies in the background!
You can get really
creative with your designs, or simply repeat a pattern with one stencil but
just change up the colors! Whatever you choose, have fun with it! After your
creation is dry, follow instructions on the screen printing ink jar as to
washing and drying your item.
Thank you so much for
joining me today!
I hope you are inspired to create something lovely and that
you catch the screen printing bug like I have!
I’d love to hear your thoughts
or see what you’ve made!
Happy printing!
Xo, Nicole
Website/blog: https://www.kinueko.com
Instagram: https://www.instagram.com/kinueko
Youtube: https://www.youtube.com/kinueko
Facebook: https://www.facebook.com/nicoleaustinart


Amazing project and great tutorial - Thank you!
ReplyDeleteThank you! :) I'm so glad you enjoyed it! :)
DeleteThis is very educational content and written well for a change. It's nice to see that some people still understand how to write a quality post! post card printing
ReplyDeleteIs it okay to post part of this on my website basically post a hyperlink to this webpage? cheap postcard printing
ReplyDeleteCool art
ReplyDelete