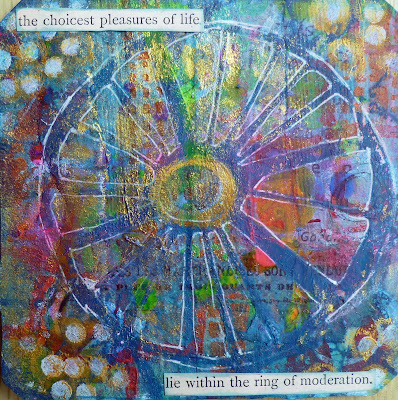
I’m still making more art cards for the #365somethings2018
undertaking. The idea is to make something creative every day of this 2018
year. I have chosen to make 3” x 3” art cards and I’m having so much fun with
them. It is very surprising to discover just how many ways there are to art on
such a small surface. Here is another set of nine cards and the good thing is
there is a full step-by-step tutorial for these as there has been before. I
even refer back to my own tutorials when I’m making cards! The cards themselves
are uploaded to my Instagram account
on a daily basis so you can see them there in detail.
1. Using
nine 3” x 3” art cards (from Artist’s Tile Set by Peter Pauper Press Inc)
collage each one with torn strips of wrapping paper, using a glue stick.
2. Using
watered down white gesso, brayer it gently over the cards.
3. Using
Lindy’s Stamp Gang’s Magical Shakers in a variety of colors, shake them onto
the cards and spray with water. This adds both color and sparkle.
4. Stamp
all over the cards using a text stamp. This does not have to be done perfectly.
In fact, it looks better if it’s not!
5. Stencil
on all the cards in a variety of colours and using the following stencils from
StencilGirl®: Repetition, Row of Triangles, Letters on Box, the small stencil from the February 2015 StencilClub and the small stencil from the October 2014 Club.
6. Stencil
all the cards with white acrylic paint through stencil Inky Circles.
7. Outline
with black and white permanent markers.
8. Collage
pieces of tissue wrap onto the cards using a glue stick.
9. Drip
some pink, yellow and orange fluorescent inks onto the cards and spread it
about using a water spray bottle.
10. Stencil
the focal points onto the cards using a variety of different stencils and
colours that match the various backgrounds of the cards. I used stencils Spiral Petals, Flag Fold, Implode and the large stencil from the August 2015 StencilClub.
11. Outline
the focal points using a permanent white marker.
12. Stencil
circles in the corners of the cards using white acrylic paint and the small stencil from the October 2014 StencilClub.
13. Outline
the circles from step 12 with Stabilo Woodies or any other water-soluble
pencils in a colour to match the various cards.
14. Glue
on vintage text of your choosing using a glue stick.
15. Spray
gold mica spray onto the cards through stencil Circles Layer Me.
16. Edge
the cards with permanent ink pads in matching colors.


Oh wow, I love these, love making journal cards and always looking for new ideas, I have used collage in art pieces and journaling but never with strips on cards, love it xx
ReplyDeleteI love how Frieda layers and uses your stencils. Such a rich, beautiful effect!
ReplyDeleteLove these, Freida - thank you!
ReplyDelete