
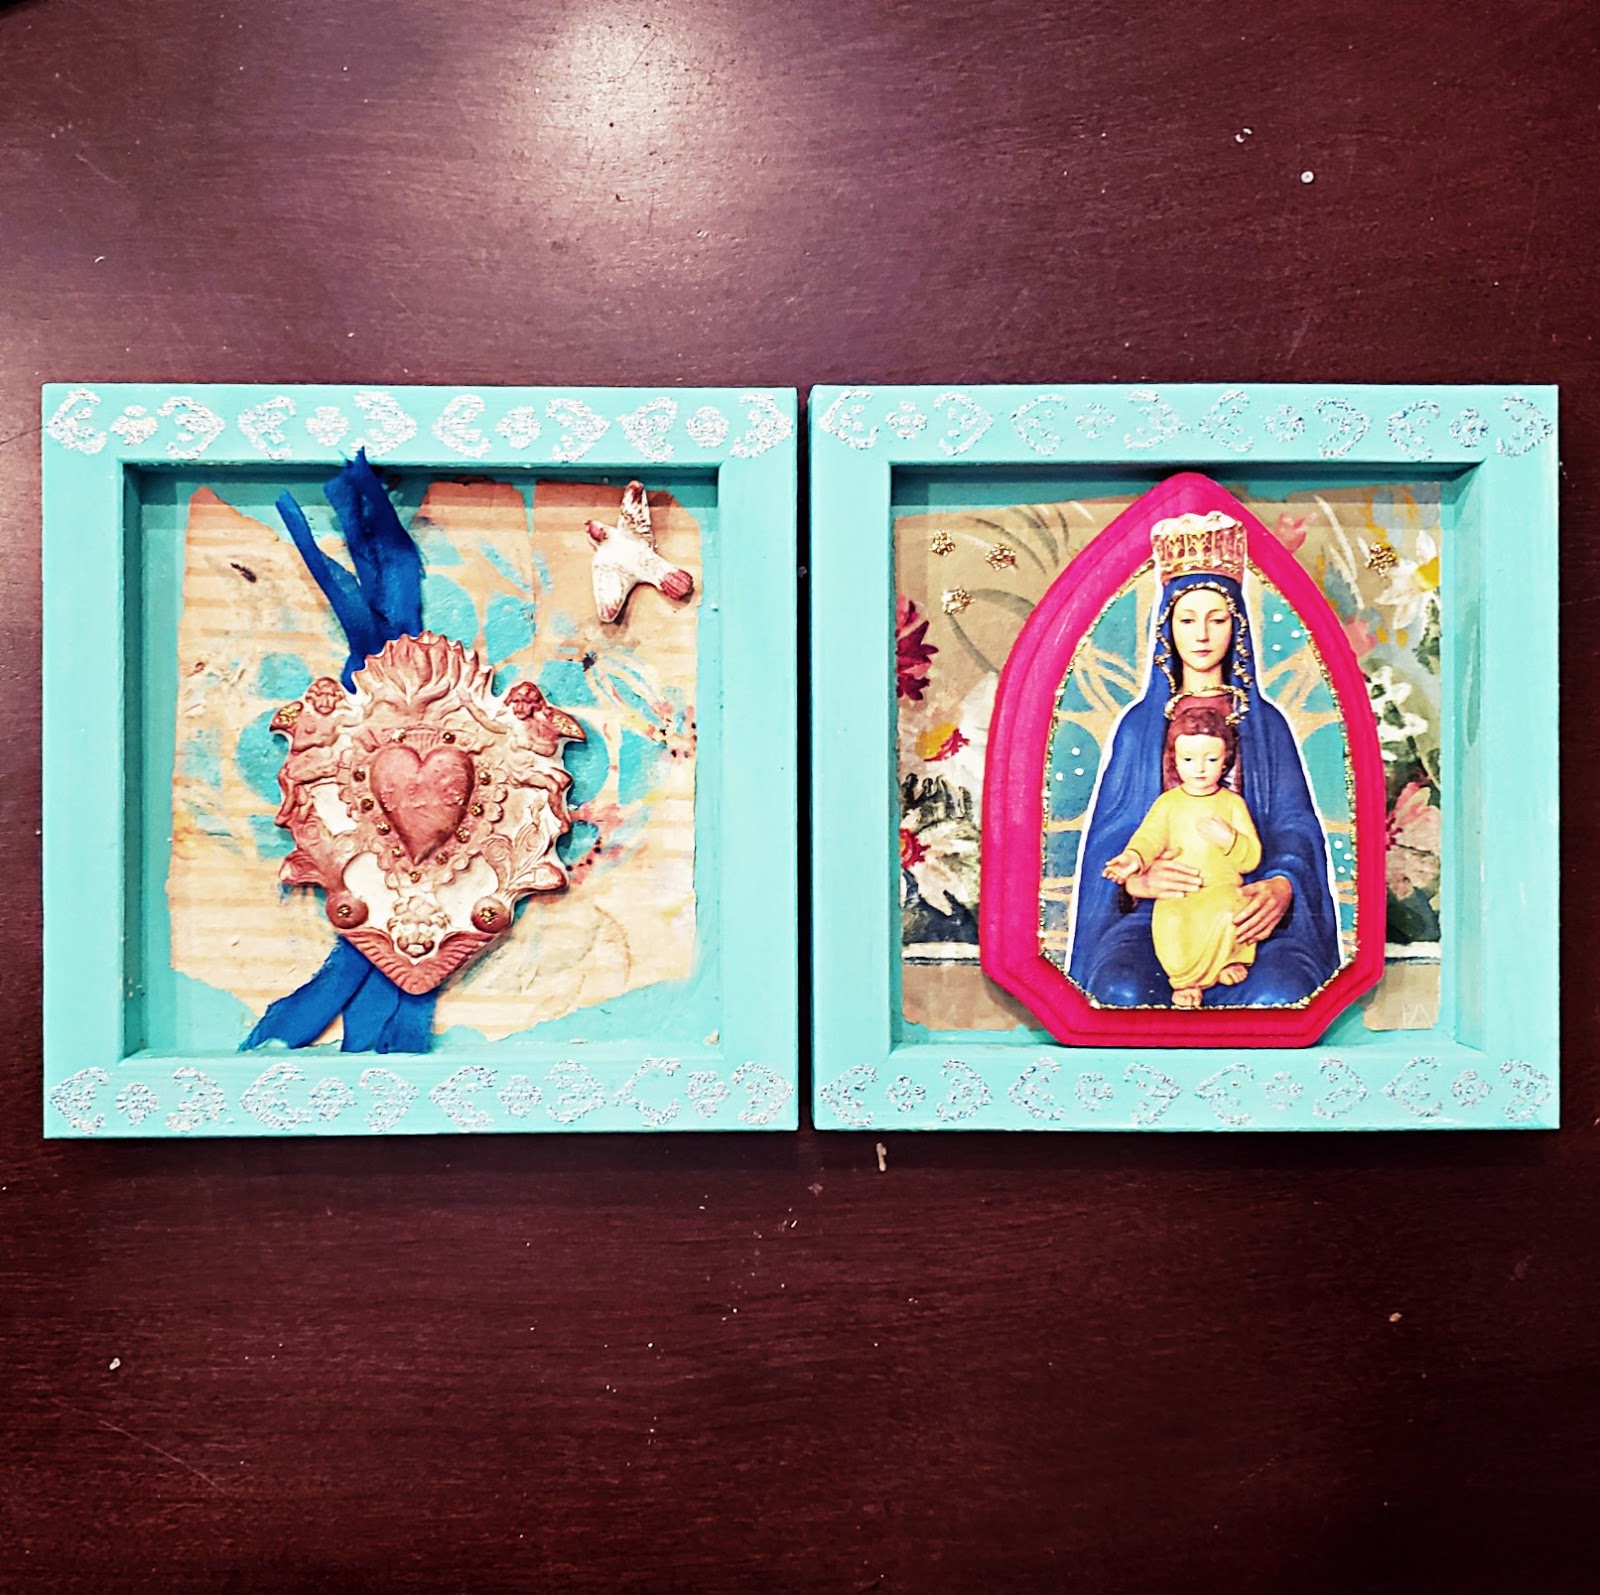
I have been fascinated lately with mixed media box arts. . .anything that you can take and dress up into something totally different. My interest in boxes led me to nicho boxes. Most people have seen them but really weren't sure what they were called. Nicho boxes are mixed media boxes that typically feature religious iconography but also feature, in modern day versions, Frida Kahlo, and anything Day of the Dead related. While these are the traditional versions, other more playful versions also exist. For this project, I decided to scavenge through my stash and I came up with some great pieces that heralded back to religious iconography.
To get started with this project, you will need:
2- 6" x 6" Gessoed wood canvases with a 4" cutout in the back
2- 5" x 5" copper sheets (36 gauge)
Stylus
Teal acrylic paint
Red Acrylic Paint
Gold Acrylic Paint
Teal and red embossing powder
Dark Brown Distress Embossing Powder
Versamark Pen
Resin pieces (I used the heart and the dove)
Wooden Arch Block (About 4")
Virgin Mary Clip Art
Floral decorative paper (or vintage wallpaper)
Silk sari ribbon
Large Dauber
Teal and Navy Blue Stamp Pad
Stickles
White Uniball Pen
Double sided tape
Clear Gorilla Glue
Finnabair Art Alchemy Waxes in Fire Ruby and Vintage Gold
Soft pad for tooling (Your mouse pad works great for this)
S654 Bent Drops Small Stencil by Andrew Borloz
S673 Tribal Birds Stencil by Andrew Borloz
6" x 6" Maya Love Stencil July 2017 StencilClub Release by Jessica Sporn
S258 Square Dancing Stencil by Terri Stegmiller
L363 Pilgrimage to Mexico Stencil by Laurie Mika
STEP 1:
Paint the two wood canvases in teal and set aside to complete drying.

STEP 2:
Using the six-inch Maya Love stencil and two of the borders from the Pilgrimage to Mexico stencil, emboss the first copper sheet with the bird and edging designs along with any other elements that you want to add from your stencils. Be sure to place the copper on your soft padding to ensure that the design comes out crisp.

For the other copper sheet, use the Tribal Birds Stencil, Bent Drops, Pilgrimage to Mexico, and the border portion of the bird stencil from Maya Love.
Using the Versamark Pen, highlight the bird and various portions of the border and other designs. Emboss these in the colors you wish to use. Do the same with the other copper sheet design.

Stencil and emboss a design from the Pilgrimage to Mexico stencil at the top and bottom of the back portion of the canvases.

Affix the copper pieces to the front and back of the wood canvases using permanent double-sided tape or glue. The large bird piece was intended to be my front piece and the smaller one the back piece.

STEP 3:
Using decorative paper or vintage wallpaper, rip pieces that fit nicely in the open area of the back side of the wood canvases. There should be some of the teal showing. Glue these pieces down.
Paint the arch block red along the sides and gold on the top. Allow to dry naturally or by heat setting.
Make sure that your resin pieces and the arch block fit cleanly in the recesses of the wood canvases. If not, choose other resin pieces. Highlight the resin pieces using Finnabair's Art Alchemy Waxes in Fire Ruby and Vintage Gold.
Fuzzy cut the Virgin Mary Clip art.
Using the Square Dance Stencil, the dauber, and the ink pads, stencil a portion of the stencil on the left inner decorative paper and on top of the arch block.
STEP 4:
Lay the silk sari material down then glue the resin pieces on the left inner side using clear Gorilla Glue. Glue the arch block on the right inner side also using clear Gorilla glue. Affix the Virgin Mary clip art on top of the arch block using double sided tape.
Create a few stars around the arch block using Gold Stickles. Also use the Stickles on important elements on the Virgin Mary clip art to create interest and definition. Add some stickles to some of the raised areas on the resin pieces.
Use the white Uniball pen to outline the Virgin Mary clip art.


STEP 5:
Attach the hinges to the connecting areas of the two wood canvases.
Attach the clasp to the front edge of the canvas.
ANNNDDD. . .the REVEAL!
ANNNDDD. . .the REVEAL!
WANT TO CONNECT WITH
ME? CLICK ON THE LINKS BELOW. 👇
Mystic Spring Studios
MSS Blog
or email me at annemarie.mysticspring@gmail.com.
Beautiful nicho box, I love the idea of a secret compartment with meaningful pieces inside. The stencil design highlighted with embossing creates such a unique appearance. Thanks for sharing
ReplyDeleteGreat idea to make a nicho box using wood canvas. Love the copper embossed pieces!
ReplyDeleteI had never heard of the term "Nicho boxes", although I have seen them. These look great, and I love the idea of using stencils for the designs on the copper.
ReplyDeleteIn the interests of reusing found objects, many years ago, I discovered that the insides of tomato puree tubes were copper, and used to use them to emboss designs on, and I used enamel paint to colour them. (This was nearly 30 years ago, so I don't know if embossing powder was around then.)