Showing posts with label #3D. Show all posts

Monday, March 15, 2021

Kau Chim for Art Making


Having moved from one state to the next recently, I have been in the process of re-establishing my art workshop. Interestingly, what seemed to fit just fine at the old house now seems to be bursting from the seams in the new one despite having more room to put things. However, the joy of the re-establishment is that I am again seeing art that I made years ago and reveling in how far I have come. As I was moving things around yet again to get just the right placement, I came across some early journal pages that I had created from prompts I was given. It occurred to me that just like writers, artists sometimes need prompts to help them move forward in their art.

Late one night, having slipped into bed but not yet ready to turn the light out, I stared at my tube of fortune telling sticks, or what is known as Kau Chim, that I had bought years ago. These sticks tell what one's fortune will be for the day, and I pondered on how I could create something similar but focus it on art making. The result is a modified Kau Chim that can help an artist determine what the immediate future of their art will be.

The idea is that the sticks will provide color options that can be used singularly or together, as well as a word prompt that can be used in collaboration with or independent of the color options. In this project, I created 52 sticks, one for each week of the year. However, more sticks can be made. The exciting aspect of this project is that the sticks can be used over and over again or they can be easily replaced at a low cost. I found the process of making the 52 sticks relaxing and pensive. 

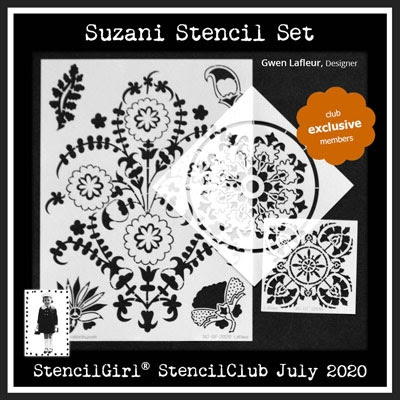
For my choice of stencils for this project, I thought it would be great to use some of the stencils that only Stencil Club members can get. Not a Stencil Club member? You should be! Join StencilClub here! 


Here's what else you will need to make the project:

Paper maché round wine box
Wavy Jumbo Wood Craft Sticks
Dried Flowers
I-Zink Dye Spray in Coffee 
Accent Piece
Green Jade Table Poem Stamp by Rubbernecker Stamps
Gesso
Paint in colors of your choice (for the container and the sticks)
White Gel Pen
Metallic Silver Gel Pen
VersaFine Stamp Pad in Vintage Sepia
Sharpie or Similar Permanent Marker
Mod Podge or similar adhesive for decoupage
Spray fixative (optional)
Paint brushes
Box cutter
Sand block or sand paper

TO MAKE THE BOX


STEP 1: Measure the sticks against the wine box and mark so you know where to cut. 


STEP 2: Cut the box to size so that it is about 1/4 to 1/2 and inch taller than the sticks.


STEP 3: Use a sand block or sandpaper to smooth the edges of the wine box and to even it out.

STEP 4: Gesso the exterior of both the box and the top. Let dry completely.

STEP 5: Paint the box and top the color of your choice. Consider the stencils you plan to use and be sure to use complementary colors. For example, if you wanted to use Gothic stencils, you wouldn't want to use pink and orange as your color choice. Allow to dry.


STEP 6: Add stenciling to the body of the box and the top. I used Suzani by Gwen Lafluer.


STEP 7: Using the I-Zink Dye Spray, spray some on a small paper plate. With a pointed round brush, dip into the spray then flick onto the box and top. These splatters should infer age. Allow to dry.


STEP 8: Use the stamp to stamp around the top and the around the box. 


STEP 9: Glue dried flowers to the box using adhesive. Allow to dry.


STEP 10: Draw edge lines at the bottom of the box and the top. Paint the space between the line and the edge of the box and the top with your choice of color. Allow to slightly dry, then use a stencil and a baby wipe to remove some of the paint.


STEP 11: Add markings using the gel pens to create interest and depth.


STEP 12: Create the accent piece and glue it to the top of the box. You can see a video here showing how to create one. 


STEP 13: (Optional). You can use a fixative or the adhesive to cover the box and top if you wish so that you don't have what looks like shadows on the box from adhering the flowers. However, I like the shadows, so I leave it as is.

TO MAKE THE STICKS

STEP 1: Line about eleven sticks up together. Using the 9 x 12 stencil from Block Prints by Jill McDowell, stencil all at the same time. You can also opt to use many different stencils.


STEP 2: Paint each edge a different color. It doesn't matter if you want to use complementary colors or if you just paint colors in general. 


STEP 3: Add a word or phrase to the middle of each stick. These should be words that will prompt you toward creating. Try to avoid specific words like bee or animal. Instead, use words that can have multiple meanings or that might convey a specific form of art making that you haven't tried before. Your job is to interpret the word as best fits the day you use it.  


HOW TO USE THE KAU CHIM FOR ART MAKING

Each week, pull one of the sticks. Decide if you want to use one color, both colors, the word, or a combination of them. Be open to numerous interpretations so that even if you draw the stick again the next week, you still create something entirely new.

While I only created 52 sticks, you can certainly make more. This will allow you to "retire" some of them in favor of adding some of the new ones. You can also finish the back side of the sticks so that you have more options to choose from.


Anne Marie

WANT TO CONNECT WITH ME? CLICK ON THE LINKS BELOW. 👇
MSS Blog 
Twitter 
Pinterest

or email me at annemarie.mysticspring@gmail.com.


Monday, September 16, 2019

The Nicho Box


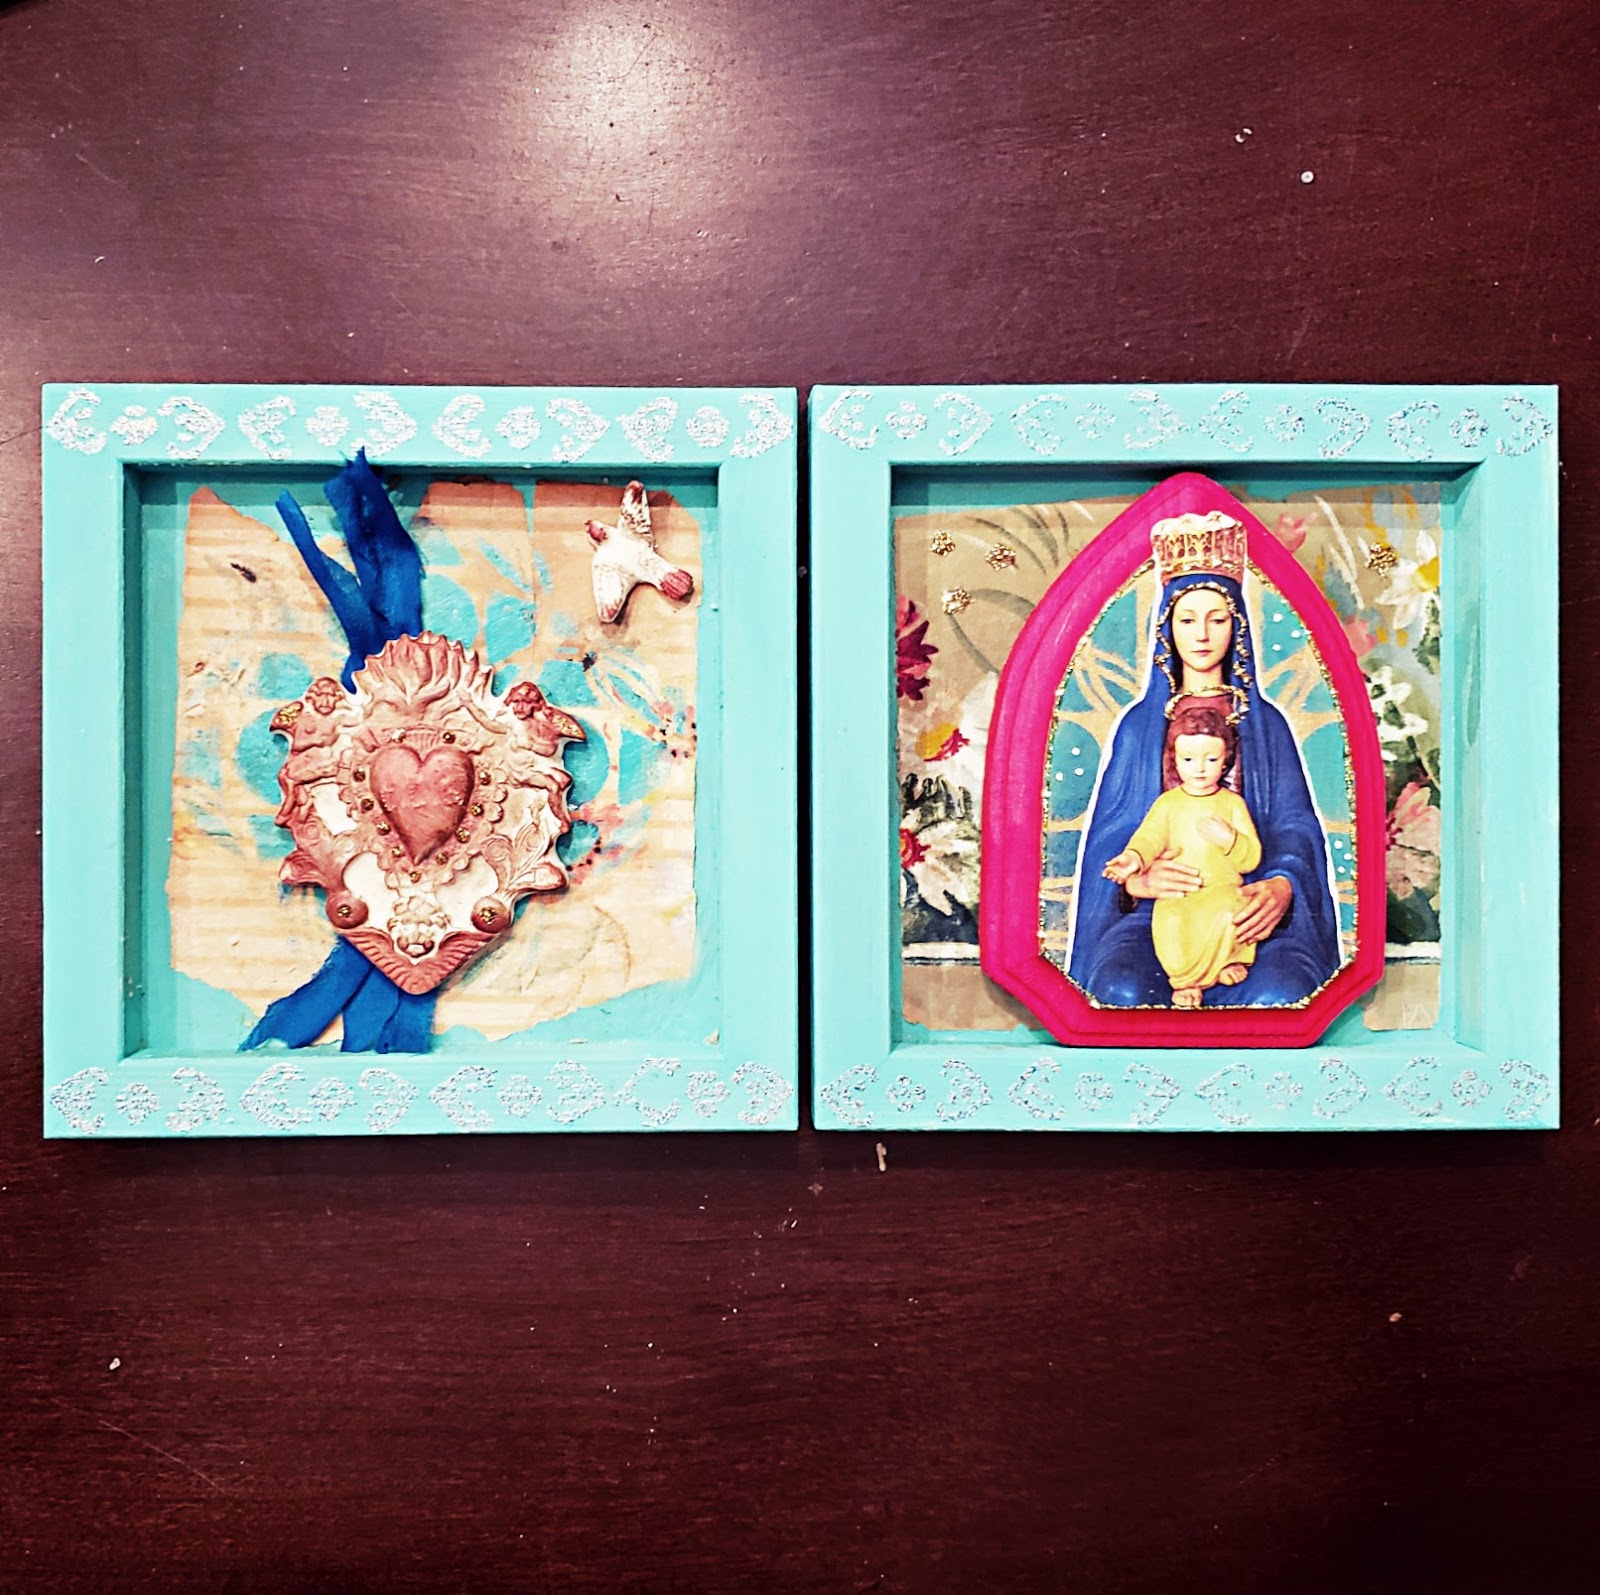
I have been fascinated lately with mixed media box arts. . .anything that you can take and dress up into something totally different. My interest in boxes led me to nicho boxes. Most people have seen them but really weren't sure what they were called. Nicho boxes are mixed media boxes that typically feature religious iconography but also feature, in modern day versions, Frida Kahlo, and anything Day of the Dead related. While these are the traditional versions, other more playful versions also exist. For this project, I decided to scavenge through my stash and I came up with some great pieces that heralded back to religious iconography.

To get started with this project, you will need:

2- 6" x 6" Gessoed wood canvases with a 4" cutout in the back
2- 5" x 5" copper sheets (36 gauge)
Stylus
Teal acrylic paint
Red Acrylic Paint
Gold Acrylic Paint
Teal and red embossing powder
Dark Brown Distress Embossing Powder
Versamark Pen
Resin pieces (I used the heart and the dove)
Wooden Arch Block (About 4")
Virgin Mary Clip Art
Floral decorative paper (or vintage wallpaper)
Silk sari ribbon
Large Dauber
Teal and Navy Blue Stamp Pad
Stickles
White Uniball Pen
Double sided tape
Clear Gorilla Glue
Finnabair Art Alchemy Waxes in Fire Ruby and Vintage Gold
Soft pad for tooling (Your mouse pad works great for this)
S654 Bent Drops Small Stencil by Andrew Borloz
S673 Tribal Birds Stencil by Andrew Borloz
 6" x 6" Maya Love Stencil July 2017 StencilClub Release by Jessica Sporn
S258 Square Dancing Stencil by Terri Stegmiller
L363 Pilgrimage to Mexico Stencil by Laurie Mika


STEP 1:

Paint the two wood canvases in teal and set aside to complete drying.


STEP 2:

Using the six-inch Maya Love stencil and two of the borders from the Pilgrimage to Mexico stencil, emboss the first copper sheet with the bird and edging designs along with any other elements that you want to add from your stencils. Be sure to place the copper on your soft padding to ensure that the design comes out crisp.


For the other copper sheet, use the Tribal Birds Stencil, Bent Drops, Pilgrimage to Mexico, and the border portion of the bird stencil from Maya Love.

Using the Versamark Pen, highlight the bird and various portions of the border and other designs. Emboss these in the colors you wish to use. Do the same with the other copper sheet design.


Stencil and emboss a design from the Pilgrimage to Mexico stencil at the top and bottom of the back portion of the canvases.


Affix the copper pieces to the front and back of the wood canvases using permanent double-sided tape or glue. The large bird piece was intended to be my front piece and the smaller one the back piece.


STEP 3:

Using decorative paper or vintage wallpaper, rip pieces that fit nicely in the open area of the back side of the wood canvases. There should be some of the teal showing. Glue these pieces down. 

Paint the arch block red along the sides and gold on the top. Allow to dry naturally or by heat setting. 

Make sure that your resin pieces and the arch block fit cleanly in the recesses of the wood canvases. If not, choose other resin pieces. Highlight the resin pieces using Finnabair's Art Alchemy Waxes in Fire Ruby and Vintage Gold.

Fuzzy cut the Virgin Mary Clip art.

Using the Square Dance Stencil, the dauber, and the ink pads, stencil a portion of the stencil on the left inner decorative paper and on top of the arch block.

STEP 4:

Lay the silk sari material down then glue the resin pieces on the left inner side using clear Gorilla Glue. Glue the arch block on the right inner side also using clear Gorilla glue. Affix the Virgin Mary clip art on top of the arch block using double sided tape.

Create a few stars around the arch block using Gold Stickles. Also use the Stickles on important elements on the Virgin Mary clip art to create interest and definition. Add some stickles to some of the raised areas on the resin pieces. 

Use the white Uniball pen to outline the Virgin Mary clip art.


STEP 5:

Attach the hinges to the connecting areas of the two wood canvases.

Attach the clasp to the front edge of the canvas.

ANNNDDD. . .the REVEAL!


Anne Marie


WANT TO CONNECT WITH ME? CLICK ON THE LINKS BELOW. 👇

Mystic Spring Studios 
Facebook
Instagram 
MSS Blog 
Twitter 
Pinterest

or email me at annemarie.mysticspring@gmail.com.

Wednesday, June 19, 2019

Beach Party Bonanza!

It’s already June, can you believe it? Summer will be here this week and I am so ready for it. To get the celebration going, I’ve created a little beach party bonanza that will have you enjoying fresh flowers, twinkling lights, and a little bit of sand and surf romance. And the best part of it is that I was finally able to use Mary Nasser's fabulous line of stencils. 

Here's the stencil lineup:


And the other materials you will need:

Small tin watering cans
Small tin buckets (I call these candle cups for this project)
Four-top tin caddy with handles
Silk sari ribbon
Sharpies in teal and blue
Shell and Starfish bead elements
Aleene’s Fast Tacky Glue
Strong glue like Clear Gorilla Glue
Clear octagonal beads with a prism-like quality
1/2 inch round magnets
White or Color battery-operated tea lights
Your choice of flowers and foliage (but the Peonies are gorgeous!)
Banner flags
Old maps
Dirty Sand Embossing Powder by Seth Apter
Embossing Stamp Pad
Blue and teal yarn (or other hanging material)
Sandwich bags
Color box Cat’s Eye ink pad in dark brown
Hole punch
Xacto Knife or tiny scissors
Table runner
Sand in white and blue
Optional: Shells


For the banner, cut the map into the same shape as your banner flag using one of the banner flags as your guide. Glue the cut map portion on top of the banner flag. Re-punch the holes. Edge the banner flags with the dark brown ink pad. Stencil each flag with a different Nasser stencil. Use the embossing ink just at the bottom making a slight wavy pattern to mimic waves. Emboss with the Dirty Sand embossing powder. Weave the yarn through each of the holes using a slip knot to hold the flag tight. Leave about three inches between each flag. Leave about a two-foot length of yarn at each end.

The little candle cups are easy to make! You will need one more than the number of banner flags you have. For example, I have eighteen banner flags so I used nineteen candle cups. First, take Mary Nasser's Navigate  stencil and shrink it down to about one-inch by copying the stencil on your copy machine. Cut out the stencil and intended open portions that should be cut out using the Xacto knife or the tiny scissors. Hold the stencil onto one side of the cup. Color about one half of the stencil with the dark blue Sharpie and the rest with the teal Sharpie. Be consistent in your coloring pattern. Be careful not to get too much ink on the tin or it could run below the copied stencil. Allow to dry completely. Attach a prism bead to the handle. Glue a magnet to the back side of each of the tea lights. 

Cut multiple eight-inch strips of sari silk ribbon so that you have enough for all of the tins. Gather three silk strips and tie a knot at the middle. Cut each end up halfway so that each silk strip has three sections. Rip the silk strips the rest of the way. Glue a magnet to the knot. Use pressure on them to ensure that the magnets are adhered completely. When they are dry, take two of the strips and use them to tie the ribbon and magnet setup in between each banner flag and at each end of the series of flags.

To make the utensil caddy, first stencil one side of each tin with the shrunk-down version of the Navigate stencil using either the blue or teal Sharpies or both Sharpies creating an ombré effect. Tie the silk sari ribbon around each tin so that you have two to three layers of ribbon and just enough to tie a knot and leave about three inches left. Cut the remaining ribbon into three strips and rip it the rest of the way. Using the strong glue, place a large bead of glue just under the knot, and nestle the shell and starfish bead on top. Rest the tin shell side up and allow to dry overnight. Take care when placing the tins back into the caddy so that you don’t catch and break the shell beads. Create the watering cans by using the teal Sharpie to stencil in the Mini Waves stencil on both sides.

To decorate for your beach party, add knives, spoons, forks, and napkins to the cubby. String the banner flags up and tie them securely and in a straight line. Turn on all of your tea lights and place them in the inside of the candle cups. Attach each candle cup to one ribbon and magnet setup. The banner flag setup will slightly bow from the weight. Place a sandwich bag into the each of the watering cans because the cans are not waterproof and will leak if you don’t. Fill with water and cut any excess bag material so that it doesn’t show. Place the peonies (or your choice of flower) into the can. On your table, place a runner of your choice then sprinkle layers of sand . I started with white then added blue. Use your fingers to shuffle the colors so that they look more seamless. 

Now that you have the secret the a stellar beach party, create your own and be sure to share it with StencilGirl and me!
Anne Marie 

WANT TO CONNECT WITH ME? CLICK ON THE LINKS BELOW. 👇

Mystic Spring Studios 
Facebook
Instagram 
MSS Blog 
Twitter 
Pinterest
or email me at annemarie.mysticspring@gmail.com.


Monday, March 18, 2019

The Journey


There is great hope that Spring is just around the corner! If only we could get the winter boom out of the way! Still, we can look ahead to warmer days, and days spent on the water. To celebrate that ever-inching possibility, I have created a canoe and paddle using basswood and some fabulous stencils. The canoe is a great gift for the canoe aficionado or the outdoorsman. But, hey, don't limit it to just the men in the household. Women are aficionados and outdoorsy, as well.

Materials:

StencilGirl® Stencils:

Journey by Roxanne Evans Stout 
ATC Mixup #2 by Mary Beth Shaw 

Basswood 3/32 x 8 x 24 inch  (Balsa Wood is also fine, but it needs very gentle care as it breaks easily.) 
Box cutter
Pencil
Sanding block
Rust-Oleum® Wood Stain Tube (This is what I used) or Minwax Wood Finish
Acrylic Paint in your chosen colors
Leather Cord (about 1/8” wide or slightly smaller than the hole you punched)
Clear Gorilla Glue
Air dry clay
Crop-a-dile or other hole punch that can go through wood.


1.       Start your project by drawing the sides and bottom of your canoe on the basswood. My version has 2 inch by 13 inch sides and a 1.5 inch by 9 inch bottom. 


2.     Lightly sand the edges so that they are smooth.
3.     Mark where you want your holes for the leather insertion on the tops and edges of the canoe. Ensure that the holes are not too close to the edges to avoid forcing the edges to snap. Punch the holes.
4.    Glue the canoe together using Clear Gorilla Glue. I place a stapler on one side and a heavy item on the other side of the canoe side to keep the side in place while drying. Allow to dry at least 24 hours.
5.    Soak the entire canoe in hot water so that the wood softens. You can then tie some of the leather cord (in a color that you don’t like) around the ends and leave it to dry completely. The canoe will be easier to shape that way. Be sure to put something in the middle of the canoe to help keep it open and rounded. I used glue bottles.


6.    Remove the leather cord from the ends when the wood is completely dry. Depending on the type of wood stain you use, you will now either stain and then stencil on top of the stain (Rustoleum), or you will stencil and then stain (Minwax). Let dry completely.
7.    Place a glue bottle in the interior of the canoe (or something wide enough to prevent the canoe from folding in on the top) and lace one end of the canoe. Start at the bottom. When you get to the top, wind the leather around the tip and tie it into a knot. Lace the tie the other end. (This photo does not show the stenciling. Hang tight. . .it's coming!)


8.     Roll out enough air-dry clay to make the paddle. I suggest a piece about four inches long and one inch wide. Impress the small leaf from the ATC Mixup #2 stencil onto the bottom portion of the clay piece. Cut the paddle design out and allow to completely dry. Paint it to match the color that you used for the stencil design on the sides of the canoe. Conversely, you can paint it brown and fleck it with some patina embossing. When dry, glue the paddle in the canoe at one end or the other.

Now that you have the canoe all put together, place a complementary piece of tissue paper into the canoe and add some of your guy’s favorite candy, cookies, brownies or jerky. This is an excellent birthday, Father’s Day, or summer get-together gift.

Design tips:
·         You can change the design and color so that this same creation can be gifted to a female. Unicorn Spit would be great for this option!
·         A printout of plane tickets or vacation reservations can be rolled up and secured with a ribbon and placed inside the canoe.
·         Instead of the canoe paddle, you could add a leaf or feather.
·         Remember that although this is made from wood, it is very thin wood and can break. Handle with gentle hands.
·         For an added effect, emboss the bottom edge with embossing powder to give the canoe a “used in the water” effect. You can also emboss parts of the paddle for the same look.


Anne Marie
WANT TO CONNECT WITH ME? CLICK ON THE LINKS BELOW. 👇Mystic Spring Studios 
Facebook
Instagram 
MSS Blog 
Twitter 
Pinterest
or email me at annemarie.mysticspring@gmail.com.