
Having moved from one state to the next recently, I have been in the process of re-establishing my art workshop. Interestingly, what seemed to fit just fine at the old house now seems to be bursting from the seams in the new one despite having more room to put things. However, the joy of the re-establishment is that I am again seeing art that I made years ago and reveling in how far I have come. As I was moving things around yet again to get just the right placement, I came across some early journal pages that I had created from prompts I was given. It occurred to me that just like writers, artists sometimes need prompts to help them move forward in their art.
Late one night, having slipped into bed but not yet ready to turn the light out, I stared at my tube of fortune telling sticks, or what is known as Kau Chim, that I had bought years ago. These sticks tell what one's fortune will be for the day, and I pondered on how I could create something similar but focus it on art making. The result is a modified Kau Chim that can help an artist determine what the immediate future of their art will be.
The idea is that the sticks will provide color options that can be used singularly or together, as well as a word prompt that can be used in collaboration with or independent of the color options. In this project, I created 52 sticks, one for each week of the year. However, more sticks can be made. The exciting aspect of this project is that the sticks can be used over and over again or they can be easily replaced at a low cost. I found the process of making the 52 sticks relaxing and pensive.
For my choice of stencils for this project, I thought it would be great to use some of the stencils that only Stencil Club members can get. Not a Stencil Club member? You should be! Join StencilClub here!

Here's what else you will need to make the project:
Paper maché round wine box
Wavy Jumbo Wood Craft Sticks
Wavy Jumbo Wood Craft Sticks
Dried Flowers
I-Zink Dye Spray in Coffee
Accent Piece
Accent Piece
Green Jade Table Poem Stamp by Rubbernecker Stamps
Gesso
Paint in colors of your choice (for the container and the sticks)
White Gel Pen
Metallic Silver Gel Pen
VersaFine Stamp Pad in Vintage Sepia
Sharpie or Similar Permanent Marker
Mod Podge or similar adhesive for decoupage
Spray fixative (optional)
Mod Podge or similar adhesive for decoupage
Spray fixative (optional)
Paint brushes
Box cutter
Sand block or sand paper
Sand block or sand paper
TO MAKE THE BOX

STEP 1: Measure the sticks against the wine box and mark so you know where to cut.

STEP 2: Cut the box to size so that it is about 1/4 to 1/2 and inch taller than the sticks.

STEP 3: Use a sand block or sandpaper to smooth the edges of the wine box and to even it out.
STEP 4: Gesso the exterior of both the box and the top. Let dry completely.
STEP 5: Paint the box and top the color of your choice. Consider the stencils you plan to use and be sure to use complementary colors. For example, if you wanted to use Gothic stencils, you wouldn't want to use pink and orange as your color choice. Allow to dry.

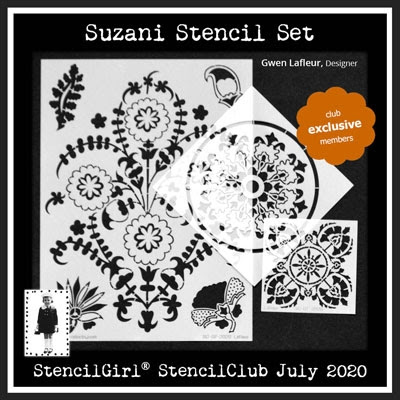
STEP 6: Add stenciling to the body of the box and the top. I used Suzani by Gwen Lafluer.

STEP 7: Using the I-Zink Dye Spray, spray some on a small paper plate. With a pointed round brush, dip into the spray then flick onto the box and top. These splatters should infer age. Allow to dry.

STEP 8: Use the stamp to stamp around the top and the around the box.

STEP 9: Glue dried flowers to the box using adhesive. Allow to dry.

STEP 10: Draw edge lines at the bottom of the box and the top. Paint the space between the line and the edge of the box and the top with your choice of color. Allow to slightly dry, then use a stencil and a baby wipe to remove some of the paint.

STEP 11: Add markings using the gel pens to create interest and depth.


STEP 12: Create the accent piece and glue it to the top of the box. You can see a video here showing how to create one.

STEP 13: (Optional). You can use a fixative or the adhesive to cover the box and top if you wish so that you don't have what looks like shadows on the box from adhering the flowers. However, I like the shadows, so I leave it as is.
TO MAKE THE STICKS
STEP 1: Line about eleven sticks up together. Using the 9 x 12 stencil from Block Prints by Jill McDowell, stencil all at the same time. You can also opt to use many different stencils.


STEP 2: Paint each edge a different color. It doesn't matter if you want to use complementary colors or if you just paint colors in general.

STEP 3: Add a word or phrase to the middle of each stick. These should be words that will prompt you toward creating. Try to avoid specific words like bee or animal. Instead, use words that can have multiple meanings or that might convey a specific form of art making that you haven't tried before. Your job is to interpret the word as best fits the day you use it.

HOW TO USE THE KAU CHIM FOR ART MAKING
Each week, pull one of the sticks. Decide if you want to use one color, both colors, the word, or a combination of them. Be open to numerous interpretations so that even if you draw the stick again the next week, you still create something entirely new.
While I only created 52 sticks, you can certainly make more. This will allow you to "retire" some of them in favor of adding some of the new ones. You can also finish the back side of the sticks so that you have more options to choose from.
While I only created 52 sticks, you can certainly make more. This will allow you to "retire" some of them in favor of adding some of the new ones. You can also finish the back side of the sticks so that you have more options to choose from.
Anne Marie
What a fun and inspiring project! Thanks, Anne Marie!
ReplyDelete