Before I start with the tutorial I just
wanted to mention that I worked on this spread at the beginning of June. A time
when in Scotland the lockdown was still almost completely intact. We were to
stay at home, not go further than approx. 5 miles from home when exercising,
not make unnecessary journeys and not visit other households indoors and stay 2
meters away from everyone not in our own household at all times. It was a bleak
time already but became even darker with the tragic death and the resulting events
surrounding George Floyds’ death. At
first I wanted to abandon the spread which was made to illustrate the next
lines in Ben Okri’s
poem that read: “We can join that
growing fight to stop our world being plunged into night”. But then I read
and re-read them until I realized that in fact they contained a message of
hope, of realizing that however dark times become there are things we can do in
however small a way to make a difference. So I continued putting all the
elements that were already made by this time, together. In the booklet I put
words that give hope to me personally and I hope also to other people. It is
also important that I mention here that Ben
Okri himself is a Nigerian poet and novelist who is considered to be one of
the foremost African authors. He has written both poetry and fiction and his
work has received many rewards. I personally love his The Magic of the Lamp
short story book, with beautifully written, thought provoking text and also
stunning illustrations by Rosemary Clunie.

Here are the steps I took to make this
spread. The pages I worked on came from the ArtbyMarlene large art journal,
which is ring-bound and makes it easy to work on each page individually.
1. Find
a small notebook. Mine was a free gift enclosed in the Flow magazine (Dutch
version). It measures 4 x 6” and has 8 sheets.
There are many such notebooks available. If you work on smaller pages
adjust the size of your notebook accordingly. Gently remove the staples and
gesso both sides of each sheet apart from the back of one of them which will be
glued to the cover in due course. Set the cover itself aside for the moment.

2. Put
color on both sides of the pages (apart from the ungessoed side of one of
them) using acrylic paints (I used a selection of Pebeo pearlescent ones) with
brushes, brayers and your fingers if you like.

3. Drip
a selection of acrylic inks on the pages after spraying them with water first.
Let it drip down from page to page.

4. Going
back to the paints you used in step 2, and using Seth Apter's ATC Mixup Apter #2 add marks to the pages using a cosmetic wedge.

5. Using
the medium the October 2019
StencilClub stencils and titanium white paint add more marks by stenciling
with a cosmetic wedge. Also add some more texture with a rubber stamp and a
permanent black ink pad. I used a crackle one.

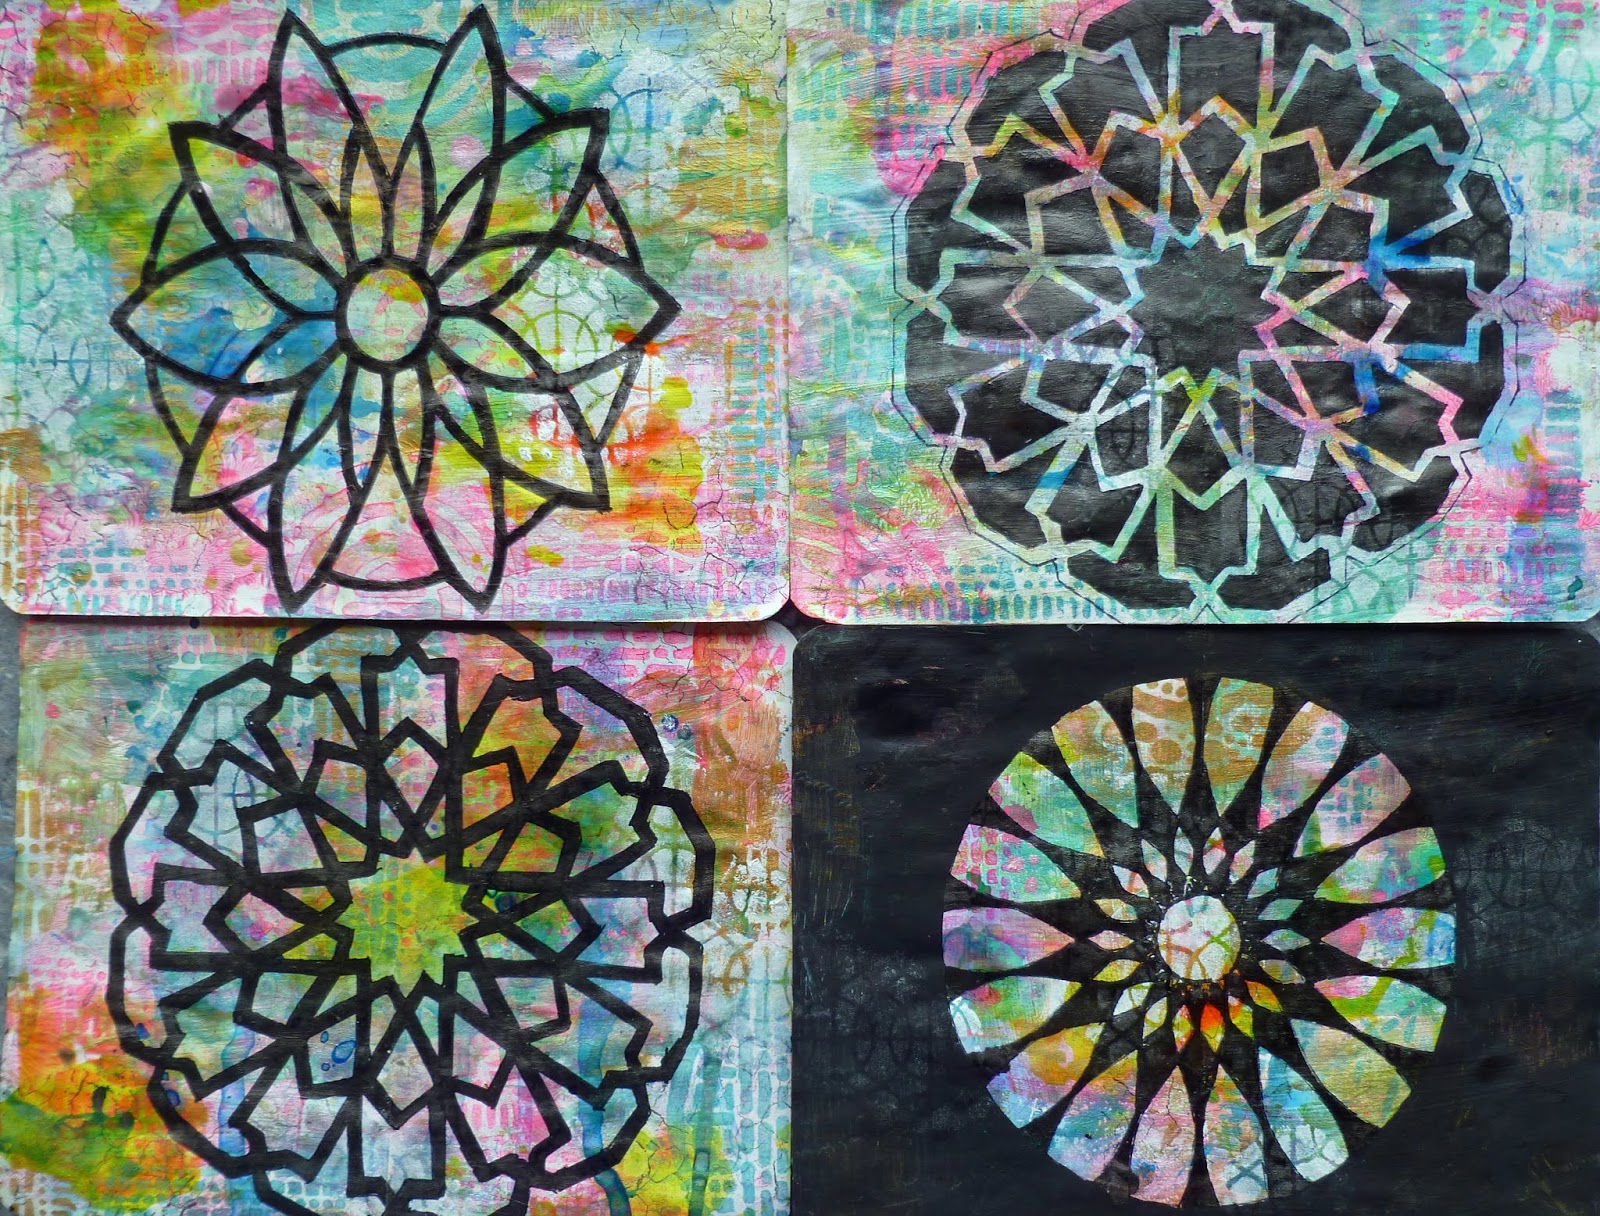
6. Then
add the focus images to all the pages (apart from the side you left blank) by
using the following stencils and a black permanent marker. Do this by outlining
the lines of the stencils and then filling in either the lines or outside the
lines, thus creating mirror images. I used the following stencils: the medium stencil from the February 2020
StencilClub, the medium stencil of the June StencilClub set, stencil Marrakesh Medina Wall and Mandals #1. Put the images both centered on the pages or add part images to
the edges of the pages.

7. Take
two large facing pages out of the ArtbyMarlene large art journal and give each
a layer of black gesso. Do the same for
the outside of the cover of the small notebook. Glue the sheet with one blank
side to the inside of the cover.

8. Using
stencil Barb Wire and Inka Gold in Silver together with a palette knife and stencil
on the barbed wire to the left hand page.
9. Refold
the remaining 7 sheets of the notebook using a bone folder and do the same to
the cover. Make a decision of the order you want your pages to be in, and once
you’re happy with the result make a template of about one inch wide and the
height of your notebook. Make a hole about ¾” from the top, ¾” from the bottom
and one in the center. Use this to make holes in all the pages and the cover
and then using a simple pamphlet stitch sew the notebook together. Use a strong
black thread, leave a good tail of thread, go into the center from the outside,
up to the top hole and out again, down to the bottom hole and in and finally go
out through the center hole and knot the resulting threads together on the outside.
If in doubt there is a wealth of videos on YouTube explaining this process.

10. Using
a small cardboard circle paint it with the acrylic colors used in step 2 and
glue it onto the cover. Also glue on the word HOPE and outline both in white.

11. Glue
on words and quotation on each spread in your little notebook.
12. Glue
the right hand side cover to the right black page from the art journal. I used
double side tape for this purpose. Thick gel medium would also work but is messier.
You can know open the booklet attached
to the black right hand side page and look through the content.
13. Stamp
on the words of the quotation by Ben Okri, using a variety of different
alphabets and vintage paper. Tear out the words and glue them on as shown in
the final picture and outline the edges with a black Stabilo All pencil.


No comments:
Post a Comment
If you are entering a GIVEAWAY, please add your email address in the event we need to contact you.
To avoid SPAM, please write it like this:
marybeth (at) stencilgirltalk (dot com)
Thank You!