
Hi All,
Niamh here from the bottom of the world! I have been playing around with mark making and abstract backgrounds for as long as I remember - its one of my favourite ways to practice making art. But occasionally it doesn't always look great! This is a brilliant way to rescue a page/background or something you are not a fan of easily.
To start with, create a background, any will do (watch the video below to see how I created this one). I would highly suggest though that to do this technique you use permanent mediums (acrylic paints, permanent inks, markers, collage etc). If you do use something that is water reactive - seal it first with a spray varnish or coat of gel medium.

To create this effect, I choose an open, organic shaped stencil that was easy to trace around. I deliberately only drew around the larger spaces, leaving the small triangular spaces as areas I would paint in. I then removed the stencil and painted in the gaps with white gesso. This wasn't painted thickly, so you can still see the colours through some areas, but I liked this effect. You can always add more coats if you want a pure colour.
I often get asked - why spend so much time on the background if you are going to paint over it. And I get it - I really liked the background I made. To quiet that thought, I often take a photo of the background before I do the masking, so I can print it out again in the future to use as collage fodder or inspiration for another day. By using the stencil over the top though, I can create little frames and snippets of colours and marks - and this gives the piece an overall focus. 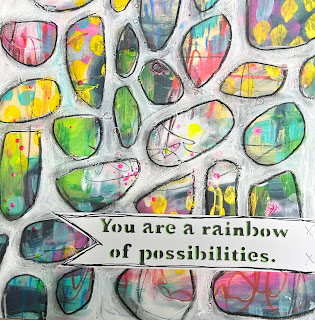


To sharpen that, I draw around the open spaces with a black stabilo all pencil and smudge it with my fingers to add a shadowed effect to the frames. I then stencilled out a quote from the rainbow quotes stencil and stapled it to the page to complete it.
I hope you have a go at masking with your stencils - it will completely change the way you look at them in the future!
Here is a video with the step by step process for you to follow:
Here is a link to the stencils I used on this page:
Happy Creating,
Niamh
This is brilliant!! Thank you for giving us a new way to use stencils- I have this one & am going to do this today! I’m so excited!
ReplyDelete