https://youtu.be/6L5_Pe0W50M
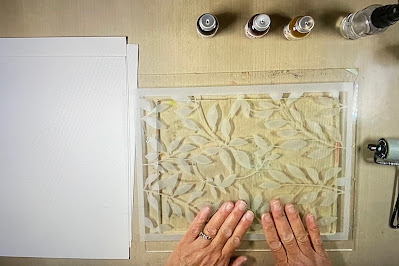
The supplies I am using are my 8" x 10" gel plate, a brayer, several colors of
PaperArtsy Infusions, 4 sheets of watercolor paper, spray bottle filled w/water, a couple
sheets of deli paper or thin copy paper to pick up excess color on plate, and a roll of paper towels.
To begin, I laid the stencil onto my gel plate and pressed it down to create good contact
with the plate to prevent the color from seeping under the stencil too much.
You can spray again after the stencil is removed. Before removing the stencil, set a blank sheet of
watercolor paper to the side of the plate and spritz an even coat of water on the paper.
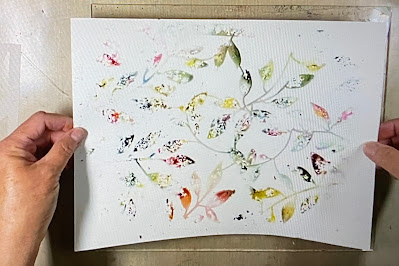
Gently lift the stencil off of the plate and lay upside down on the moistened
paper. This will allow the reverse image to be printed on this sheet.
vivid paper to add other elements onto. You could even roll acrylic paint on
the gel plate, lay the stencil back down on top of the acrylic and pull a print leaving
the background in the spaces where the stencil is a solid image.
I will use this as collage paper of add other images on top of this.
roll and rolled it over the stencil to pick up and water remaining. This will help keep the
image crisp and keep the pigment from bleeding into the white area.
lightly mist it again with water remembering that the color may spread into the white areas
so be sure to use a light mist, let it do it's work, and then add more in small increments.

Thank you for joining me today and I hope you enjoy trying this technique.
I look forward to sharing projects with you in the future on the StencilGirl® blog.
Thank you StencilGirl® Products for providing me with this free StencilClub set so
that I could play in advance and share what I create each month with you.
Join StencilClub by December 15th to receive these exclusive stencils, an accompanying
video tutorial with PDF (both downloadable!), and 25% OFF STENCILS EVERY DAY!!
Happy Creating!
To see more of my work please visit my Instagram page.


These are beautiful Carol! Thank you for sharing this technique! ☺️
ReplyDeleteThese are beautiful Carol! Thank you for sharing this technique☺️
ReplyDeleteThank you Rae! Wonderful stencil set this month.
DeleteI'm having trouble finding a way to buy the stencils used in the presentations. Looking around on the page. Help! :)
ReplyDeleteAs Terry explained below. These are the December stencil club set available to member of StencilClub. She posted the link to sign up if you are interested. This set will be available to anyone who signs up by December 15th.
DeleteAnonymous, the stencils used are the December Stencil Club stencils. You have to be a member of Stencil Club to receive them. For more info and to join, go here: https://www.stencilgirlproducts.com/stencil-club-s/1850.htm
ReplyDeleteCarol, it's great to see someone experimenting with unusual products. Thanks much for sharing your experience!
ReplyDeleteThank you Terry. I love finding new ways to use the stencils. I appreciate your help with the previous post and your kind comment.
Delete