Tuesday, July 31, 2018

In Honor of Gramma Bee by Kristin Peterson


I come from a long line of artists. My Gramma Bee was the first, then my mom and myself. When I was a kid, my gramma and mom would make wheat weaving and we would travel all summer long, going to art and crafts fairs in the Midwest.

When I got a bit older we would all take art classes together, and then, staying with gramma, we would do class all day, eat supper and then, break out the paints around the table, and the three of us would paint that evening. 

Now, I need to let you in on the rest of the scoop.... so as it went, my gramma painted mainly in watercolors and was a realist painter. my mom could go between watercolor and acrylic and work anywhere from realism to abstract. And then, there's me.... acrylic and abstract. So, my gramma and I were at the ends of the spectrum.

That is until the last year she was with us. That last year will be something to remember for sure. the art classes would be too long of a day for her, but my mom and I would still come and take the class and stay with her. We would bring home what we had done in class and gramma would critique the work and provide additional feedback for us. We would eat and continue the conversation, and after supper, we would break out the paint again. 

But remarkably, we transitioned to mainly acrylic..... and mainly abstract.... even my gramma.

One of my fondest memories of my gramma was us sitting around her table painting with acrylics when she grabbed one of the plastic forks and started painting with that and exclaimed, "This is awesome! Why haven't we been painting like this the whole time?!"

My gramma was the most prolific painter that last year she was with us. She painted up a pile of little abstract paintings which my mom would cut up and mount onto cards, which were sold locally in a gallery.

Which leads me back to my project.... a handmade card, which I started with watercolor, added a bit of acrylic paint and finished with a stencil making abstract marks. 

Let's walk through the process. I hope you enjoy..... 

xo. kristin

I squeezed a bit of watercolors onto a note card. I am totally obsessed with Payne's Grey and Nickel Azo Gold.


Then, I painted my watercolor paper with the colors and let it do its' own thing- running, mixing a bit and then dried thoroughly.


I looked through my stencils and chose one knowing I was doing to cut it down to fit my card. I especially liked the left hand corner with its square-ish vibe.... 


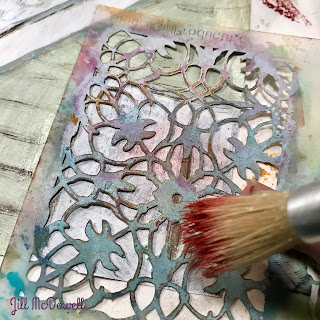
Here is the entire stencil, Soulful Scribbles by Traci Bautista.


I usually always roll the paint through my stencils onto whatever I am working on, so I will squeeze out a bit of white paint onto a card and run my roller through. (Hint: I normally only use either white or Payne's Grey with my stencils; so I keep my rollers in baggies until I can't use them anymore.)


Place stencil over your work, and roll..... total happiness.


I love the white on top of the Payne's Grey and yellow. It is soft, yet provides a nice contrast with my background.


Then I cut my background down in size, choosing what I wanted for my card and mounted on a small piece of book paper to provide a visual difference between my background piece and my white card.


My gramma was also a seamstress - and I love sewing on paper any chance I get. I glued my background onto the book paper and decided to sew it onto my card.


Here is how my piece looks sewn onto my card..... so much happiness.


I love giving a homemade card. I think of them as little pieces of art. 


And in this case, in honor of my late Gramma Bee.

Monday, July 30, 2018

Six Ways to Use Your StencilGirl® Stencils & Stenciled Papers for Book Art Projects

Six Ways to Use Your StencilGirl® Stencils & Stenciled Papers for Book Art Projects
Hi Everyone!
Kiala Givehand here with my first post as a StencilGirl® Columnist. 

My hope is that this year, as a columnist focused on Book Art and Bookbinding related topics, I can bring you lots of fun ways to start, continue, and complete those many projects you have sitting around your studio/art table (or the ones floating around in your heart). 

In this first post, I'm delighted to share six of my favorite ways to use stencils and stenciled papers in book art and bookbinding projects. If you are new to bookbinding or to the term "Book Art", don't worry, there's lots of time to get up to speed. For now, all you need to know is that these are my working definitions when I use these terms: 

BOOK ART: Art that incorporates the form, and/or function of a book as inspiration or as a way to deliver content. 

BOOKBINDING: The act of binding papers together to create a book (or book-like) structure that can be blank or filled with words and images. 

But for now, just take it easy and see what strikes your fancy as I share my love for paper, stencils, and bookbinding. I welcome conversation, your questions, and tons of alternative ideas. I love when I share something you've done or hear how you might take my idea/suggestion and expand on it. 


StencilGirl® Stencils I used:


Now that you've seen my favorite 6 ways to give my projects an intentional look, I'm curious, which was your favorite? Which one are you going to try this week? 

Stay tuned for more tips, techniques, and talk about Book Art. 

Hugs and Creative High Fives...
Kiala

Friday, July 27, 2018

Just a few minutes with Mary Beth, episode 3


We hope you enjoyed this episode of Just a few minutes with Mary Beth!
We would love to see you over at StencilGirl Studio!!


Stay tuned!
Mary Beth Shaw will be back again next month with another new VLOG post!

Thursday, July 26, 2018

Silvia Souza's Prayer Flags for a Friend


In Northern Virginia, there is a wealth of both thrift stores and consignment shops.  My favorite thrift stores near home are the Good Shepherd Alliance’s Hope’s Treasures and the Salvation Army.  But to really delve into thrift store shopping, I love doing the rounds in Fredericksburg with artist Leslie Brier, who is a seeker of treasures extraordinaire! Lastly, we are fortunate in this area to have Upcycle in Alexandria- not a thrift store exactly but a resource for artists, teachers and others who prefer recycling donated materials. You pay a yearly membership and can take as much as you want each visit.  But my treasure seeking for this project was further from home.

I was visiting my sister in North Carolina and I forced her to take me to Durham’s Scrap Exchange. WOW! Room upon room of goodies, including lots of medical and construction stuff with classroom space and a gallery! Upcycle/thrift on steroids! My sister would normally never step into a place like this but she had a great time making fun of how thrilled I was. I would walk down the aisles, see something cool, then turn around and get excited by the next ‘shiny’ thing.

Scrap Exchange- Durham, NC
Gallery in Scrap Exchange

Wednesday, July 25, 2018

Swag, Swirls, Scallops and Drops ~ New Stencils by Valerie Sjodin

Pull up a chair and get ready to stencil! 

You'll find that this collection of stencils by Valerie Sjodin allow you to embellish your art projects with a hand-painted look.


Valerie Sjodin designed this Swag Borders and Dangles stencil with a mask to work with a multitude of applications. Its swag border is suitable for furniture, journals, envelopes and more! The dangles can be added to any border and personalized with a pen.
Swag Borders and Dangles, L650, 9"x12" Stencil with Mask
Art journal page - collage with acrylics


Calendar pages with gelatos


Valerie Sjodin's Scalloped Border Mask stencil is quite versatile!


Similar to the width of washi tape, the little borders of Valerie's Swag Border Mini Repeat, add pattern and interest to the edges of cards, journals, and artwork. They can also be used for additional dangles. Add your own pen flourishes for a more personalized look.


It's a new twist on diamonds and swirls!

Add mystery and style to any piece of art with Valerie's Drops and Swirls Repeat Stencil. Valerie gave a new twist on diamonds and swirls.


acrylic pens on an envelope

The interior of Valerie's Pointed Scalloped Borders stencil is enhanced with an Eastern European/Middle East flair and features a mask you can snip out. This tool can be a focus feature. The repeated border that stands alone or mixes well with Valerie other stencil designs.

Pointed Scalloped Borders Stencil & Mask, L649, 9"x12"
Discover all of Valerie's stencil designs here.

What will you embellish with these pretty stencils?

Tuesday, July 24, 2018

Honoring My Dad on a Vintage Dovetail Drawer Back by Jill McDowell


Hi Everyone,  

It's Jill McDowell here with you today and I'm really excited to share a stenciling project I made to honor my Dad.  I used the back of a vintage dovetail dresser drawer, a print that I pulled from my own Linocut, and four gorgeous stencils from StencilGirl® Products to set the stage.  The barn and the weathervane represent how throughout my life, my Dad's love, encouragement, and steady belief in me has both grounded and kept me moving in the right direction.


My Dad, a retired aeronautical engineer, is in his heart a craftsman.  Like me, he enjoys working with his hands on DIY projects around the house. One of those project was this shed that he designed and built in our backyard in Portland, Connecticut in the 70's. It was outfitted with recycled french doors, flower boxes, Hex signs, and a cupola that was topped with a copper weathervane.  It was quite the talk of the neighborhood back then.  Looking back, I think that my Dad was actually far ahead of his time.  I wish I could have his shed in my backyard now to use as my own "She-Shed" / Art Studio.
The shed my Dad designed and built in our backyard in Portland, CT 
I felt lucky when I found this jewel of a piece of wood hidden in a scrap pile. Once it was the back to a dovetailed dresser drawer, now it is a serendipitous substrate for my mixed media piece.  As an engineer, my Dad marvels at the time and craftsmanship involved in making furniture with dovetail joints.  Their tensile strength is resistant to being pulled apart, much like my family living now living 900 miles a part.

The wood only needed a light sanding to ready it for the project.  For the first layer, I adhered squares cut from vintage wallpaper with matte medium.  


Which I then proceeded to cover completely with gesso that I scraped on with a Catalyst blade.

Using a make-up sponge, I pounced Titan Buff paint though the 9X12 stencil from the June 2013 stencil set designed by MaryBeth Shaw.   In the back off my mind, I was thinking how funny it was that I was using a stencil inspired by wallpaper to cover up actual wallpaper.  

I tinted a glaze with Golden's Quinacridone Nickel Azo Gold and applied it with a baby wipe to add depth and color.

When it dried I added a final layer of stenciling using the same stencil in Quinacridone Burnt Orange.

Meanwhile, I made a print from a Linocut I had carved on a linoleum block.  The block was originally designed to be printed on a printing press, but I've found that I can also use it to print at home by hand.

I inked the block with black StazOn and then gently placed SUMI-E Painting Sketch Paper, (a relatively inexpensive Japanese rice paper) on top.  


I burnished the entire page with a baren using a lot of pressure. 


Then I pulled the print.


The sky area was cut off and discarded, leaving only the structure of the building to work with.  Then I began adding color with washes of acrylic paints.


I used Golden paints to create the look of copper and patina on the roof of the cupola, (more information on the colors I used follow below).  I'm really happy with the results.


I adhered the barn onto the panel with matte medium then went to work upgrading the doors to something more suitable to my Dad's high standards. If you recall, his shed had French doors of clear glass.  Clearly I needed to up my game....

MaryBeth Shaw knows that using repetition is an excellent way to strengthen the overall design of any composition.  I was delighted to find that she had included a proportionately miniaturized version of her Wallpaper stencil in her ATC Mixup #2 Stencil.


I started playing with the stencil on piece of scrap paper and I found that the smaller design reminded me of a Pennsylvania Dutch hex sign, much like the ones hanging on either side of the French doors of my Dad's shed.  Another, serendipitous moment!


Time to create the weathervane.  I knew from the start that I wanted to use a character from Carolyn Dube's Little Figments of Imagination Stencil.  Carolyn's characters are just the sweetest, just the right size for my project.  I choose to work with the Bunny as it reminded me of the nickname of a dear, old family friend.


I painted a piece of card stock to look like copper and patina.  Working wet on dry, I laid down my first layer of paint with Iridescent Copper followed by a layer of a Paynes Grey wash.

I let those layers dry and then added a Quinacridone Burnt Orange wash followed by more Iridescent Copper to create the third and fourth layer. I topped it off with a wash of Cobalt Teal.  (Note: all paints are Golden brand).  I think the result is gorgeous.

I used the stencil to trace bunny onto the back of the "Copper", aka painted card stock, and then cut him out.  Unfortunately, the copper and patina colors were a bit too strong for the little guy.  But, that was easily remedied with washes of Cobalt Teal, Light Phthalo Blue, and Light Phthalo Green, (three of the newest in the Golden color family) that I tapped on with the tip of my finger until I got the effect I was looking for.


After he dried I polished him up a bit with a not-so-moist baby wipe, and Voila...


Side note:  You'll laugh when I tell you that I actually made quite a few bunnies but they kept disappearing.  What can I say?  They were small and blended in with the surroundings really well...  The funny thing is that they didn't disappear all at once. I'd make one, leave it to overnight to dry but it would be gone the next morning.  So then I'd make another one, only to have the same thing happen again.  But I perservered on and finally captured one.  I'm sure the others will turn up at some point, just probably out of some magician's hat...

I used a piece of wrapped copper wire for the spokes of the weathervane and directional elements from Mary Nasser's  Map Symbol Mini Stencil.  Mary's stencils were  proportioned perfectly for my weathervane!


When honoring your Dad with a piece, I think its appropriate to have a dedication on the back.

I learned something fun when I used Mary Nasser's Map Symbol Mini Stencil on the dedication.  If you use a dark color to stencil the design;, and then flip it over and position it so that the openings and the stenciled areas just slightly overlap and stencil using a lighter color, then you get a 3-D effect.  Pretty Cool!  (Hmmm, I wonder if you can do that with any of her other stencils?  I'm going to have to try that.)


Thanks so much for spending a little of your day with me.  Hugs until next time,  Jill


StencilGirl® Stencils Used:

June 2013 StencilClub by MaryBeth Shaw


ATC Mixup #2 Designed by MaryBeth Shaw

Little Figments of Imagination Designed by Carolyn Dube

Map Symbols Mini Stencil Designed by Mary C. Nasser