Hi all! It's Gwen, back again with my quarterly Paint & Texture column. This month we're going to explore just a few of the many ways that you can use your stencils with acrylic skins and incorporate them into your projects.
For this month's project, I've used a few of my stencil designs and two different types / methods of making acrylic skins to create a layered and textured page in my art journal.
I've put together a little tutorial to show you how to create the acrylic skin layers on this page. Ready to get started?
For the first type of skin, I used one that was created organically over time... that's right, I peeled it right off of my paint palette. I have a tendency to let the bits of acrylic paint left over on my palette build up until they create a nice solid skin, then I peel it off and store it in a folder in between layers of wax paper. For the first technique, I chose a skin that was thick enough to hold together when I cut pieces out of it, but not so thick that I would have trouble getting a blade through the dried paint.
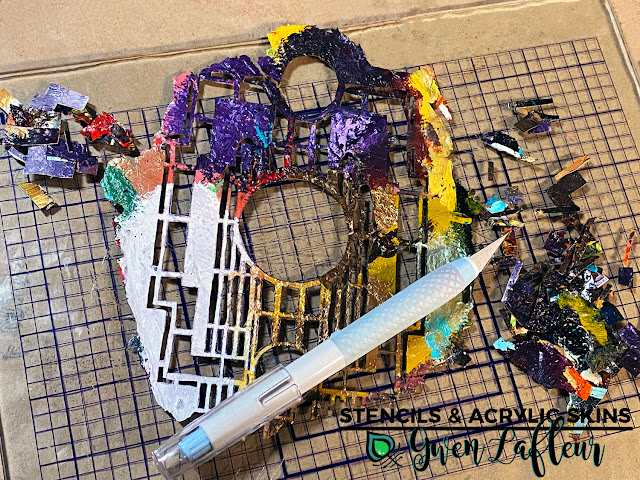
I stenciled my Art Deco Bookplates stencil onto the skin with black Archival Ink and a blender brush, deliberately allowing the design to go off the edges - I wanted something that would have a naturally ragged border.
Next I used a craft knife with a fresh, sharp blade and carefully cut out the pieces of the stenciled design that I wanted to remove. I used a glass cutting mat for this part... partly because the acrylic skin sticks to it a bit which kept it in place while I was cutting, partly because I get less drag against the mat when I'm cutting than I do with a self-healing mat, which makes for quicker and cleaner cuts and less tearing of the acrylic skin. Just take your time and go slowly and carefully, making sure to keep your fingers out of the path of the blade.
With my stenciled design cut out of the paint skin, I pulled out my art journal. I had a page in the journal where I had stenciled with my Collage Textures and Patterns - Leaves stencil - both the repeating pattern and also some of the leaves in the center and along the edges of the page. (Those are colored with Posca colored pencils.)
I positioned my skin where I wanted it and adhered it by collaging with Golden Soft Gel Matte medium. I used a traditional collage method; I coated the page where I was going to adhere it, then the back of the skin, and then a coat over top after it was adhered. I used wax paper to press the skin down and make sure the extra gel medium came out the sides and was cleaned up and that the skin was flat and firmly adhered.
The first skin is fairly thin - you can see some of the texture and dimension in the photo above, but I wanted to amp it up with more layers from a second and different type of acrylic skin.
This skin I made from scratch. I put a fairly thick layer of Golden Molding Paste on a non-stick sheet and let it dry for about two days (it may take less time depending on the climate - it's quite humid here in Virginia, so thick coats of acrylic take a while to dry.) Once it was close to dry, I coated the top of it with Golden Matte Pouring Medium to matte down the surface and also counter any brittleness that I might get from the molding paste. When it was totally dry, it peeled right off my Teflon sheet.
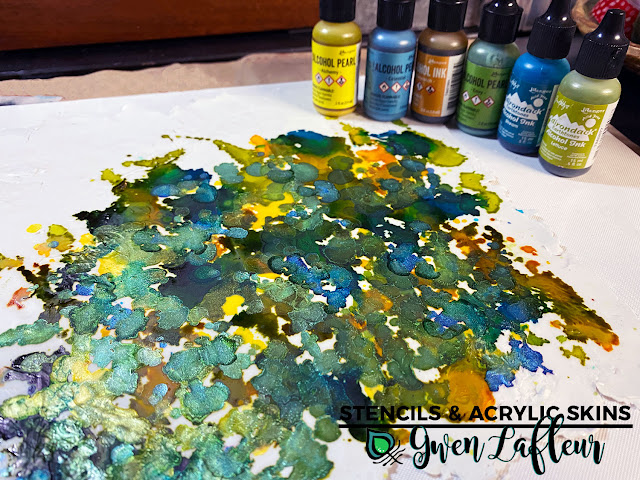
I wanted to use this skin to make some leaves, so I pulled out a mix of regular and pearlescent Alcohol Inks and splattered leafy colors all over the skin, then let it dry completely.
From here I took my Collage Textures and Patterns - Leaves stencil again and stenciled some of the larger leaves on my inked up acrylic skin.
I cut the leaves out and then used a black Posca pen and a gold marker to go over the black lines and close the bridges from the stencil and edge the leaves with gold to cover up the white. This skin was about 1/16" thick, so the white edges would definitely show from the sides if I didn't cover them in some way.
I used Tacky Glue to add the leaves onto my art journal page, cut off the edges where they hung over, and then went back over with the gold pen again to cover the white. I also used a black Stabilo All pencil and a water brush to add some additional depth and shading and to really highlight the dimension from the skins.
With the background done and all of my acrylic skins adhered, I wanted to add a more definitive focal point so I pulled out my Christmas Cardinal and Holly stencil. I stenciled the bird onto a very thin sheet of handmade cotton paper (15gsm, so extremely thin and delicate) using red Archival Ink and a blender brush. You could also use tissue, rice, or mulberry paper to get a similar effect.
To color my cardinal, I knew that I wanted a semi-translucent paint. Watercolor and gouache are great, but can still be water soluble and I knew I was going to collage this onto my page so I needed something permanent. You could use translucent acrylic paints, but I have this amazing Holbein Acryla Gouache which acts like gouache when wet, but is permanent like acrylics once dry. I used a few colors of the Acryla to paint my cardinal - I wanted it to be at least a bit translucent so that the stenciled details would still show through. (You just use the tiniest dot of Acryla Gouache and then mix with water and you get more than enough.)
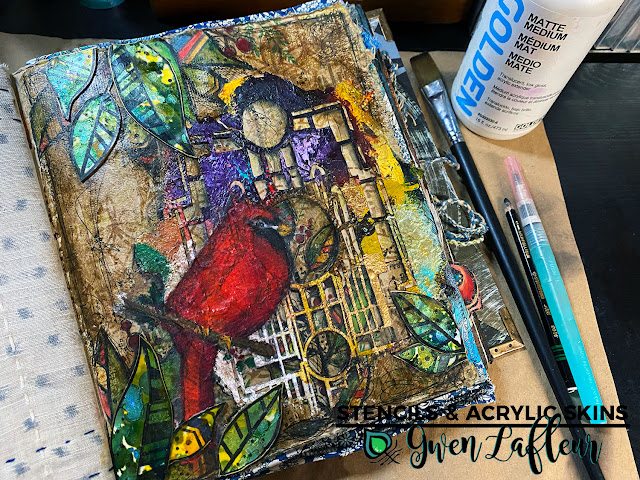
Once my cardinal was totally dry, I tore the edges of the paper from around the bird and then collaged it onto my art journal page with matte medium. Then I used my Stabilo All pencil and water brush again to add a bit more shading.
Voilà! My finished page.
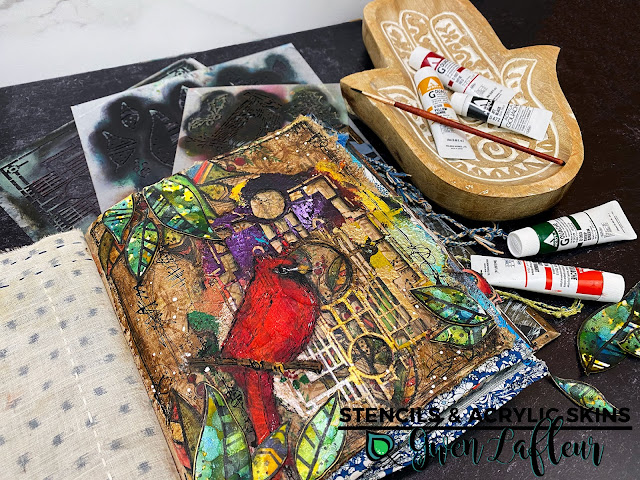
I love using acrylic skins in my art journal because I can get really obvious differences in texture and dimension without adding significant bulk or weight to the page. Here you can get a good look at how much dimension there really is:
Of course, you can also add acrylic skins into your mixed media canvases and panels, use them in assemblage work, and add them to cards or even scrapbook layouts - they're incredibly versatile.
That's it for today's post... I hope you enjoyed the project and tutorial and that you're feeling inspired to peel some paint off of your palette or make your own skins and try using them to add layers and texture into your own artwork.
Until next time, happy stenciling!
(PS... don't forget to check out my live online workshops! I have three more this year.)


Gwen - a great tutorial with fabulous photo layouts! I love paint skin projects and these ideas are super! The stencils you showcased are now tops on my wish list! Not quite ready to invest in Holbein, but getting closer. Thank you for this lesson. clintine
ReplyDeleteAwesome project Gwen and fab stencils. Really looking forward to you joining Stampers Grove for your MASKquerade class this Saturday 24th. 🙂
ReplyDeleteI'll be checking everywhere for acrylic skins. I often end up with dabs of acrylic on various plastic lids and other disposables. Your page is very complex and wonderful.
ReplyDeleteWonderful Gern. It's so interesting, as I also let my acrylic palette build up to peel the skin, so it's easier to clean. Now I may have to be more discerning with my globs of unused paint!😍
ReplyDeleteArt journaling with texture and color inspires deeper creativity, much like how aroma and sensation impact the mood. Just as acrylic skins add dimension to a page, products like kronic c-liquid can enhance calm or focus during artistic routines or relaxed sessions. Known for its unique blend, kronic c-liquid offers a smooth experience and is often appreciated for promoting mindfulness—something valuable when creating or unwinding. Blending sensory expression with tools or scents that relax the mind can make art and downtime more fulfilling. Connection, whether through visual texture or calming aroma, builds meaningful engagement.
ReplyDelete