Hello all! It's Gwen back again with another project tutorial focusing on paint and texture. This month I wanted to share a quick and easy way to create a layered mixed media piece by doing some printmaking with several of my stencil designs and a gelatin plate.
To start, I took a piece of 9" x 9" watercolor paper (140lb / 300 gsm) and covered the background with two colors of PaperArtsy Fresco Acrylic Paint (Twilight and Azure,) let it dry, and then stenciled layered patterns from three of my stencils using ink and a blender brush.
I started with my Collage Textures & Patterns - Medieval Cyrillic stencil (with Cobalt Archival Ink,) then added sections of one of the designs from my Art Deco Borders stencil (Sepia Archival Ink,) and in the top layer I repeated my Suzani Circle Flowers stencil (Jet Black Archival Ink.)
I was just looking for layers of pattern to create a sense of texture since this was just going to be the background and a lot would get covered up.
Now for the printmaking part... you can do this with a stencil, but for the effect I wanted on this piece I chose to use a mask (you paint or ink around the design rather than through it.)
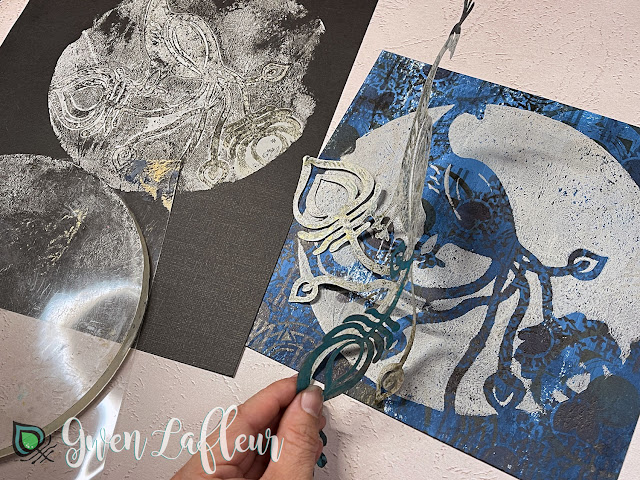
I pulled out my Ornamental Peacock mask and positioned it where I wanted the shape to show up on my piece and then used my brayer to coat an 8" round gelatin plate with paint (I used PaperArtsy Fresco Acrylic Paint in Truffle.) I left one of the acetate sheets on the plate to use as kind of a stamp mount for printing.
With the paint still wet I quickly but carefully flipped the gelatin plate upside down (holding the acetate as much as possible to keep my fingers out of the paint,) and laid it down over my mask centered on the page. I rubbed firmly all over to make sure the plate completely printed before carefully peeling it back off.
I stamped the gelatin plate again on a piece of black cardstock (why waste the paint?) and got a bit of a peacock design that I can use later in another piece and then lifted my peacock mask off of the background. (If you do that quickly enough and the paint is still wet, you can print that too.)
If you have any details that didn't completely print (like the wing on my peacock,) you can always replace the mask and go back over the details with more paint and a stencil brush or sponge.
When my print was dry, I pulled out my Chinese Garden Buddha stencil, my Palmistry Hand stencil, and the 4" x 4" from my February 2021 StencilClub Feathered Tribe set and added some marks onto the printed circle.
For the final details I took one of the designs from my EGL-10 stamp set from PaperArtsy (I call this my Japanese Patterns set,) and stamped a bit of a cruciform pattern to fill in and anchor the design and then used a pen and colored pencil to outline and add a few more details.
Last but not least, I edged the borders with brown and black ink to frame and finish the piece.
I really love the deceptive simplicity of this project - it's quick and easy, but the layers and details made with a few basic tools and supplies make it look a lot more complicated than it actually is... one of my favorite types of projects!
Here's another peek at the finished project... you could follow the same process on a canvas or panel, in an art journal, or even on a handmade card or tag just using different sizes of gelatin plates and masks.

Hopefully you enjoyed today's project and tutorial as much as I did! And if you try this yourself, make sure to link me up so I can see how it turns out.
Until next time, happy stenciling!


You do such beautifully detailed work, Gwen. Thank you for sharing this.
ReplyDeleteYou have an uncanny way of posting procedure tips at just the right time ,,,this looks so much easier than neatly subtraction painting on a background which I had thought I would have to do on a project I am planning ...thanks !!
ReplyDeleteBeautiful project, Gwen!
ReplyDeleteAbsolutely Gorgeous Gwen!! And you are right about how deceiving the process is! Bravo!!
ReplyDelete