S P O N G E D
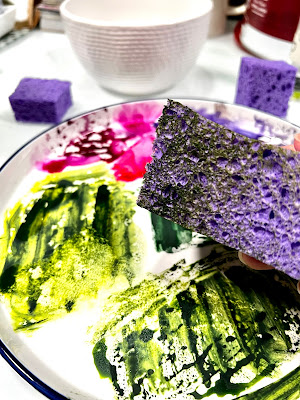
It's Nancy Curry back on the blog with my first projects for 2023. Even when I've worked with a medium for a long time, I love to find new (to me) ways to apply that lend themselves to different outcomes. This week's exploration was applying watercolor with a household sponge. Using a sponge through a stencil helps to control the amount of water leading to less seepage and adds an interesting texture as well. The three pieces in the top photo were all done with the same palette of colors. All are done on craft paper that had an application of gesso, but you can also do this with watercolor paper or even a good mixed media paper.
M A T E R I A L S L I S T:
- artist grade watercolors
- gesso
- household sponges cut into parts
- plate
- watercolor paper or paper treated with gesso
- black gouache, acrylic paint or permanent black ink
- scissors and glue stick
- cardstock or other substrate
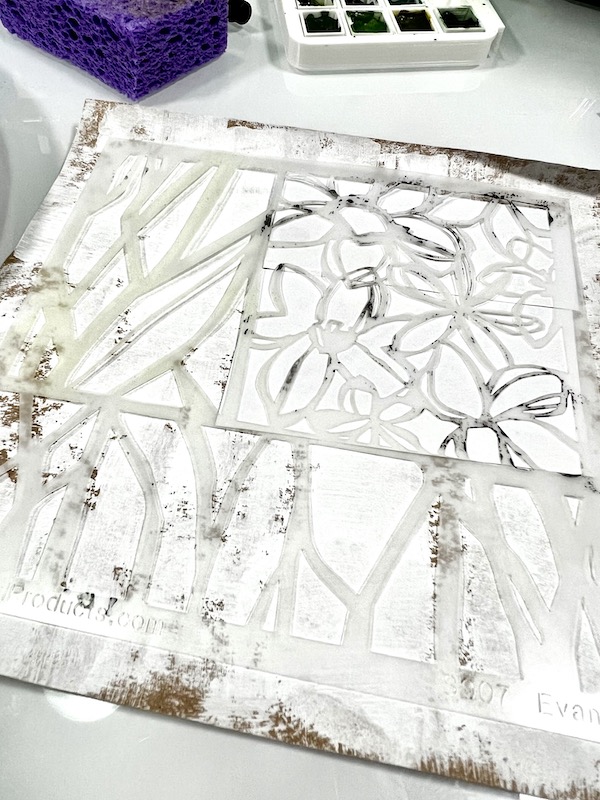
S T E N C I L L I S T:I like to use a large stoneware plate that I found at Wal-Mart for my palette. It is non staining and the flat surface is good for a number of different applications. I bought a few and let the watercolor dry on them so I have palettes ready. I transfer the watercolor with an old brush a few minutes before I am starting to paint. Its surface area can hold a nice array for colors. You'll see me use it often in my Instagram videos. I also prepped some craft paper with gesso. I generally apply it in a thick and thin manner and leave some areas bare for a distressed look. Complete coverage is also fine.


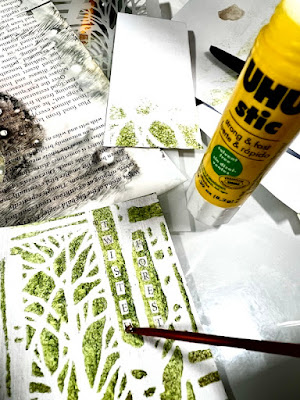
I spritzed the dry watercolors with a light fine mist of water and pressed my sponge into it. I then used a light-medium pressure to pounce through the Paperwhites stencil. If there are areas that you want to use different palette colors, place a piece of printer paper in those areas. In this case, I did the leaf areas first and later returned to do the flowers in purple. I decided the flowers needed centers and added them with a brush.

To finish, I mounted it on dimensionally striped cardstock.
I had paint left over so I continued playing. For the second piece, I chose a rectangular format and parts of Capture the Journey. I began by using washi tape to mark off a place for a word and then sponged on the background florals and leaves. Originally, I was going to add a word in the masked area directly onto the background, but changed course and did it on a separate piece of paper. I finished it off by sponging black gouache with Emotions & Feelings #3 and attached to the background with a glue stick.


I mounted the background on coordinating green cardstock
My final piece was a stencil I'd been dying to use, Twisted Forest. I cut paper into a 3.75" square and sponged into the stencil. Once finished, I attached it to tumbled stone coaster, cut out letters from a National Geographic, and used a glue stick to affix.
I had a great time playing with kitchen sponges. They clean up well, are reusable and easy to find. Be sure to use highly pigmented watercolors for the best color. Acrylic ink will also do well if you're looking for something else to try. Just don't leave it on your sponge overnight! As always, it's a pleasure to share my projects with you. For more of my work, head
here, or my main
website where my store is.
I wish you a happy, healthy and creative 2023.
xoxo,
Nancy


Love this
ReplyDeleteBeautiful work - love your color combos!
ReplyDelete