Showing posts with label Art & Whimsy. Show all posts

Tuesday, March 3, 2026

Create A Whimsical Infinity Roll for Your Mixed Media Projects

Hello again from Kim Hamburg, a mixed media collage artist who believes there is no such thing as too much paper. Today I’m sharing one of my favorite studio habits — making an “infinity roll,” a continuous strip of dyed and stenciled paper that you can tear from whenever your collage, junk journal, or assemblage needs an extra layer of texture and story.


Infinity Roll


ATC card with Infinity Roll Piece


The Infinity Roll

A never-ending strip of possibility for your mixed media projects

There is something very satisfying about a roll of paper.

Not a precious sheet you’re afraid to ruin. Not a perfectly cut background. A roll. Continuous. Practical. A little industrial. The kind that used to live in a cash register.

In the studio, though? It becomes an infinity roll — a stash of ready-to-use collage magic you can tear from whenever your junk journal, assemblage, or mixed media piece needs “just one more thing.”

This month, I decided to make mine monochromatic. I made one in purple and one in teal, and I’m honestly in love with how the edges turned out.


Here are the completed Infinity Rolls -- one in blue, one in purple.


Supplies


Step 1: Dye the Paper (Trust the Process)

First, tear off a workable section of your roll — about 3 to 5 feet. That’s the sweet spot. Long enough to feel abundant, short enough to manage without dye going everywhere.

Pour a little RIT liquid dye into a shallow cup or lid. Set one end of your paper strip directly into the dye so the edge can start absorbing color.

Let it sit for about an hour. If you want deeper color, leave it longer. After an hour, flip the strip and let the other end soak.

As it dries, the dye creates this beautiful watercolor bloom along the edges. It’s soft, organic, and slightly unpredictable — which is exactly what we want. Mine dried into these moody purple and teal gradients that feel rich but not fussy.

Let it dry completely before moving on.


Paper Cash Register Roll


RIT dye in shallow container


I flipped the paper over to dye the other half.
Notice how beautiful the dye takes to the paper.


Completely Dry 


Step 2: Add the Stencils (Layer It Up)

Once your paper is dry, roll it out across your table.

I used this month’s Stencil Club set — “Wonderfully Wonky” by Cat Kerr. It’s a two-stencil set filled with imperfect, handmade-feeling marks. They’re playful and organic, which makes them perfect for something like this.


Using a sponge roller and acrylic paint, I randomly applied the first stencil across the strip. I didn’t measure. I didn’t space things evenly. I just moved along the paper and let the marks land where they wanted.

Be sure to stencil both sides. That way, no matter how you tear or layer it later, you’ll have interest.

After the first layer dried, I used the second stencil from the set and added another color on top. The layered marks give it depth and movement — and suddenly your plain roll looks like something you bought at a fancy art supply store.

Except you made it.


Using a sponge roller to add first layer of stencil images


Adding second layer with a contrasting color


Step 3: Tear and Use

Now comes the best part.

Tear pieces off as you need them.

I used mine to create ATC cards (2.5" x 3.5") and layered sections of the infinity roll onto cardstock. Add collage papers, glue it down, build on top. The dyed edges create built-in softness, and the stencil layers make even the smallest scrap feel intentional.

Because the roll is continuous, you always have more. No pressure. No preciousness.


ATC Cards with Infinity Roll Pieces


Why an Infinity Roll?

Because mixed media artists need building blocks.

Because junk journals are hungry for texture.

Because it’s easier to create freely when you already have beautiful components ready to go..

And honestly? There’s something really comforting about knowing you can just reach over, tear a piece, and keep making.

Plus it looks great sitting in your art space ready for the next creative idea.

Here are few tips you may want to use:
1.  This is super messy!!  Make sure to lay down paper over your work surface.
2.  You can add water to the dye to make it less intense.
      Instead of RIT dye, you can use watercolor liquid.
3.  You can leave the paper roll in the dye overnight and you will get a really great result.
4.  You can mist the paper roll with water while it is sitting in the dye.
5.  Make sure to let it dry completely before adding the stencil designs.
6.  These make really great gifts for your favorite mixed media friends.  You can actually use an old spool to roll the paper around and then add a fabric bow to hold it together.


Wonderfully Wonky is only available to StencilClub Members who join by March 15th and will ship on that day.


Infinity Roll dry and ready to use


You get lots of great benefits as a club member, including a coupon for 25% off all regular collection stencils, a project and PDF from the artist, and an additional project by me that is for members only. So don’t delay!

Get more information about StencilClub

Stencil Club

I would love to see your work. Please tag me on Instagram — check out my IG 

Kim Hamburg Instagram

Facebook   Kim Hamburg on Facebook 


Final look at the completed Infinity Roll -- make sure to tag me when you make yours!


Tuesday, April 30, 2019

A heartfelt thank you to our 2018-19 Creative Team!

Talent.
Caring.
Talent.
Laughs.
Talent.
Oh my goodness, thanks for stopping by so I can tell you how much I have enjoyed working with (occasionally nudging) the delightful, brilliant, inspiring 2018-19 StencilGirl Creative Team. I'm Carol Baxter and it has been my role to manage this artistic group of women Mary Beth Shaw chose especially to represent her company.

An excited Mary Beth calls me all the time and asks, "Have you seen what x made on StencilGirl Talk? She really put thought and time into her art. StencilGirl is so lucky she is on the team."

Cheetarah Cheda, Silvia Souza, Louise Nelson, Natalie May, Kristin Peterson, BelenSotelo, Sunila & Aditi Mahajan, ClaudiaNeubacher, Katie Lamb, Trena Brannon, Sandee Setliff, and Jill McDowell your art inspires and never fail to make me smile. 

I have favorite pieces of art that you have made in the past year so I get to wax philosophic as to why it moved me (in no particular order).

Cheetarah, thank you for sharing your love of pens with me and fantastic layered art journaling. I appreciate your esthetic.


Kristin P, you have sewing skills for days. Your storybook for our stenciled poetry theme was utterly breathtaking.


Sunila & Aditi (Dots2Lines), It makes my heart happy that you are a mother and daughter making art together. These sweet ATC cards are my faves because they are lovely I imagine them being tucked away as a surprise to brighten someone's day.


Katie, stencil on a ukelele? Applause for a perfectly delightful, completely outside-the-box upcycled project. Thank you for your camaraderie and enthusiasm on social media too!


Jill, I couldn't decide between the record album stencil storage and this cake. Food won! You have more patience I think in your little finger than I have in my body. This cake topper is da bomb and...


Trena has just the plate to serve it on! Seriously, Trena, your words of cheer always seemed to arrive at the perfect time in my email, along with your art. These plates are just like you, so welcoming.


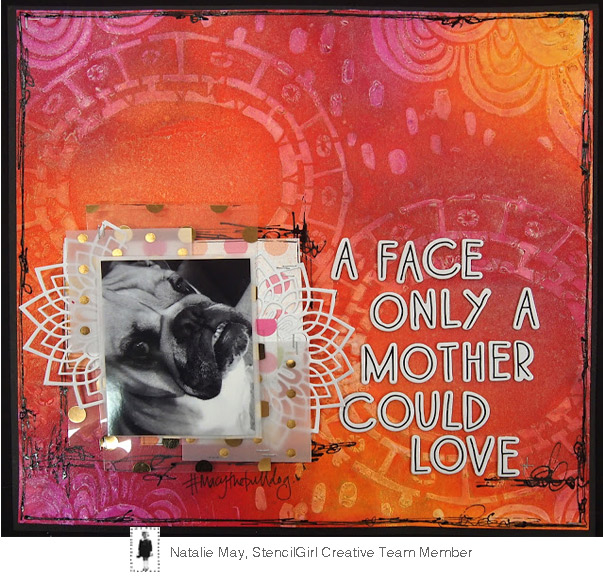
Natalie, it was so fun meeting you at the hobby show and I wish there had been a week to hang out. Your projects have made me pull out my scrapbooks again and play with pics of my family, including pets!


Silvia, Can I rub your shoulder and get a little of your sense of style and detail when it comes to making art? These kicks are made for showing off!


Sandee, I must not be drinking coffee or tea when I go to look at your art because it might have a funny saying and cause me to need to clean my keyboard and desk. I adore your sense of humor but I had to go with this completely fabulous table. 


Louise, I have been known to be all about the jewelry. I find this necklace so appealing because it is made out of cloth and, like all of your wonderfully quirky art, it is so you!


Belen (Art & Whimsy), You are all about vibrant colors, woman! My art making stuff is stashed in a stack so I can concentrate (at least that is what I tell myself) but I love the idea of baskets of collage papers. They are calling to me. Come and play! 


Claudia, I immediately coveted the cuffs you made for your very first team post but I must say, being a fan of Halloween, I am ready to celebrate the holiday with you. Alas, you live far away.


With applause for the team,
Carol Baxter

pssst!  If you are reading this before midnight on May 3rd, you still have time to take a look at and maybe win a prize during the team's Spectacular Squared-Off Swap Hop. All the links are HERE. Our team members always bring their A-game so it's doubly worth your time to take a look!

Saturday, April 6, 2019

Stencil Poetry - "Have You Earned Your Tomorow"


Hi friend. It's Belen with Art & Whimsy here and today I'd like to share an art journal spread inspired by a poem that I enjoy called "Have You Earned Your Tomorrow" by Edgar Guest.

I started with a base layer of inks and acrylic paint over gessoed pages.


I added a layer of gesso in random places to help unify the colors. Once that was done I used various stencils, like this one from the December 2015 exclusive StencilClub kit, and wiped off the gesso with a baby wipe to add great texture.


Deconstructed Della Robbia Cluster


Warped Holes 6 stencil


Next, I added some contrasting color with the Bittersweet Mini stencil.


Next, I used an exclusive trade show stencil by Seth Apter for more texture. Similar stencils are Numbers and Inside Out.


 For my main focal point, I used the Remember Face stencil by Pam Carriker.


To finish it off, I stamped out the title of the poem and added some mark making with the Grid A1 stencil and some markers.


Thank you for following along in my creative process. I hope you enjoy the poem. Belen


"Have You Earned Your Tomorrow"

Is anybody happier because you passed his way?
Does anyone remember that you spoke to him today?
This day is almost over, and its toiling time is through;
Is there anyone to utter now a kindly word of you?

Did you give a cheerful greeting to the friend who came along?
Or a churlish sort of "Howdy" and then vanish in the throng?
Were you selfish pure and simple as you rushed along the way,
Or is someone mighty grateful for a deed you did today?

Can you say tonight, in parting with the days that's slipping fast,
That you helped a single brother of the many that you passed?
Is a single heart rejoicing over what you did or said;
Does a man whose hopes were fading now with courage look ahead?

Did you waste the day, or lose it, was it well or sorely spent?
Did you leave a trail of kindness or a scar of discontent?
As you close your eyes in slumber do you think that He would say,
You have earned one more tomorrow by the work you did today?

  
Happy stenciling!
-Belen


Tuesday, March 12, 2019

Carry It: Zippered Art Pouch


Hi Friend! If you ask me, you can never have too many art pouches. I use them for my pens, pencils, misc art supplies, even to store and carry smaller stencils. So when I was presented with the Carry It challenge, I just knew it was the perfect opportunity to create another art pouch.


I found a pack of these blank, zippered pouches on Amazon, a while back so I used one of these. I started by taping off the zipper and hardware to keep it paint free.


Next, I busted out my biggest gel plate. This one measures 12x14 and is perfect for a job of this size. I first gave one side a base layer of color by pressing it down onto my gel plate, just as if it was a piece of paper. I did the same thing to the pouch strap.


Then I just flipped it over and painted the other side by pressing it down onto my gel plate again.


With both sides colored, it was time for my favorite step... stenciling! I used the Create Face stencil by Pam Carriker to create my focal point. This stencil measures 6x6 so it was the perfect size for the project.


 After stenciling on the face and hair, I stenciled on the body, using the same stencil. I also added some background texture using the Thicket Background stencil by Trish McKinney.


 To add a little more interest to my art pouch, I used Vintage Typewriter Numbers by Carolyn Dube and Hash Marks by Marybeth Shaw.


To add just a bit more contrast, I used my fave white Sharpie for a little mark making.


Lastly, I stenciled the pouch strap, again using the Thicket Background stencil.

And done! All that was left to do was add a few art supplies and toss my new art pouch into my bag for some art on the go.

Thanks for following along. Wishing you a week full of art and full of whimsy.
xo,
Belen
Art & Whimsy