Showing posts with label canvas pouch. Show all posts

Thursday, March 18, 2021

Cathy Nichols: Zipper Pouch with StencilGirl® Stencils

I don’t know about you, but with the spring thaw, I start getting excited for summer fun in the sun!  In honor of summer daydreams, I want to share a project for a beachy zipper pouch to store all of your summer supplies – sunglasses, sunblock, lip balm and, yes, even a dolphin-printed mask and hand sanitizer.  I’ll be using my Love Mermaid Stencil from StencilGirl® and showing you two variations that use other stencils as accents.

For my first mermaid pouch variation, I painted my background on the pouch and added colorful accents.

I began with a canvas zipper pouch from Dick Blick, my Love Mermaid Stencil, a stencil brush, and an assortment of acrylic blue paints and some neutrals. 

Choose colors for your background and one main color that contrasts to make the mermaid stand out – I used Cobalt Blue for the mermaid.  

Next, insert a piece of cardboard into your pouch so that the paint doesn’t bleed through. You can reuse this piece for the next project, too.

Then add your various blues to the background using an assortment of flat brushes.
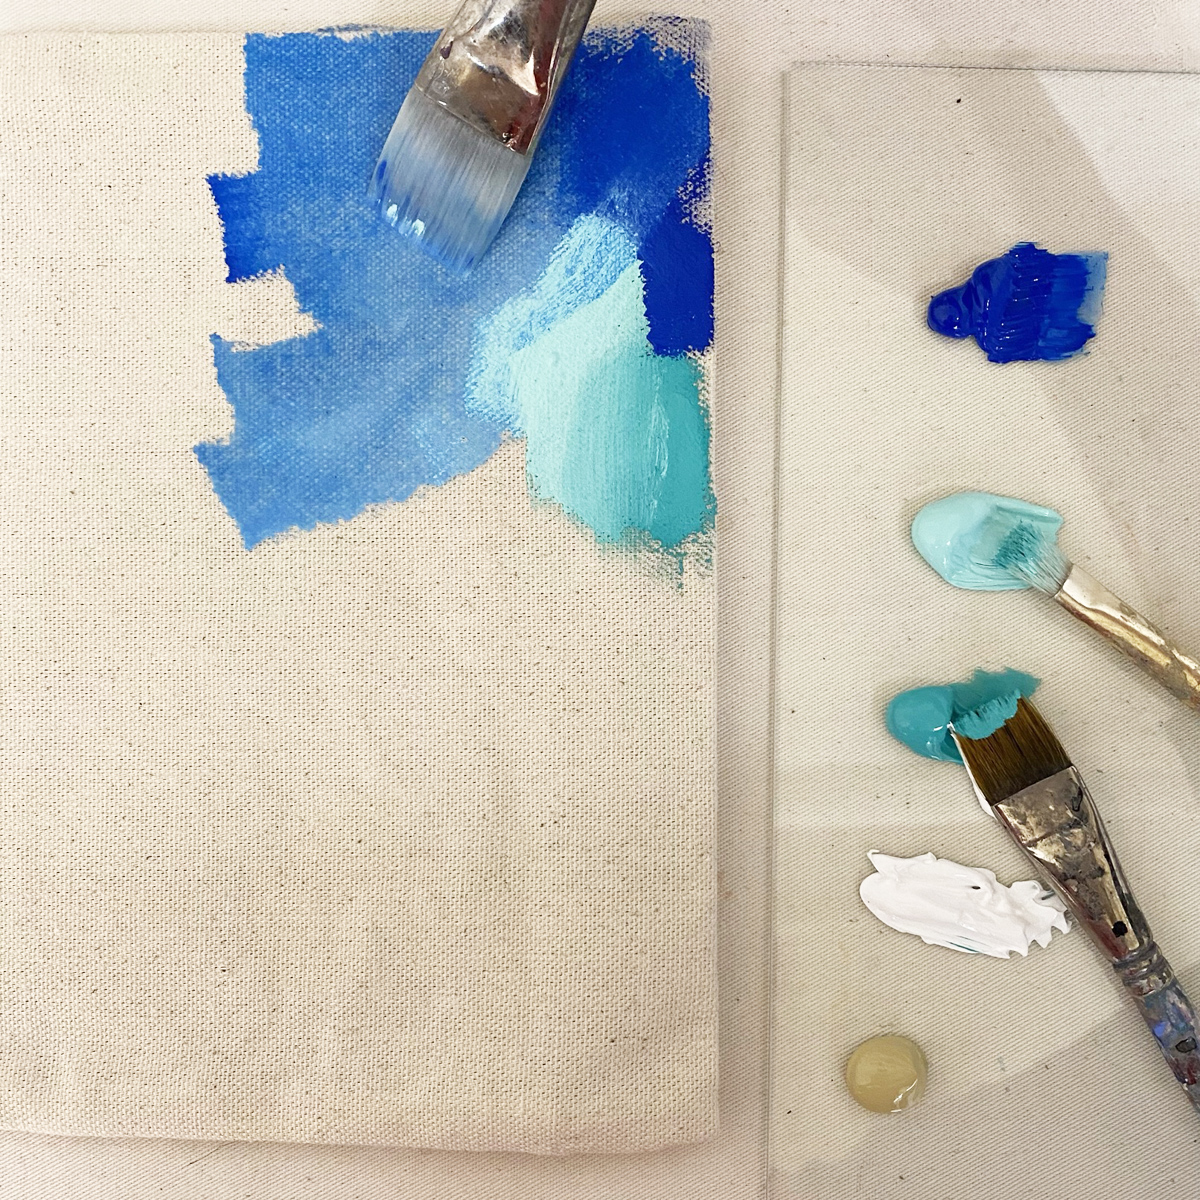
You can add a bit of water to the acrylic paints to increase their flow on the canvas pouch. This watery look will contrast nicely with the crisp lines of your mermaid.

Once the background dries completely, apply Cobalt Blue to your Love Mermaid Stencil.  To warm up the design, it’s nice to add a few other stenciled touches.  I added a bright orange sun from my Folk Art Embroidery Stencil from my February 2020 StencilClub set and a pink flower from my  Boho Patterns Stencil from StencilGirl®. 
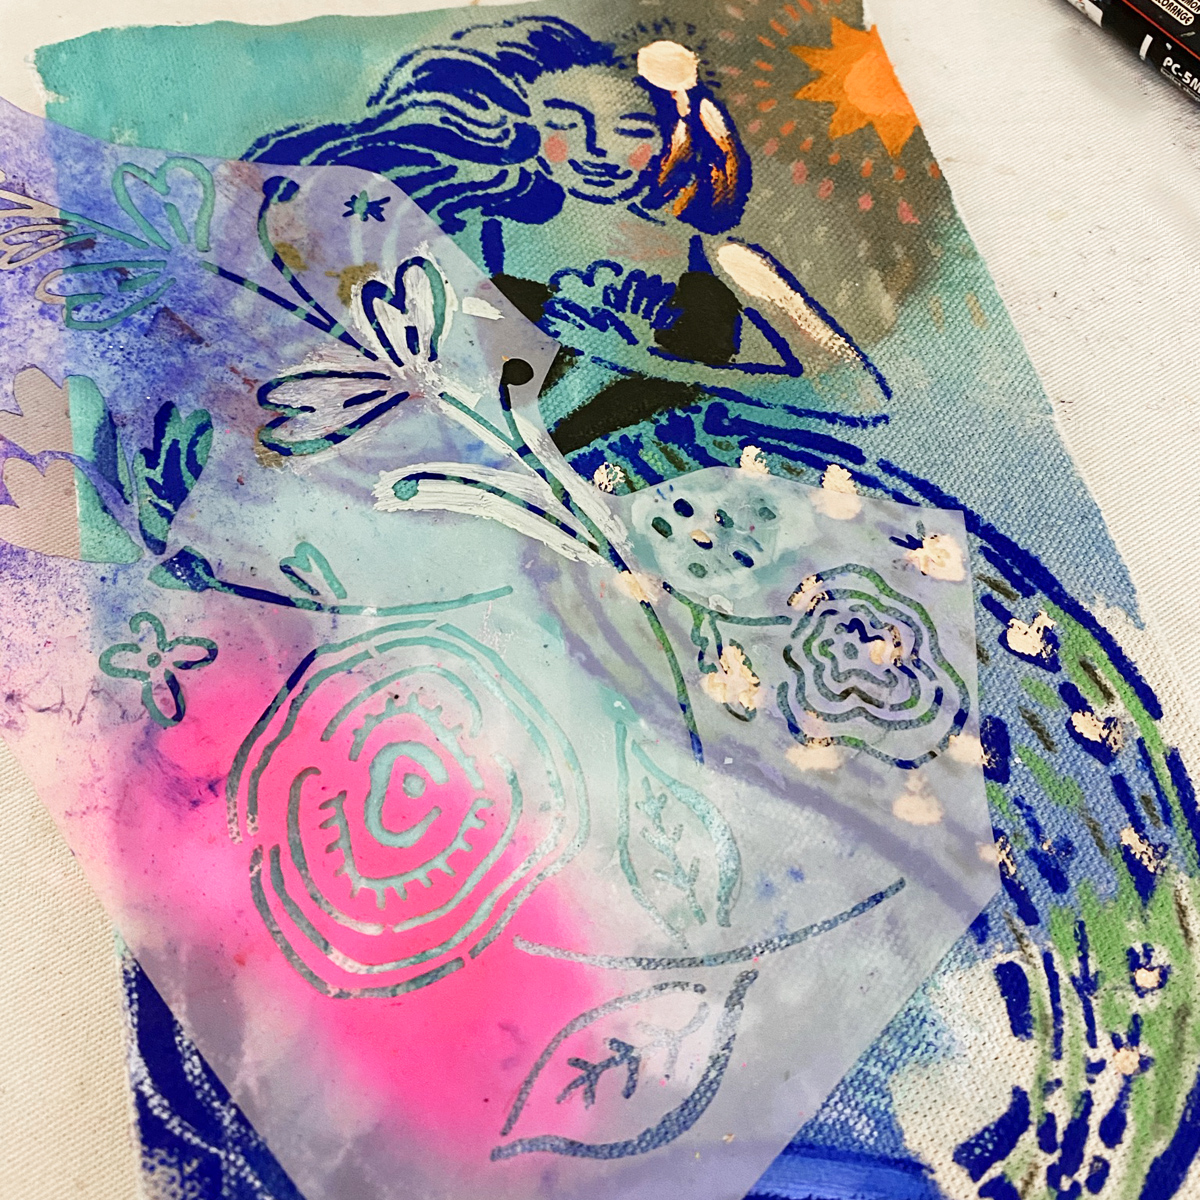
Finally, add a few touches with your warm colors to brighten the mermaid – adding dappled sunlight to her hair and the hearts on her tail. I used hot pink and light peach for these accents.
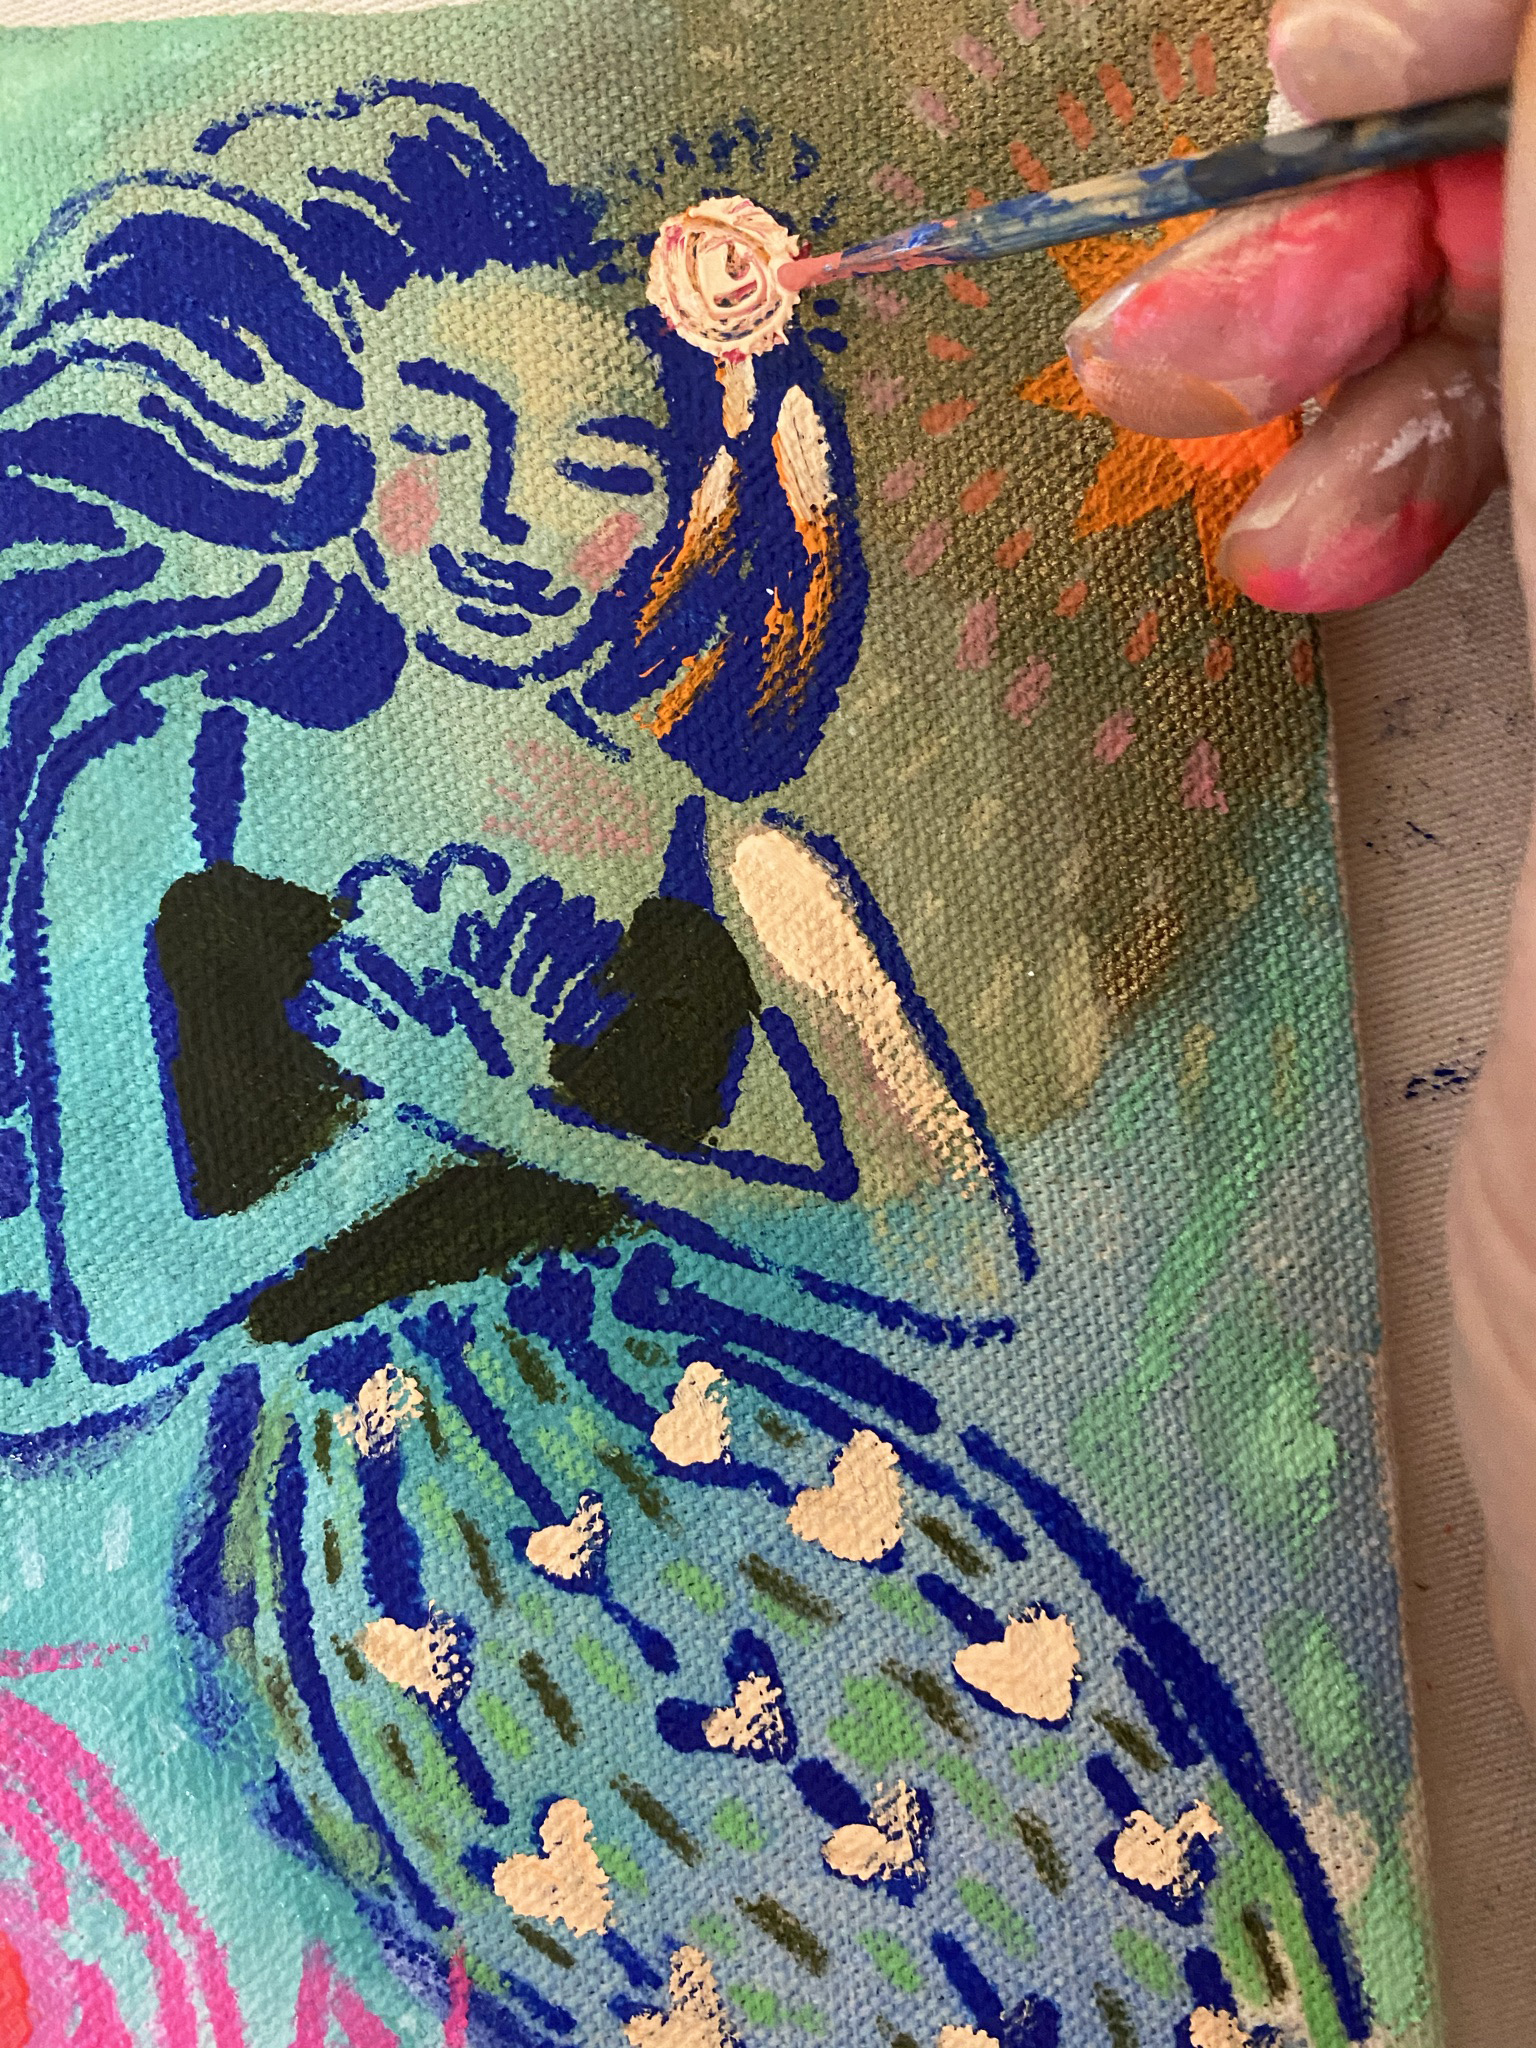
This pouch was such fun to create that I also made one for a friend! Her birthday is in July, and she’s a Cancer, and I can’t wait to give her this pouch filled with cute lip balms and coconut moisturizer. For my friend’s pouch, I used just Cobalt Blue paint for the mermaid, orange for the sun and, as a special touch added her Cancer zodiac sign using my What’s Your Sign Zodiac Constellations Stencil from StencilGirl®. 

I hope this little tutorial brightens up your day and puts you in a summer state of mind! Tag me @cathynicholsart on Instagram if you create your own Mermaid Love Stencil artwork, and I will share the summertime vibes with other winter-weary friends in my IG Stories. You can also see more of my artwork and oracle decks at www.cathynichols.com.


Monday, February 17, 2020

A little help from my friends!


I am ever so thankful for a virtual BOATLOAD of creative friends! January felt like it lasted 72 days this year, I've not been in a creative place in my head, and I was struggling to figure out something you gals might want to read about!

Luckily I signed up for Creative Jumpstart this year and boy did it do the trick!! I love the format of daily short videos and our fabulous Mary Beth Shaw is one of the instructors. Watching those helped get me out of my funk and inspired.

Another dear friend, Andrea Chebeleu, who owns and operates A Work of Heart Studio in San Jose, CA is an instructor in the series showcasing her project going all mixed media on a zippered canvas bag.

She and I love sharing class curriculums with each other as we are on opposite sides of the country and run the same kind of businesses.  I had a stash of canvas bags from previous conversations with her and thought my take on gussying one up might be a fun project.

Debi Adams is yet another special buddy, and when her line of mushroom-themed stencils came out, I swooned.  Aren't they adorable?!?!


Check your local art/craft store for the bags otherwise they are readily available on Amazon.


In a rare moment of restraint (for me) I chose a neutral color palette with my fav Paper Artsy Fresco Finish paints. I used Debi's Tall Skinny Mushrooms L749 for one side of the pouch and chose a little trio of mushrooms from her ATC Mixup: Toadstools L748 for the other side. I highlighted with the eggshell color after stenciling with the neutral browns.


And, being me, I had to add a little stitching. I choose the mushroom with the longest stem and outlined it with backstitch with variegated floss. I used a little satin stitch on the cap.


On the opposite side, I decorated the mushroom caps using a different color and stitch for each one. I made French Knots, Cross Stitches and tiny Seed stitches on give them a little oomph.

On my second pouch, I decided I'd like a little color and used a scraper to spread on teals and greens on both sides. Using another ATC from Debi's Toadstool Mixup L738, I stenciled the same way, but also added highlights using a white pen. When adding highlights, I always try to imagine where the light source is and from what direction it's hitting my subject. I also added a few cross stitches to one cap.


On the other side of the painted pouch, I decided to use another friend's stencil, Valerie Sjodin's gorgeous Leafy Doodle Border L736. She was so clever in designing it! I used eggshell on top on my teal background for the top, the neutral on the green with the leaves, then went back to Debi's ATC sampler for the "Groovy" which finished it up quite well!


What a treat to borrow ideas and inspirations from so many creative friends. Now, to fill those pouches with art supplies.... xoxoxo


Friday, March 8, 2019

Carry It: Stenciled Make-Up Pouch by Cheetarah


Hi Stencil Lover, hope you are enjoying the Carry It theme so far. I'm excited to show you the project I made for this theme. In my Mari Kondo clean up of my art room (which is still an ongoing process) I have found a make-up bag that was begging for a do-over, so I did just that and used some of my fave stencils at the moment. 


The is the pouch as it was in its previous form. Love the birds but the colors were not my thing and that's why I never used it. The pouch is made out of sturdy canvas so I took the risk of just using acrylic paint and see how it will hold up over time and use. 


First I gave the pouch a double coating of white Gesso. After that dried I added some colors. 


I used a mixture of turquoise, tangerine and gold to convey the sunset on a beautiful summer day. I really love walks in nature and this stencil at the moment has been my fave to use. 
This is Stencil/Mask L634 - Leafy Tree Arch by Valerie Sjodin. I have used a soft round brush to carefully apply the layers of color to the pouch. Both the front and the back have the same pattern. 


Then I took Carolyn Dube's uplifting words stencil and a dark blue paint color to add the sentiment "Be fearless" to the pouch. It's a reminder to myself really, because at the moment I am experiencing some changes in life that require me to look fear in the eye and be kind to myself in the process. 


And this is what it looks like carried around :) I absolutely love having this reminder with me and I hope it inspired you to "make up" something uplifting for yourself. 

Until the next project! Have a wonderful day!
Cheetarah


Monday, January 19, 2015

Musical Canvas Pouch

Hi! Mary Nasser here! For today’s project, I wanted to share what I made for my sweet niece!
I used Carolyn Dube’s Now Is The Time smallNow Is The Time large and Uplifting Words stencils,

I purchased a canvas pouch from the local craft store and found royalty free clipart images of cellos on the internet,
since my niece is passionate about playing her cello!


First, on my laptop, using Microsoft Word, I inserted the three clipart cello images I wanted to incorporate into this project.
I enlarged the images, reversed the images, then printed them out onto my TAP paper.

I trimmed the excess paper away from the images while I had my iron heating up to its highest setting.
I placed the images face down onto the canvas – the transparency of the TAP paper makes this a cinch – then ironed straight down onto the images. I love that you cannot over-iron the TAP paper! My TAP paper slid right off once the images had transferred.


Next, I used Carolyn Dube’s stencils and a mini sponge dauber to add lettering in red acrylics – my niece's favorite color!
I chose inspiring words to encourage her new passion. The transparency of the stencils made it really easy to lay out the lettering.


 You can use Post-it notes or artist tape on the stencils to mask off words before pouncing paint through, too. 


I also removed the lobster clasp and strap,


For the other side, I used Nancy Curry’s stencils and a mini sponge dauber to add a treble clef and notes and the word Allegro.
Using a red colored pencil, I traced the bass clef in the upper right corner.


Then I added another shade of red acrylic with a small brush.


Lastly, I used Carolyn Dube’s stencils and a mini sponge dauber to add more inspiring lettering
and a black Identi-pen on the musical notes and word Allegro.


I hope my niece enjoys this half as much as I did making it!
She's going to use this to keep her allowance in!

Happy Stenciling!