Showing posts with label collage fodder. Show all posts

Sunday, January 4, 2026

Using January's StencilClub Set to Build a Library of Marks, Texture, and Future Possibilities

Happy New Year, 2026!

I am Kim Hamburg, a mixed media collage artist who happens to love all things stencils and all things numbers.

There is something quietly reassuring about numbers. They suggest order, sequence, logic—ideas that can feel grounding inside a creative practice built on intuition and experimentation. I’ve long been drawn to typography and numeric forms for this reason. Frequently you will find a number or a series of numbers in my work.


That balance between structure and freedom is what immediately drew me to By the Numbers, a pair of stencils designed by Sarah Short for the January 2026 StencilClub.  Based on the numbers three and four, these stencils feel less like numerals and more like visual rhythms—curves, dashes, and pauses that hint at typography without fully declaring it. Sarah’s love of letterforms is present, but softened and abstracted, inviting interpretation rather than instruction.  

As a mixed media collage artist—and a guest designer for this month—I approached these stencils not as finished images, but as tools for building a visual language.  The papers I made will remain in my stash and I plan on using them in future collage work.


Image caption:

The By the Numbers stencils by Sarah Short—abstracted interpretations of  the numbers three and four, ready to move from structure into mark-making.


Supplies

  • India ink

  • Acrylic paint (any colors you enjoy)

  • Vintage book or textbook pages

  • Pre-made Gelli printed papers, or other favorite papers

  • Sponge roller

  • Sponge brush

Optional:

  • Wood panel

  • Glue stick or gel medium

  • Utility blade or scissors

  • Ephemera

  • Hole punch (any size)


.


Building a Library of Painted Papers

Painted papers are an essential part of my practice. I think of them as future ingredients—materials made without pressure, ready when a collage needs something graphic, textural, or quietly directive. Having a small stack of prepared papers nearby removes the friction of starting and allows me to stay responsive once I’m composing.


I began with India ink and a sponge roller, rolling the ink directly through both stencils onto a variety of papers. Vintage book pages are a favorite because they introduce text, diagrams, and subtle grids, but this process works just as well on Gelli prints or plain paper. The sponge roller keeps the ink layer thin and even, catching the stencil edges without flooding the surface.


I repeated this step across multiple papers, switching between the two stencil designs, then let everything dry completely.


Image caption:
India ink rolled through the stencil with a sponge roller, allowing the dash marks to read as rhythm rather than number.


Isolating Sections for Intentional Design

Once the ink layers were dry, I returned with acrylic paint and a sponge brush, this time resisting the urge to use the entire stencil. Instead, I isolated smaller sections—the curve of the number three, or the dash marks embedded in the number four stencil.


This approach transforms the stencil from a single image into a system of marks. By focusing on fragments, the numbers dissolve into shape and pattern. I also paid close attention to alignment, allowing stencil lines to echo the lines already present on the paper—text columns, margins, and subtle grids—so these papers would feel compositionally resolved when used later in a collage.  I tend to use a grid system when collaging, so making sure things were lined up felt more intentional.


Image caption:

By isolating sections of the stencil, the number begins to dissolve into shape, texture, and pattern.  Think of stencils not as images, but as systems—sources of marks that can be repeated, rearranged, and reimagined.


From Painted Paper to Finished Piece

After everything had dried, I selected a small wood panel and adhered one of the stenciled papers using a glue stick or gel medium. The wood immediately adds weight and presence, shifting the paper from background to surface.


I added more acrylic paint at this stage, scraping it across the panel with a playing card. This tool creates uneven, expressive marks and helps integrate the paper into the surface rather than letting it sit on top.


From another painted and stencilled page, I punched out a few circles—simple shapes that subtly reference the numeric origins of the stencils. These were layered onto the panel, followed by a flower and a bingo piece. Found elements like these bring their own histories and associations, grounding the composition and adding quiet narrative weight.


Image caption:
Painted papers move from preparation to composition as layers, shapes, and found elements come together.


Letting the Stencils Do Their Quiet Work

What I love most about the By the Numbers stencils is their flexibility. They can be bold or subtle, central or supporting. You can use the full design, isolate a single mark, or cut the resulting papers into fragments that disappear into a larger composition.

Vintage textbook pages add visual interest through typography and diagrams, while painted layers soften and unify everything. In the end, these papers are less about numbers and more about readiness—about giving yourself a library of marks, textures, and shapes that already speak the same language.

When you sit down to make a collage, the conversation has already begun.

Sometimes the most expressive work starts with something as orderly as a number—and then lets it wander.


Image caption:  Finished Mixed Media Collage on Wood Panel

By the Numbers is only available to StencilClub Members who join by January 15th and will ship on that day.  You get lots of great benefits as a club member, including a coupon for 25% off all regular collection stencils, a project and pdf from the artist and an additional project by me that is for members only.  So don't delay!  Get more information about StencilClub here! 

I would love to see your work.  Please tag me on Instagram Check out my IG

Facebook Kim Hamburg Facebook 


Friday, February 9, 2024

Using stencils to make marks easily in your journal pages


Hi Everyone,
Niamh here from sunny down under! I love mark making and it is something I know a lot of people find tricky. But what if there was a way to make it easier for you? There is - stencils!!!!
Stencils come in so many varieties - but at stencil girl products - there are sooooooo many that you can use in different ways to help you with mark making in your art easily.
I have chosen two of my favourites today to play with, the Maltese mix stencil and the CM 2019 circle stencil. I love these as there is a great mix of sizes and flow on the stencils allowing you to be a little random with your marks. 

Here is the step by step video making this page: 

Stencils used: the Maltese mix stencil and the CM 2019 circle 
Happy Creating,
Niamh
@niamhbaly (IG/YouTube)


Tuesday, August 29, 2023

Cyanotype with Stencils + Vintage Papers


Hello StencilGirl® fans! Nicole here, and I’m back with a fun way to create unique papers for your mixed media collages and art journaling. 


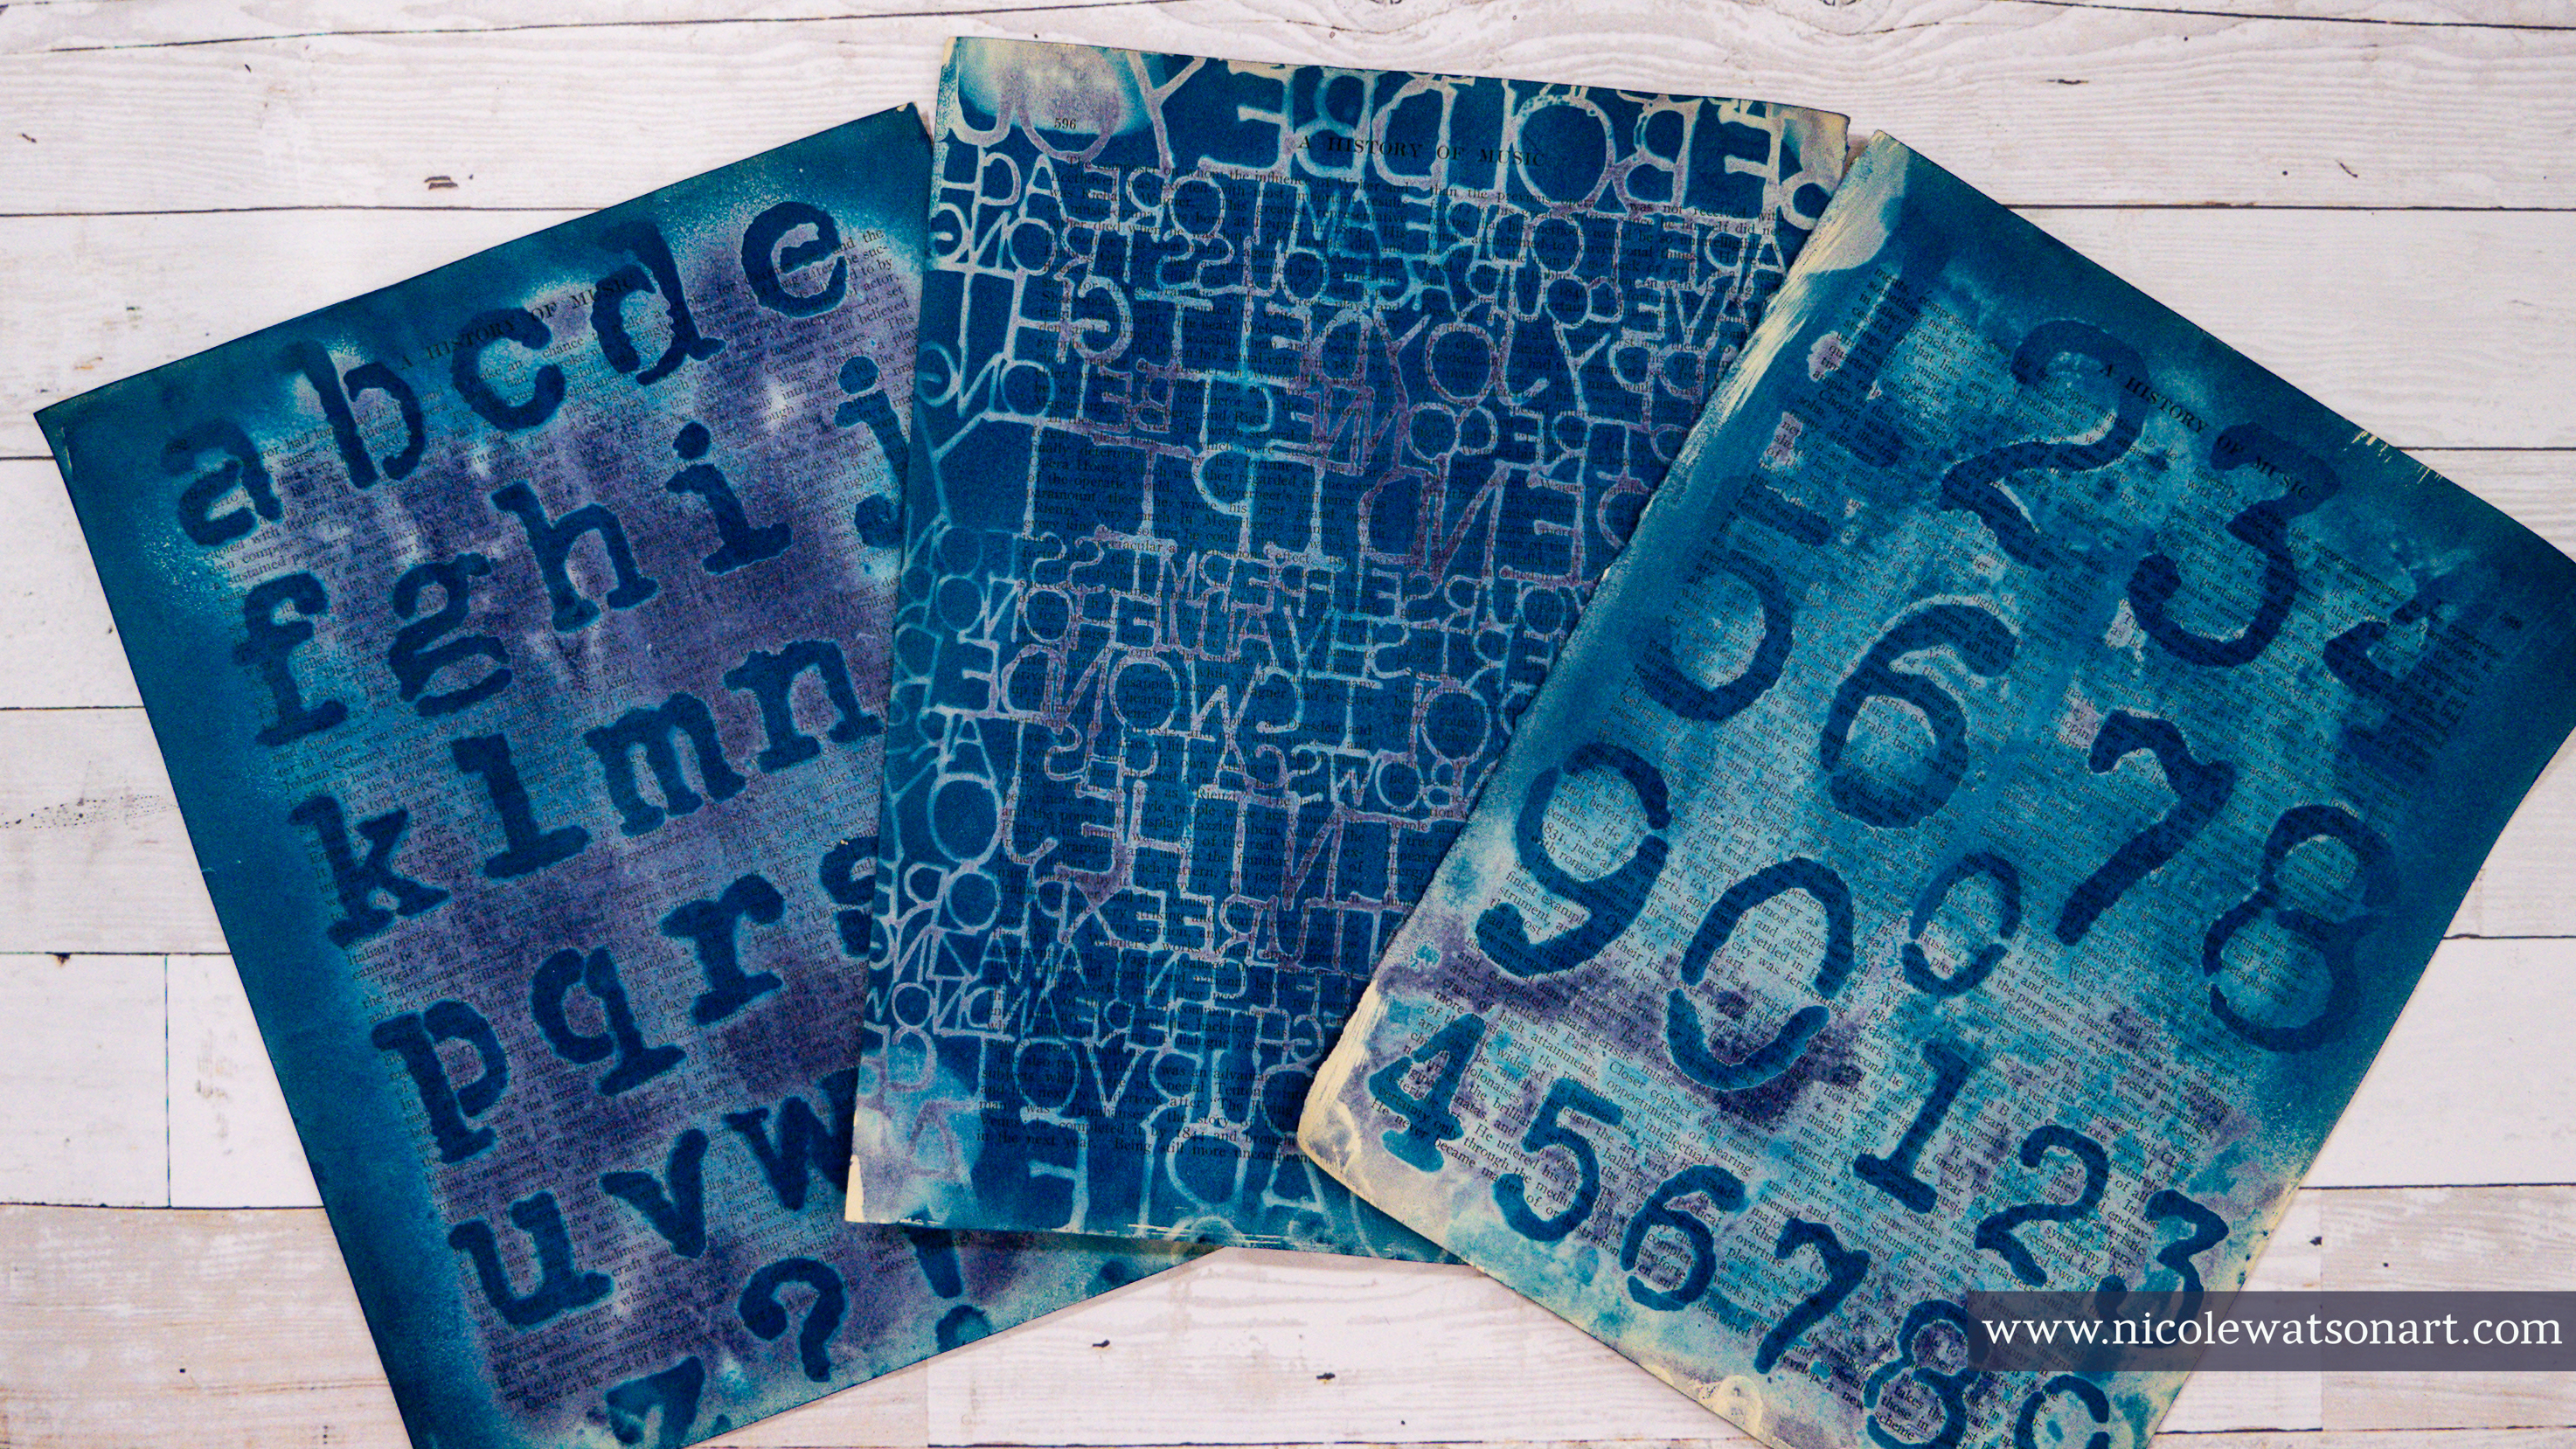
I have long admired cyanotypes. There’s just something about those mysterious blue and white images that draw me in. In fact, when a local art gallery had a class last fall to learn how to cyanotype, I was there! In class we used hot press watercolor paper and fresh flowers to play with layers and the sun to create a few different pieces of art. Here is what I made in class:


After taking the class, I knew I just had to try the process with stencils.  And, I failed. Miserably. I don’t know what I did wrong, but nothing worked. All my images washed away in the developing process. 


However, I am determined! So, I am here several months later trying this again.


The basic process of creating a cyanotype is simple:


1. Mix up the solutions as directed (allow to rest 24 hours) 
2. Mix one part of each solution (I use the lid to measure) and put into a cup (only mix what you need as the solution is only stable for a short time)
3. Lightly paint the solution on your papers in a darkish room with limited UV light


4. When dry, protect the papers from light until you are ready to develop them
5. Place the stencil on top the paper and expose it to the sun (3-30 minutes) 


6. Once developed, process the print in water


7. It will take about 24 hours for the print to completely oxidize, or turn the deeper blue

 Note: More detailed instructions are on the cyanotype solution package, and there are a lot of websites and videos to also help in the process and include even more ways to alter prints.

Creating cyanotypes my way.


Instead of plain watercolor paper for my substrate, I wanted to use vintage book pages and ledger pages, two of my favorite papers to use in my artwork. In keeping with the cyanotype tradition, I did also use some hot press watercolor paper and a white tag (pictured below) as well to have some of the true blue and white images.


One of the fun parts of cyanotypes is the unpredictability and layering. On the other hand, it’s also one of the most frustrating parts. They take a few minutes to develop, and you don’t always know what you’ll create until the end. During the development process, you can move the flowers (or stencils in my case) about every 30 seconds or so to add interest and different intensities of blue.

Since I failed miserably the first time, I practiced before my official blog. And, yay! It worked, plus I learned a few things to tweak.


I learned that not all paper works the same.


When using vintage papers, you have to be ok with the unpredictability! Not all papers are created the same, and some just don’t work as well. But, I’m making collage material, so in the end there is always something to use no matter how well it works.


Sometimes the vintage paper itself reacts with the solution so that the cyanotype doesn’t darken as much. Also, since vintage papers are not white, the final outcome colors are varied. It can be frustrating, but occasionally you develop amazing results that you have no idea how it occurred. 


For some reason, several of my papers partially developed soon after I spread the cyanotype mixture on them. I’m not sure if it was a reaction to the vintage papers or that I let too much light get to them. Since I didn’t want to waste the papers, I still printed on them with interesting results. 

On a side note, when using papers with handwriting, choose ones that won’t react with water, such as ledger pages written in pencil only.


I learned, or realized, that my previously used stencils that were full of paint worked the best.


Since new stencils are clear(ish), they don’t block the UV rays 100%. However, with that, the clear stencils were also fun because they let light in causing a lighter shade of blue with the darker images of the stencil. Both are fun! It just depends on what type of images you are wanting to create.


Since I had some new stencils I picked out specifically for cyanotypes, I solved that problem by spray painting them with black paint first. 


As an added bonus, this created some more collage papers!


Most importantly, I learned to just enjoy the process.


I am certainly not an expert at cyanotypes. Over the course of a couple days and sessions printing my papers, no results were alike. Some turned out absolutely amazing and others, well, let’s just say they will make great background layers.


As frustrated as I was in the sunshine and 100+ degree temps here in Austin, I am truly excited to play again! I have so many more amazing StencilGirl® stencils I want to explore.


If you are like me and always admired cyanotypes but thought they would be difficult to create, I hope this tutorial inspires you to have fun and play. I cannot wait to add these papers to my mixed media art and collage.


I posted my favorite result throughout the blog above, and here are some more of my favorites playing with stencils and cyanotypes:


And, you can watch some of the process in the video below, with additional commentary and a flip through of all the papers I made. 


 Happy Cyanotyping!


-Nicole


Connect with me on


Stencils Used (some are only shown in YouTube flip through)


Supplies

  • Cyanotype Solution by Jacquard
  • Foam brushes
  • Disposable cup
  • Access to water/sink or a large container of water
  • Hot press watercolor paper (90 lb or thinner for easier collage making)
  • Vintage book and ledger pages
  • Liquitex black spray paint (optional)
  • Sunshine! Or a UV light


Sunday, October 17, 2021

5 Step Collage Fodder... With Stencils!


Hi all! It's Gwen back this month with another installment of my Paint & Texture column. 

DIY collage fodder has been all the buzz on Instagram lately, so I thought it would be fun to add another technique into the mix and share Five Steps to Collage Fodder... with stencils!

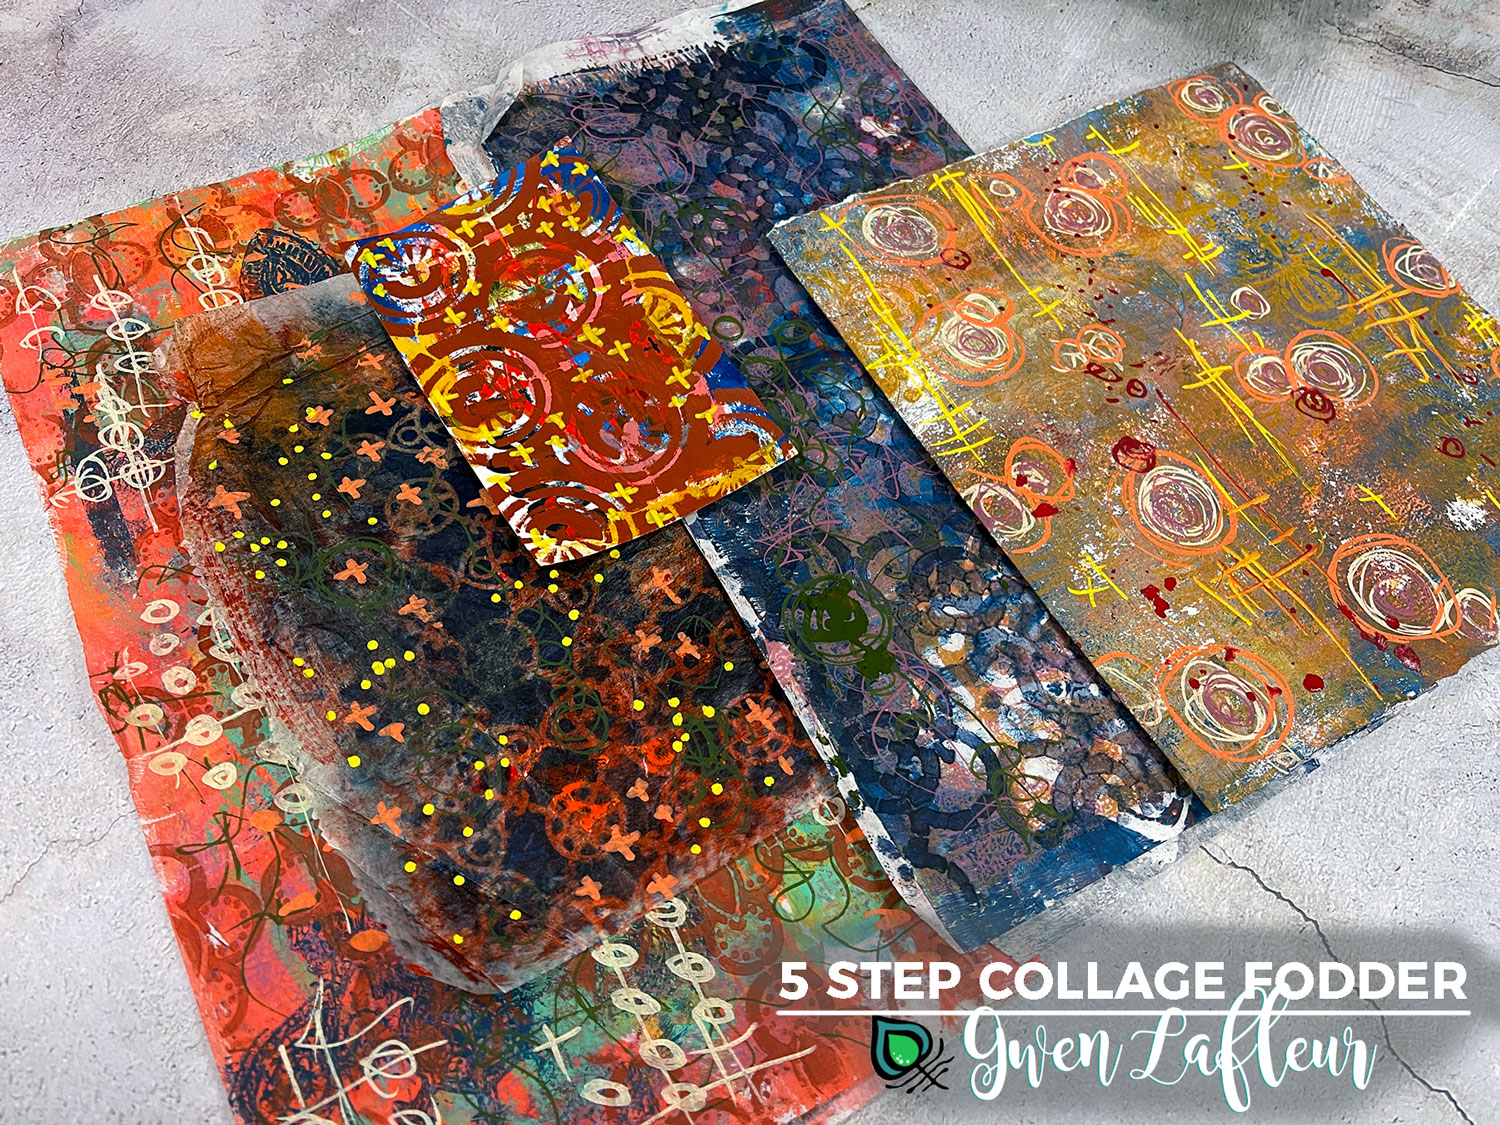
5-Step Collage Fodder with Stencils - Tutorial by Gwen Lafleur

I know that a lot of us, which definitely includes me, have piles of papers that we can't bear to throw away but haven't found a use for. They're either too busy or not the right color or, I'll just own it, downright ugly. 

5-Step Collage Fodder - Pile of Scrap Papers - Gwen Lafleur

To start my tutorial for today's post, I browsed through my pile of less-than-pretty collage and background papers as well as a few failed gelli prints and pulled out a few of them to turn into collage fodder. With those selected, it was just 5 easy steps to a great collage! Ready to see how it came together?

Step 1. Tame & Tone

5-Step Collage Fodder - Step 1 Tame and Tone - Gwen Lafleur

The first of the five steps in this process is what I call "Tame & Tone." For this, I took a dark, opaque color of acrylic paint and a nice all-over stencil pattern to tone down the color and tame the crazy. In the image above, I used my Collage Textures & Patterns, Circles stencil and you can see on the left where I also used the 6x6 from Jill McDowell's December 2000 Block Prints StencilClub collection.

Step 2. Make Your Mark

5-Step Collage Fodder - Step 2 Make Your Mark - Gwen Lafleur

For the next layer I added some marks. For this step I pulled out my trusty Posca paint markers, but you can use whatever you'd like or use your favorite mark-making stencils for this step.

Below you can see all five of the pieces I worked on here and how just the first two steps have already transformed them quite a bit!

(Here you can see three more of the stencils I used in step 1, including my Decorative Flower Stamen Medallion, Ornamental Compass Screen, and Ornamental Circle Cluster Screen stencils.

5-Step Collage Fodder - Step 2 Make Your Mark Samples - Gwen Lafleur

Step 3: Lighten & Brighten

5-Step Collage Fodder - Step 3 Lighten & Brighten - Gwen Lafleur

Step three is a bit of a cheat since it's kind of two steps in one, but whether you do one, the other, or both is up to you. Here I used a color tint (Titan Mars Pale in the sample above) with a smaller scale all-over pattern and then stenciled with white in the top layer to lighten and brighten the papers. This also pushes some of the busyness of the previous layers into the background.

Below you can see the result of this step on all five papers. Additional stencils used on this step include the 4x4 from my February 2021 Feathered Tribe StencilClub collection as well as part of the 9x12 from my December 2016 Heraldry set. I also used the Patterned Circles and X Rows stencils by Michelle Ward.

5-Step Collage Fodder - Step 3 Lighten & Brighten Samples - Gwen Lafleur


Step 4: Cut it Out

5-Step Collage Fodder - Step 4 Cut it Out - Gwen Lafleur

These papers are still quite busy, but that changes when you cut them into smaller pieces. If you have shapes that are go-to elements, that's a great place to start. I know that I will always use circles, squares, and leaf shapes, so I cut out several of each of those.

5-Step Collage Fodder - Step 4A Cut it Out w/ a Stencil - Gwen Lafleur

If you aren't so keen on just freehand cutting into your collage papers or if you want a bit of a different shape, you can pull your stencils back out again. Above you can see where I used my Ornamental Circle Clusters Screen stencil to trace the outline of the base shape on the back of one of my collage papers and then cut it out.

Here you can see the shapes I cut from all five sheets (and I also have some paper leftover to use later.)

5-Step Collage Fodder - Step 4 Samples - Gwen Lafleur

Step 5: Collage It!

5-Step Collage Fodder - Step 5 Collage It - Gwen Lafleur

The last step... collage it! Pull out the glue or matte medium or whatever you want to use and collage your new bits and pieces into your work. Above you can see that I painted rectangles on some Canson drawing paper and then collaged all or half of my petal shaped pieces into the center of each rectangle and then colored and smudged around them with some of my handmade art crayons. 

On the rectangles with the half petals, I took some of my stenciled cut-out shapes and cut those in half and added them on the other side to create some visual interest. 

5-Step Collage Fodder - Step 5 Collage Sample - Gwen Lafleur

When I first started working on the painted rectangles, I'd envisioned that as the final piece. But once I collaged the pieces on and then stepped back, it just called out to me to cut them into individual rectangles... so I did! Sometimes collaging the collage fodder just makes more fodder. lol. 

I pulled out some stamped and colored images from my EGL19 Build-A-Collage, Birds stamp set with PaperArtsy and layered them on top, then added a few marks and adhered it onto a previously completed background in one of my mini art journals. I finished the page with a fun little clip and some washi tape.

5-Step Collage Fodder - Final Art Journal Page - Gwen Lafleur

So just that quickly and easily, I have a completed art journal page, five more fun collage pieces, more fodder shapes that are cut and ready, AND some more paper ready to cut into new shapes.

5-Step Collage Fodder - Final Page with Extras - Gwen Lafleur

So that's it! I hope you enjoyed today's tutorial and that you have fun making your own 5-Step Collage Fodder to use in your projects.

Until next time, happy stenciling!
Gwen Lafleur Headshot