Hi, my friends! Consie Sindet here again to share an experiment that I did with you!
I've been fascinated by the cyanotype process for a while and wanted to see if I could create a look-a-like version with just watercolor and stencils! Spoiler alert: YES, you can! And it is so simple!
BTW...I made a video of the process which you can find at the bottom of this post.
I started by painting my watercolor paper with a couple of layers of Indigo blue watercolor. Let it dry completely.
I then grabbed the Boho Daisy small stencil by Gwen Lefleur: S846 to start. I laid it on the blue watercolor paper and using a damp paper towel or baby wipe, began to gently erase the watercolor through the stencil. Try to keep the water to a minimum! I added a few more marks from the ATC Mixup Evan stencil by Jennifer Evans: L654 as well to fill out the bookmark that this became.
To create the collage clusters, I use the ATC Mixup Evan stencil by Jennifer Evans: L654 to add designs to the paper that would fit inside of the paper punches. I was very deliberate so that I wouldn't cut off interesting sections once I punched out my shapes.
I then punched out a circle and a rectangle from the print I made. The leftover piece became the tag with a window that you can see in the first photo.
To assemble my clusters, I layered burlap ribbon, a ripped piece of coffee dyed paper, bits of thread and my punched out cyanotype print together. I used a sewing machine or a stapler to attach the group together.
By final experiment was using the Leafy Doodle Verge stencil/mask by Valerie Sjodin: S714. I used one of the masks to see if it worked as well as a stencil. It did but I do think the stencils work the best! The photo above shows the finished design that I embellished with gold watercolor. It will make a great pocket! Also in the photo is the leftover section from the circle/rectangle punched paper. I created a tag and used a white gel pen to enhance the designs.
I really love how this experiment worked! You can hear more and follow along with the video below.
I would love to see what you create using these stencils! You can tag me on Instagram and find me in the following spaces!
HiStencilGirl®friends! Nicole here, and today I’m playing with stencils and collaging in my art journal.
In January I began a very unplanned cleaning and purging of my art studio. Phew! I still have some drawers and shelves that I need to tackle, but the re-set and clean feel so good.
Due to just one of those years, I had a couple piles of supplies and things I purchased that I hadn’t sat down to play with. So, I grabbed the paint and a few stencils to explore to have a creative play session. It was so good. Even though I didn’t love everything I created, I learned, discovered, explored and best of all let loose! Splashing paint around and not caring is the best. We all need to schedule these play times into our art practice!
In that play session, I created a couple of small stenciled papers that I feel in love with and just knew I needed to add them to my art journal.
To make the papers, first I added a layer of watered-down gesso.
Then, I splashed around some walnut ink on one and watered-down Payne’s gray on the other.
When those were dry, I grabbed a new to me paint color, purple madder (matte acrylic paint by Blick), and used it through the longwood florals stencil. Before the paint could completely dry, I also scuffed up the stenciled imaged a bit and added some watered-down purple madder too.
Next, I had to figure out what to do with them! I grabbed my art journal and stuck down some blank ledger paper. Then, I broke those ledger sheets by first spreading around some paint and gesso and then loosely tracing inside the bittersweet mini stencil with my stabilo all in graphite.
I then activated it with my dirty paint water. It had the most beautiful lavender hue from the purple madder paint. After that, I splashed around some walnut ink.
After breaking those pages, I thought a simple collage on each would be perfect. It took me a while and lots of moving around of papers and images to achieve what I wanted. I’m not a seasoned collage artist, and it’s one of my goals this year to play more with collage.
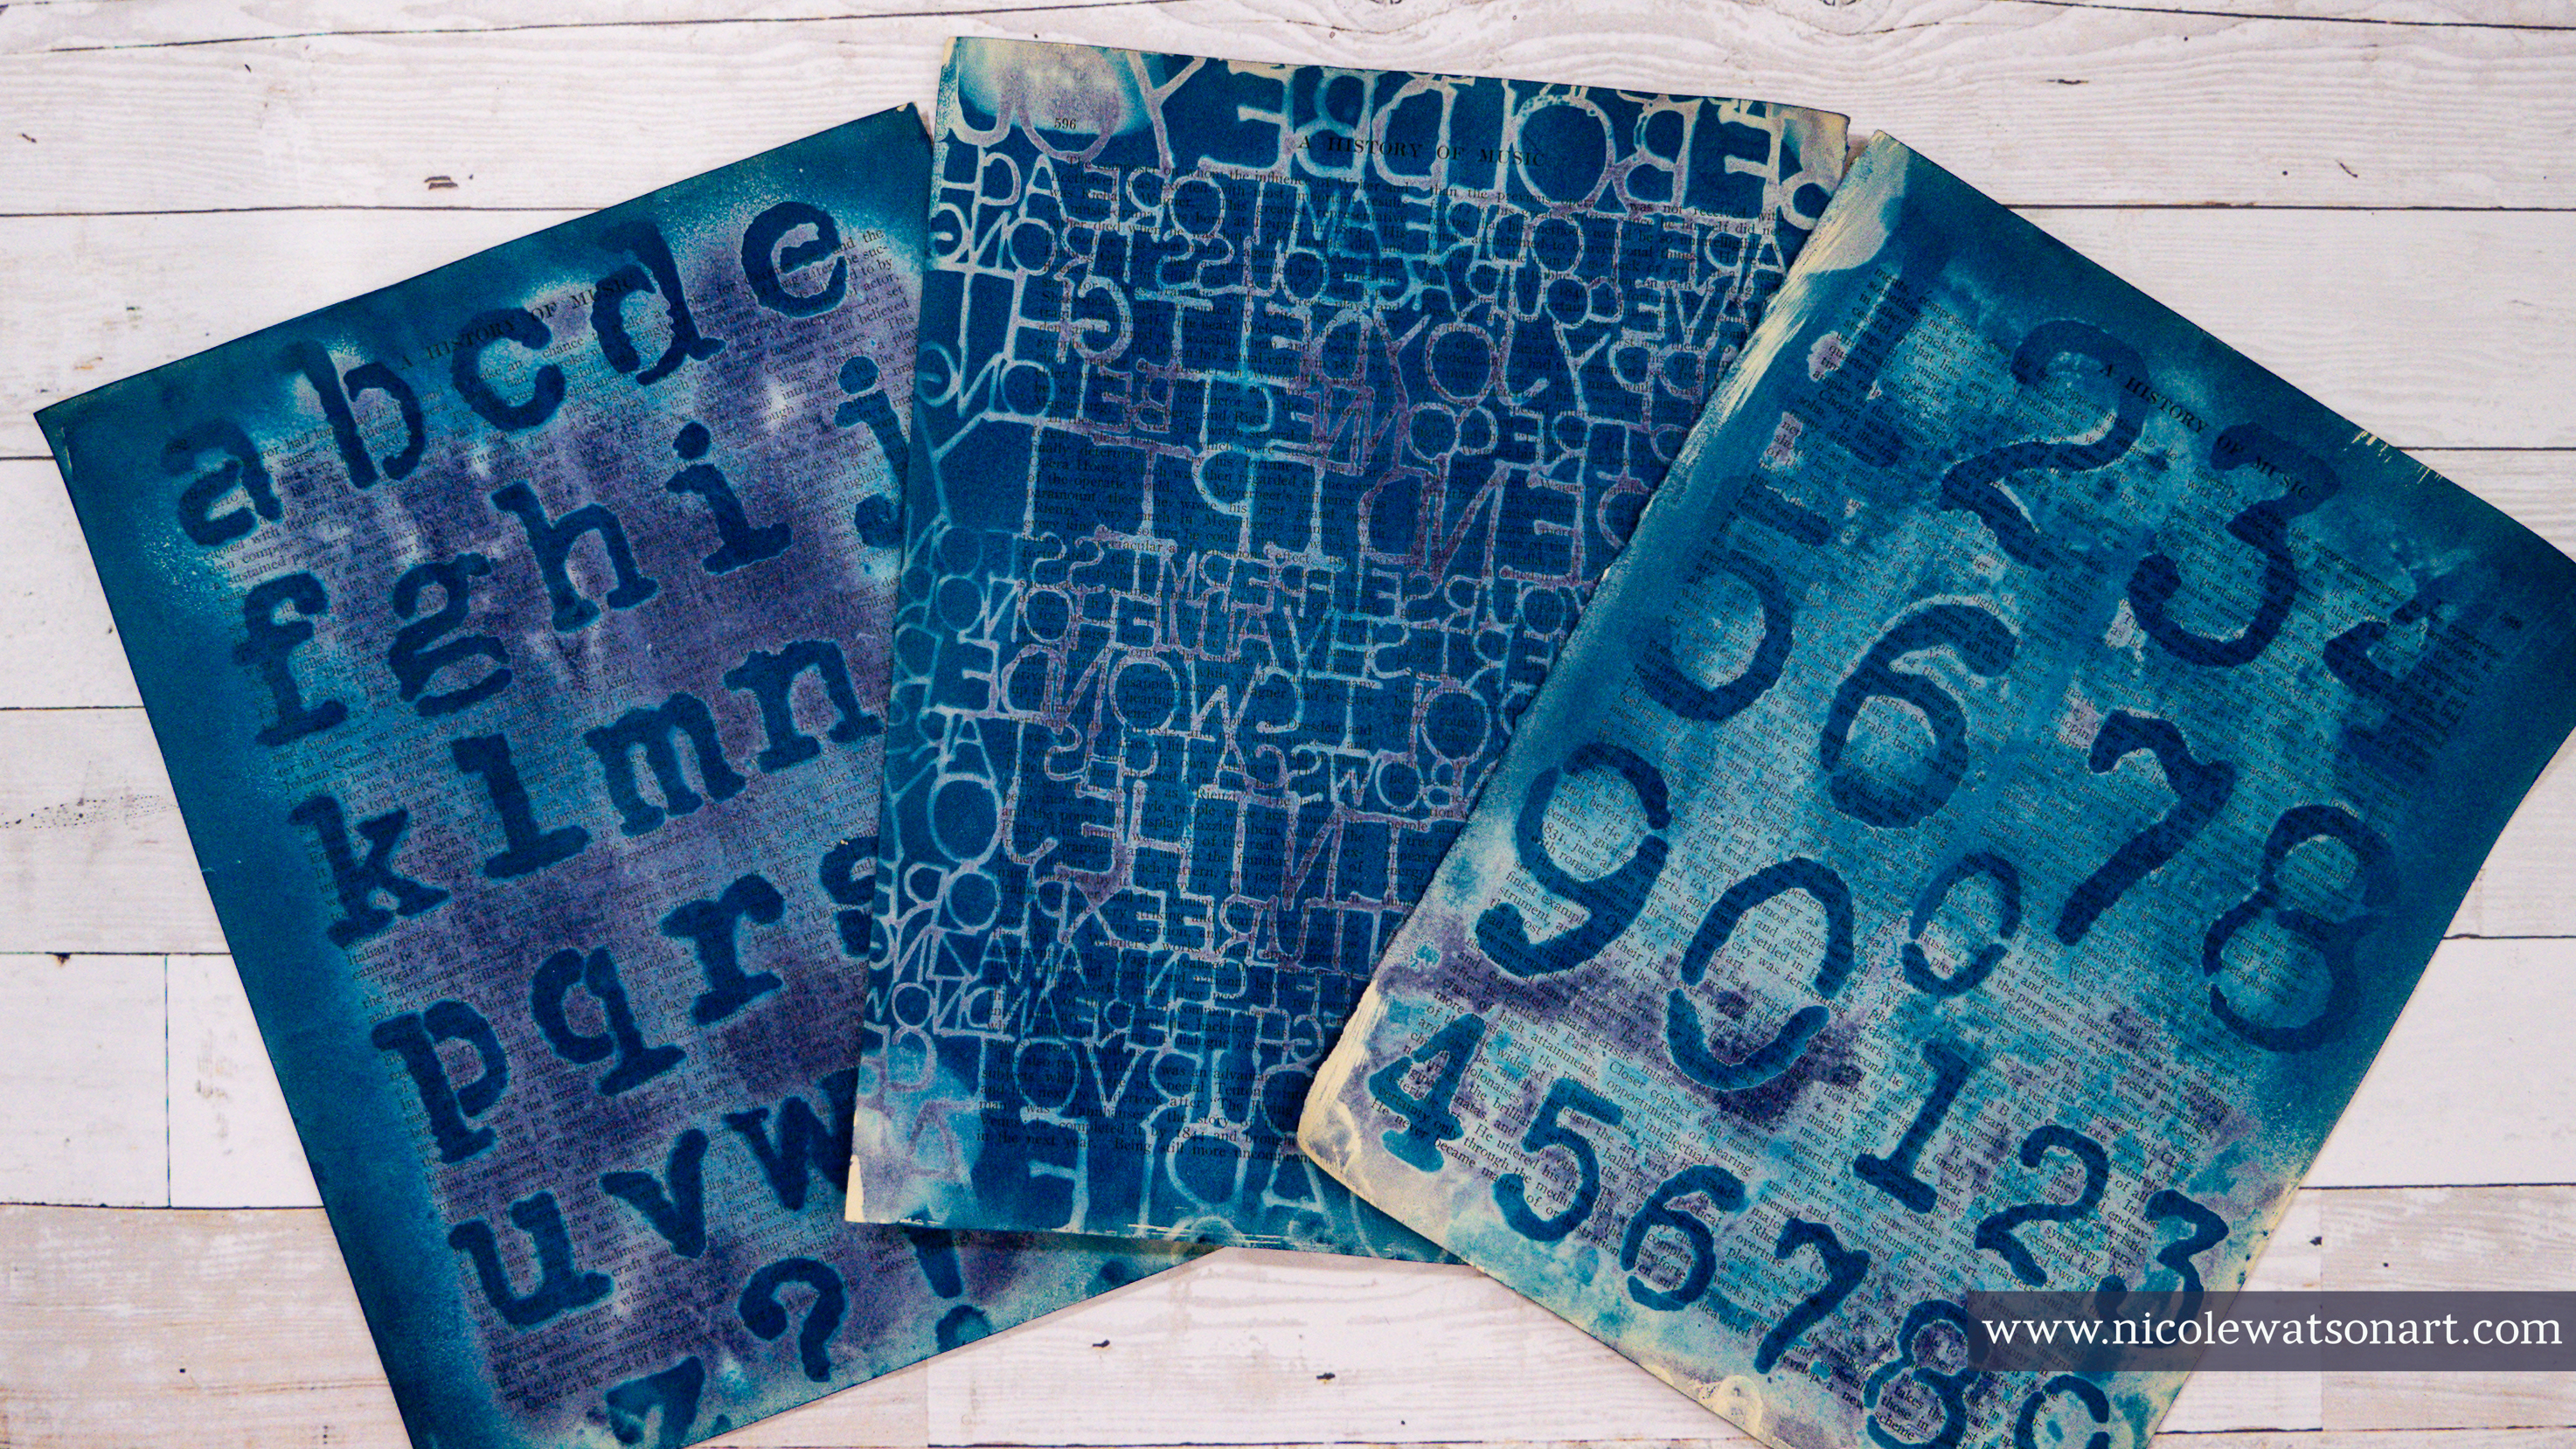
For the papers, I used my stenciled cyanotypes and stenciled pages. You can read how I created them and see tutorials here on the StencilGirl® blog. (The stenciled page sheet was from another play session similar to the one linked to the blog post but doesn’t appear in the blog.)
I topped off the collages with a vintage photograph, some really old stamps, and the string the stamps were tied up with.
My last step was to just add a touch of watered-down Payne's gray around the bits of Boro collage papers.
Watch how it all came together, and count how many times I moved the paper bits around in the video tutorial below.
Hello StencilGirl® fans! Nicole here, and I’m back with a fun way to create unique papers for your mixed media collages and art journaling.
I have long admired cyanotypes. There’s just something about those mysterious blue and white images that draw me in. In fact, when a local art gallery had a class last fall to learn how to cyanotype, I was there! In class we used hot press watercolor paper and fresh flowers to play with layers and the sun to create a few different pieces of art. Here is what I made in class:
After taking the class, I knew I just had to try the process with stencils. And, I failed. Miserably. I don’t know what I did wrong, but nothing worked. All my images washed away in the developing process.
However, I am determined! So, I am here several months later trying this again.
The basic process of creating a cyanotype is simple:
1. Mix up the solutions as directed (allow to rest 24 hours)
2. Mix one part of each solution (I use the lid to measure) and put into a cup (only mix what you need as the solution is only stable for a short time) 3. Lightly paint the solution on your papers in a darkish room with limited UV light
4. When dry, protect the papers from light until you are ready to develop them
5. Place the stencil on top the paper and expose it to the sun (3-30 minutes)
6. Once developed, process the print in water
7. It will take about 24 hours for the print to completely oxidize, or turn the deeper blue
Note: More detailed instructions are on the cyanotype solution package, and there are a lot of websites and videos to also help in the process and include even more ways to alter prints.
Creating cyanotypes my way.
Instead of plain watercolor paper for my substrate, I wanted to use vintage book pages and ledger pages, two of my favorite papers to use in my artwork. In keeping with the cyanotype tradition, I did also use some hot press watercolor paper and a white tag (pictured below) as well to have some of the true blue and white images.
One of the fun parts of cyanotypes is the unpredictability and layering. On the other hand, it’s also one of the most frustrating parts. They take a few minutes to develop, and you don’t always know what you’ll create until the end. During the development process, you can move the flowers (or stencils in my case) about every 30 seconds or so to add interest and different intensities of blue.
Since I failed miserably the first time, I practiced before my official blog. And, yay! It worked, plus I learned a few things to tweak.
I learned that not all paper works the same.
When using vintage papers, you have to be ok with the unpredictability! Not all papers are created the same, and some just don’t work as well. But, I’m making collage material, so in the end there is always something to use no matter how well it works.
Sometimes the vintage paper itself reacts with the solution so that the cyanotype doesn’t darken as much. Also, since vintage papers are not white, the final outcome colors are varied. It can be frustrating, but occasionally you develop amazing results that you have no idea how it occurred.
For some reason, several of my papers partially developed soon after I spread the cyanotype mixture on them. I’m not sure if it was a reaction to the vintage papers or that I let too much light get to them. Since I didn’t want to waste the papers, I still printed on them with interesting results.
On a side note, when using papers with handwriting, choose ones that won’t react with water, such as ledger pages written in pencil only.
I learned, or realized, that my previously used stencils that were full of paint worked the best.
Since new stencils are clear(ish), they don’t block the UV rays 100%. However, with that, the clear stencils were also fun because they let light in causing a lighter shade of blue with the darker images of the stencil. Both are fun! It just depends on what type of images you are wanting to create.
Since I had some new stencils I picked out specifically for cyanotypes, I solved that problem by spray painting them with black paint first.
As an added bonus, this created some more collage papers!
Most importantly, I learned to just enjoy the process.
I am certainly not an expert at cyanotypes. Over the course of a couple days and sessions printing my papers, no results were alike. Some turned out absolutely amazing and others, well, let’s just say they will make great background layers.
As frustrated as I was in the sunshine and 100+ degree temps here in Austin, I am truly excited to play again! I have so many more amazing StencilGirl® stencils I want to explore.
If you are like me and always admired cyanotypes but thought they would be difficult to create, I hope this tutorial inspires you to have fun and play. I cannot wait to add these papers to my mixed media art and collage.
I posted my favorite result throughout the blog above, and here are some more of my favorites playing with stencils and cyanotypes:
And, you can watch some of the process in the video below, with additional commentary and a flip through of all the papers I made.
Last week I took a 2-day class on using cyanotype fabric sheets. I dabbled in the medium last summer and really enjoyed experimenting with it. When I really embrace a process, I like to research it more to get a good idea of the possibilities. I had a great time watching videos and reading up on cyanotype.
Cyanotype is a photographic printing process dating back to 1842. Once the medium is applied to fabric or paper (or you can order pretreated sheets), It is then placed in the sun and a chemical process occurs between the UV rays and the synthetic treatment.
So many fun things can be used to create an image, such as botanicals, negatives, flat objects ( or slightly dimensional), and more. One of the things that caught my eye was to try stencils. So of course, I got very excited about experimenting with those.
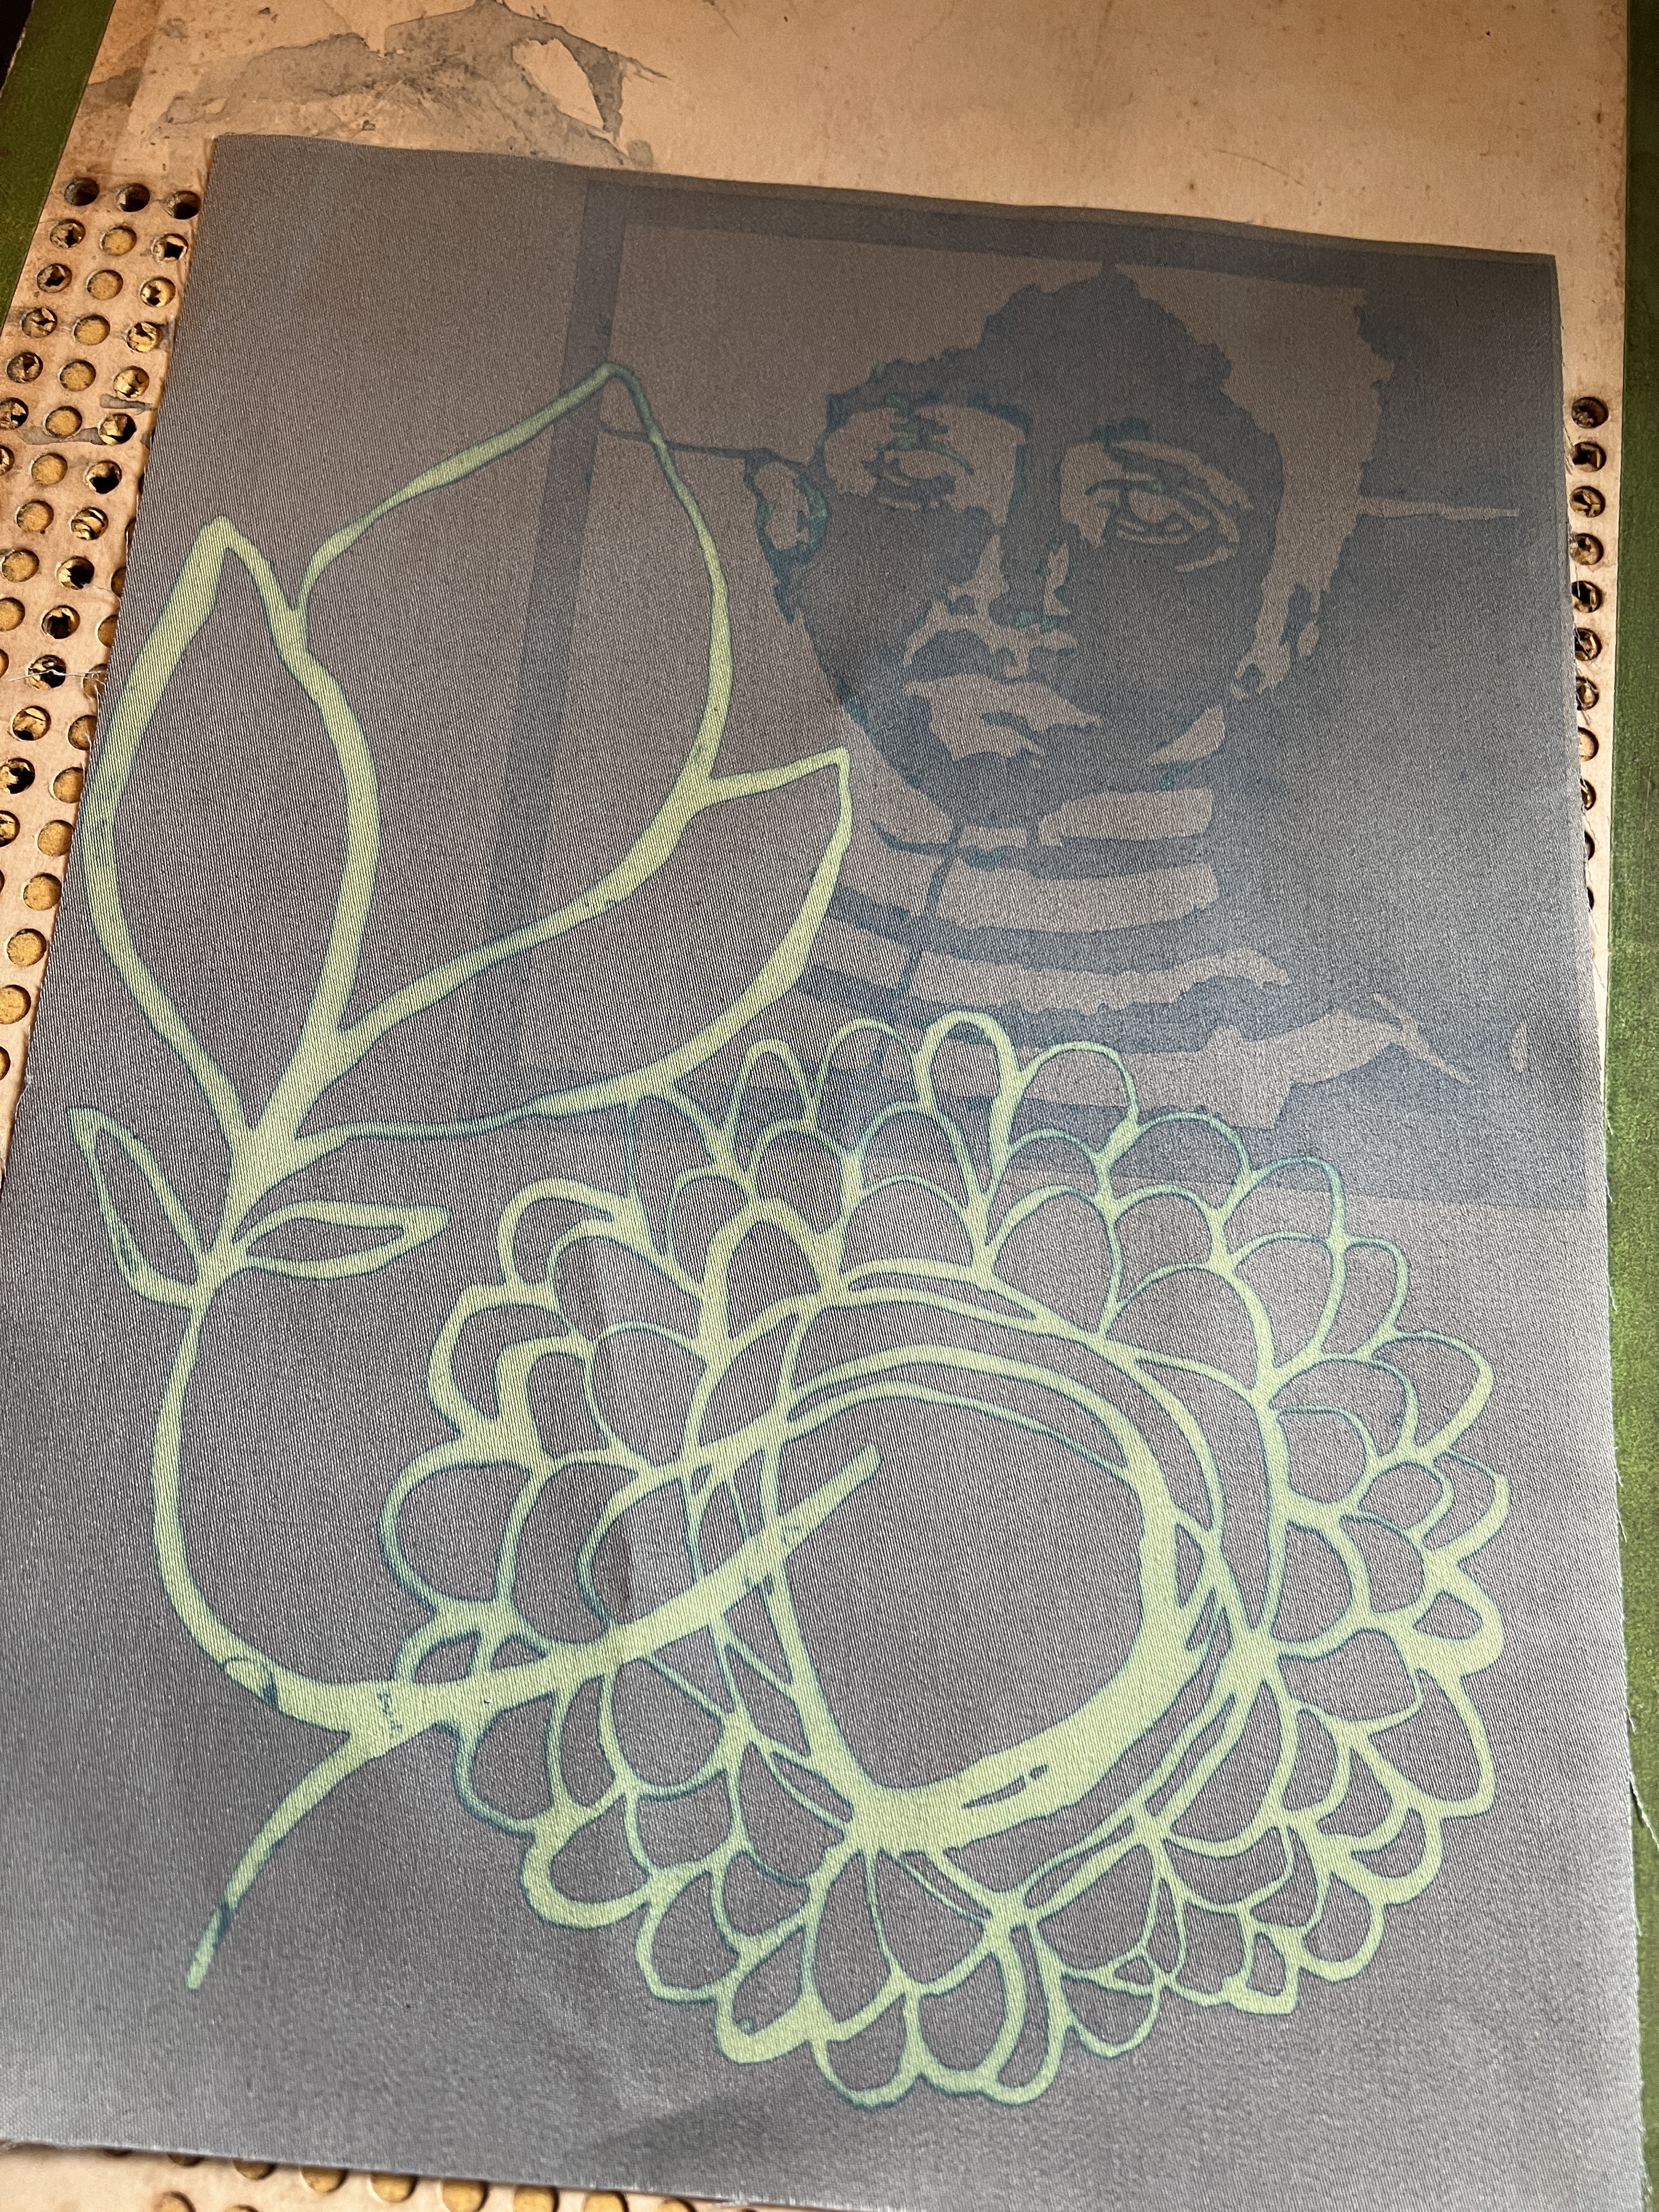
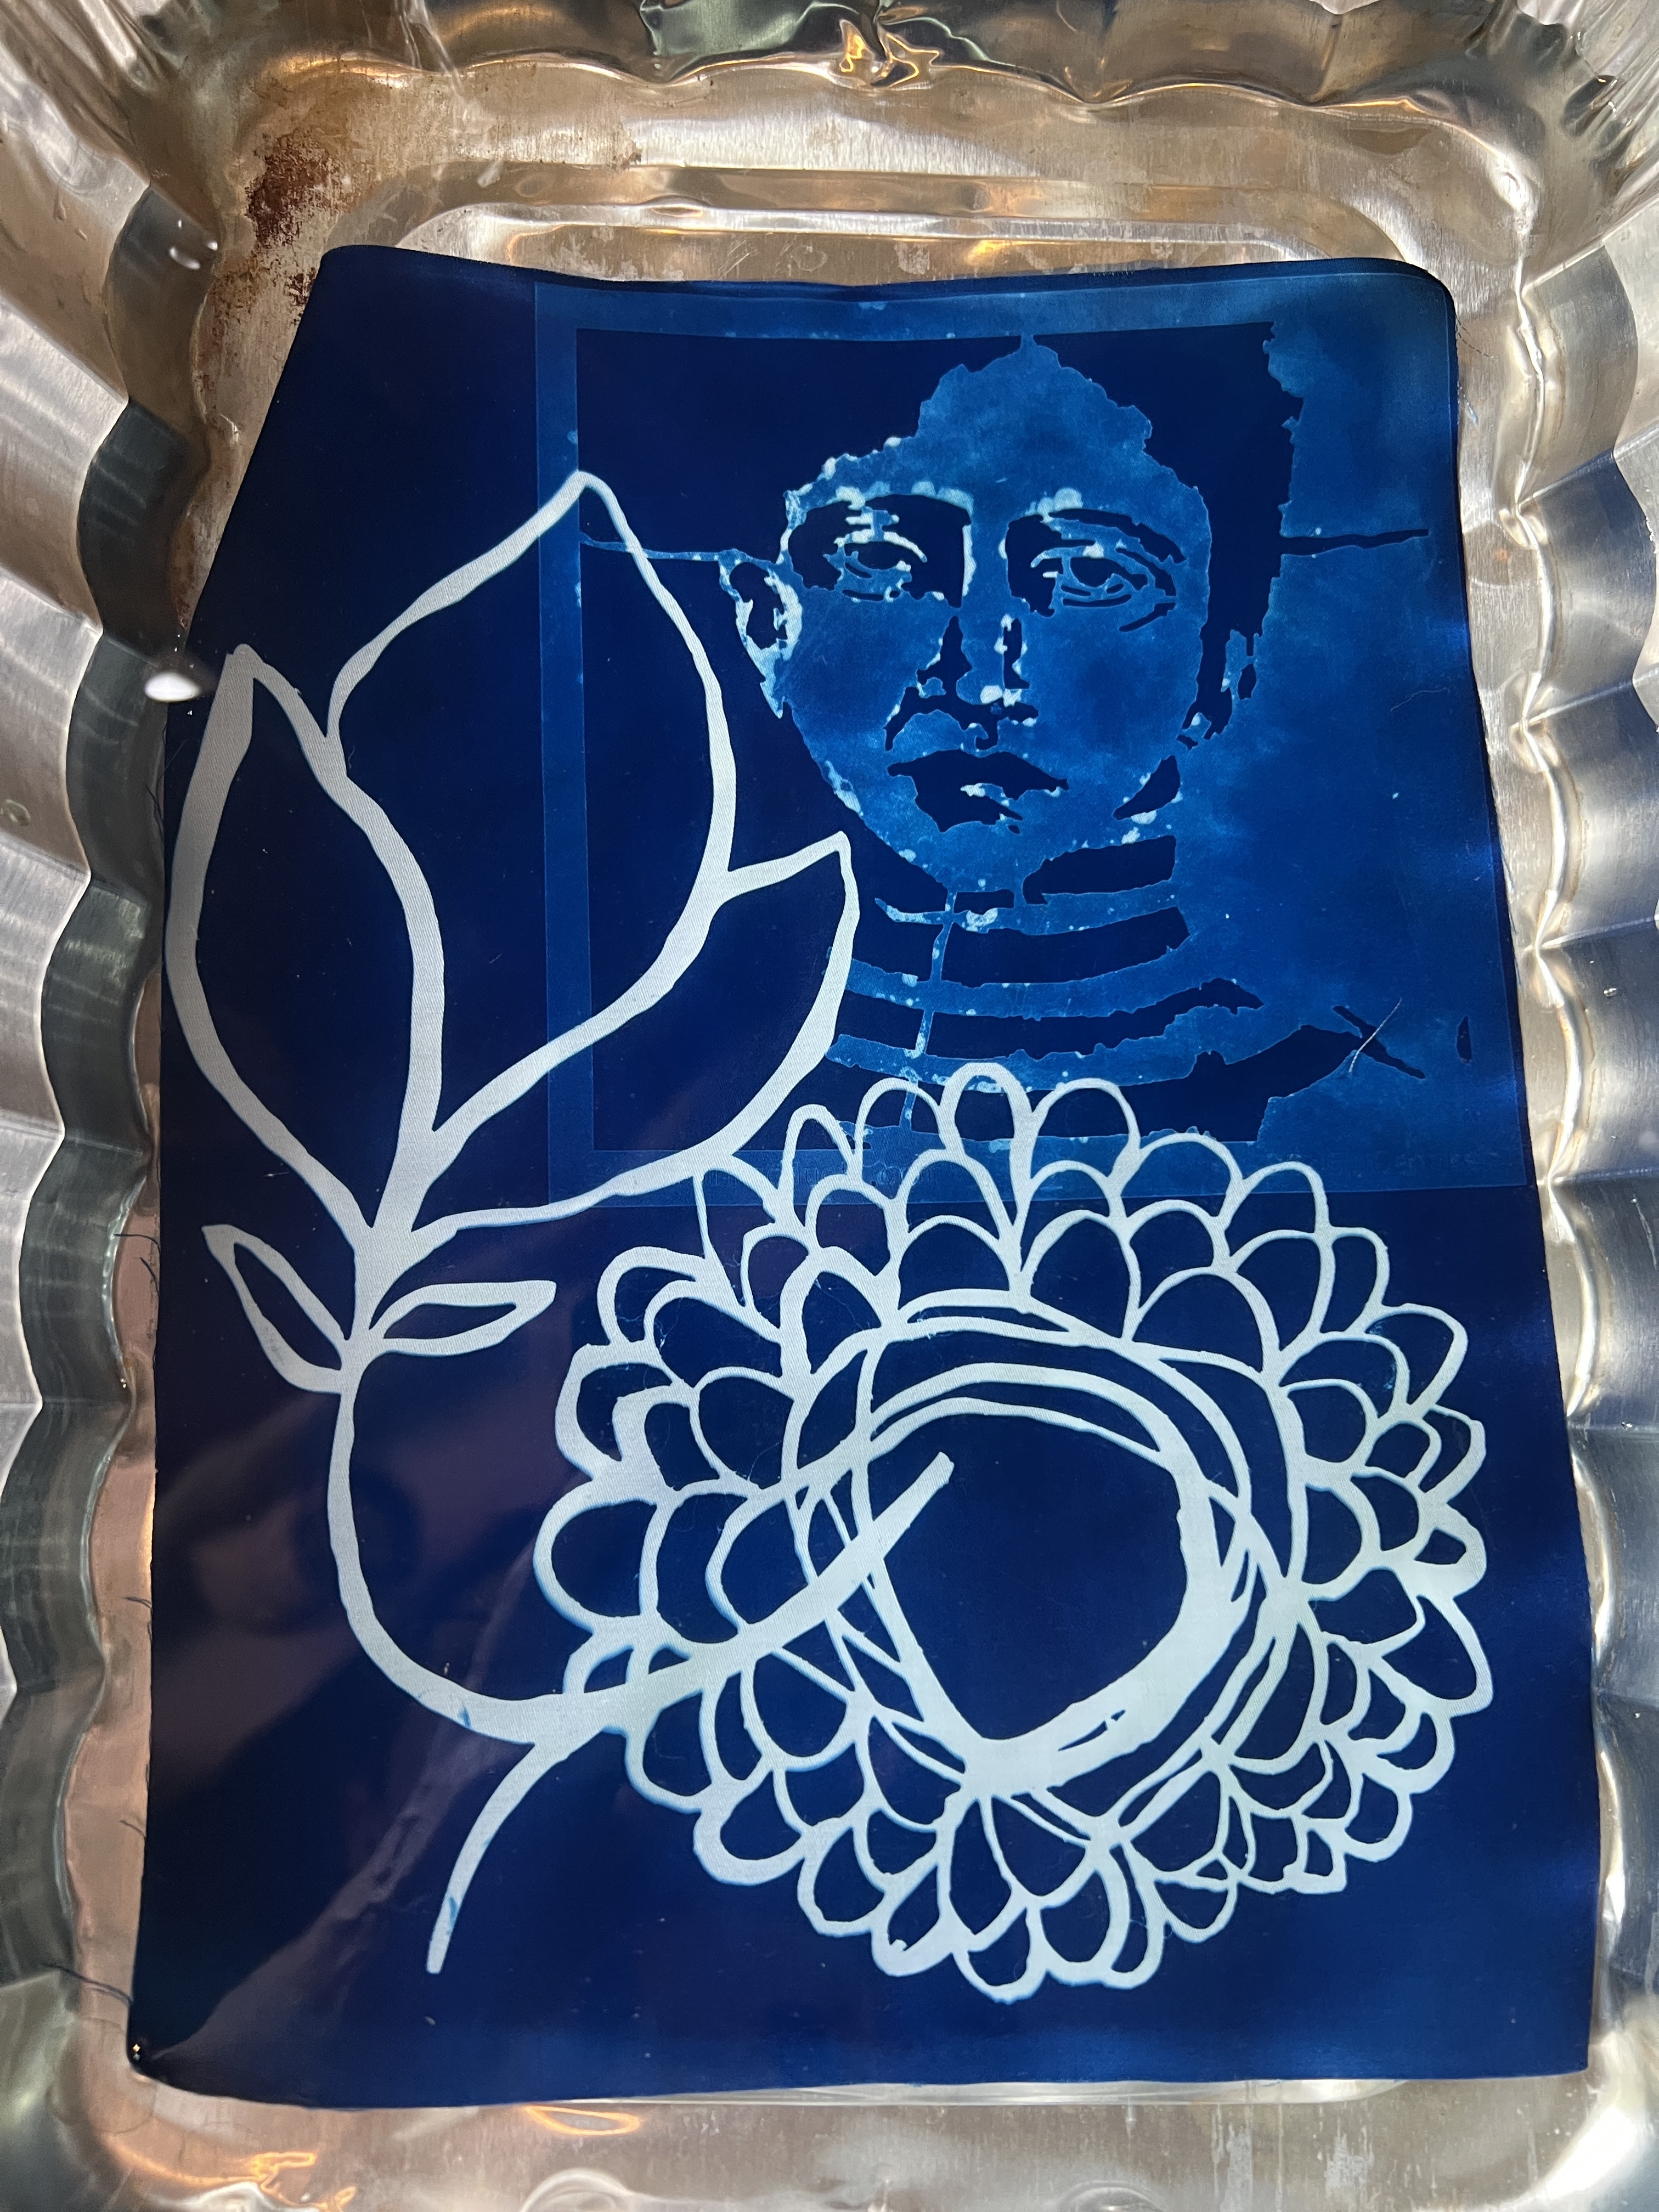
On a pretreated cyanotype fabric sheet, I placed a face stencil by Pam Carriker, a botanical image by Flora Bowley, and a flower by Traci Bautista. I laid it out in a way to create a scene that I knew I would later develop with embroidery floss. On the second sheet of pre-treated fabric, I laid out the four sacred hearts stencil by Laurie Mika. It was my intention to cut one of those out and add It as a separate layer to the final piece.
After about 15 minutes, in good sunlight, your piece will be developed and ready for a rinse in bleach water. It’s the bleach water that really heightens the blue colors. From there you rinse well in clean water and dry.
Once my fabric was dry, I ironed it and in my mind began developing ideas. I was working with some limitations with the main color being all blue, so I decided to make a limited palette of blue, white, and rust colors. I also knew it would become a wall hanging. I set about hand stitching on it and layering it with vintage fabrics.
Once I finished the piece, I decided to add a crystal inside the chrysalis for a double meaning. I am calling the piece, “Pure Energy”.