Showing posts with label Flora Bowley. Show all posts

Friday, January 17, 2025

How to Create Stunning Watercolor Floods with StencilGirl Stencils and Masks

Welcome back to the StencilGirlTalk Blog! My name is Jane Bellante, and I’m excited to share one of my favorite techniques with you: creating watercolor floods using the Chrysalis Stencil and Mask (L390) by Flora Bowley. This simple, playful method is perfect for creating beautiful backgrounds for your art projects.


Materials You'll Need


Step 1: Prepare Your Paper

Begin by spraying your watercolor paper with water. This helps the paint flow beautifully across the surface. Choose your favorite colors and start laying them down loosely. For the first design, I used the stencil portion of the Chrysalis set. Don’t worry about precision—this is all about playful experimentation!


Step 2: Adding the Stencil

While the paint is still wet, place the stencil portion of the Chrysalis set onto your paper. Use a brush to fill in the stencil with your chosen colors. You can keep the application loose and watery to allow for natural blending and movement within the stencil shape. Once you’re satisfied, let the paper dry completely with the stencil on top.


Step 3: Experimenting with the Mask

For the mask portion, I experimented with a faux-rusty effect. First, lay down your colors as before, then place the mask onto the wet paint. Add more layers of color around the edges of the mask for extra depth. Spray with water to blend and soften the edges. When you’re happy with the coverage, let the paper dry with the mask on top.


Step 4: Adjusting Details After Drying

Once the paint is dry, remove the stencil or mask to reveal your design. If some areas lack definition or clarity, don’t worry! You can always reapply the stencil or mask and add more paint. For my stencil design, I deepened the tones around the stem to enhance visibility (for the stencil flood) while keeping the overall effect soft and vibrant. I also increased the rust tones (for the mask flood).  


Step 5: The Final Reveal

The most exciting step is revealing your finished watercolor floods! Carefully peel away the stencil or mask to uncover the design. If any areas feel too bold, you can easily adjust the colors—this is the beauty of working with watercolor. Add or subtract paint as needed until you’re happy with the final look.


You can watch the full video tutorial right here:


Why I Love Watercolor Floods

Watercolor floods are perfect for creating unique backgrounds for your projects. You can let them dry, store them in your paper stash, and use them whenever inspiration strikes. Their versatility allows you to revisit and modify them even after they’ve dried—perfect for evolving creative ideas!


Give It a Try!

I hope this tutorial inspires you to experiment with StencilGirl stencils and masks to create your own watercolor floods. This technique is a wonderful way to play, explore, and let your creativity flow.

Thank you for joining me! You can find more of my work at janebellanteart.com.

Happy creating!


xoxo, 

Jane


Tuesday, July 19, 2022

Exploring Cyanotypes with Kecia Deveney


Last week I took a 2-day class on using cyanotype fabric sheets. I dabbled in the medium last summer and really enjoyed experimenting with it. When I really embrace a process, I like to research it more to get a good idea of the possibilities. I had a great time watching videos and reading up on cyanotype. 


Cyanotype is a photographic printing process dating back to 1842. Once the medium is applied to fabric or paper (or you can order pretreated sheets), It is then placed in the sun and a chemical process occurs between the UV rays and the synthetic treatment. 


So many fun things can be used to create an image, such as botanicals, negatives, flat objects ( or slightly dimensional), and more. One of the things that caught my eye was to try stencils. So of course, I got very excited about experimenting with those. 


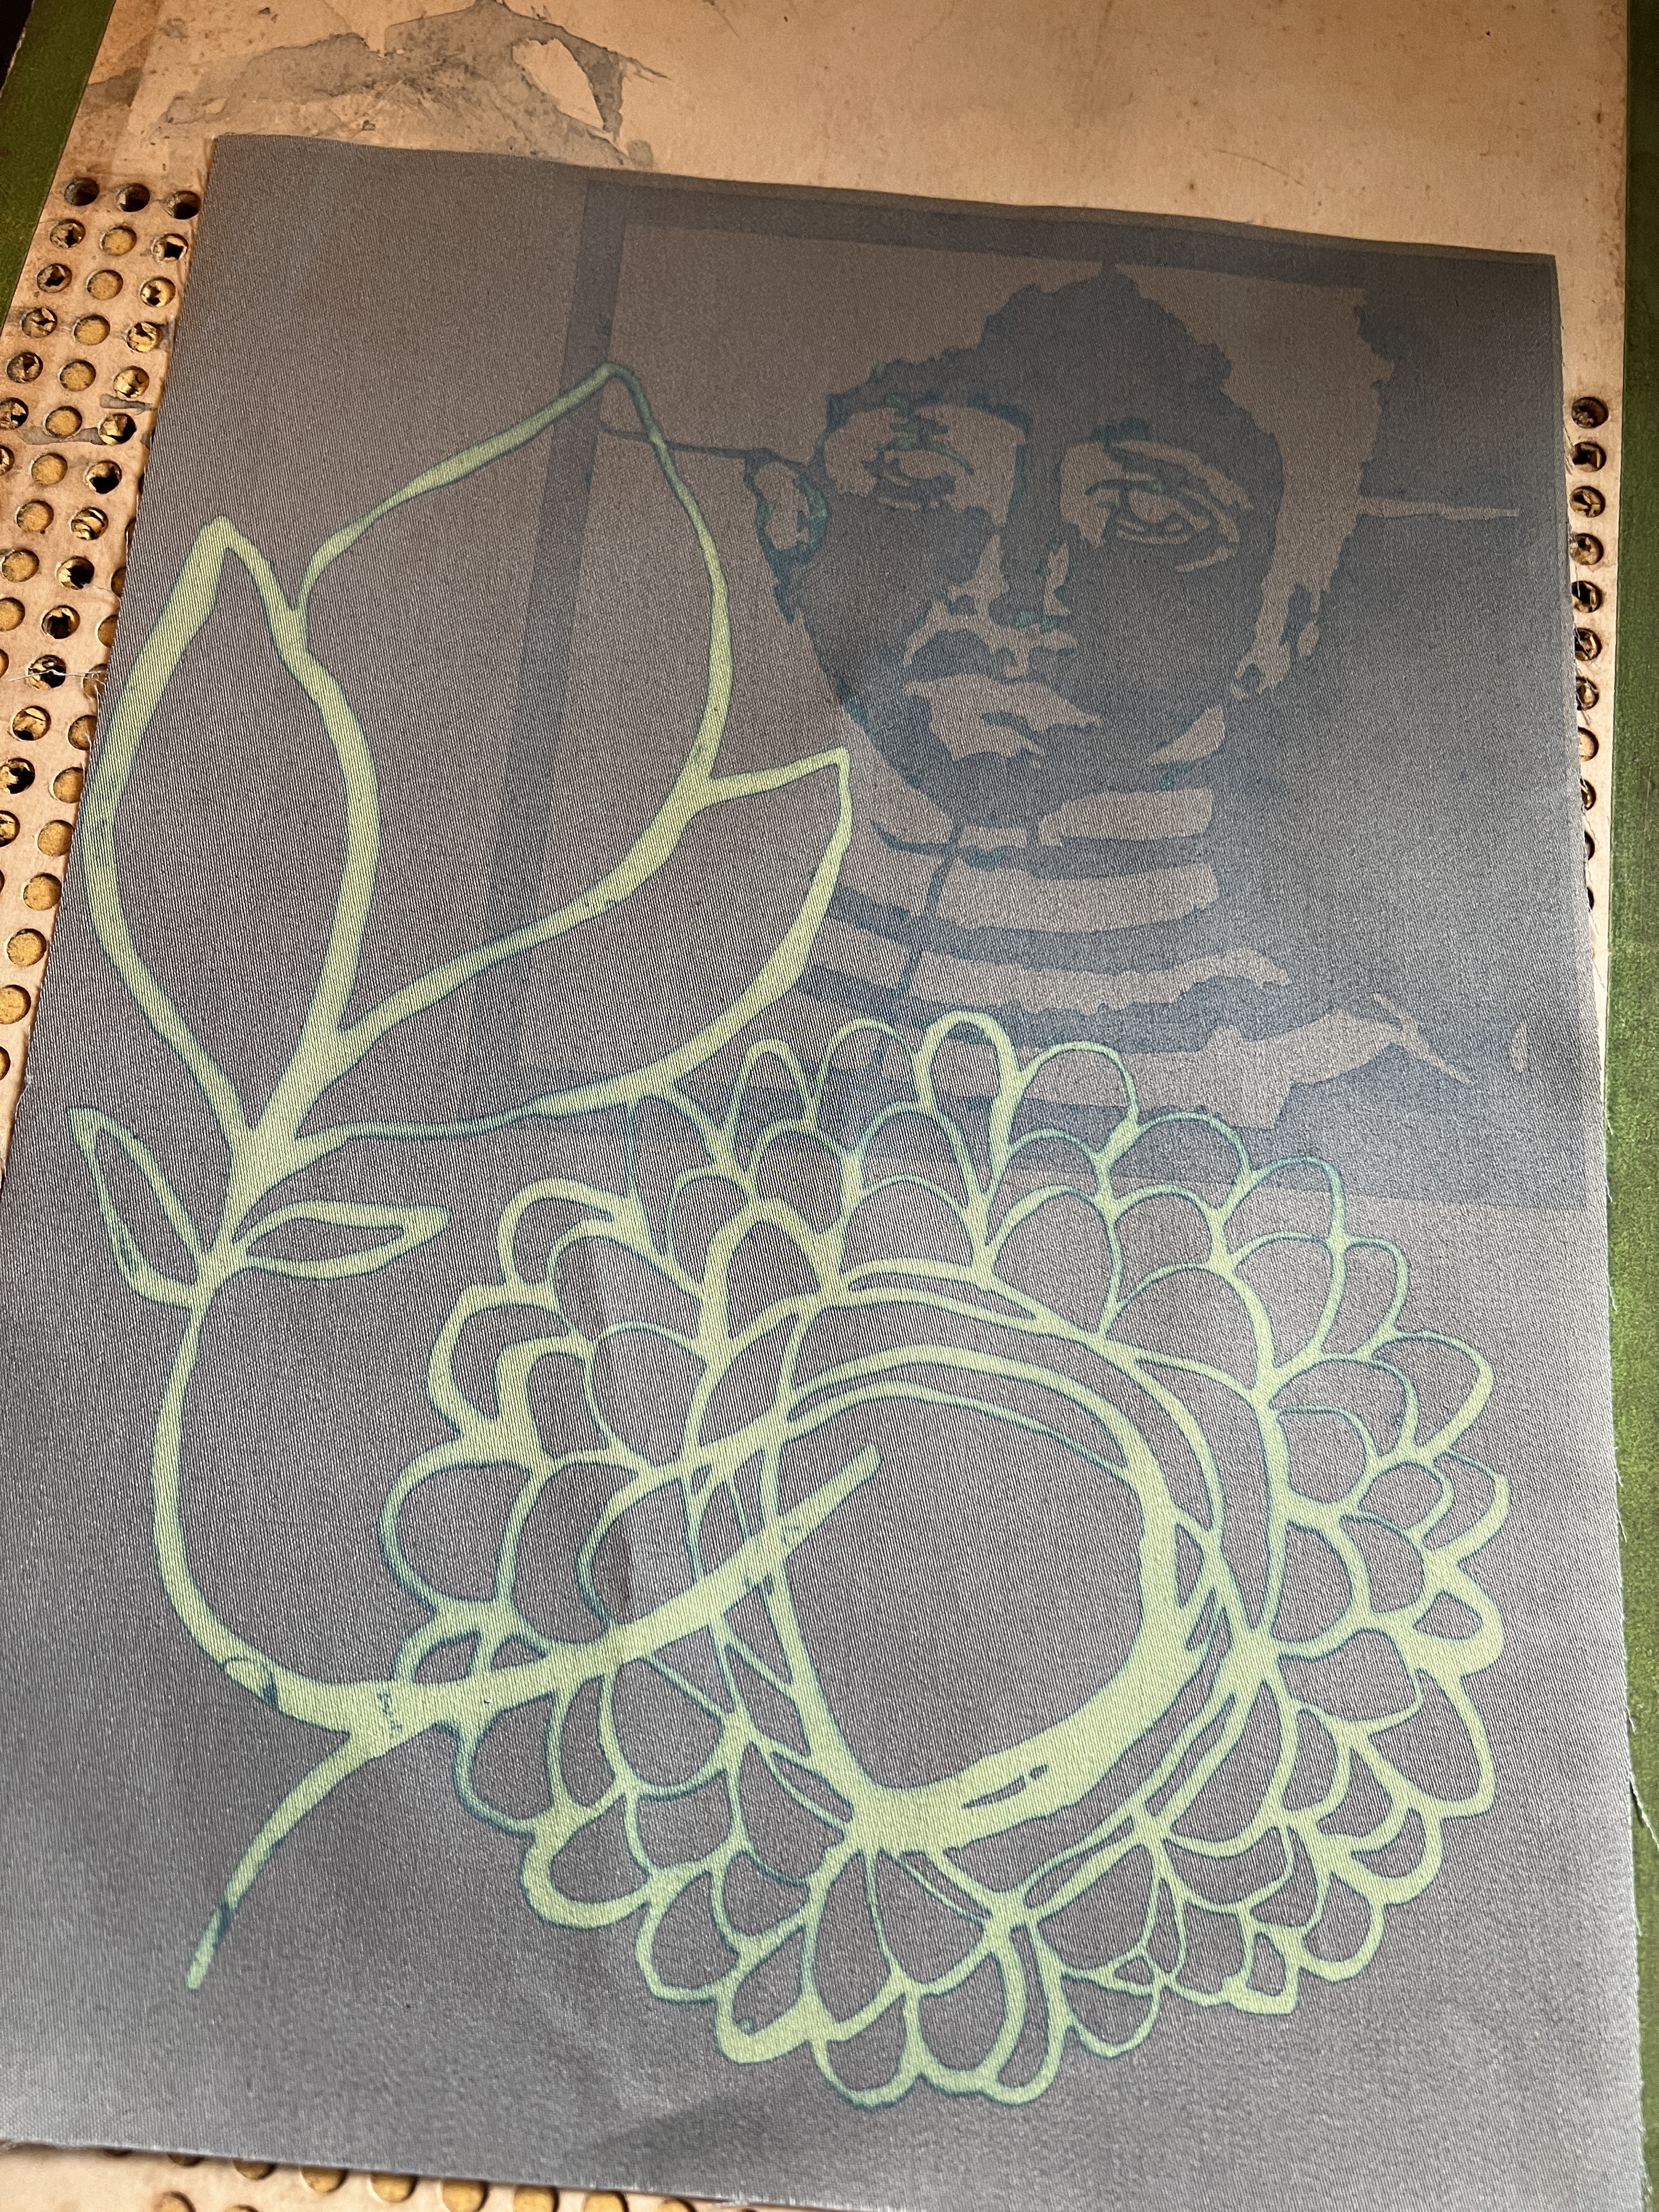
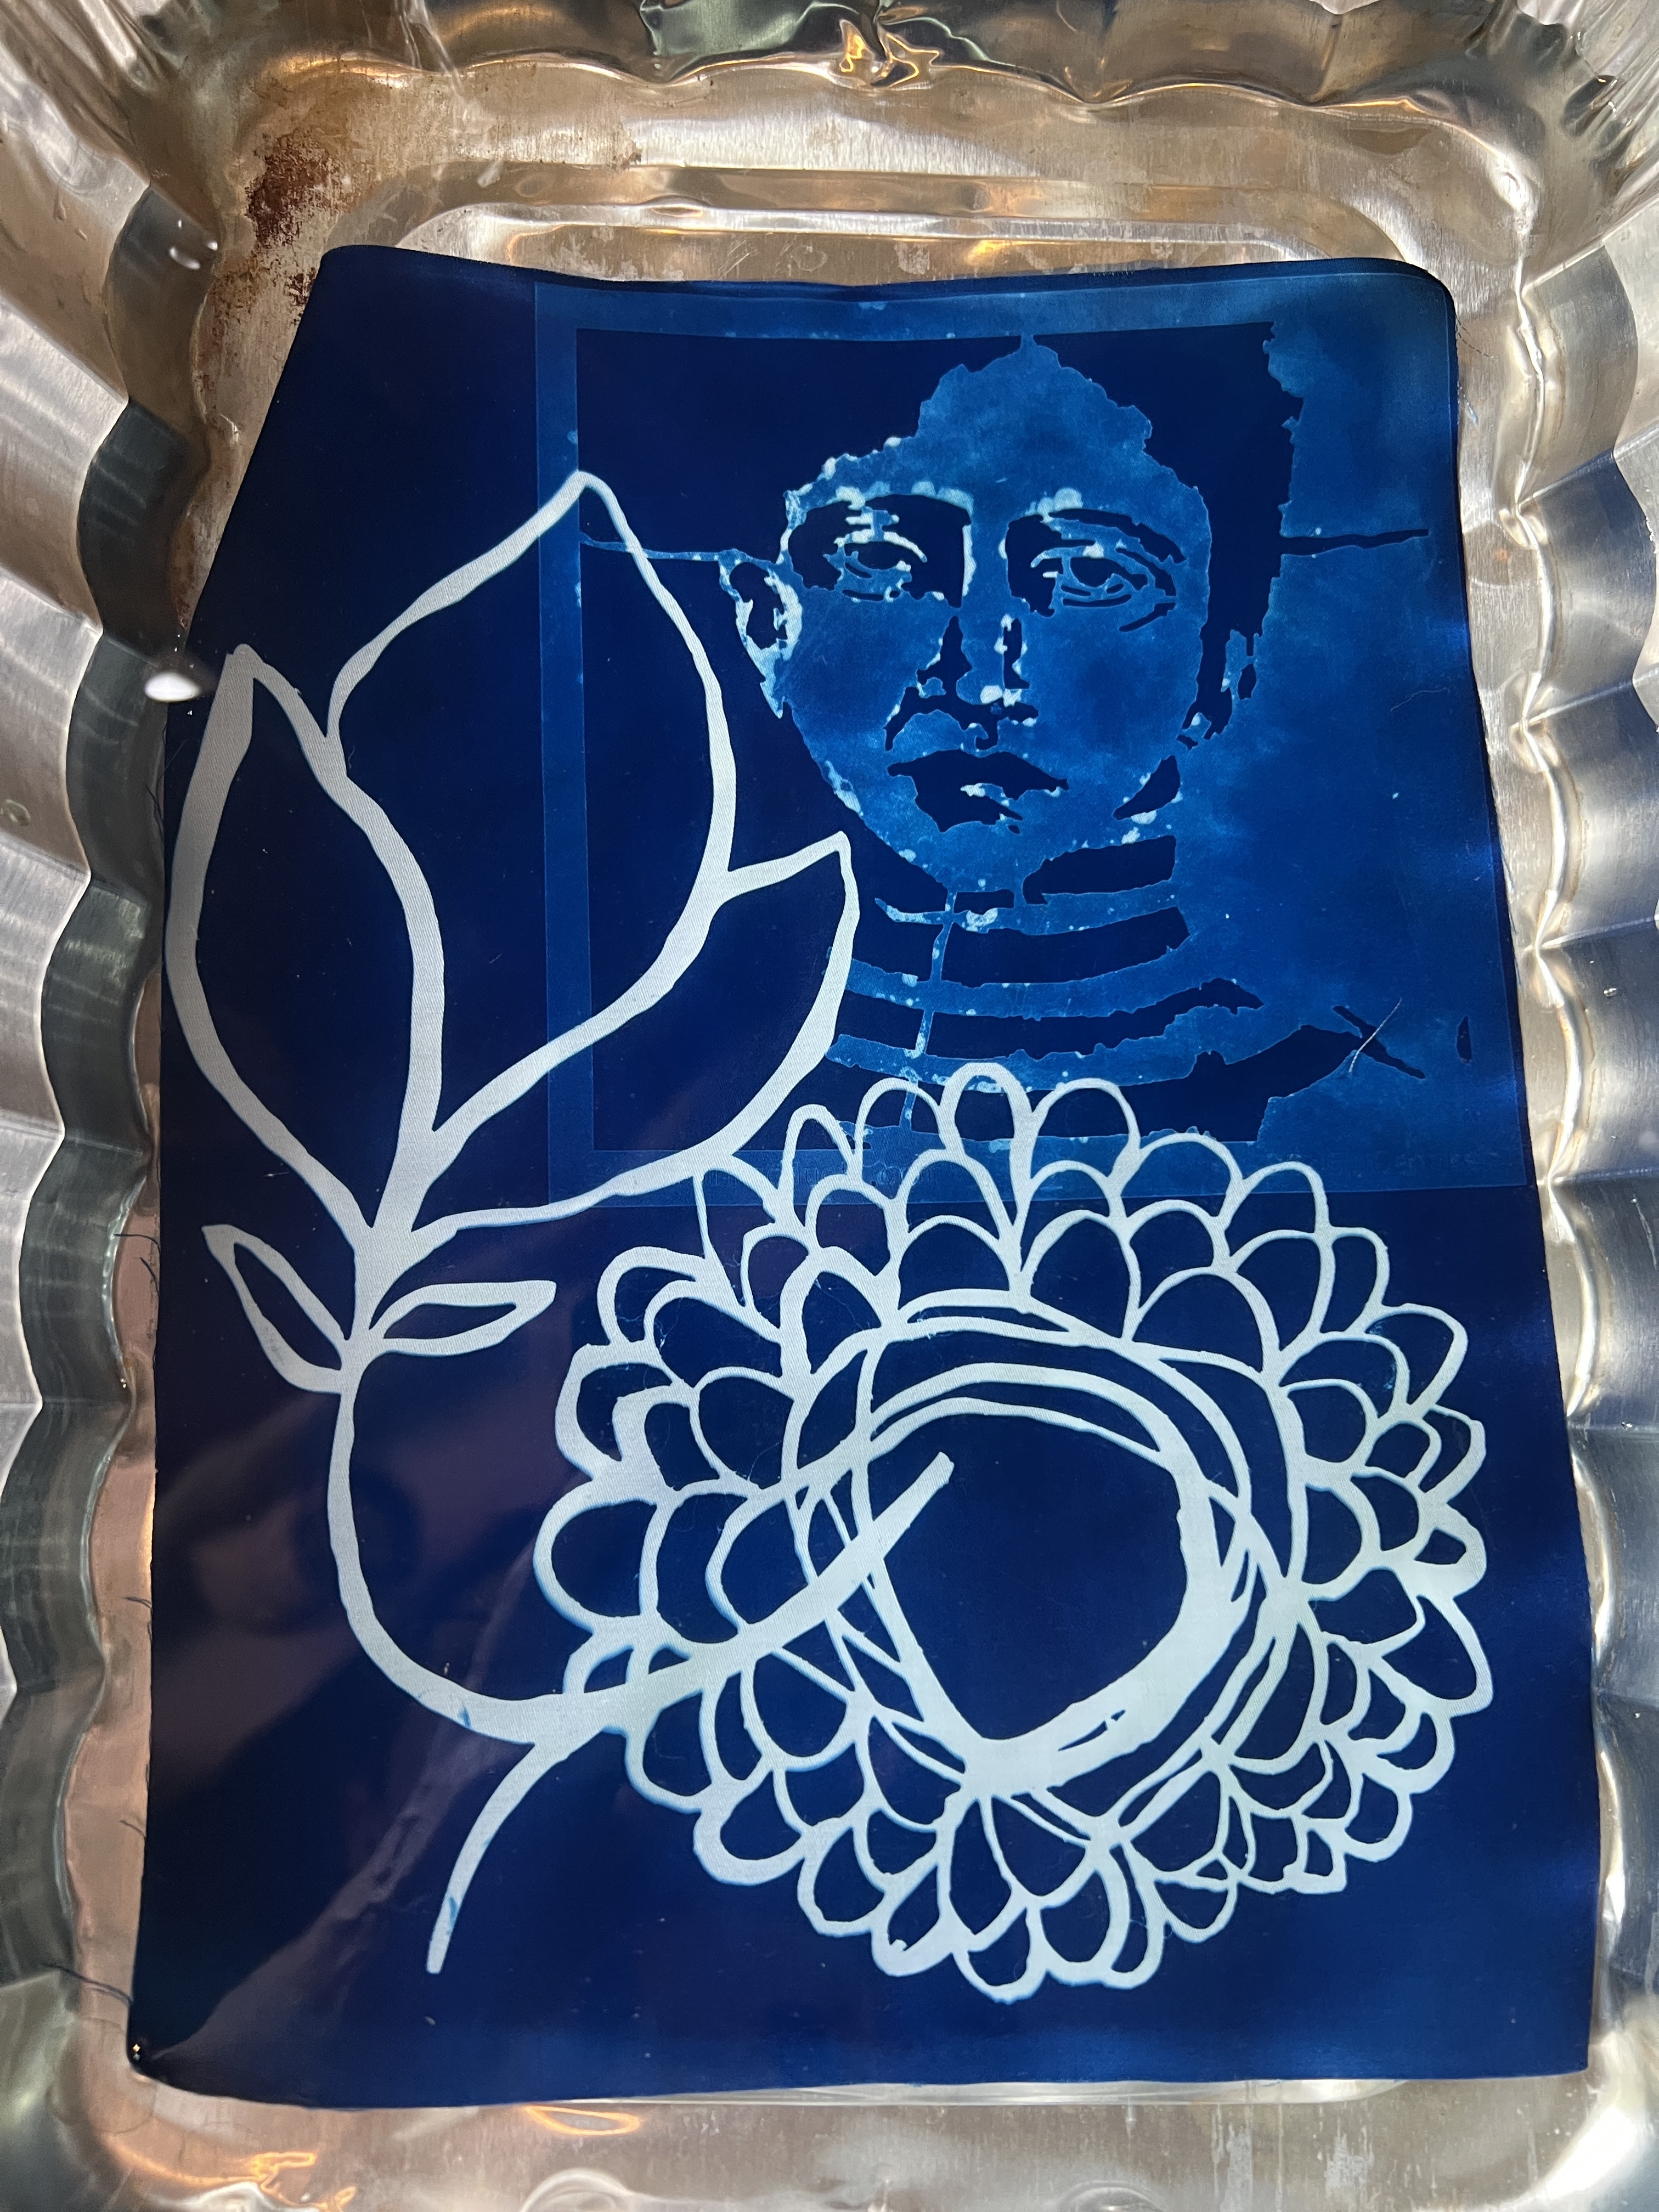
On a pretreated cyanotype fabric sheet, I placed a face stencil by Pam Carriker, a botanical image by Flora Bowley, and a flower by Traci Bautista. I laid it out in a way to create a scene that I knew I would later develop with embroidery floss. On the second sheet of pre-treated fabric, I laid out the four sacred hearts stencil by Laurie Mika. It was my intention to cut one of those out and add It as a separate layer to the final piece. 


After about 15 minutes, in good sunlight, your piece will be developed and ready for a rinse in bleach water. It’s the bleach water that really heightens the blue colors. From there you rinse well in clean water and dry. 


Once my fabric was dry, I ironed it and in my mind began developing ideas. I was working with some limitations with the main color being all blue, so I decided to make a limited palette of blue, white, and rust colors. I also knew it would become a wall hanging. I set about hand stitching on it and layering it with vintage fabrics.


Once I finished the piece, I decided to add a crystal inside the chrysalis for a double meaning. I am calling the piece, “Pure Energy”. 


Stencils Used: 


Traci Bautista’s - Deconstructed Zinnia Mask & Stencil (S290)

Pam Carriker’s  - Create Face (S646)

Laurie Mika’s - Four Sacred Hearts (L782)

Flora Bowley’s - Chrysalis (L390)


Saturday, June 30, 2018

Martha Stewart Living July/August issue features StencilGirl® Stencils!

Check us out!

The July/August 2018 issue of Martha Stewart Living Magazine just hit the newsstands and bookstores and StencilGirl® has 5 stencils by 4 of our amazing designers, Cecilia Swatton, Terri Stegmiller, Flora Bowley, and Jennifer Evans.

"I loved the simplicity of design along with excellent step by step instruction. It is so fresh and modern," Mary Beth Shaw says.


Our products were featured in projects 2, 3, and 5.

Thistle by Cecilia Swatton graces a throw pillow.

L594
A Notebook Cover features He Loves Me by Terri Stegmiller.

S315
Bali Love and Spring Fling by Flora Bowley became elegant wall art.

L388


L392
Jennifer Evans' Daisy Wildflowers was sweetly stenciled in the round and really makes the grouping of art on the wall look fresh!

G021
What home decor project are you thinking about creating?

Friday, February 10, 2017

Guest Designer: Ivy Newport

Hello there! It’s IvyNewport here,and I’m so excited to share a special painting with you today
using three wonderful stencils from StencilGirl!
When I was asked to be a guest designer for StencilGirl, I was thrilled! Such a fabulous opportunity!
My imagination began to run wild the minute I began to peruse all the gorgeous stencils available.
After much thought, I selected three beautiful stencils - Marrakesh Mix, Hash Marks and Bloom True.
Visions of a lantern lit night began to swirl around my mind and I couldn’t wait to get started!

Supply List
Marrakesh Mix stencil
Hash Marks stencil
Bloom True Stencil
Art board 11” x 14”
White gesso
Tracing paper
Acrylic/craft paints
Brushes
Carbothello Pastel pencils
Clear gesso
Mechanical pencil
White charcoal pencil
Saral Transfer paper in white
Soft chalk pastels
Fine liner applicator
White gel pen
Gold gel pen
Gold acrylic paint
Makeup sponge
Black Stabilo Marks-all pencil

Artwork Color Inspiration: Young Woman with Lantern, 1921 by Gene Pressler.

I hope you enjoy the making of “The Night of Lanterns.”

Watch Ivy Newport's The Night of Lanterns, Part 1, here.

Watch Ivy Newport's The Night of Lanterns, Part 2, here.

Watch Ivy Newport's The Night of Lanterns, Part 3, here.

If you would like to see more free tutorials from me you can head on over to my website: ivynewport.com/free-videos.

You can also check out my latest online classes here: ivynewport.com/classes.

Happy creating!
Xo,
Ivy
Ivy Newport
Artist * Teacher * Creative Guide

Tuesday, November 15, 2016

Dramatic Layered Florals

Hi all you awesome stencil lovers, Kristie Taylor here and  today I want to show you how to use Stencilgirl stencils to create paintings  With lots of layers and depth. I really enjoy watching Flora Bowley, I find her style fun, dramatic and full of gorgeous color.  So, using her style and her stencil as my inspiration, I created this:  
I used the following stencils from Stencilgirl
and the large stencil from December 2014 StencilClub

So let's get started:

Paint the entire canvas with red paint.


Place stencil over wet paint and use a wet wipe to remove portions of the paint.
Continue, changing the direction of the stencil until the entire canvas is covered.


Use paint markers and paint to "color" inside the lines. 
This will create an interesting background.


Now place the "Time to bloom" stencil by Flora Bowley on the canvas and 
Trace the shape onto the canvas with a marker. I did this in three places.
Time to Bloom L394


Paint the flower shapes with white paint.


Next, start adding color to the flowers, following the shape of the petals. 


Place the alphabet stencil over the canvas and use a black homemade "spray paint"
(1 part liquid paint, 1part water or airbrush medium)


Now for the part that brings it all to life
Use your fingers(or a brush if you are wimpy lol)
To spread paint all around the canvas. Be sure to leave some spots 
where that awesome background can show through!


That's all there is to it!
With just a few simple steps we created a colorful, cohesive 
painting with depth And personality.


I used water soluble oil pastels to add some shadow and scribbles onto the background.
Adding shadow around the flowers and stems helps them pop off the canvas 


Thank you so much for visiting today!
I hope I have inspired you to use these techniques to create your own beautiful art.