Showing posts with label hand embroidery. Show all posts

Tuesday, October 8, 2019

Let's Wear It: Stenciled, Embroidery Embellished Skirt by Sunila & Aditi


Hello!

Sunila and Aditi here with another post for StencilGirl® Products! This month's theme is 'Dress it or Wear it' and it got us excited because we've been wanting to use our stencils and embroider something.

So we decided to dress up a plain skirt:)! Here's a look at the skirt, before we get into the steps of creating it!


Step 1:
Here's a look at the skirt. Begin by picking out the stencils you'd like to use. We chose Star Struck by Nathalie Kalbach (L662) for a border and Art Deco Peacock Feathers by Gwen Lafleur for motifs! We picked these specifically because we had in mind a folk style pattern for the skirt, and these fit right!


Step 2: 
Place a few layers of paper in between the skirt in order to prevent the paint from seeping through. 


Step3:
Choose an acrylic paint and begin stenciling the pattern dabbing it with a sponge. In our case, we wanted to use lime green, fuchsia, and purple for our final look. Since the skirt is a dark grey, we picked lemon yellow acrylic paint, which upon drying looks like lime green on the dark background. 


We first completed the border and then added elements as motifs from the Peacock Feathers Stencil.


Here's a look at the skirt so far:


Step 4:
Now it's time to embroider. If you choose not to, you could also use different acrylic paints and stencil the pattern and complete the skirt. We've used treads in four colors- baby pink, fuchsia, purple and lime green. We've also used beads, pearls, and colored stones to embellish it. For the border, we've used the Herringbone Stitch Design and for the rest, we've used the backstitch pattern. 


And that's it! Our gorgeous skirt is ready! Here are some close-ups:


We hope we've inspired you to dress up and wear something from your wardrobe!
Hugs,


Thursday, June 27, 2019

New Designer Kristin Reese Williams has stencils for Stitching and there are 4 more must-have stencils from 2 designers!

A talented entrepreneur, artist, and no stranger to anyone who has been following StencilGirl, Kristin Williams has joined our cadre of stencil designers. She brings one of her current obsessions for embroidery to her new designs. She has lots of tips to share for using these stencils.

Cecilia Swatton has two new abstract stencils and Valerie Sjodin has new Leafy Doodle stencils (and a diy washi tape video), so please scroll on down.


Floral Sampler, S706, 6"x6" Stencil


Kristin’s art oftentimes revolves around flowers, and her Floral Sampler Stencil is a nod to her mother’s wildflower garden. No rhyme or reason for the Daisys, Cone Flowers, or happy little flowers swirling around this stencil. Just flower happiness.

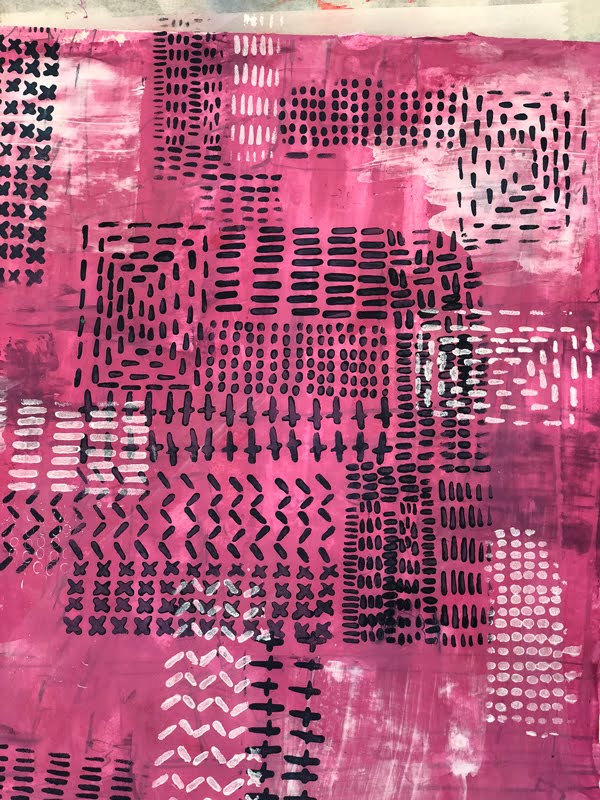
Your stencils can be used as patterns for stitching! Kristin recommends using matte acrylic paint (like Paper Artsy) or white or black gesso. Your paint can be part of your design, or you may cover everything up with stitches.

For stitching on the Floral Sampler, you have opportunities for Cross Stitch, Satin Stitch, Running Stitch, French Knots, Spider Web Rose or whatever stitch strikes you! Same with choosing your colors for painting or stitching. It’s a wildflower garden so, go wild!


Kristin has used this Stencil as a key element on her pocket for her in-progress stitched shop apron.


Boro, meaning “rags” or “tattered cloth,” refers to textiles that have been patched many times over and were passed on through generations.

Boro is an ancient art form and alters a wonderful textural creation of stitches upon stitches and cloth upon cloth to mend and repair garments. Generally involving patches and many “tiny stabs” of stitches, Japanese Boro cloth is a sought-after textile.

Kristin designed this stencil as she loves the texture, history and utilitarian beauty of Boro. A stitcher, herself, she finds beauty in the multitude of stitches and tattered cloth that preserved clothing through the years.


Here Kristin shows you a background using the Boro stencil. As always, you can use the stencil as a whole or just stencil through parts as she did in white gesso. 

Boro, S705, 6" x 6" Stencil


ATC Stitch Mixup, L729, 9" x 12" Stencil

Oftentimes when Kristin was teaching stitching classes, she’d grab a dishtowel or random piece of fabric to use to show how to create specific embroidery stitches. She had an “Aha! Moment” realizing a stencil with her favorite stitches would be great to use for students as well as teachers.


Using muslin or any lightweight fabric, stencil so that you have about 3-4 inches on each side —this makes it easier to place a hoop anywhere on the fabric. Stencil with any matte acrylic paint (like Paper Artsy) or black or white gesso.


Kristin stitched with all 6 strands of DMC floss using a Chenille Needle as it has large eye and a sharp point. The larger stitch patterns on this Stitch ATC Stencil are great for beginners as they can learn the intricacies with less frustration.

Starting at the top left the stitches used are: Seed, Cross, Chain, Spider Web Rose, Lazy Daisy, French Knots, Running, Couching, and Fly.


Not a stitcher? Cut this stencil up and use these great patterns in your art journaling backgrounds or to integrate your designs!


Abstracted Letters by Cecilia Swatton

Cecilia Swatton is in her happy place when she is customizing letters. Her R & E and M & Y 4" x 4" Mini Stencils are each a combination of two letters that evolved into an abstract pattern. 


M & Y , R & E 4" x 4" Mini stencils


You can check out Cecilia's blog in the coming week for more inspiration with these stencils.


Leafy Doodles by Valerie Sjodin


If you want to make a repeated leaf border, Valerie Sjodin's large 9" x 12" Leafy Doodle Border is the stencil for you.  The stencil includes three borders, a leafy branch mask, and random leaves to stencil on your artwork. Random leaves can be sprinkled over artwork and journal pages.


L736
handmade washi tape


S714
Leafy Doodle Verge is the small 6" x 6" version.  The stencil pieces fit nicely in the pockets of a Moleskine or Leuchturrm 1917 journal.


All three borders on either stencil are repeatable.


You can discover all the latest stencils on our website.

Happy stenciling!

Monday, August 20, 2018

Happy Patches


I live in Paducah, KY, “Quilt City, USA,” home to the National Quilt Museum and now biannual QuiltWeeks. I am hardly a traditional “quilter.” Precision is NOT my jam. When I try to make a baby quilt I’ll piece it and it will never, ever line up. Ever. I figure a baby is going to spit up on it so it doesn't matter. Big Juicy Rationalization. My sewing machine intimidates me (I actually have written on it with a Sharpie to remind me what certain buttons are for and duct taped the instruction manual to the case). I’m sure the “Quilt Police” have a warrant for my arrest!…......yet....from time-to-time..... I'll machine sew.
This is my "janky" sewing machine.
Earlier this year a group of artsy-craftsy friends and I hung out in my Studio and The Loft for a private retreat. Huge. Fun. Each participant taught the others something or put together a project for our weekend. Brenda Delaney and Valerie Pollard taught us how to make Boho Bags using upholstery fabric as a base for the bag and tons of fabric scraps, lace, trims, and “Happy Patches” as adornment.

We ripped and sewed fabric scraps to our bags with abandon! It was a blast!

I had an “Aha!” moment while sewing that day. What I loved about what we were doing were the same things I love about creating Mixed Media Art; working in layers to create interest, tripping across something surprising in your work, finding cohesion in the mess, editing, adding, subtracting, and finally pulling it all together. 

Paper, paint, assemblage or fabric, it’s the same process! Doh! The fabric didn’t have to represent just precision quilting for me anymore!!

My favorite part of our project was making “Happy Patches.” I’m not sure who named them, “Happy Patches,” but that is exactly what they are because they make you smile. Using fabric, acrylic paint, stencils (of course!), rubber stamps, and Stazon ink we created personal badges to adorn our bags. 
The perfect weather to stay inside and get creative!

A few Sundays ago I was seized with opportunity. Hubby was on a trip with his brothers. The sky looked like this. 

Whoop! An afternoon in the Studio with no other responsibilities. 

If you’ve ever taken a workshop with Mary Beth Shaw, you know she is alllll about the “parts.” When I was a prolific handmade cardmaker, there were days I wasn’t inspired to make a card but felt creative. Those days I’d sit in my craft room and make parts for future uses.  Making parts is a great way to jumpstart your creativity, hone your skills, and create for the love of creating. 

I decided to pull out the machine and make some Happy Patches. 

Months ago I ordered vintage linens off of Etsy. Some of these precious old fabrics were used as the base of my patches. You know how wonderful working with old paper is, right? Same thing with the fabric. It rips beautifully, soaks up the paint, and feels so natural — no sizing or anything left in it but natural fibers. Yum. 

I chose stencils that represented my mood and what I might like to see added to Bag or article of clothing one day. Carolyn Dube's Fridge Poetry is a great one thinking I would use it whole or cut out the words to use separately, and Mary Nasser's  Go Your Own Way Arrows is a perfect choice as the arrows work great on Happy Patches!

For the black, I used Liquitex Black Gesso. Why is it Black Gesso gets EVERYWHERE when I use it?? The hardest part is keeping my hands clean. 

I stenciled on a large piece of vintage fabric knowing I'd cut or rip out the images. 

I'm desperately in love with Andrea Matus deMeng's Free As A Bird and smaller version called Fowl Play stencils and use them in so much of my artwork. I layered the birds with sections of Jessica Sporn's Becoming sentiments.  The Wolf (who I think of as a sassy fox) and eyeballs came from Roxanne Coble's Wolf stencil. She's teaching at Ephemera Paducah next month and we all can't wait to meet her in real life! Squee! The bright citrusy looking stencils are ones that I grab a lot when art journaling, created by Terry Stegmiller and called Slices 6. Gwen Lafluer's July Stencil 2018 StencilClub set was the Bomb and the choice for the multiple colored circle/mandala. Below you'll see I also used Nathalie Kalbach's Typewriter, a lovely image!

I’m kind of in love with Dina Wakley’s acrylic paints. They have a great opacity and awesome bright colors. I decided to give them a whirl with the stencils I wanted to use with color. They worked brilliantly. 


(Often times I field questions from our QuiltWeek visitors about what “works” on fabric. In my opinion, most everything does, it just matters what you’re going to do with it when you are done. If you plan on putting it in a washing machine one day, obviously you have to be more judicious with heat-setting and using the proper mediums so that your work doesn’t wash out. If it’s going to hang on a wall or decorate your purse, go wild!)

I dipped into my fabric stash and ironed pieces I thought would layer well with my painted fabric. I use any kind of fabric for these including felt, cotton prints, velvet scraps, silk scraps, and ribbon, laces, and other embellishments. Literally. Anything goes. 


Black thread is my preference for stitching these but that's purely a personal choice. I purchase the packs of already threaded bobbins in black and white so I don’t have to stop the creativity when the bobbin runs out (and I have to re-educate myself how to fill it). 

Some very important tips when making these:
  • Use a “Denim” or another heavy-duty needle
  • Increase your stitch length to 3.5 or 4
And then start stitching!


Then it’s all about quick decisions. Don't think too much--layer, add words, add trim, HAVE FUN! (And please don't look too closely at my stitching!!!


I love creating for the sake of creating. These Happy Patches let me do just that. And, one day they will add interest to whatever I decide to sew or glue them to. The possibilities are endless... the front of a journal, Boho Bags, my new overalls, a chambray shirt from the Thrift Store, aprons for the studio, the backside of my favorite jeans....makes me want to stitch some more....xoxoxo, Kristin