Showing posts with label ICE Resin. Show all posts

Wednesday, December 19, 2018

Artful Celebration: Silvia Souza beings joy to the season with Luminarias


Psst! Carol Baxter here - Luminarias were far from all Silvia Souza made!  
You really, really need to check out this entire post!


Season's Greetings from Silvia!

I love the celebration of light at this time of year in the Northern Hemisphere.  Whether its the light decorations across the streets of Europe or the wacky displays in our neighborhood (and this year around the corner from us is a "lightfest" replete with a volcano, tyrannosaurus, Chinese pagoda, and the US Capitol!), these lights all bring joy to the season.

In many parts of the world, paper lanterns are used in many different kinds of celebrations.  Mexico has a lovely tradition of luminarias or farolitos. I was hoping to create double-sided translucent paper to make my own small luminarias. I didn't quite achieve the stained glass effect I had in mind at first, but after some play and with many sheets to experiment with, I did make stained glass with leftovers!


I started by painting deli paper in various tones of reds without too much cleaning in between to get variations of color. 


I painted both sides of the paper and created many sheets, this shows both sides. Then I used Michelle Ward's X Rows Stencil, L067, on one side with gold and silver paint. I had also made some green sheets.


I discovered that a foam roller worked better and faster on the reverse when I stenciled with a couple of Andrew Borloz's Crazy Quilt stencils, L570 and L568. I loved that the red paper looked a bit like Chinese joss paper!


With lots of sheets to work with, it was time for some math.  I made a template for my luminarias and mocked it up to make sure the folds and gluing would work.


Luminarias measured 3" x 2" x 5" when assembled.
Once the details worked, I started cutting and assembling.

I cut some darts for better assembly.
I pre-creased all the folds.


Added two-sided tape and began putting the luminary together.


Here are some photos of the final products with battery powered candles.


I then made a cut paper ornament that I made for many years with my middle-schoolers.


And I still had more paper to play with.  So I made origami stars using strips cut from the sheets of paper.  These will be strung like ornaments and be added to gift packages.


The snippets I had to cut off the strips, and after these were put together, look like little houses and will be made into little village tags.

Lastly, I used ICE Resin on a sheet of paper, which finally gave me the translucent look I had envisioned.  I used this paper as a stained glass window for textured Kraft-tex houses for this month's ATC exchange with an art group I belong to.


Which just goes to show how creating paper in some quantity opens up so many creative possibilities!

May this month be filled with light and joy for you!

Silvia


Monday, February 20, 2017

Gwen's Gems: Stenciled ICE Resin Paper Art Journal

Hi everyone! It's Gwen back again this month with another edition of Gwen's Gems! For this month's project, I experimented with a technique that's been on my to-do list for a long time... making resin coated stenciled papers with ICE Resin. Of course I couldn't just stop at making the papers; to really highlight how cool they are, I made them into window pages and covers for a hand-bound art journal.


To start, I picked out some stencils I wanted to use along with the papers. One of the really cool things about this process is that when you coat certain types of paper with ICE Resin, the un-stenciled areas become almost completely transparent. To take advantage of that, I chose rice paper, tissue paper, and glassine paper.


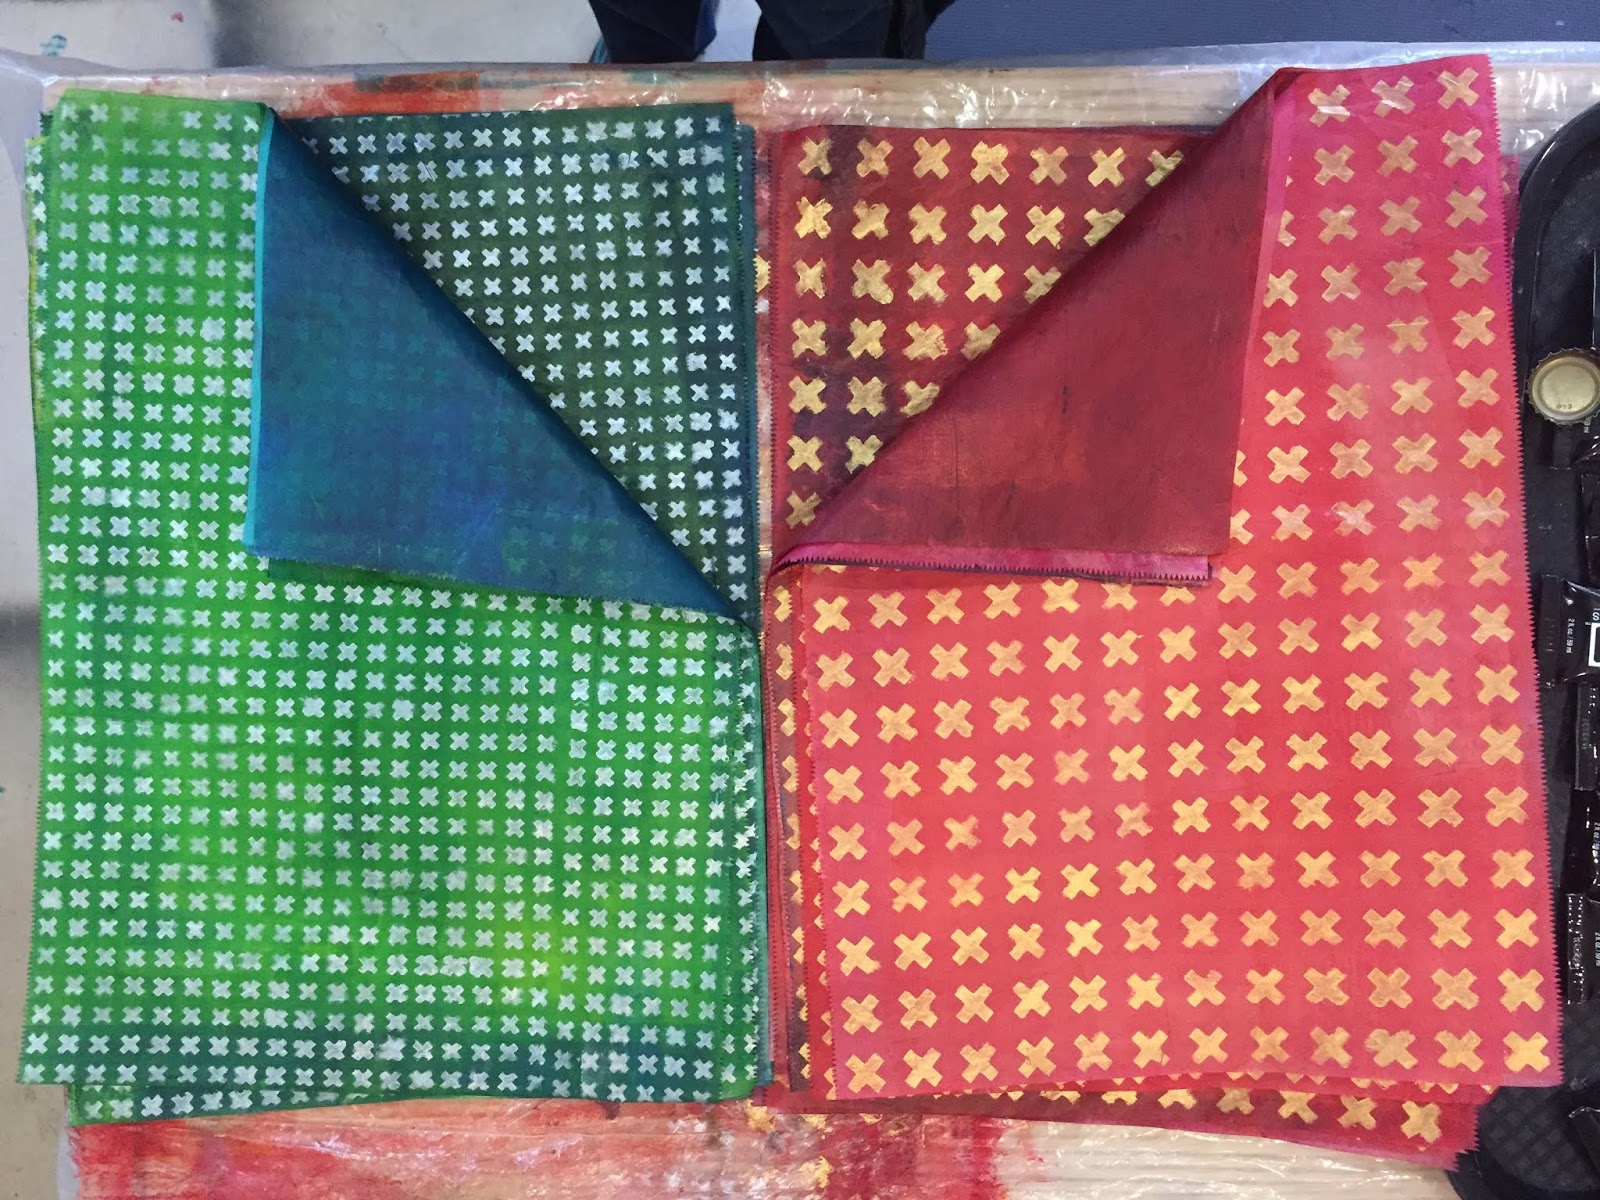
I cut the papers to the sizes I wanted (so that you don't waste your resin by coating areas you aren't going to use) and then used acrylic paints to stencil on them. I chose acrylics because I knew that they wouldn't bleed into the paper and that the color wouldn't lift as I coated the papers - it worked great!


Left to right, top to bottom, these are the stencils I used for this part:
Once the stenciling is done, it's time for the resin. I didn't do a full step-by-step tutorial of this part since there are already some really good ones out there. Here are two good places to get details on this process: How to Use ICE Resin on Paper, and a video tutorial by Jen Cushman for Stampington.

Here's the short version - you need gloves, a trash bag (trust me when I say that a grocery store plastic bag will NOT work, even if that's your version of a trash bag!) and a sponge. I just used a cheap cosmetic sponge. What worked best for me was to put a silicon mat on my work surface to apply the resin, then to transfer the coated papers to a trash bag laying on the floor. This way I could drag the trash bag into another room so it could be out of the way while it dried and not monopolize my work station.

Start in the middle and work out, dip your sponge into the cup rather than pouring - it saves resin, and coat both sides. I mixed up 1oz of resin and it was more than enough for all my papers.


Here are all of my coated papers, laid out on plastic and ready to start curing (this was round 1, where I gained the wisdom to tell you NOT to use grocery store bags.)


While the resin is still wet, you can sprinkle in some add-ons... I used some of the fun gold glitter mix-ins that you can get from ICE Resin.


Once that's done, carefully pull the bag out of the way to someplace where it will be safe and untouched until it's cured; I found that they needed a minimum of 18 hours until they were no longer tacky. Don't try and pull them off until they're totally dry... when they are, they should just peel off the trash bag and are ready to use!


See how cool they are? The colors can intensify while the background is almost clear. They're SO COOL!

Next, it was time to start putting together the window pages for my art journal. I took some specialty papers and some thin chipboard and cut them into 6"x6" squares and then cut squares out of the middle for the windows. I had two matching pieces for each page so they would look good from both sides. 

Here you can see how I applied adhesive along the back of the first piece and then adhered the resin coated paper and sandwiched it with the top piece.


Finished page:


For the chipboard pages, I painted the fronts and backs with matte paint. (Autumn Fire Fresco Finish Paint by PaperArtsy, black gesso from Liquitex, Turquoise and China Red Background Paint from Matisse.)


Once the base layers were dry, I stenciled them - no plain frames in my book!


When those were dry, I repeated the process to sandwich pieces of stenciled resin paper in each frame set.


Now all of my window pages are ready to go! I added some cardstock pages to go in between each of the window pages / covers where I can do some actual art journaling, and with that it was time to bind the book.

To bind these types of pages where there aren't signatures there are a few methods you can use, but I like to do a Single Sheet Coptic Binding. I learned my favorite way to do this binding in a class with Sharon Payne Bolton, but you can find some decent tutorials on the web - I've used this one from Boundary Press with some success in the past. You can also do a search and find some videos if you prefer to watch the process.

I started by prepping my pages for binding - I made a template and punched all my holes, then added eyelets to make it cleaner looking and easier to turn the pages. (I have long-shank eyelets for bookbinding that I used for the thicker chipboard pages. The others were old scrapbooking eyelets.)


Then I got my tapestry needles and waxed linen thread and started sewing the pages together:


Now I have a book!


I embellished a bit by putting washi tape around the edges of some of the pages, edging with a gold marker, and adding some glitter here and there. On the cover, I used a molded escutcheon that I'd made with leftover ICE Resin. I painted it gold and then glazed it to get it darker in the nooks and crannies.

Doesn't it look like it might actually be metal! I glued that onto the front cover of my book. 


Now I have a fun new art journal, all ready to be used!

Here are some of the inside pages so you can see what they look like before I start working on the blank pages:


(I'm skipping photos of some of the back-sides... they look almost the same but in some cases are a little less translucent.)


Last two spreads...


Here you can see the entire book again - I love the glimpses of light through the windows inside!


I'm excited to start experimenting in the book and seeing how I can take advantage of the windows as I work on my pages. It's going to be so fun!


Have you ever used ICE Resin to make your own resin-coated and stenciled papers? What did you use them for?

I hope you enjoyed today's project and that you give ICE Resin a try at home - it's so much fun and so addicting! The hardest part is really waiting for the resin to cure so you can play :)

Until next time, happy stenciling!

Wednesday, May 14, 2014

StencilGirl Guest Artist Jen Cushman


Please welcome our Guest Designer today....Jen Cushman!

Hey everyone! I’m so thrilled to be doing a guest spot on the StencilGirl Talk blog today. Most people who know my work think I only make jewelry.  Actually, I’m a mixed-media artist and I work in collage, assemblage and jewelry. But it’s true that for the past three years I have making LOTS of jewelry using metalworking and ICE Resin.

At one time, I was a big rubber stamper and stencil fanatic. This was back in the 1990s when the stencil designs were not that cool and they were mostly bought at the big box craft stores for home décor.  Man, I stenciled the heck out of our “starter home” because  we didn’t have money for much else but paint.

Then along comes Mary Beth Shaw and StencilGirl Products. I’m so happy to call Mary Beth a friend because she is one wickedly-talented human being. She showed me the very first art stencils she created when we were teaching together at the Art Unraveled art retreat and I was over the moon excited!  Fast forward to now and I’m thrilled to watch her company’s success and see what amazing art and artists StencilGirl Products are inspiring.

For today’s guest post I thought I would do something shocking and NOT make jewelry. (grin). Of course, I had to use ICE Resin, but that’s just because I don’t ever make a piece of art without it. Seriously.

When I looked over all the amazing artist’s stencil designs, it was like being in a chocolate shop the day you decide to ditch the diet. Soooooo many great choices! I decided I wanted to stretch myself and choose something a little out of my comfort zone.  I tend to use lots of bright colors in my work so I wanted to experiment with a soothing color palette and a natural theme. Celestial Grove Stencil by Kae Pea fit the assemblage idea I had in my head perfectly. 


For a substrate, I pulled a wooden painter’s palette from my stash.  I painted a quick coat of white gesso for a base and let dry. I then placed the stencil on the palette and started painting with acrylics. Since I wanted to keep things simple, I kept my colors pretty straightforward. Green for the bamboo grove and orange, yellow and red for the sunset. 


A little bit of dark green for shading and some white helped to pop the bamboo from the background. I added a journal quote with a black Sharpie marker.


Next came ICE Resin. I mixed up a full calibrated cup that comes with our doming kit and then put on a pair of disposable latex gloves. Rather than using a disposable paintbrush, I just pour the mixed resin onto the painted wood and used my gloved fingers to spread it around. (A bit messy, but no brush marks this way ever).  I kept it on my silicone craft mat to dry overnight (ICE Resin takes 8-10 hours to dry) and woke up the next day to a beautiful first layer.

I did a small amount of doodling with my white Sharpie marker – just a few lines here and there to give it a more art journaling look. (Yes, you can draw on dry ICE Resin. Something I’m teaching more in depth in Chicago at my Art Journal Jewelry class at the CREATE mixed media art retreats. Come join me!). 


The final step was to grab some of the disposable paint brushes that I use in Iced Enamels when doing Cold Enameling.  (I never throw them away but keep a stash on hand to repurpose into my work).  Little blobs of paint on the already resined brushes added a touch of color. I let those dry and then mixed up a little more ICE Resin and painted a thin layer onto the piece. I arranged the paint brushes on the painting in an artful manner with a little bit of extra  resin as “glue” and let the whole thing dry another 8 hours.  ICE makes a great glue. Anything you place on it while wet, which stick permanently while it cures. Those brushes are never coming off!

I do need to add a picture hanger and wire onto the back of the piece to hang it. For photo purposes I placed it on the thumbhole, but it hangs a little wonky.


I hope you’ve enjoyed this little tutorial as much as I did creating it. If you want to see more of my work, you can go to my WEBSITE  or subscribe to my BLOG.


ARTIST BIO: Jen Cushman is a natural storyteller who found mixed media art 14 years ago and never looked back. She is drawn to the imperfect, the funky, the quirky, the artsy and the authentic: be it people or objects or art. Her work has been widely published in national art and jewelry magazines, and she currently writes a DIY colum called "The Mixed Media Metalsmith" for Cloth, Paper, Scissors magazine. She is the author of two jewelry books, and she travels the country teaching collage, assemblage and jewelry making techniques. An inspiring speaker, Jen's been invited to present talks on business, marketing and creativity at conferences and art events. She is Vice President and Partner of Susan Lenart Kazmer LLC/ICE Resin. To learn more about ICE Resin, visit the company's website.