Stay tuned!
Mary Beth Shaw will be back again next month with another new VLOG post!

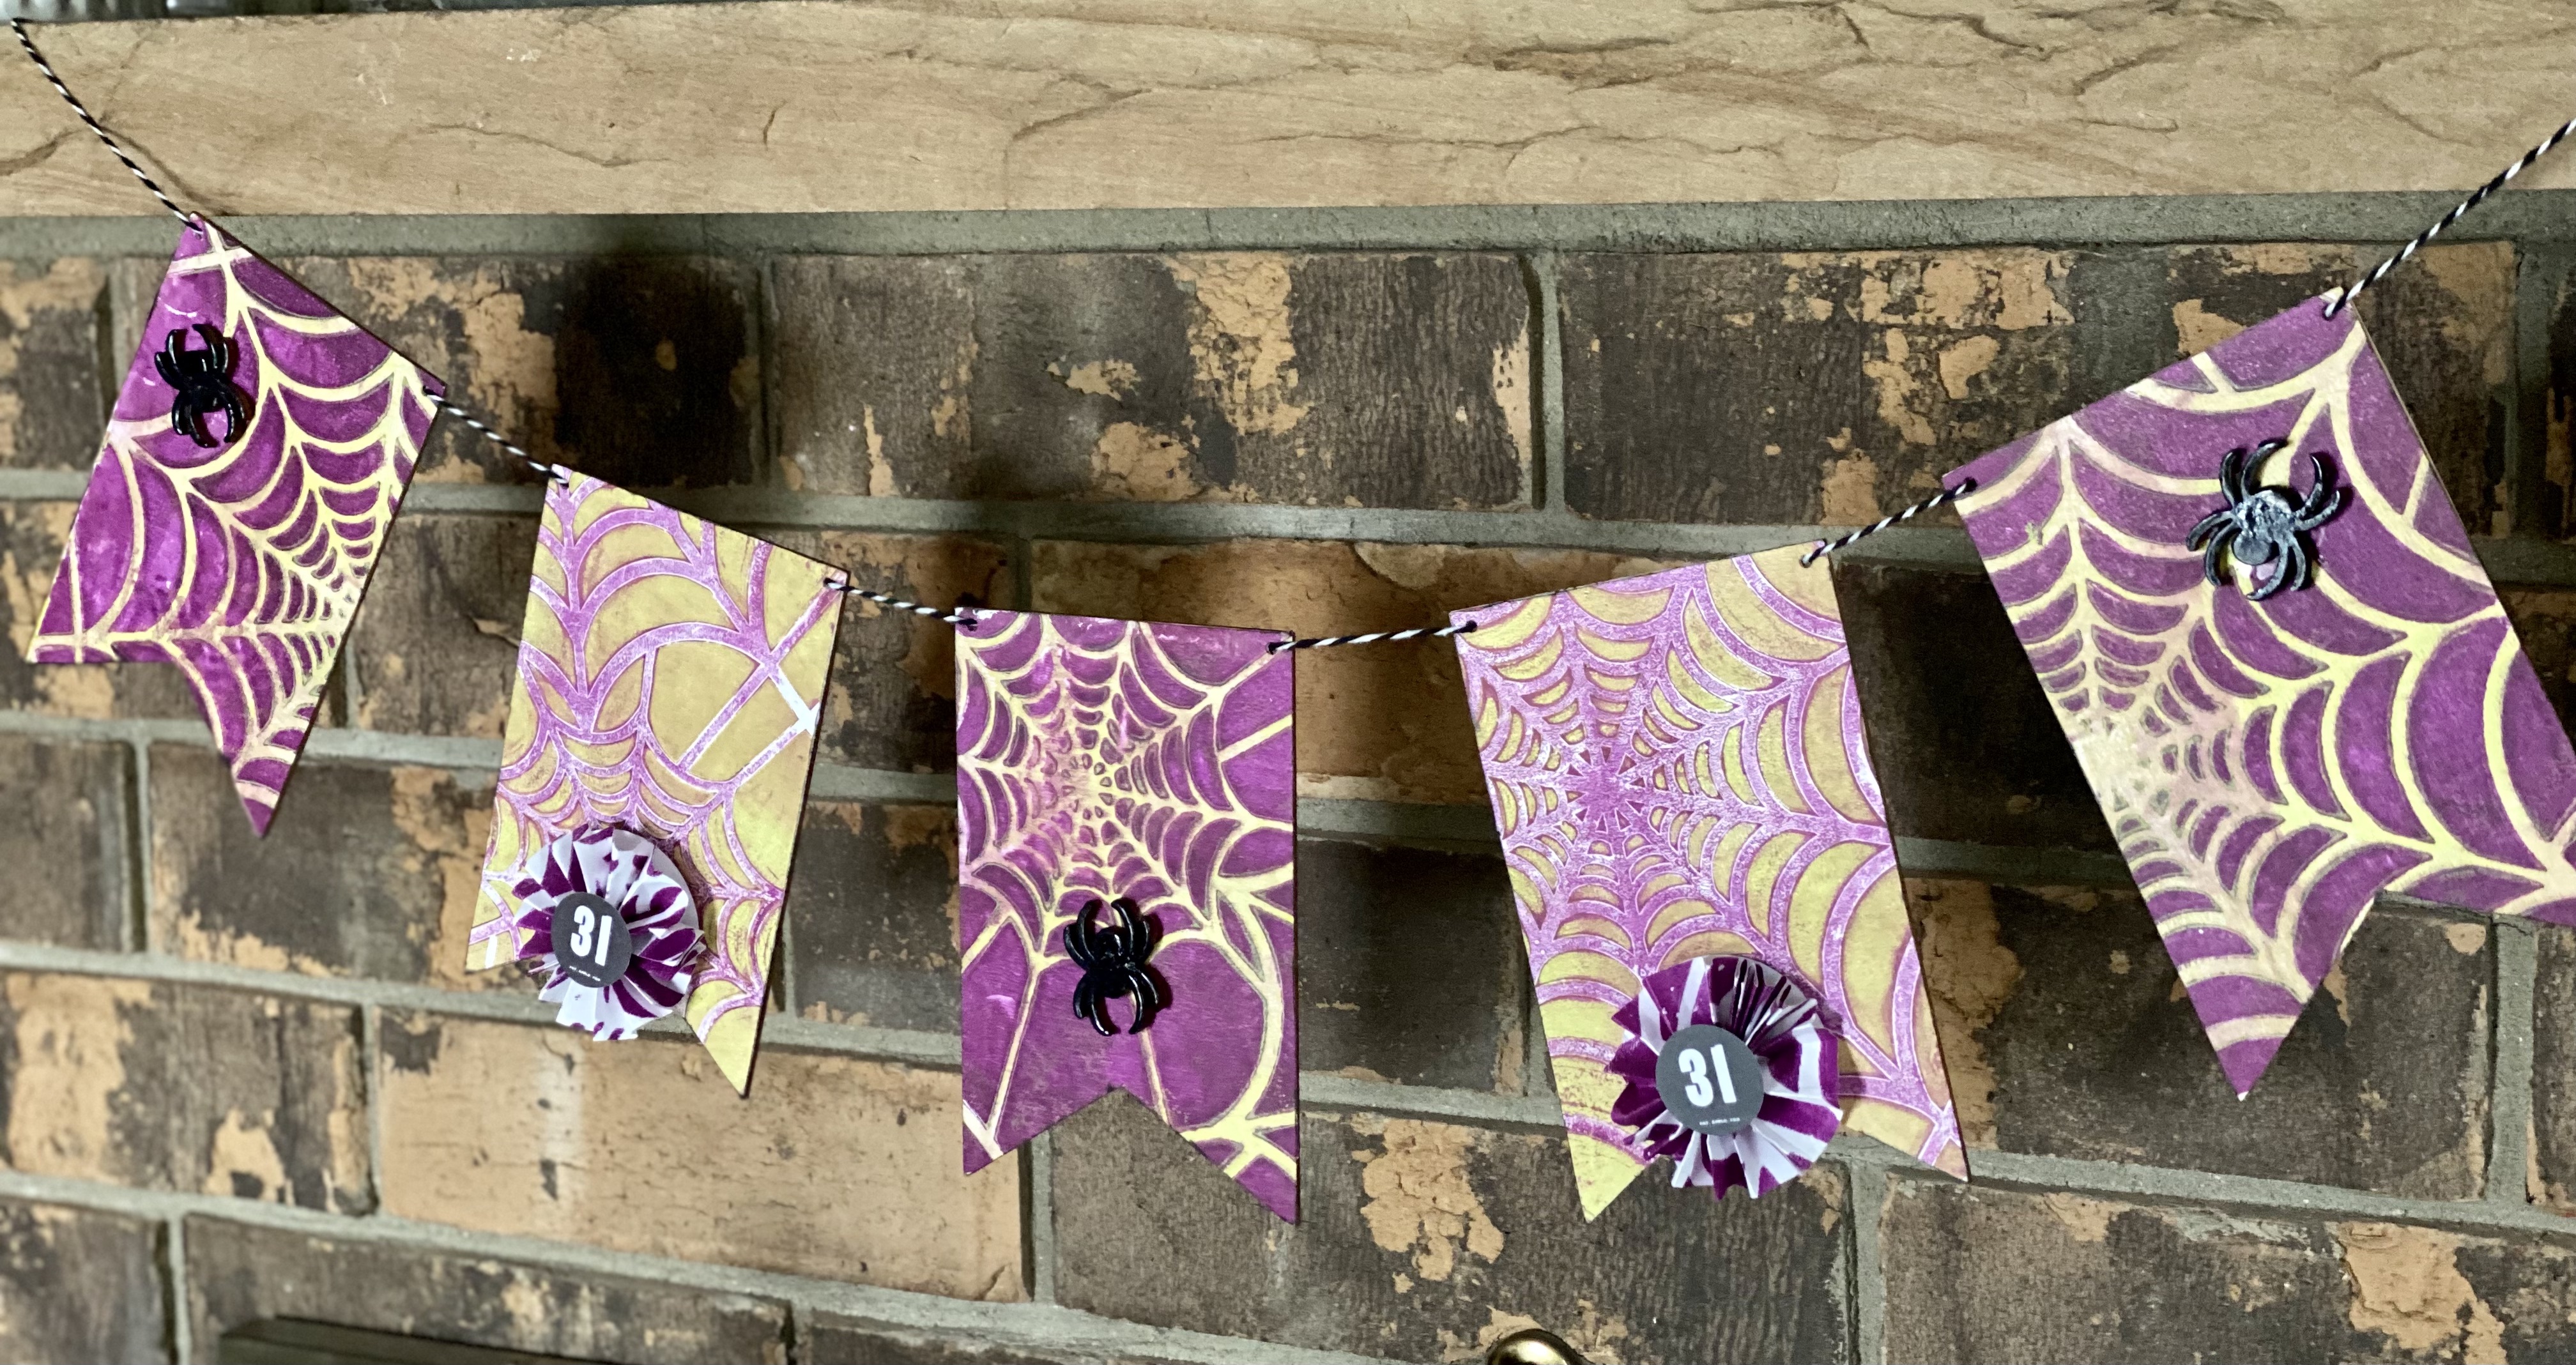
Hello and happy fall!
Nicole here to share a fun, quick and easy card that’s perfect for the fall season. It’s almost starting to feel a little more fall-like here in Central Texas, and I am waiting in anticipation for our leaves to start changing. Until then, I am going to have to be satisfied with making my own fall leaves.
I always like to have a variety of cards on hand for sending happy mail or tucking into giveaways and attaching to art that someone purchases from me. With my stash dwindling a bit, I needed to get creative to make some more.
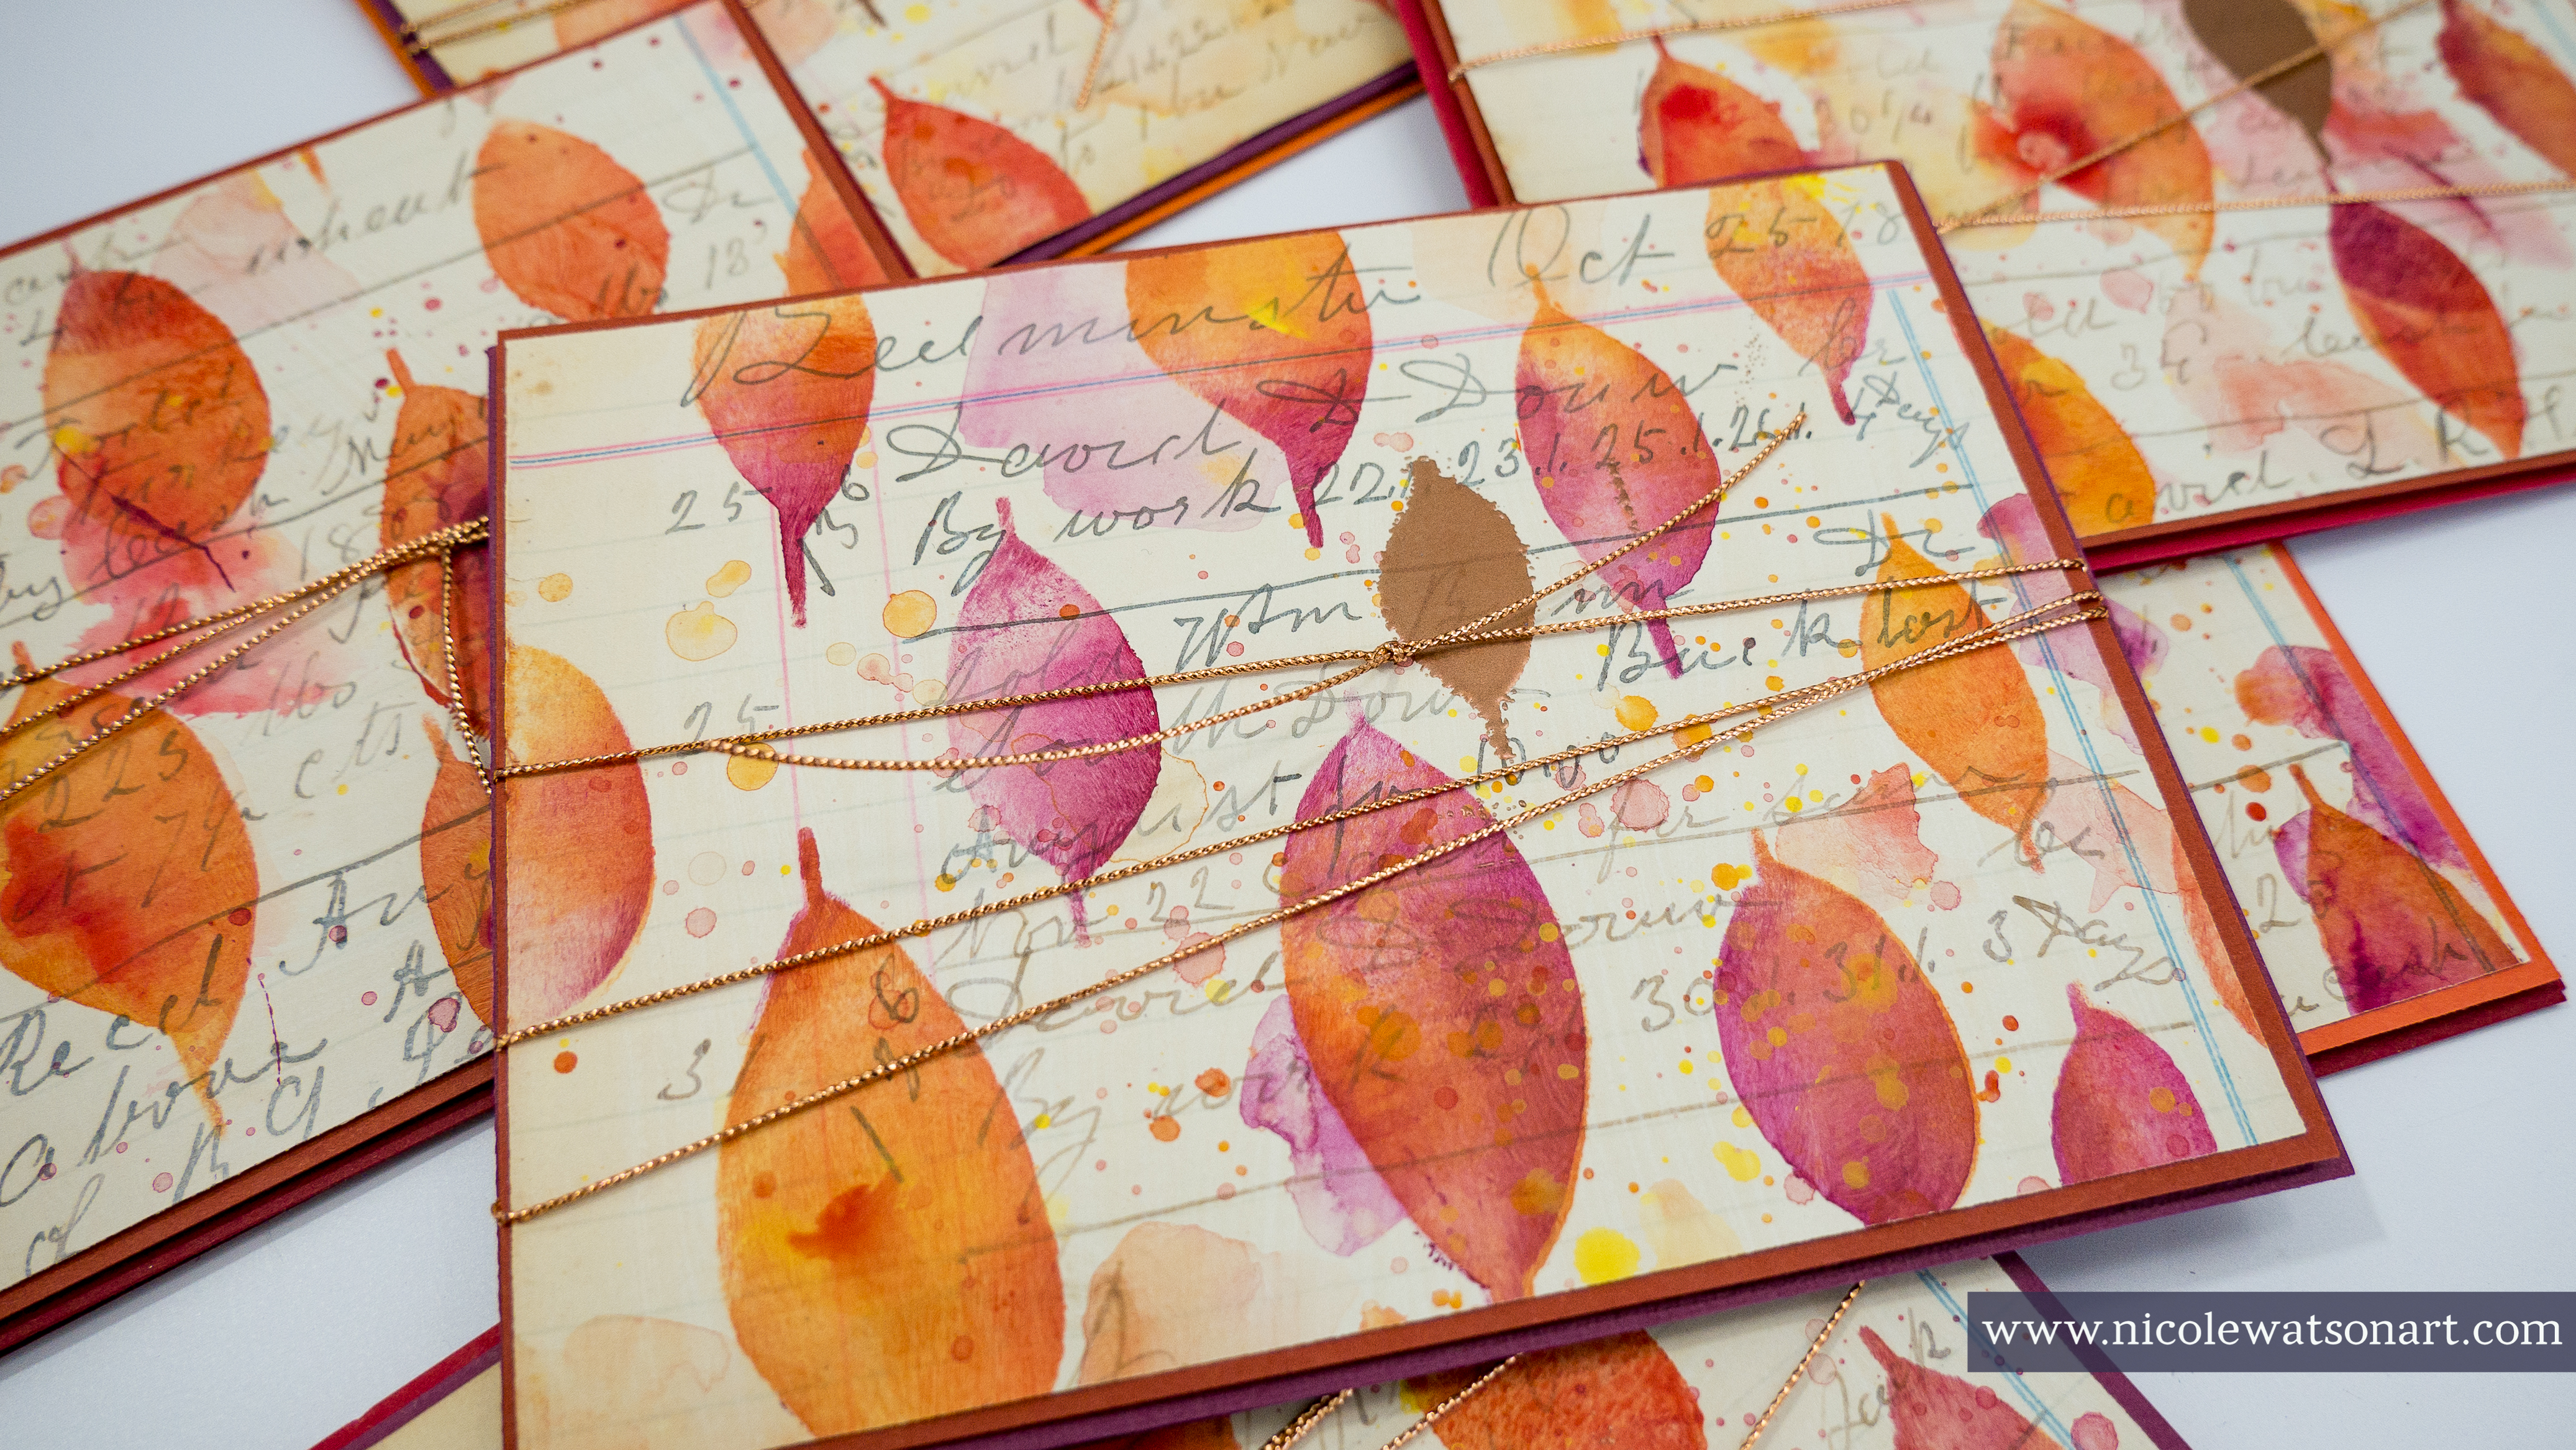
Often when I sit down to make cards, I find making multiples takes just about as much time as making one. (Plus the supplies are all out!) In just under a couple hours, with four large ledger sheets, one stencil, a bunch of paint, cardstock, and a few other supplies, I was able to create 10 cards and 10 different postcards.

I began by adding a small amount of watered-down gesso to some vintage ledger sheets. If you don’t have a ledger that’s falling apart or that you want to take pages out of, you could also use book text or even use your own handwriting on some pages. This card would be awesome with a fall poem as the background, too!

The way white gesso mingles on the old book text is one of my favorite layers, however you can also use clear gesso. The white doesn’t cover up the pages much at all, it just adds a sort of chalky-like coloring. The gesso protects the pages just a bit from the paint we’ll be adding next.

Once that gesso was dry, I grabbed my closed leaves stencil, all the fall (warm) colors from my Dina Wakley Media paint, sponge applicators and some patty paper for my palettes.
Begin with one of the fall colors. I like to start lighter and then progress to darker colors. (By the fourth ledger sheet, I just had fun and didn’t use that rule!) Use the sponge applicator to stencil loosely inside the leaf shapes. Don’t stencil prefect; keep some of the leaves half stenciled. Lift the stencil and repeat the process to fill maybe about half of the page or so. My favorite part about this particular stenciling process is that it does not have to be perfect.
Then, pick up another color and place the stencil in the same spots to add color to the leaves and complete the shape. Repeat this process with several colors on the page. All these colors mix beautifully together, so you do not have to worry about making mud. A quick note, if this isn’t making sense, I have a video of the process linked below!

Once the page is full of leaves, grab a paintbrush and add splatters, watered-down pools of color, and even paint a bit on top of the leaves. Use this process to add interest, grunge the page up a bit, and disguise any problem areas.

Repeat this process with several different color combinations on all of the ledger sheets.
When the sheets are dry, cut the pages into card fronts (mine are 4 by 5 ¼"), and also cut colored card stock into base cards and a layering card as well (the layer is 4 1/8 by 4 3/8").

At this point, you can assemble the cards as they are, or add some embellishments like I did.
I decided it would be fun to add one embossed leaf to the front, so I squished versamark ink through one of the leaves on the ledger page. I chose a spot that needed a leaf and whatever size leaf fit best. Be careful to not get the versamark anywhere else, by using a mask to prevent this.

Then, I sprinkled copper embossing powder on top and use a heat gun to melt it.

After repeating this process nine more times, I added the ledger sheets to the layering card. I felt they needed something else, so I wrapped them with some copper string.

I stuck the card front to the base with some dimensional foam adhesive.

When the cards were finished, I still had some leftover stenciled papers that were odd sizes, so I made some postcards with those.

This process was so much fun to make cards with. I anticipate myself making similar cards each season with a different stencil. Winter snowflakes, spring flowers, summer sunshine… or even shapes in seasonal colors. I’m getting excited just thinking about it!

Check out the process video below (or click here!):
I hope this inspires you to create some cards and send some happy mail! If you do, be sure to tag me on social media so I can see your beautiful art
Happy Fall!
-Nicole

Connect with me on
Stencil


Tiffany is a southern gal living on the coast of Alabama with her husband. She is happiest with paint on her hands and usually in her hair. She’s a free spirit with a love for exploring, she loves to guide others on pushing the limits and understanding their creative voice. Her love of color, texture and her love for recycling fuels her when she shows up in her studio. Tiffany has been published in countless magazines and is one of the founders of The Ugly Art Club. She is passionate about empowering other creatives to lean into the unknown and reimagine what is possible.

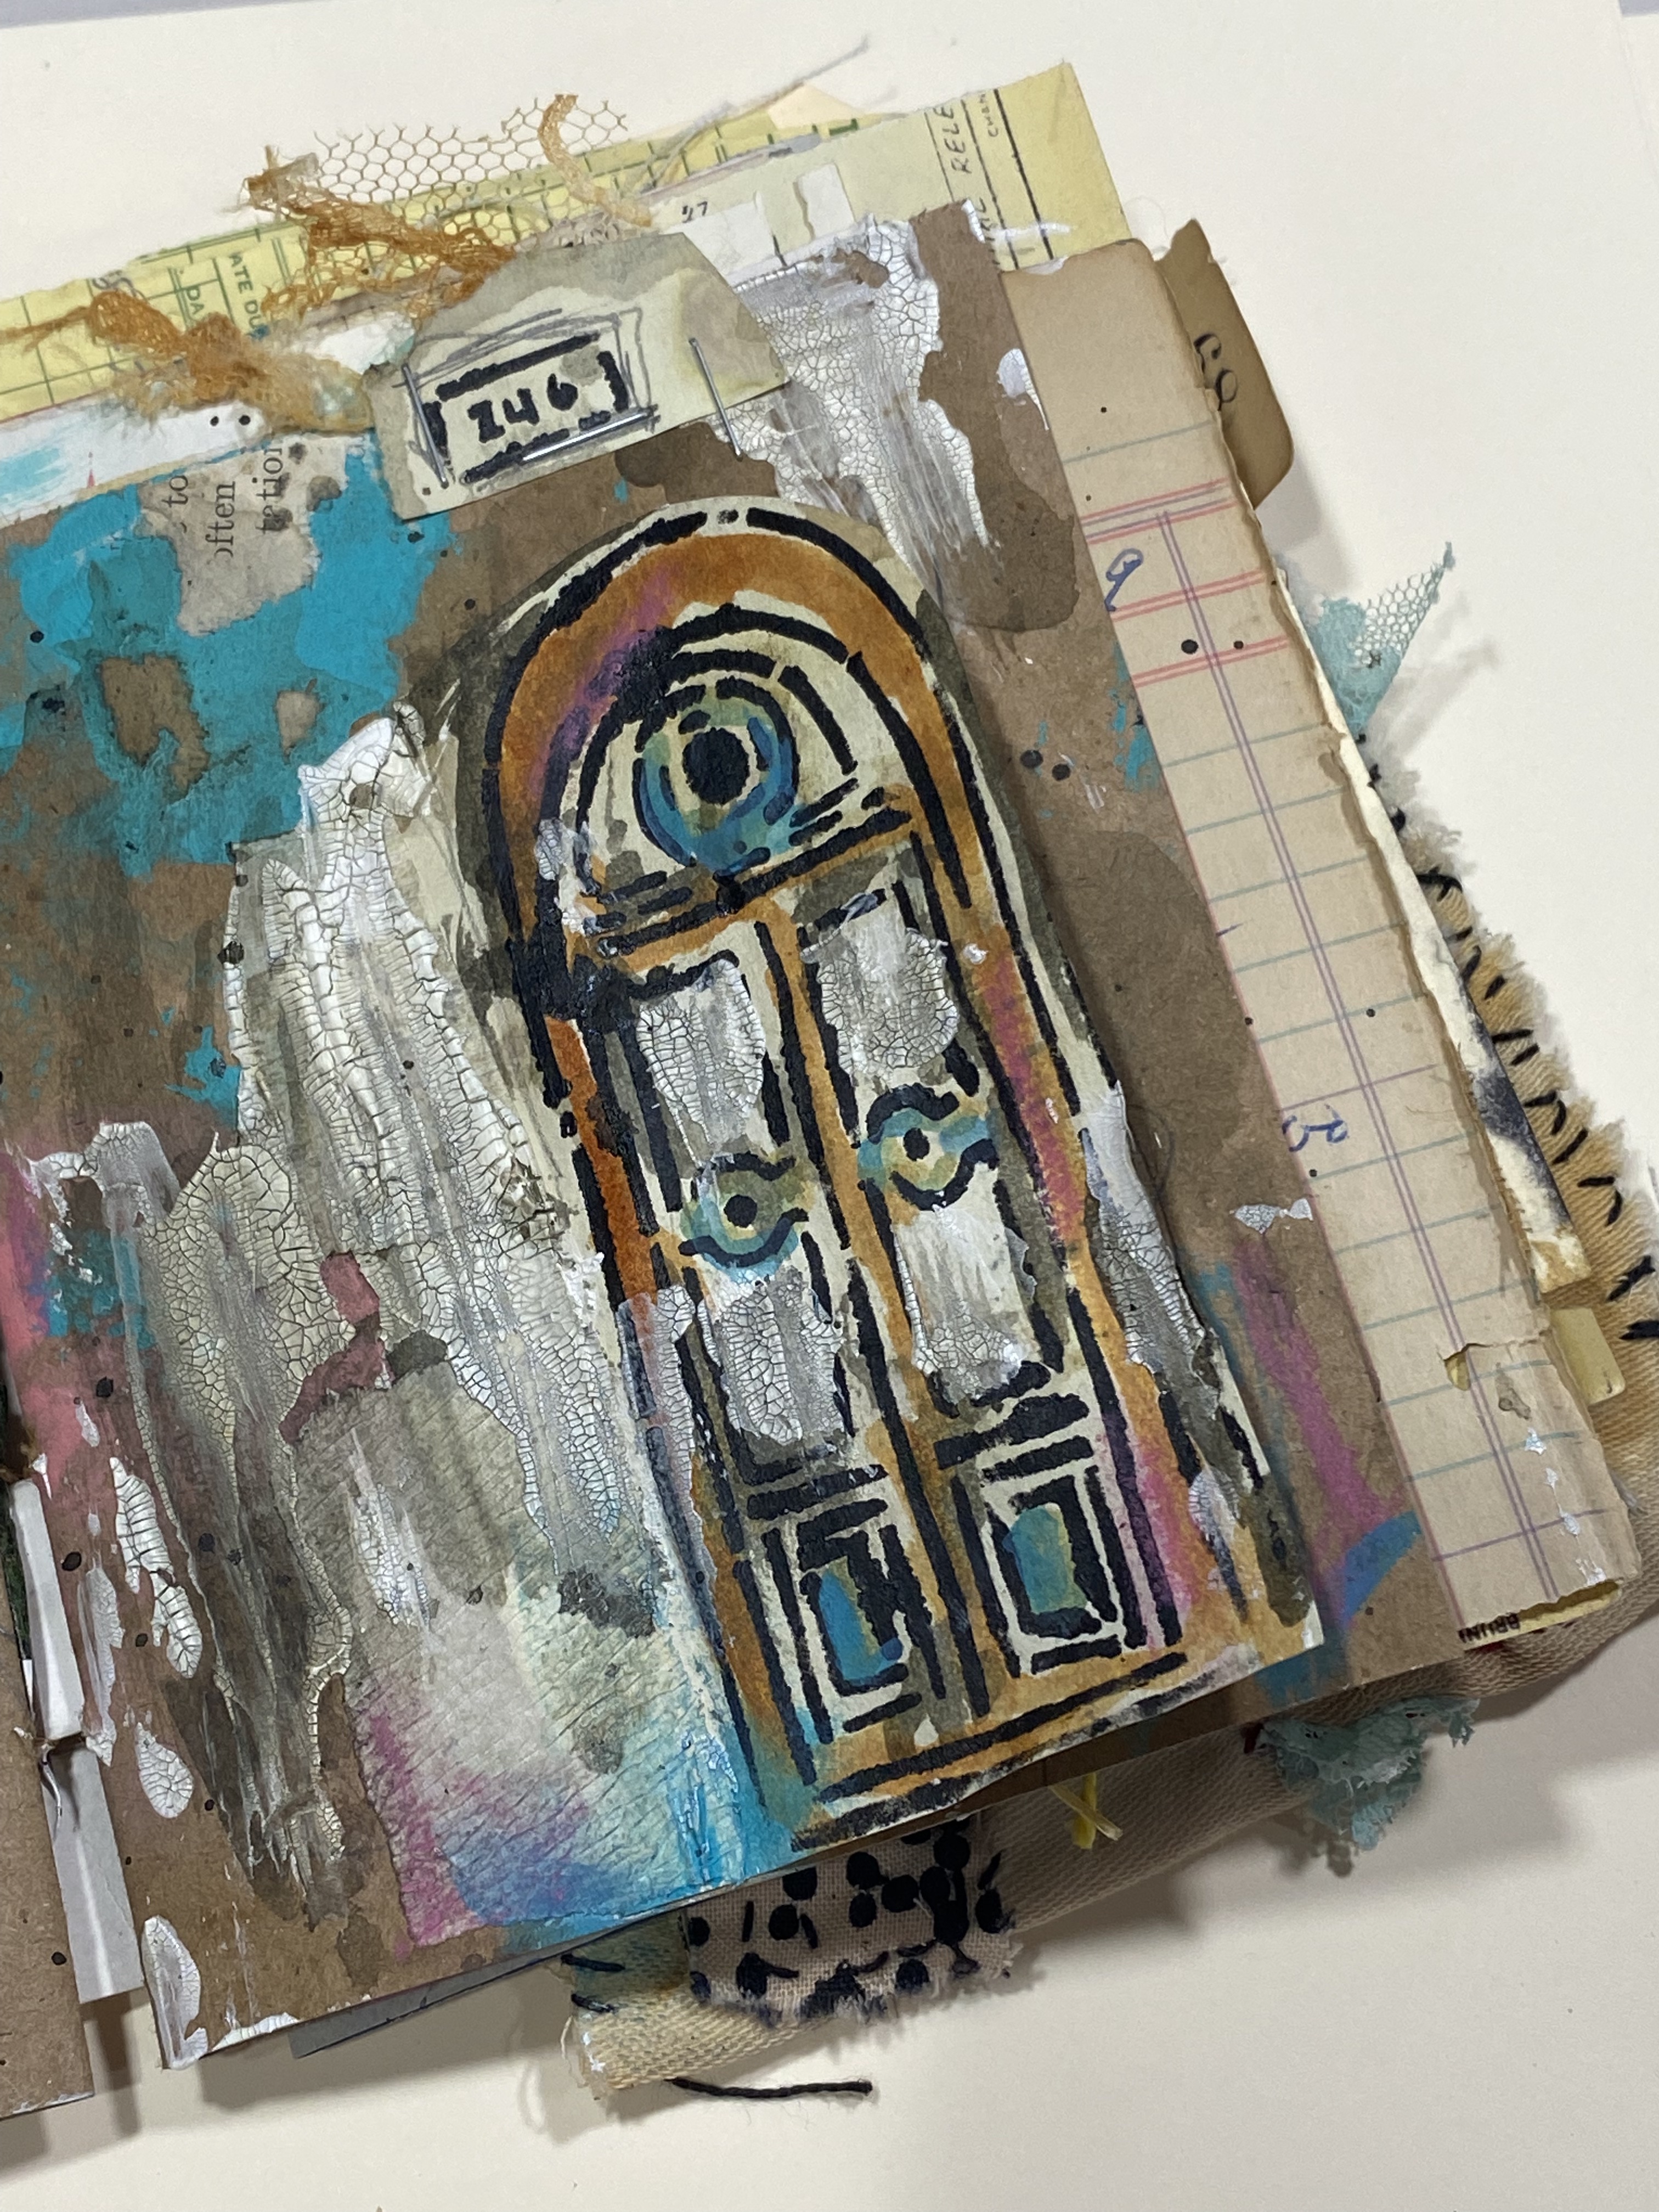
The Doorway stencil was inspired by the beauty found in the old paint-peeled doors. The stories and secrets that happen behind them, Tiffany thinks this is why she puts them into her journal every chance she gets. They are like a portal to a secret world that Tiffany creates one page at a time.


When not in her studio you can find Tiffany out playing with her dogs and chickens or sitting on the beach with her husband Josh, who is a huge supporter of her work.
You can find her at the links below:
www.instagram.com/southerngals_designs

Hi Everyone,
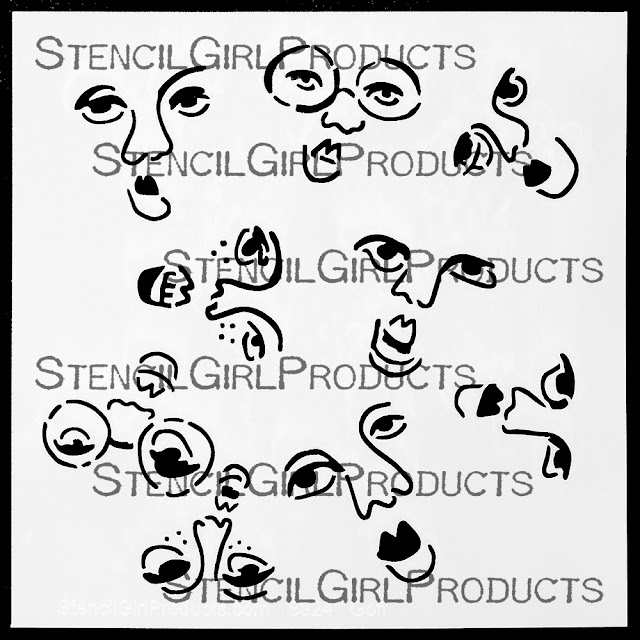
My name is Niamh Baly and I am a stencil addict. Lately I have been fascinated with faces and using stencils to create large figures in my journal pages. This watercolour technique is super simple and so easy to create lots of focal images quickly. Here is a step by step video taking you through the full process.
To begin, dampen a piece of watercolour paper. I have done this on ordinary card – but using watercolour paper does give a better result. Place the face stencil down onto the paper and paint through the stencil with watercolours. I chose to use dark neutral colours (sepia, navy) , but any colours will work. I found through experimenting that you don’t want the watercolours to be too watery. The damp paper in the background will help the paint spread.

To create the body I painted a simple arch shape using the neck on the stencil as a guide. I then chose some abstract stencils to help add detail and texture to the body. Once you have added the stencilling, remove the stencil carefully. Use your own judgement to add more stencilling, or use a brush with water and a paper towel to blot away or remove any darkness or texture you don’t want. I turned the stencil over with the excess paint on the surface and printed it onto my figure as well for more texture. You may like to add in more hair and shading to the figure once you have finished stencilling. All you need to do is use a wet brush and pull the watercolour out from the stencil to create a shadowed effect.

Here is a list of the StencilGirl® stencils I have used in this project to create the focal figures for these pages:
Pretty as a peacock Mini M305:
Here is a finished journal page I created using the same techniques and adding additional details with a quote and background stencilling.

Thank you so much for stopping by the blog. I hope that this video has inspired you to get into your journals and create something beautiful using the fabulous face stencils and watercolours.
Happy Creating,
Niamh
Instagram: @niamhbaly
YouTube: https://www.youtube.com/niamhbaly/
Hi, everyone! Christa
Forrest here! Want to explore creating expressive portraits but a bit fearful
of drawing a face? Try using stencils!
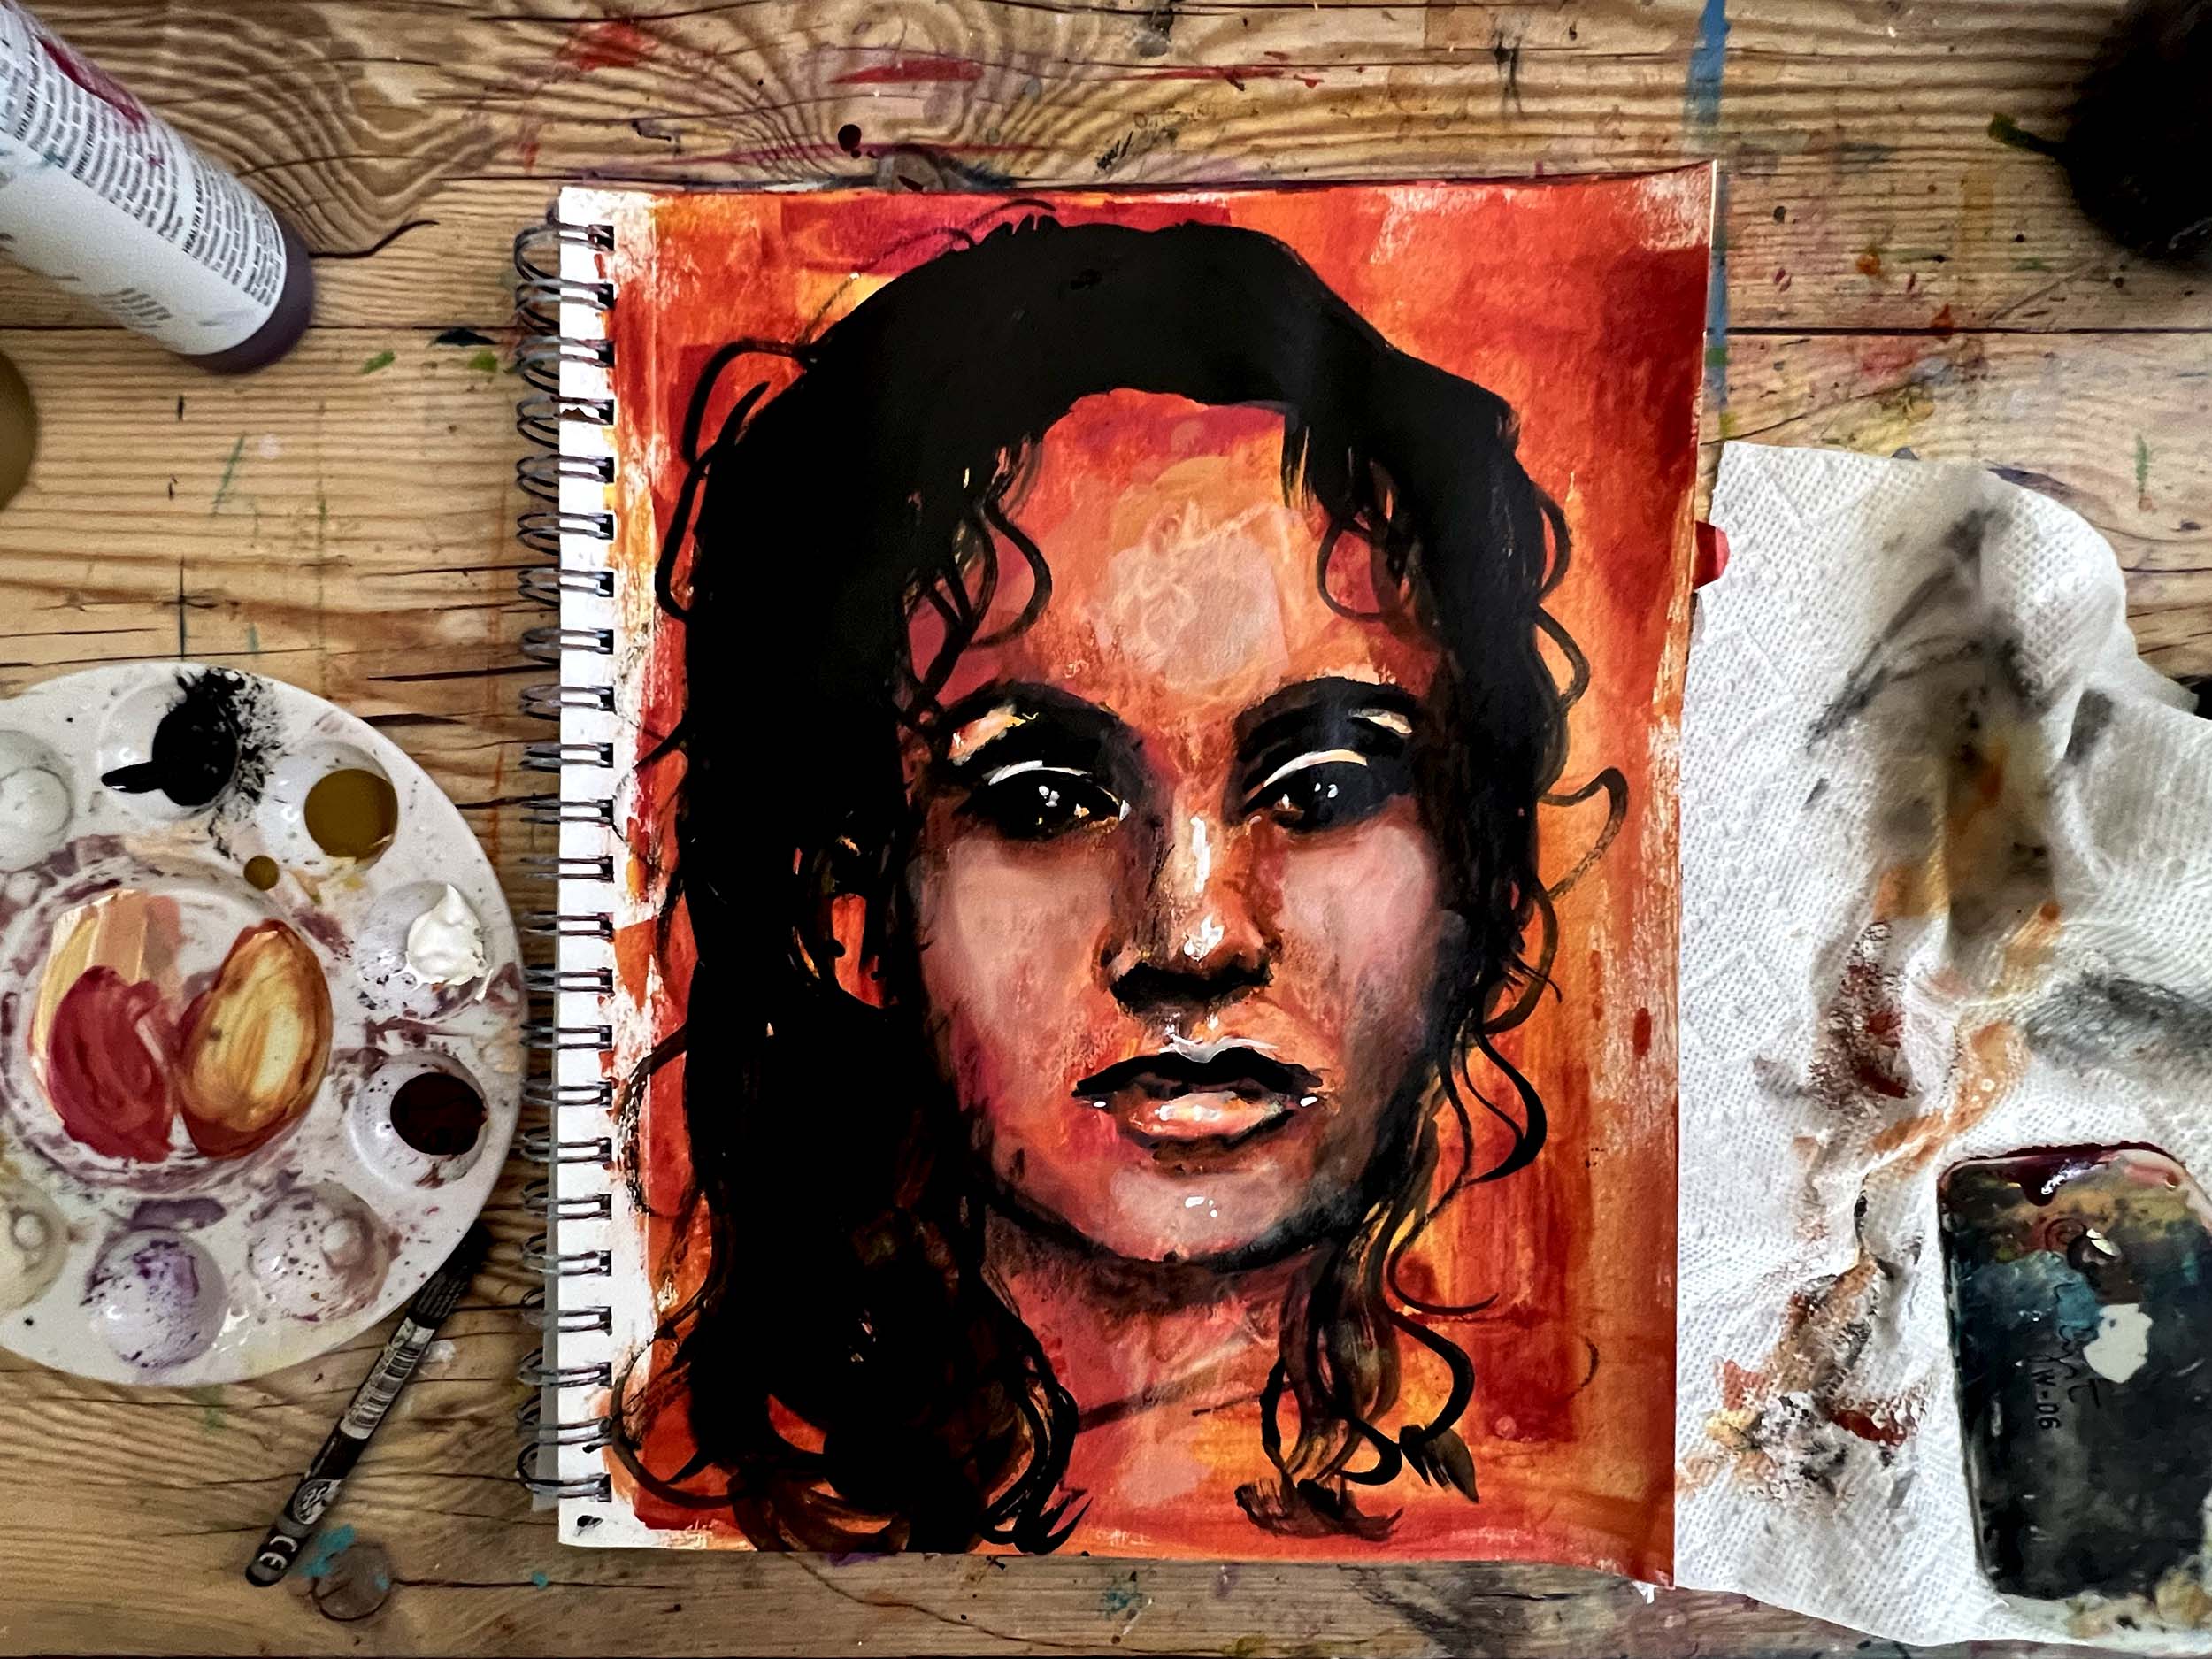
I love using stencils and
about 6 years ago I wanted to paint faces but wasn’t too great at it. Plain
and simple I was scared. I found these amazing face stencils
from StencilGirl® and
decided to explore. I was immediately hooked! I could
experiment with mediums, mixed media and not get caught up in struggling to
draw a half-way decent face. I learned along the way.
The stencil made it
easier for me to understand the basic structure of the face. The
eyes, nose and mouth were where they needed to be. I could then open myself up
to playing and practicing. This eventually built up my creative
confidence to start actually drawing a face.
Do I still use a face
stencil?
I have come a long way
since the beginning. The face stencils allowed me to feel
comfortable with exploring faces in my work. The more confidence I
gained, the more comfortable I became. Now it feels like second
nature. I still bring out the stencils every once in a while, to
play and practice AND show others that they too can incorporate expressive
portraits in their work with ease.
Here is a quick video of how I can utilize a face stencil to create a fun expressive portrait.
Materials:
StencilGirl® stencils:
Abigail, A Timeless Woman Large
Acrylic
Paint:
Golden’s
Quinacridone crimson
Golden’s
nickel azo yellow
Titanium
white
Black
Assorted
brushes
Spray bottle
Paper towel
Princeton
catalyst scraper tool
Caran d’Ache
Neocolor II crayons
Mixed media sketchbook 9x12

Christa Forrest
https://www.facebook.com/ChristaForrestFineArt
.jpg)
Tracy Villaume here from Cork & Brush Studio with another fun and easy stencil project that I think you are going to love!
Here are the supplies you will need:


Kelp can be seen floating around in some of the aquariums at the park
and I could literally watch them dance for hours!


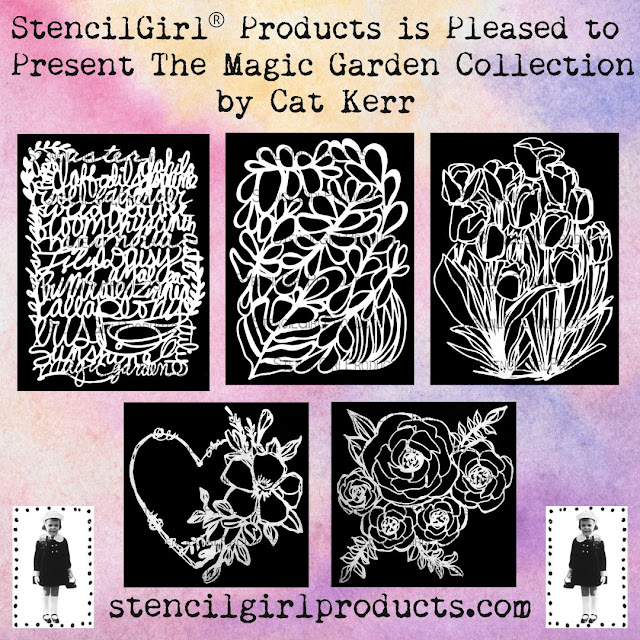
Magic Garden is a handwritten list of some of the names
of the flowers that I admired at the festival.


Disney goes all out for this festival and when it comes to tulips,
they plant them as far as the eye can see. What a stunning sight to behold!


Flower Heart is my tribute to those that tend with care and cultivate a garden.


No garden or bouquet is complete without the rose.
My wonky hand-drawn roses are perfect to use as a focal
or they can be staggered to create a lovely background!


