Hello and welcome to the heat of the summer!
Tina Walker here today with my latest collaboration.
First
of all, collaborations like this are some of my faves! It's a little
bit of recipe and prompt and a lot a bit of 'the same starting point'. I
love combining these two elements because the outcomes and completed
projects are always a surprise! They vary as much as we are individuals
and that is what makes them perfect.
The concept behind this collaboration was the following -
Each participant received one of these vintage books - titled, "13 Days Adrift", the experiences of M. Stanley McLean.
The
participants had to deconstruct, then reconstruct the book into another
book or journal with a specific technique or style of their choosing.
They could add additional pages to their book, use pages from the
original book as collage material, gelli plate backgrounds, or whatever
they could dream up!
But.....to challenge them even more, the following had to be done.
1.
They had to pick ONE shape (circle, square, rectangle, triangle,
floral, etc.) and only that ONE shape could an be used throughout their
new book/journal.
PLUS
2. Only Black & White (and all shades of grey in between) were to be used.
They could create with any theme, structure or story. Intrigued yet?
Just
wait - - - their finished books are truly works of art! Each artist
interpreted the prompts differently and various reconstructions were
used. I am SO in love with this collaboration and the boldness of the
black & white! Let's check em' out!
(Be sure to click each participants name for more details and photos of their journals)
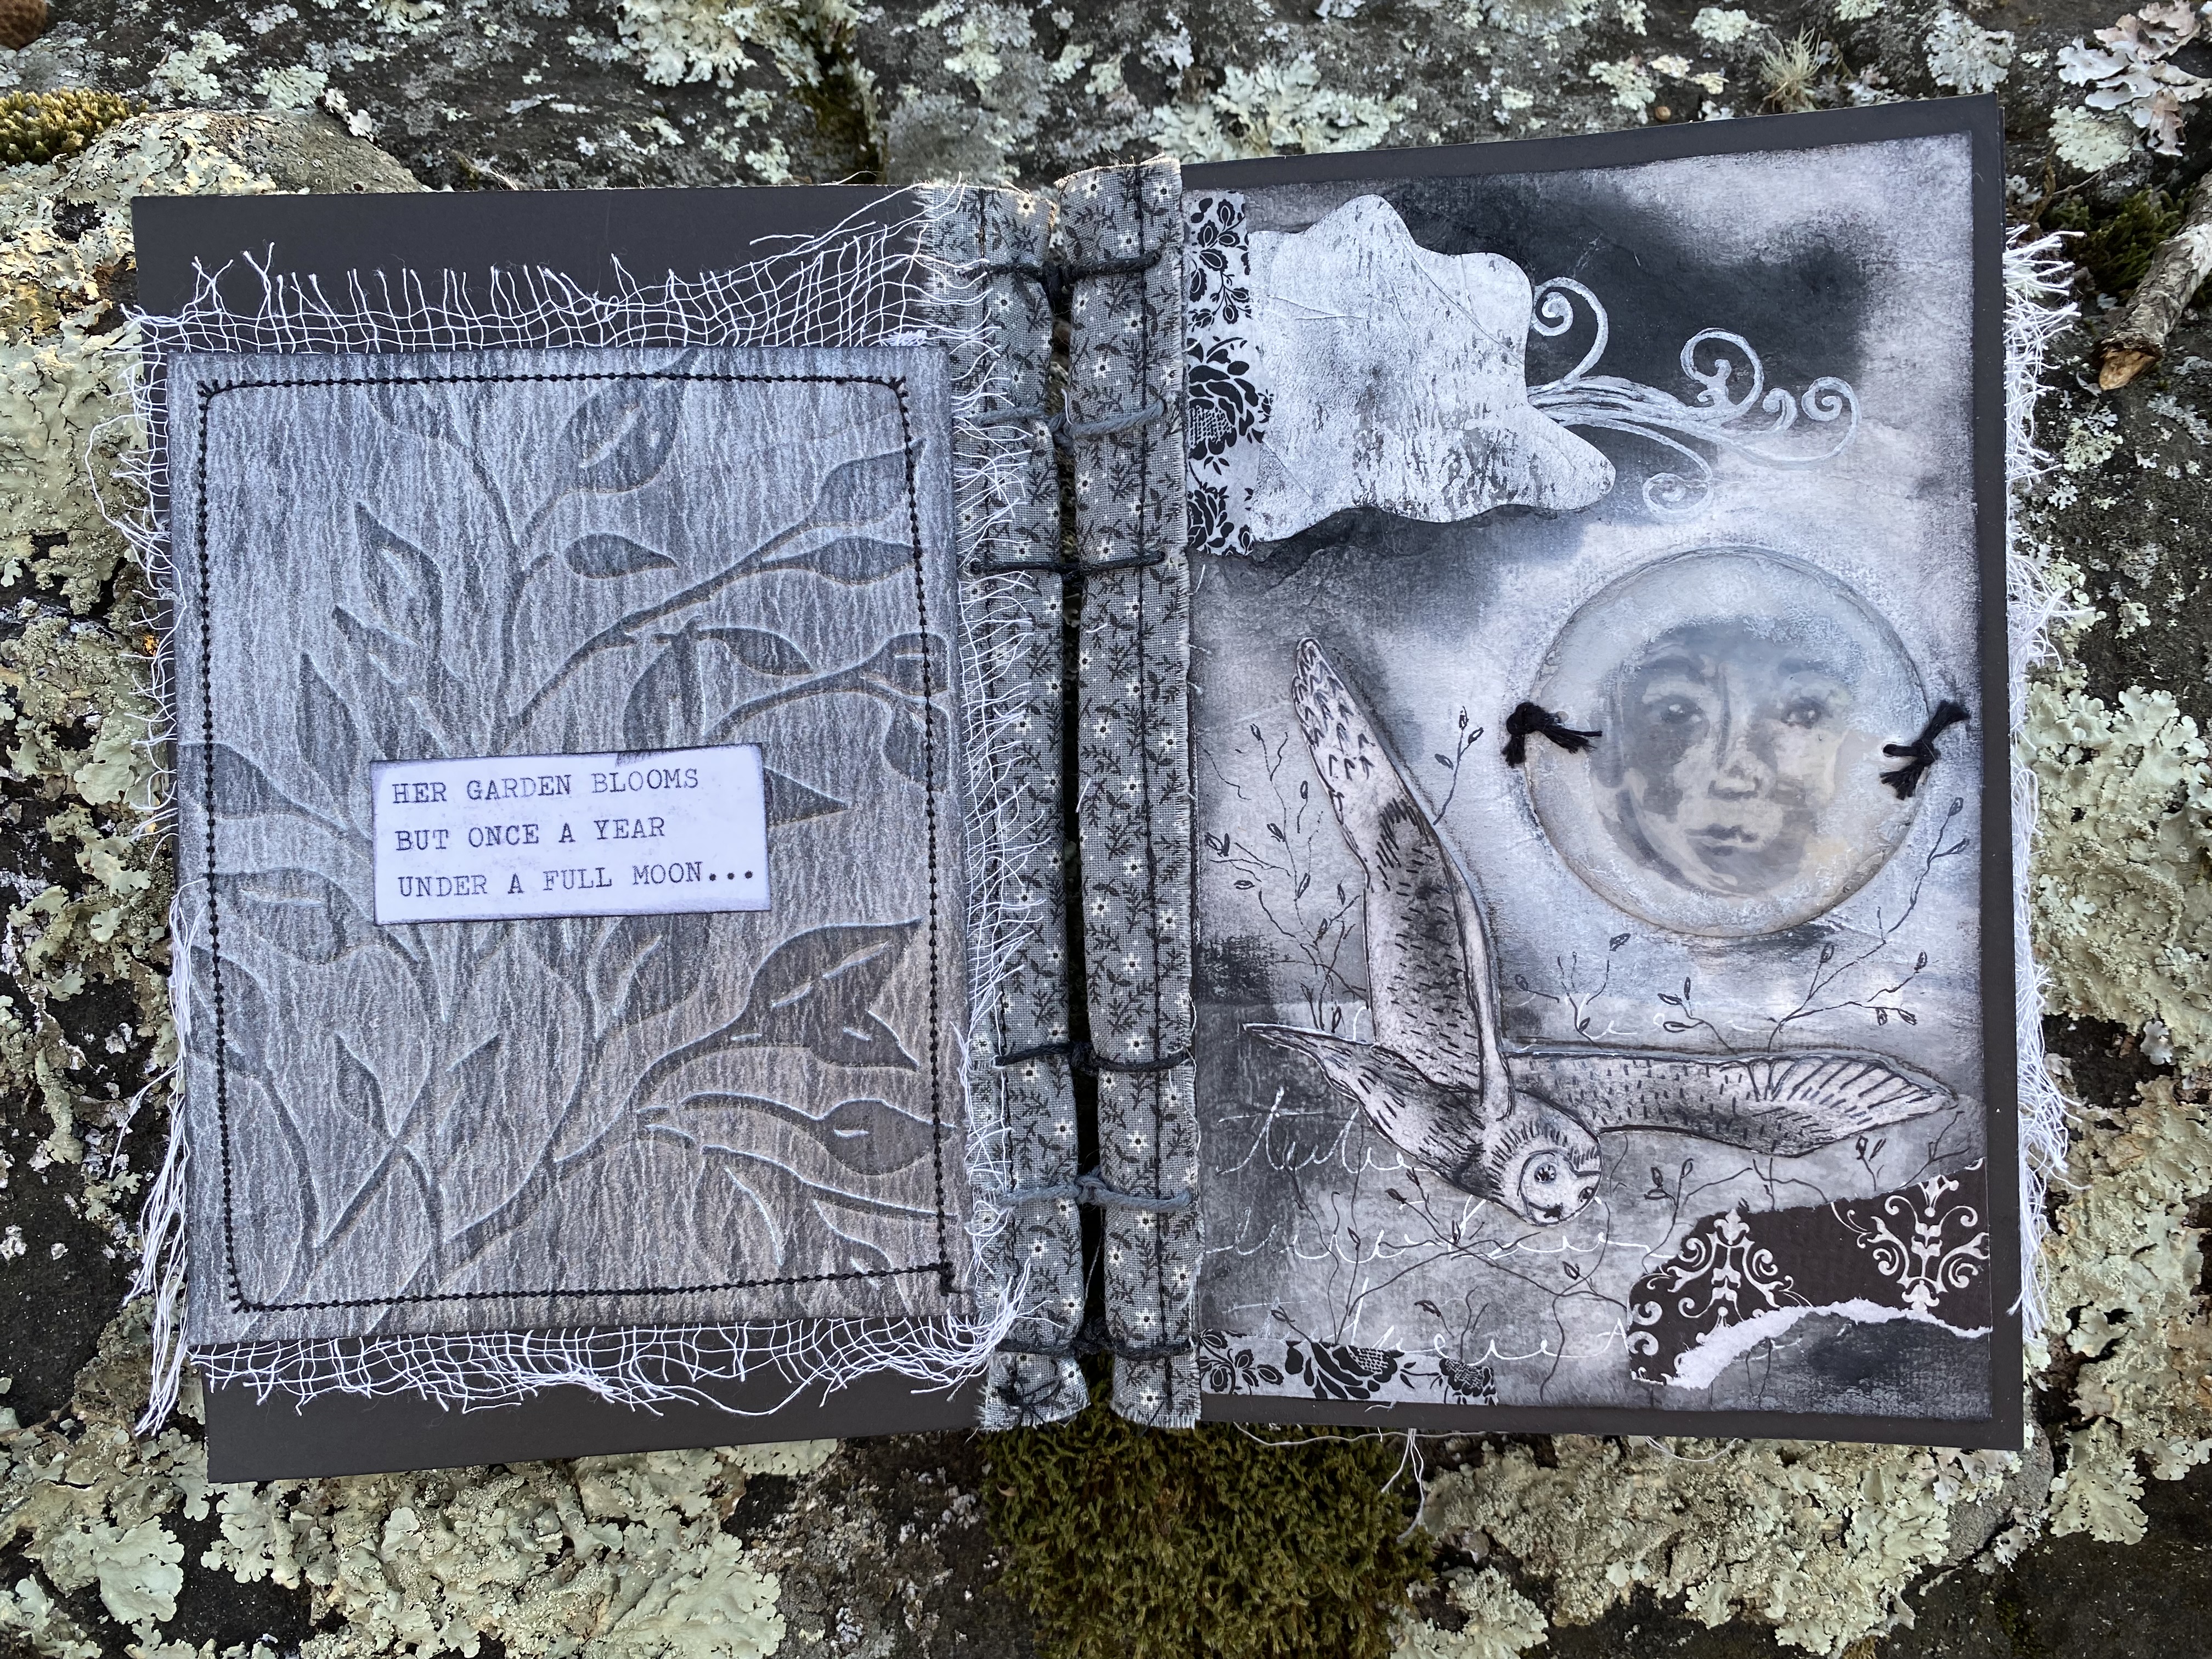
Ann's theme was CIRCLES, and she had this to say about the collaboration.
"Wanting to stay as true to the theme as the original booklet, my "new"
book features driftwood covers with an exposed binding, it maintains a
nautical theme and incorporates stencils that feature a circular shape. (
Full disclosure: since we were allowed to use black, white and all
shades of grey, I used Payne's Grey as my main color with black and
white...)"
Stencils Used:
JANET SCHMITZ
Janet's theme was also CIRCLES. Here's what she had to say about the collaboration.
"I have been in a few collaborations with Tina and Stencilgirl and this
one by far has been the best! I believe it is because the challenge of
using neutral colors, 13 Days Adrift book, and one shape but the freedom
of however shape the journal may be. it was absolutely freeing for me
and the best challenge. In fact, I'm going to take these same to create
a similar journal! Just loved it! Thank you Tina!!!"
Stencils Used:
Crazy Quilts
Eucalyptus
Winter Berries
KERRY MOLINA
Kerry's theme was COMPASSES.
Stencils Used:
Ornamental Compass
Compass Rose
Compass
KRISTI NAZARRO
Kristi's theme was CIRCLES. She
incorporated some of the book words with some form of texture and used slow stitching
for that. Here's what she had to say.
"I
found it really challenging with the limited palette but was super
happy with the way it turned out. It stretched me as an artist and I was
happy with my little journal in the end."
Stencils Used:
ATC MixUp Missigman
Bittersweet Mini
River Rocks Mini
LEACA YOUNG
Leaca's theme was CIRCLES. That seems to be very popular. :)
Stencil Used:
Large Bubbles
LINDA WYATT
Linda's theme was HEARTS.
Stencils Used:
Four Sacred Hearts
ATC Mixup Mika
MARTHA CHRISTOPHER
Martha's theme was also CIRCLES. Here's what she had to say.
"When I first read about this challenge I couldn’t wait to join in! I
love making journals, vintage books and love a challenge. But I have to
admit that I had a moment of doubt when I was getting started. I wanted to make something different than the journals I usually make, but my brain
was finding it difficult to deal with using only the colors black,
white and gray and focusing on only one shape. Once I turned off the
part of my brain that was blocked and just started, the ideas started
flowing and I thoroughly enjoyed the process."
StencilClub Jan 2019
Inky Circles
River Rocks
MARY NASSER
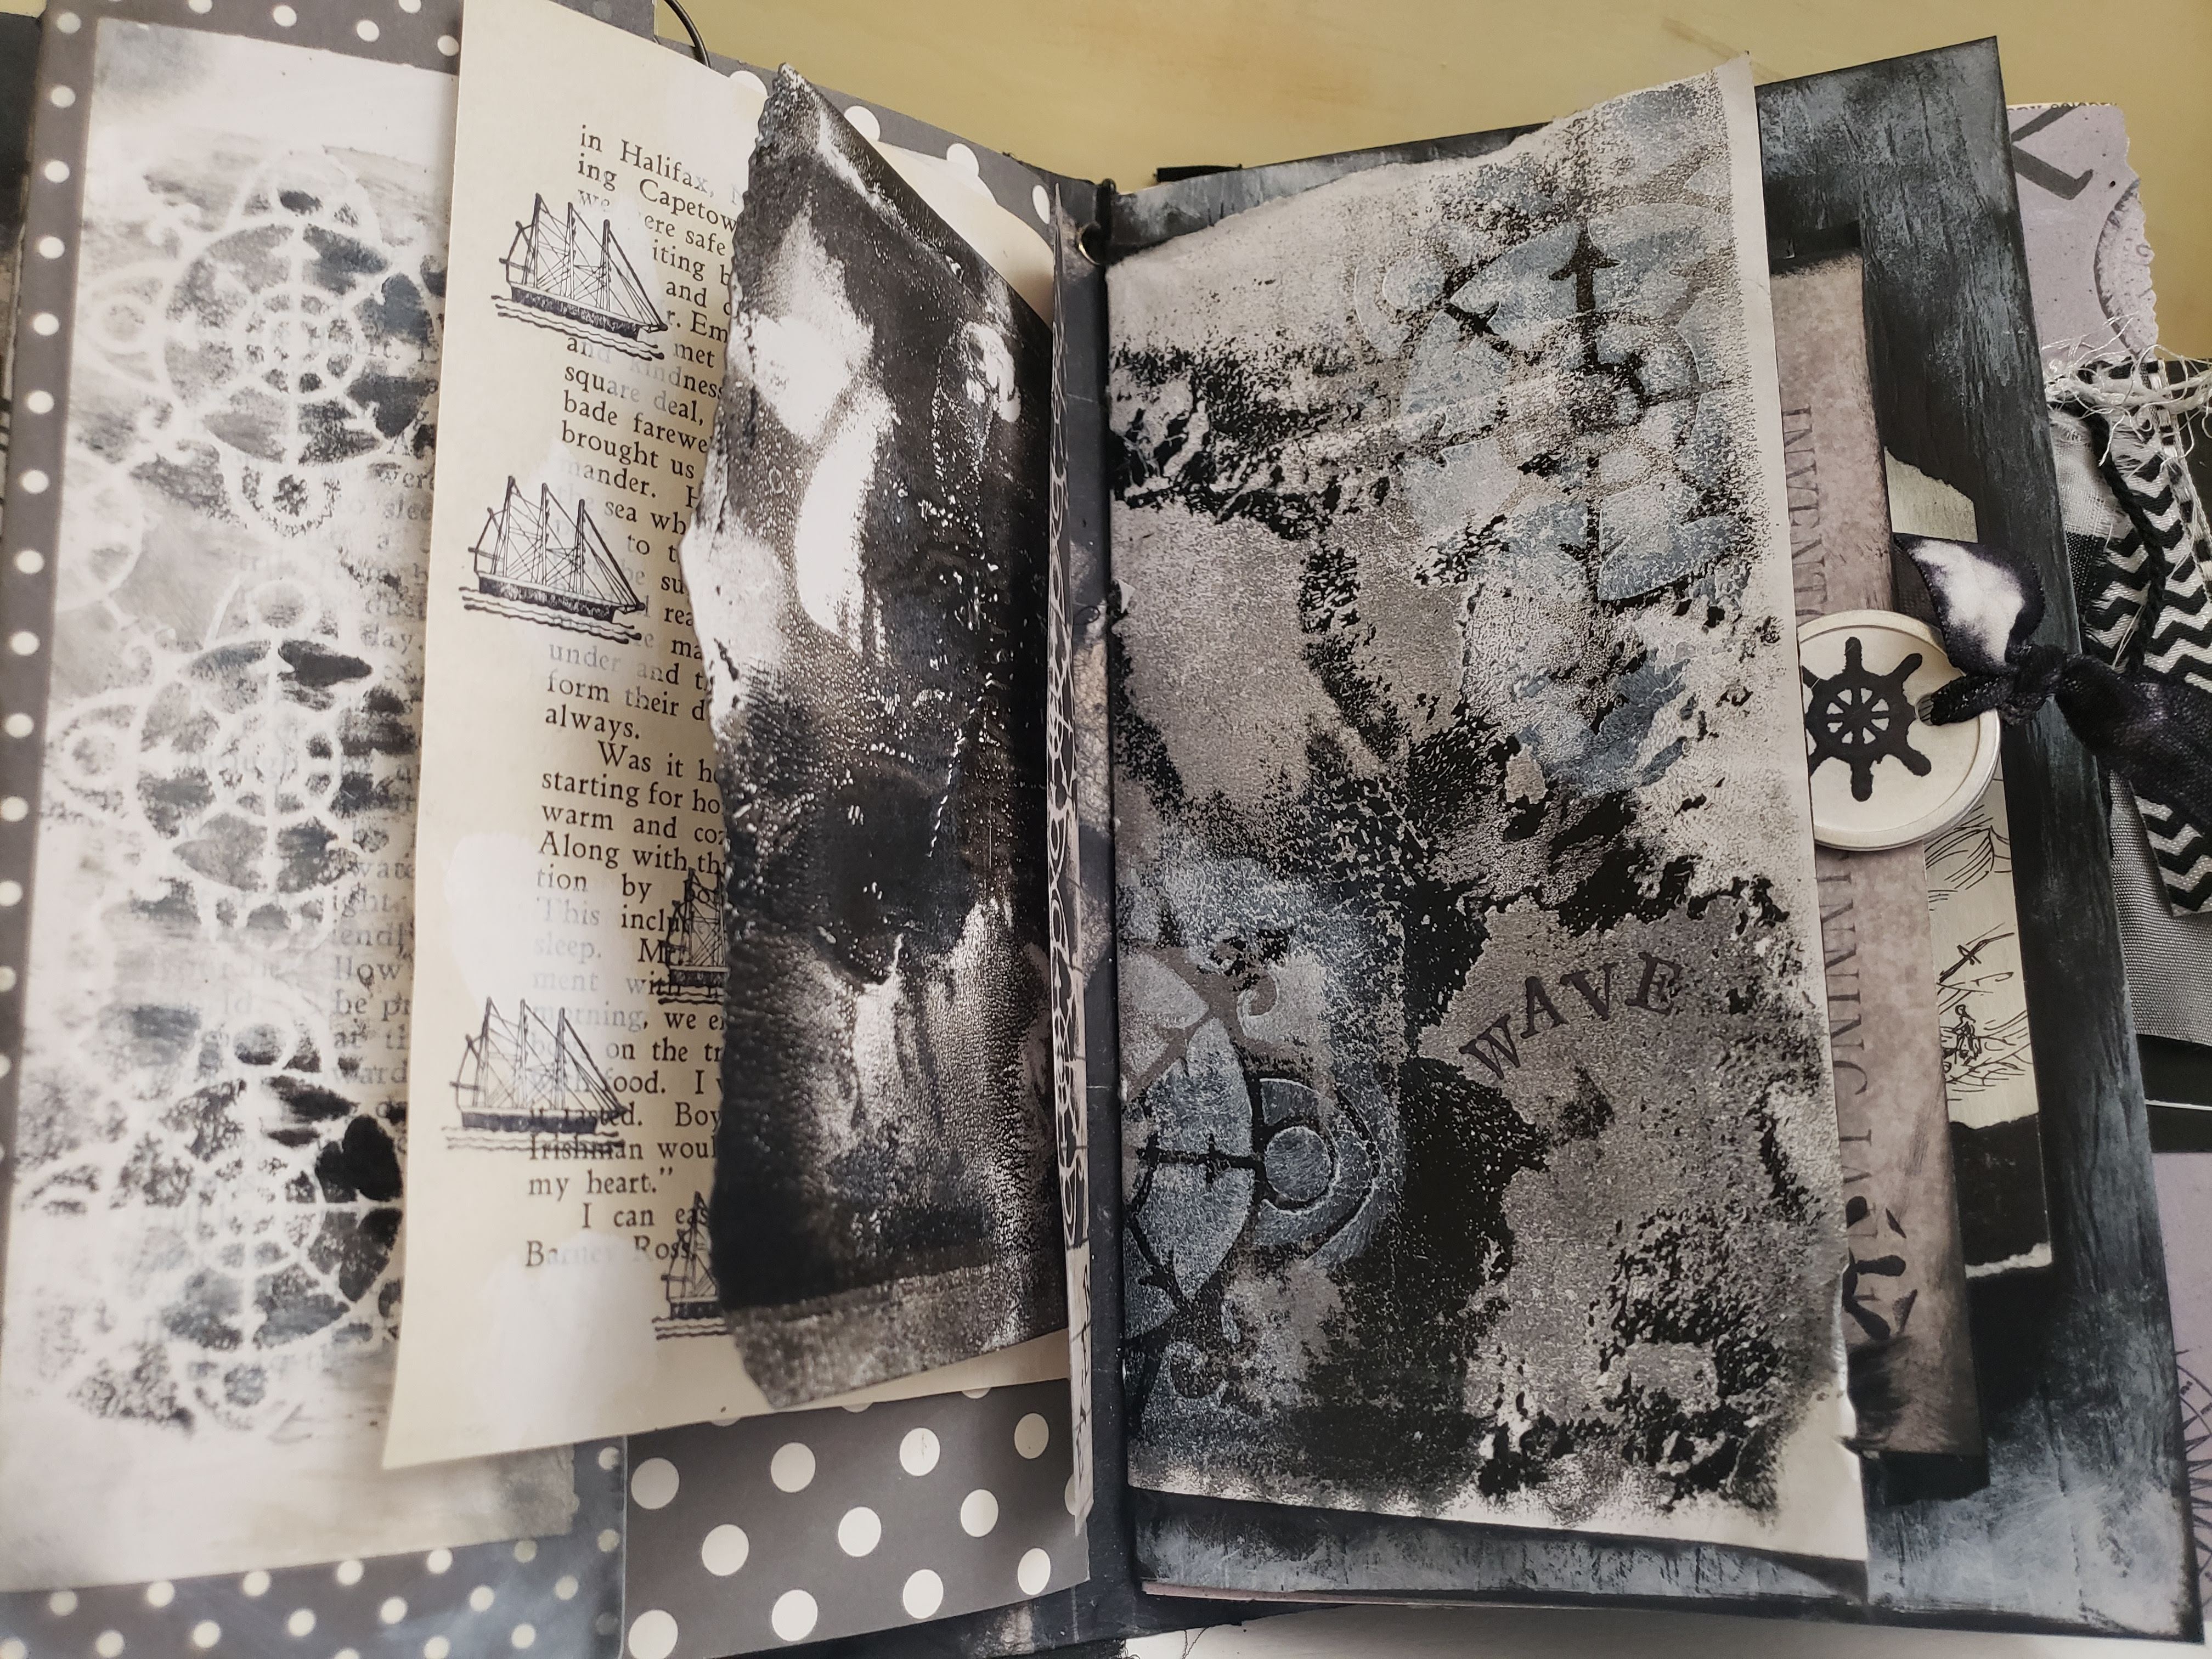
Mary's theme was WAVES! Love this so much!
Stencils Used:
Water's Edge
Mini Waves
MICHELLE PIERRON
Michelle's theme is CIRCLES. Here's what she had to say about the collaboration
"My book was inspired by a quote from Karen Marie Moning: "I was adrift in a sea of questions and
if answers were lifeboats I was in imminent danger of drowning." The book was called 13 days adrift
and i kept thinking what does adrift mean to me.
It makes me think of all those times in the last couple of years with the pandemic that we have kind
of been adrift without any real answers or any idea of how to make the best of a weird situation.
This is definitely a tongue in cheek kind of book and on the front i cut a little snip from the book
that says, "To all my shipmates who paid the supreme sacrifice I dedicate this book." Maybe some
of the same thoughts going through the author's mind back in 1943 were spiraling around in mine
while i was trying to make sense of life recently.
Stencils Used:
Speckles and spots
Arrows within Rounds
Deconstructed Della Robbia
MICHELLE SANDERS
Michelle's theme is faces.
Stencils Used:
Stone Face
Thoughtfull Face
Sweet Girl Face
NINA FICKETT
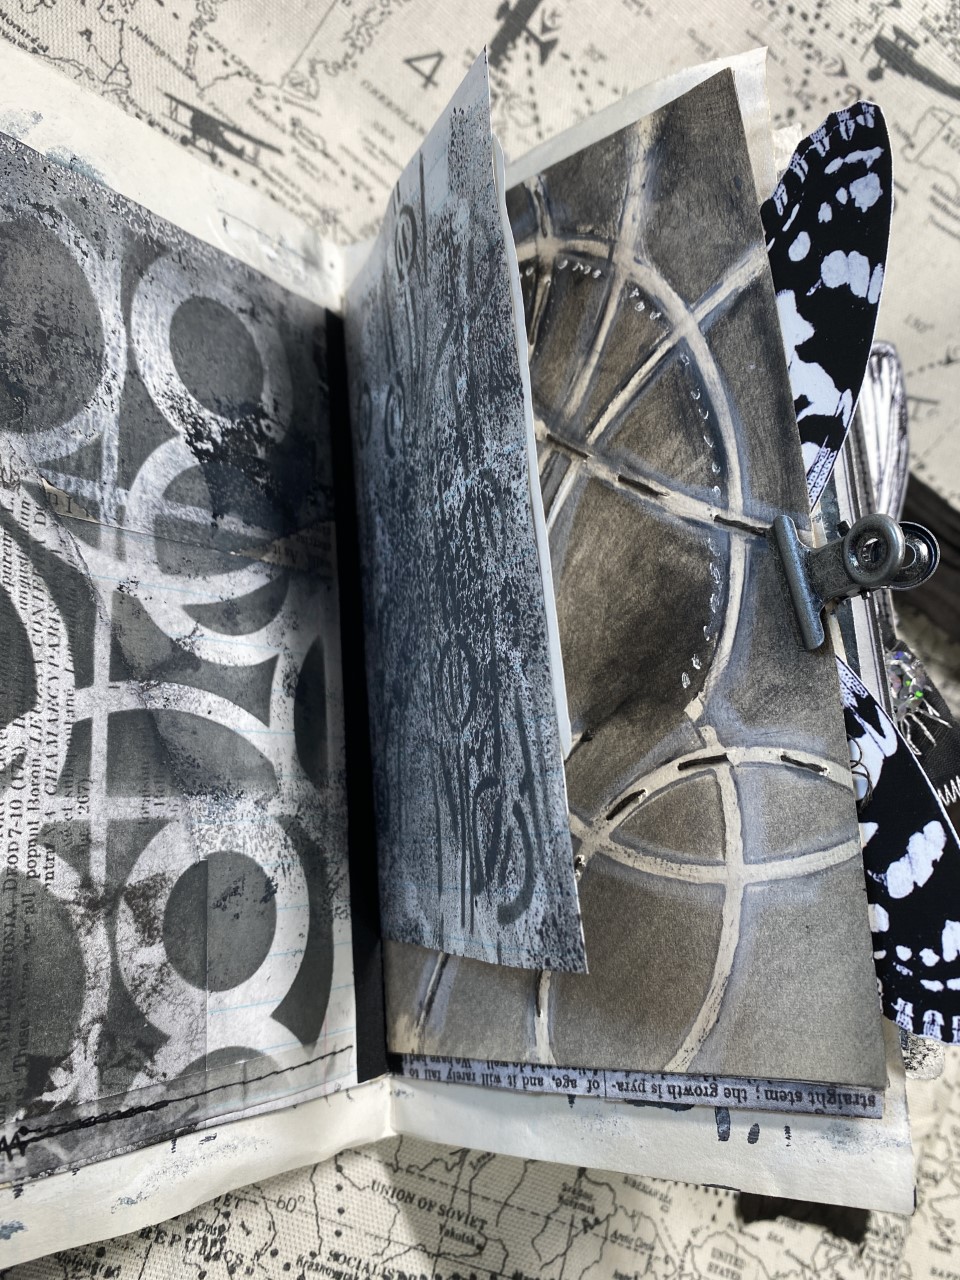
Nina's theme is CRESCENTS. Here's what she had to say.
"I
started with b&w alcohol ink gel prints. The original 13 Days
Adrift booklet is completely embedded in every page. The shape I focused
on was on the crescent. Focal points are vintage scraps of book
bindings with alcohol ink's. The binding is vintage upholstery fabric
mixed with collage."
Stencils Used:
StencilClub Jan 2022
StencilClub Oct 2021
SANDY BABB
Sandy's theme is FACES. Here's what Sandy had to say.
"Adrift…to float as if neither being moored or steered…pretty much sums
up how I felt at the beginning of this project. I found my course
within the parameters of the challenge Tina set and embraced them as an
artistic story began to unfold with the inspiration of Stencil Girls
Faces in the Crowd stencil. In the end it was a wonderful journey that
stretched my imagination."
Stencils Used:
Faces in the Crowd
TRACY KRUEGER
Tracy's theme was BONTANICAL. Here's what she had to say.
"When challenged with this collaboration and using one stencil "type", I
knew it had to be botanical. Only using a black, white and grey palette
actually made it easier for me, once I started my book, I was hooked and
couldn't stop!"
Stencils Used:
Curvey Stems
Wildflowers and Grasses
Leavy Doodle Border
TRACY VILLAUME
Tracy's theme was also BOTANICALS. Here's what she had to say.
"I really loved this collaboration and seeing all the different
interpretations...It is amazing how unique stencils can make a piece
even when using a single shape and limited color palette!"
Stencils Used:
ATC Mixup Missigman
Botanical Wildflowers
Floral Embellishments
KATHY BERG
Kathy's theme was WATER. Here's what she had to say.
"I chose the theme adrift from the title and contents of the book. The
word adrift caught my attention so I went with the theme adrift and knew
I wanted to go with some sort of water, wave, flow theme. This is the
first collab I had ever participated and it was a little challenging
when I started. I skimmed through the book and then did research on the
word adrift trying to visualize journal pages. Once I started and chose
the papers for my cover I found my direction. I decided I would make a
journal focusing on quotes about being adrift, wandering anything along
that theme. I gathered hand died papers I had collected from other
artist, my own painty papers and pages from the book. The journal has
several pages because I had so many pretty papers to use along with the
book pages. I decided to make a journal that would be an ongoing
project. An art journal to add quotes an things about water as I found
them. A place for stamps, pictures, my own art and keep it along the
black and white theme. It will be an inspiration of quotes and ideas. I
really enjoyed working on the collab. It gave me the opportunity to work
on something in a way I have not worked on other art journal pages or
art journals."
Stencils Used:
Water's Edge
Mini Waves
KATHY MASONE
Here's what Kathy had to say.
"I thought Adrift = pandemic, and that's where I went with it. Such a metaphor for what we are experiencing (me still)."
Stencils Used:
FLOCK
Tiny Medallion
DEEDEE CATRON
DeeDee chose ARCHES as her theme. Here's what she had to say.
"I chose arches as my book shape & pretty much loved every second! I
utilized my factory & cut some custom shaped chip to build this
book. The pages have been collaged with the 13 Days Adrift book pages,
stenciled heavily with StencilGirl Products & embellished with
various goods like tissue paper from Tina Walker, washi tape, chipboard
& diecuts all from UmWowStudio. There are also image transfers &
paint, marks & fabric, gesso + loads more on these pages, which
were finalized in order with a tab binding."
Stencils Used:
Cathedral Arch
Mix and Match
Towers of Arches
CHRISTY STRICKLER
Christy's theme was CIRCLES. Here's what she had to say.
"I chose to deconstruct the book, using words and phrases from the
text to tell a story in my journal. You can see a few small bits on this
page. I used Payne's grey with it's bluish grey tones to help pull the
blue from some of the images in the book and make it color consistent
throughout."
Stencils Used:
Alexa's theme was FACES.
Stencils used:
And lastly, my project. My theme was CIRCLES (again!). Circles seem to the crowd favorite.
I completely took the book apart, collaged the book pages on a master sheet, then cut the master sheet into smaller sizes.
I
bound these smaller sizes into a flip journal/book, machine stitched
together. I really loved my finished project and the focus on the
limited color palette of black & white.
Stencils Used:
StencilClub July 2019
StencilClub June 2021
River Rocks
I made a short video for your viewing pleasure. ♥
Till next time.
XOXO Tina


.jpg)