Showing posts with label Cecillia Swatton. Show all posts

Thursday, June 11, 2015

June StencilClub Preview


Hello Stencil Lovers!
to show you how I used this month's StencilClub Stencils
 in my Daily Art Journal.


You know I liberally use stencils as a tool in my Daily.
I am always picking pieces and parts out of them to get
 movement and direction... shape and line....
And I am continually mixing different stencils and styles
 together on the same layout or page.....


This Spread from May started with an Andrea Matus deMeng face...
Coming right out of her neck area is the beautiful swoop 
from the largest of this month's club stencils.


I love the shading and cross hatching which really connects 
the two unrelated stencils, making them one.


I used this same swoop in a different direction for my June 3rd entry...
As well as the yin and yang symbol included in the design of the same stencil.


That yin and yang reminded me of a paisley design....
so those got incorporated into the next area.


I didn't get real far on this start of a page in my Moleskine...
Just used a sponge applicator and an Azure StazOn Ink Pad.
It looks kind of dreamy... a good start anyways.


This spread has the insides of the 6x6 round design
going down the center seam of my journal.


Again, I used that swoopy design down the side.
It looks totally different than the other ways I used it.


And last, but not least, a peek into my Gratitude Journal.
It is a small book I bound myself...about 5" x 5".
The smallest StencilClub stencil in this set fits perfectly on a page.
This interesting design invites doodling in it's open areas.


Thanks for joining me.
Hope you love these Crop Circles
designed by Cecilia Swatton.
These are spectacular!

Come visit me at Happy Reminders 
or follow me on InstaGram (janetjoehlin)
See you there!


Thursday, June 12, 2014

Fun with Stencils and Molding Paste

A GREAT BIG WELCOME
to new Creative Team Member
Gwen Lafleur!!!!
Hi everyone! I'm Gwen Lafleur and I'm so excited to be sharing my first post here on the blog.

One of my favorite techniques is to use molding paste together with stencils. Usually I put the molding paste through the stencil, but today's project uses the stencils to create a layered foundation and then the molding paste goes on top.

Here's the final project - it's an 18"x18" mixed media canvas.

I love it because it's full of color, texture, and pattern, and it's also pretty easy to make!

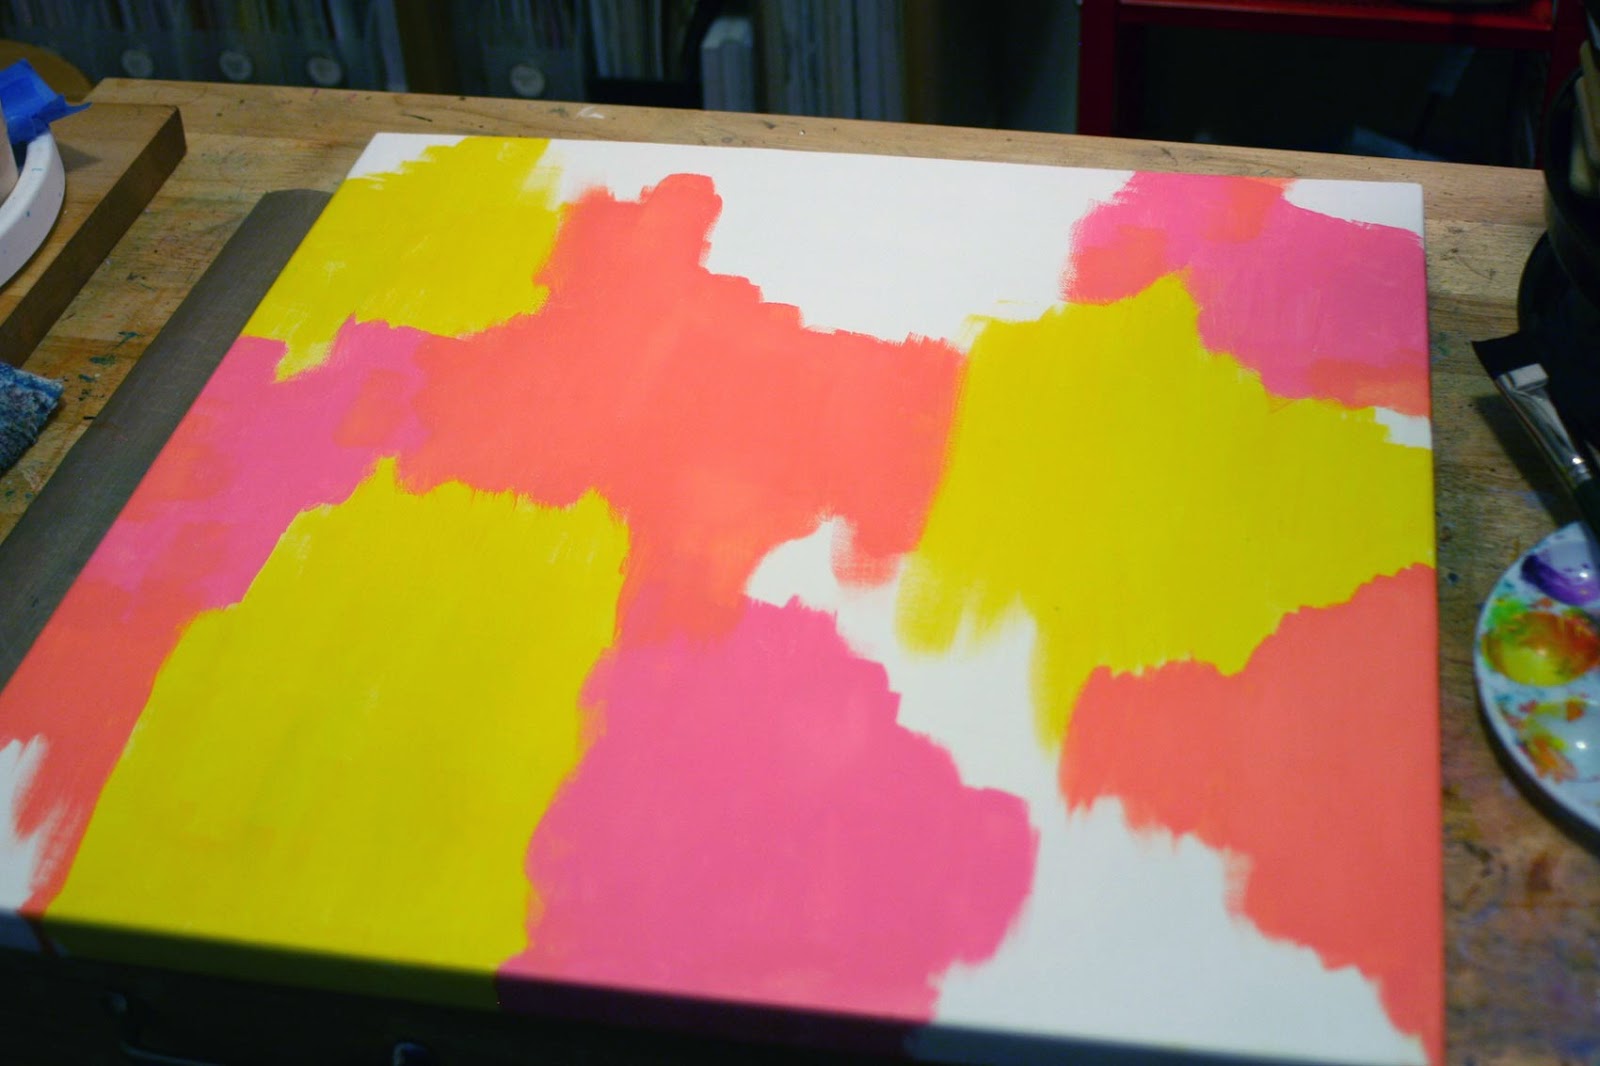
So getting started, I gesso'd the canvas and then laid down several patches of paint using three colors. I made sure to leave a bit of white space so that it wouldn't be solid color on the finished product.


Next, I started pulling out my stencils. I used a stiff, dry paint brush to kind of stipple or pounce the paint through the openings. Just keep the paint light so that you don't get a lot spreading underneath.


I used the Tribal Leaves stencil by Kae Pea, the Pods stencil by Jane LaFazio, the Sea Urchin stencil by June Pfaff Daley, and the Optical Large stencil by Michelle Ward.

Next I picked a few more designs to give just a bit more contrast and to fill in a bit more of the open space. I wanted plenty of stuff going on for the second part of the project!

For this layer, I added the 6x6 stencil from the April 2013 Stencil Club set designed by Mary Beth Shaw, and then finished it with some black lettering using the Vintage Script stencil by Cecilia Swatton.

So with that, the stenciling was done and I wanted to add just a bit more to the background. I used my fine line applicators to draw circles with paint and to do some teal splatters - I wanted to introduce a bit of contrasting color and tie in with the color I knew I wanted to use on the top layer. I also added some random green circles using a Molotow paint pen.


And now you can see what the foundation looked like... there's a lot going on, but it's exactly what I was looking for.


With part one done, you'll want to prep for part 2 - getting ready to add the molding paste.


I used regular molding paste because I knew I was going to use a very thin coat and because I was working on canvas. I did a similar project in my art journal and used light molding paste for that. I also used some fluid acrylics to tint the paste, palette knives, and a cup with a lid to mix and store. What I have mixed above was exactly enough for my entire canvas (a few tbsp worth of molding paste and 10 drops of paint.)

Next, decide what design you want to do. Because my stenciling was all circle and oval-ish, I went with leaves to tie in with the foundation design shapes. I used a Stabilo All Marks pencil to trace out the first section of the design, and then I used my palette knife to start adding the tinted molding paste to the canvas, working my way around the design.

I found it was easier to work around the design than to try and put down a coat and scrape off later. It works fine for adjustments as you go, though... and using your palette knife to scrape off the molding paste is how you add in the stems - just drag the knife through it.

You can kind of see from the photos that I worked in sections - that's why I kept the molding paste in a container with a lid - it kept it fresh in between sections. I also used a pretty thin coat as I was working on the canvas - I wanted hints of the design to show through, but you could also do it a lot thicker depending on the look you want.

At this point you could call it done. I kind of tend toward the "more is more" philosophy, and I may have a slight addiction to Liquid Pearls, so I pulled some out to finish off my canvas.


You can see that I just outlined the leaves and stems and added a few dots - I used Platinum Pearl so that it would be subtle, but still add a bit of definition and dimension, as well as just a hint of shine.

And that's it! I painted the edges of my canvas and hung it on the wall!


I hope you enjoyed today's project! I had a lot of fun making it :)

Gwen Lafleur

Monday, August 19, 2013

Sea Turtle Play


Hi! Kirsten Reed here making a splash with Andrew Borloz's Connection Full stencil and other fun stencils from StencilGirl Products.  I love the look of this stencil, it reminds me of the sun reflecting off of the ripples in the water ~ so it will serve as my water on my canvas today.

I spent some time at the beach and was inspired by all the baby turtles hatching and making their way to the water, so I decided to make a baby turtle.

I used a 5x7 canvas in my video which is not my comfort zone, I tend to like larger canvases, but it is a great size to try when playing with new techniques.

It is only my second attempt at a video and I was actually speaking while taping, but the audio and video did not match up so I typed key points over the tape.   If you have any questions please fee free to leave it in the comment section.

Hope you like my cute little man of the sea!


Here are links to the other stencils you saw me use in the video:


Thank you for stopping by ~ hope you enjoyed!  For more fun art stuff, come join me at my blog ~ Keystrokes & Kaleidoscopes.

kirsten

Friday, July 5, 2013

Playing with Cecilia Swatton's Seaweed Stencil


My name is Mary Nasser, and I'm super-excited to be on the StencilGirl Creative Team.
This week, I played with Cecilia Swatton's Seaweed Stencil to create new mixed-media map painting!


As soon as I saw this 6" x 6" stencil, I knew exactly which maps I wanted to use it with:
a seashell-shaped map and a map I had with very similar lines and shapes as this stencil.

After collaging these 2 maps onto an 8" x 10" stretched canvas, I added light values with Unbleached Titanium acrylic and a make-up sponge:

Next, I added dark values with Irridescent Rich Silver and a 6B pencil. Then came the fun part...I placed the Seaweed Stencil directly onto my painting and applied Iridescent Antique Bronze acrylic with an ink sweeper. Then I removed the stencil and applied more Iridescent Antique Bronze acrylic with a brush.

I really enjoy using parts of the stencil and wiping away paint after stenciling, too. You can use a paper towel and/or baby wipe to subtract paint and push the pattern of the stencil back into the surface so it appears more integrated.

Next, I layered the Seaweed Stencil with Cobalt Turquoise acrylic.
Then I removed the stencil and applied more Cobalt Turquoise with a brush.

For lighter values of blue, I layered the Seaweed Stencil with Cobalt Teal, removed the stencil and applied more.
Again, I selected just of section of the painting to apply a portion of the stencil to and paint.

A little more Unbleached Titanium for more light values and some complementary Iridescent Rich Copper...

Finally, I added some Iridescent Copper Light. The very last step was incorporating the text nature – because all of my work is inspired by nature:


And here are a couple detail shots of the work:


It's such a privilege to be on the StencilGirl Creative Team!
I hope that I've inspired you to collage and play.

Have fun painting and playing and layering with your StencilGirl stencils!

Wishing you all the best,


Come back on Monday!
Samie Harding will be back with another tutorial.

Tuesday, July 2, 2013

Playing with Cecillia Swatton's Flowers


Woo Hoo! Carolyn Dube here. I'm so, so, so very excited to be a part of such a wonderful Creative Team!    Today, I'm playing with Cecilia Swatton's Flowers V2 Stencil from StencilGirl. I love how easy it was to use this stencil to cover a whole page.  Lining up the edges was so forgiving even for impatient me!


The first video shows how I made the patterned paper.

 You can watch the video on YouTube here.  


In part 2, I create the tag including a wet-on-wet technique with Cecilia's stencil.

 
You can watch the video on YouTube here. 


I'm a big fan of stencils and I've been playing with lots of them lately!
I've got a video using the Gelli Plate with  Mary Beth's Random Circles stencil here.
It just happens that I am also playing with another StencilGirl stencil on my own blog today with TAP Transfer Artist Paper and I have a giveaway!


Stop back on Friday!  Mary C. Nasser will be back with another tutorial!