Hello from Sue Ann “Swan” Hum! I'm a full time
artist working in Colorado, USA. It's pure happiness to be a StencilGirl®
Talk Guest Designer sharing my love of using stencils in Mixed Media
Portraiture.
Today it is Sunila and Aditi here to share our 'Wearable' creation with you. This theme is always fun because it helps us use our stencils to create something fun that can be a part of the wardrobe. Last year we created and embroidered a skirt we still love.
This time we decided to fancy up our little one's dress to create a fun play day dress.
Here's a look at it.
Here's a quick video sharing the process:
We've used the Play Everyday Dress Up L599 stencil by Cat Kerr. We took an imprint of the image and the phrases on our dress by dabbing Black and Blue Acrylic paint on the front and back of the dress.
We then used beads and sequins to highlight the dress, some words and the strings of the swing. This adds a pop and uplifts our dress.
On the back, we decided to merely stencil acrylic paint and achieve a shadow effect scene.
This stencil mask helps add sparkle and shine to your artwork and
journal pages. So versatile to use as a starry border, add deep-sky stars &
space, and twinkling individual stars.
Add the sparkle and shine to your journal
pages, smaller artwork, and ATC cards. This 6"x6" stencil is versatile enough to use as a starry border along the edges of your journal pages, cards, et cetera, or stenciling individual and
groups of stars.
My
creative practice is a big part of my self-care. Art journaling is one of my
favorite creative things to do. I work in my art journal in a mixed media style
that can be a multi-stage process sometimes spread out over days. For me, junk
journaling is the creative and intuitive process of art journaling with a
little less pressure and commitment.
I
always use what I call “art papers” as part of any junk journal that I make.
This usually includes a heavy weight paper for the cover and several other
different papers that will be pages in the junk journal. StencilGirl® stencils
are a great way to add color and marks to these papers! This allows me to set
up a color scheme for the journal, and gives me some ready-made backgrounds and
marks to start from as I work in the journal later on.
For
my art papers, I used Bristol for the cover, a security envelope, some
scrapbooking paper (card stock), a piece of mixed media paper, and part of a
brown paper shopping bag as my substrates.
Here
is the cover and the security envelope.
I gessoed the Bristol before embellishing it to give it even more weight
as the cover of the journal.
Here
are the supplies and stencils I used:
For the initial marks I used graphite pencil, a Woody in light pink, and
Caran D’Ache Neocolor II’s in Indigo, and Orange. Then randomly sprayed on Dylusions Ink Spray
in mostly After Midnight and a little Bubblegum Pink. I sponged teal, light
turquoise, celadon and white acrylic through Rae Missigman’s Botanical
Wildflowers,
Frazzled
and Ruffled Feathers mask,
and her small Travel
Note.
Here
is the printed piece of scrapbooking paper, using the same techniques, stencils
and colors, except for the Dylusions Ink Spray. I only used Bubblegum Pink.
Here
are the last two prepared papers. One is
the mixed media paper, and the other is the brown paper bag, both of which are
two-sided.
The
mixed media paper is a gel print on one side and a layered stencil print on the
other. For the stencil print I used Traci’s
Circles Circles
large stencil with that same mixture of pink, red and white acrylic over the
paper I had randomly covered with the Dylusions Spray Inks. The other side is heavily layered with gel
prints using the same color palette. I used all the same stencils except for
the addition of the large stencil from the Block prints December 2020
StencilClub collection. You can’t really see discrete shapes but it is a
wonderful multi-colored paper that will be a great background for art
journaling!
For
the paper bag piece (photo 3 upper left corner), I had to throw in some Holbein
Luminous Rose through Traci Bautista’sDeconstructed Zinnia Mask
at the stenciling stage. I used pretty
much the same process, but finished with a mixture of red, white and pink
acrylic through Rae’s large stencil from
the September 2020 StencilClub Collection: Modern Botanicals. I also added some
white through her ATC Mixup #2 Botanicals.
The
reverse of the paper bag piece is going to be my centerfold. I used Rae’s Botanical
Wildflowers
mask and sponged a combo of red, pink and white over it to cover the brown
paper. Then, I used Caran D’Ache
Neocolor II’s in Turquoise, Ultramarine, and Light Grey to color in the leaves
of the stenciled image.
Here’s
the step-by-step:
1. Make some random marks and scribbles with a
lead pencil and some water soluble crayons.
2. Then, spray the papers with some ink sprays or
shimmer sprays.
3.Add
a spritz of water to activate the water soluble crayons and dilute the ink
sprays.
4.Use
one stencil and one color to add painty stenciled marks randomly over the
page. You can use a mask or a stencil
for this.
5.Repeat
this process with two or three more stencils/masks and two to three different
colors of acrylic paint. I like to be
sure to use a neutral (Celadon is my neutral) and some white.
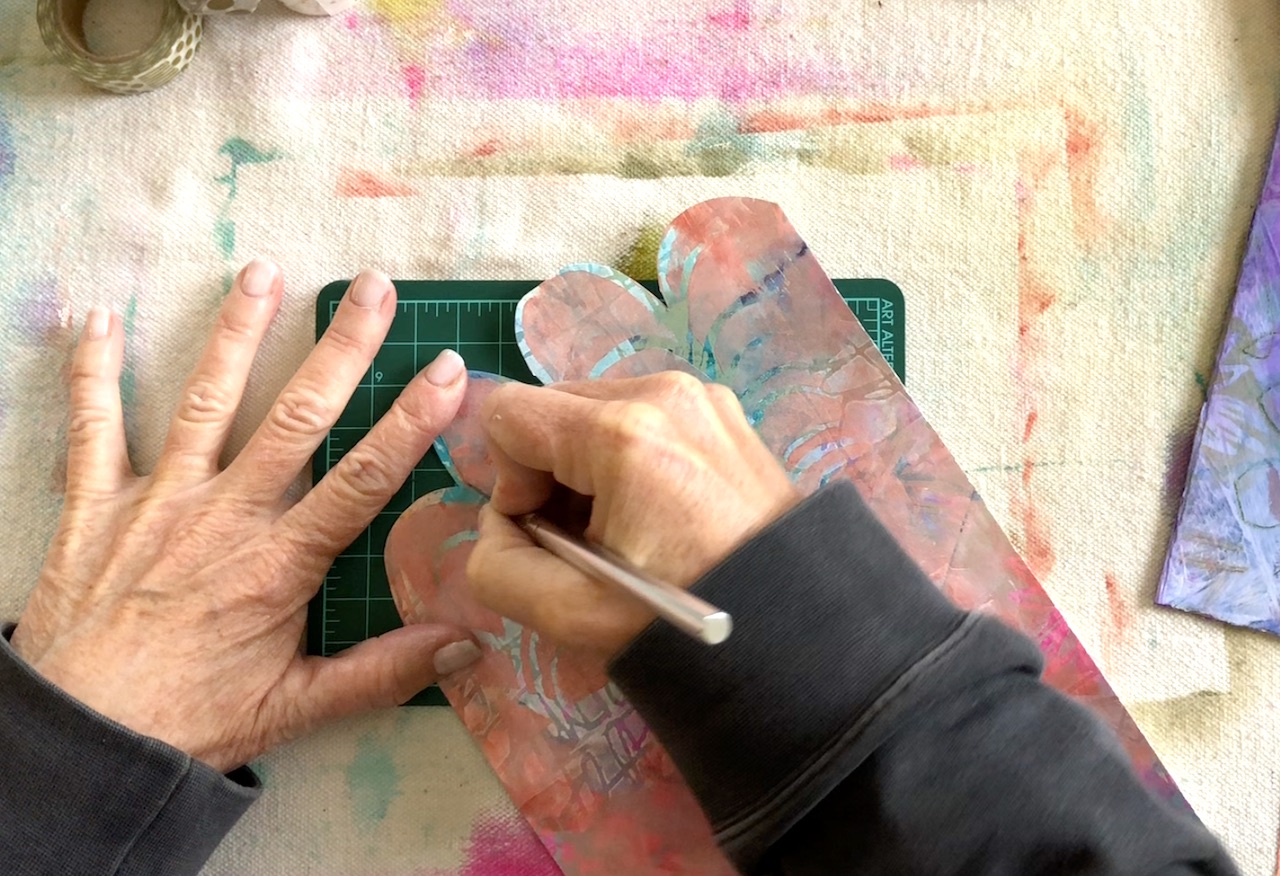
6.Here’s
an option to further embellish your art paper:
Add stenciling of a coordinating color over your stenciled paper. This
tones the paper down a little. In this
case, I used Mary Beth Shaw’s Layers of Scallops stencil and I now have a scalloped
edge to cut as a unique feature of this page in my junk journal.
Now
to assemble the journal:
I
used some vintage ledger, book paper (dictionary and botanical), and wallpaper
for some of the other pages in this journal.
I also have a piece of polka dotted scrapbooking paper, a piece of craft
card stock, and some fine handmade paper in turquoise with gold printing. All of these have to be cut to size to fit
into the cover, so I just eyeball it and use a metal ruler to trim them
down. I don’t care if it’s precise, but
if you do, you can use a paper trimmer, and even mark the pages with a ruler
and use scissors. Don’t throw those scraps away!!!! These are collage papers
that already match with your junk journal!
So handy!
Some
of the vintage papers are pretty delicate and I don’t want them to tear during
the binding process or when I’m using the journal. So I reinforce these at the fold with some
washi tape.
Arranging
the papers so that the different “spreads” in the journal invite me to play is
part of the binding process. Once I have
them arranged, I separate them into a couple different sections that will
nestle into each other. Then I have the
cover, and two sections.
Instead
of clipping the pages as a way to hold them together while sewing the binding,
I stitch the two sections at the spine separately on my sewing machine. Then, they easily hold together while I bind
them because the papers are already secure.
As I was sewing, I decided to sew on a sari ribbon to act as the closure
for the journal.
I
use a simple pamphlet stitch for the binding.
I nestle the two sewn sections together, add the cover to the outside,
and then start the binding process.
First, I punch three holes in the center fold with an awl.
Then,
using a needle and thread I go into the middle hole from the outside leaving
some thread outside to tie at the end.
From the middle hole inside I stitch into one of the outer holes. As I come around to the outside I go back in
at the farthest hole and inside the journal I will finally go back out through
the middle hole. I like to have my two
tails, on either side of the outside stitch and I tie a knot around this to
secure the binding.
Wrap
your ribbon and tuck it in to close the journal until you want to work in
it. I can’t wait! But I have to write up
this blog post, so I will have to!
Have
fun! Tag me so I can see if you make a
junk journal like this!